Hello,
I finally decided to cut 2' 2" from my loop and mod my P180 to accommodate the smaller loop.
Setup:
-660 OC 4.36 @ 1.5250V in bios no modding
-x1900xtx OC 733.5/846 @ 1.500VGPU/MVDDC 2.108V/MVDDQ 2.108/VDDCI 1.503
-P5WD2-E Prem
-2 Gig Corsair PC6400
-PC P&C 510 ASL PSU
-P180 Case
------------
Cooling Setup:
-Maze 4 for GPU
-Storm CPU
-D5 Pump
-Tygon loop
-BIX II
-Distilled Water
Here are a few photos.
---------------

This photo shows the look of my loop prior to modding. This [hoto shows only:
-1 BIX
-roughly 9' of loop
-Maze4
-D5 (not shown)
---------------

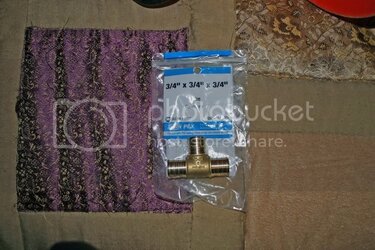
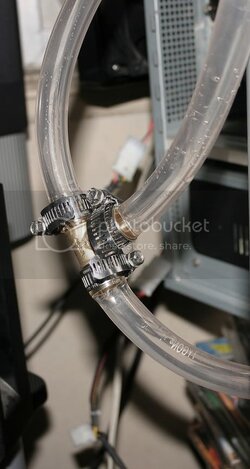
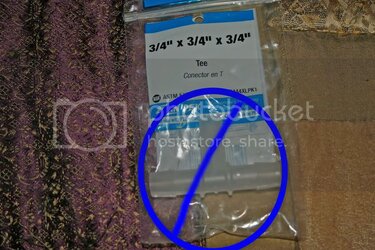
This photo shows the look after modding the P180. The loop is cloudy because there are still bubbles in the loop at the time the photo was taken. Also note the 1/2" T which is actually the OD not the ID. The ID of this T normally purchased anywhere, is 3/8" which is smaller then 1/2", creating restriction...a lot of restriction.
---------------

This is a close up of the 2 holes that I drilled. If you noticed I switch the order of how it enters the rad only because the tube would kink if I used the normal method. In all this worked best.
--------------

this shows the tools I used as well as how much tubing I cut which is 2' 2"
--------------
In order to fit the rubber hole gormments I had to drill a 1" hole in order to accommodate 3/4" gormment. Keep that in mind if you want to drill holes in your case. Also note that you want to buy a metal/wood not the wood kind. You will know you have the right tool because it costs more :
:
Needless to say its still a work in progress...
Ok, after about 1 hour 40 minutes bleeding (T line in loop)is complete and I took some temp readings (using the 3/4" OD 1/2" ID T). Before bleeding was roughly 6.5 to 7 hours on average with the 1/2" T with the 3/8" ID.
Before, with the extra 2' 2" of loop and 1/2" T with 3/8" ID (small hole) readings are as follows:
Ambient is 25C
-x1900xtx OC 733.5 GPU and 833 MEM
idle 33C and 41C using RTHDTIBL
VC temps is 38C
-660 OC from 3.6 to 4.36GHz
idle 37C and 42.5C using Prime95
MB temps is 27C
Now, with 2' 2" less tubing in the loop making it roughly 6'-7' with 3/4" T with 1/2" ID
AMBIENT TEMPS ARE 30C
x1900xtx OC 733.5 GPU and 833 MEM
-idle temps 35.6C

-Load temps 43.6

-660 OC from 3.6 to 4.36GHz
-idle temps 38C

-Load temps 44.5C

In all in overall improvement even though there is disparity of 5C hotter on ambient, load temps for:
x1900xtx = 2.6C difference with ambient temps being 5C hotter
660 OC 4.36 = 2.0C difference with ambient temps being 5C hotter. Again, the only difference is:
-2' 2" less tubing
-only using distilled water this time
-used 3/4" T with 1/2" instead of 1/2" T with3/8" ID
That is basically all that I have changed in this WC setup
Also, some good info regarding DD's Maze4 & the x1900xtx from personal experience
-you need to loosen all 4 blots and try to keep them all at the same height or simply remove them all and start over from stretch.
-if you start over from stretch you need to count the number of turns for the first bolt, then place the 2nd bolt diagnal the 1st bolt or crisscross. Then count the same number of turns you used for the first bolt. No more then 3-4 turns please!
-do the same for 3rd and 4th bolts, in criss cross fashion.
-tighten the 1st 2 bolts (1st and 2nd) in a crisscross fashion with 3 or 4 turns ONLY
-tighten the 2nd set of bolts (3rd and 4th bolts) in a crisscross fashion with 3 or 4 turns ONLY
-now go back to the 1st bolt turn it another 3 or 4 times and do the same for the 2nd bolt.
-repeat this process with the 3rd and 4th bolt.
-DO NOT OVER TIGHTEN. YOU DON"T NEED TO TIGHTEN UNTIL YOU CAN'T TURN IT NO MORE...t
-In all each bolt should have around 7-9 turns each. This is what I have counted but I used a x1900xtx and this number can vary. However you should only worry about tightening down the bolts when all 4 bolts are properly torqued. Then you can do 1 full turn of each of the 4 bolts until all have the same level of stress when you turn them. This is the best method that I found. Unless there is a torque alan wrench you can buy???
Why do it this way? It's been my experience when one bolt is to tight you warp the card if you do not apply the same amount of pressure (aka turns on each screw) on all 4 screws. This is because you do not have the necessary slack when tighten down the WB on the gpu (such as springs) and with each turn (when contact is made with the screw and the video card) you are actually apply pressure on the VC with the WB. All you need to do is place the card on it's axis (horizontal position) at eye level. Also, you will notice that its a bit more difficult to place it in your PCI slot and it will not line up properly. This also can cause your WB to not have contact on certain portions of the GPU while other portions have full contact...
I finally decided to cut 2' 2" from my loop and mod my P180 to accommodate the smaller loop.
Setup:
-660 OC 4.36 @ 1.5250V in bios no modding
-x1900xtx OC 733.5/846 @ 1.500VGPU/MVDDC 2.108V/MVDDQ 2.108/VDDCI 1.503
-P5WD2-E Prem
-2 Gig Corsair PC6400
-PC P&C 510 ASL PSU
-P180 Case
------------
Cooling Setup:
-Maze 4 for GPU
-Storm CPU
-D5 Pump
-Tygon loop
-BIX II
-Distilled Water
Here are a few photos.
---------------
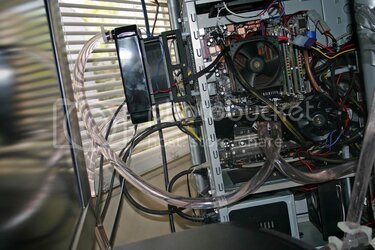
This photo shows the look of my loop prior to modding. This [hoto shows only:
-1 BIX
-roughly 9' of loop
-Maze4
-D5 (not shown)
---------------
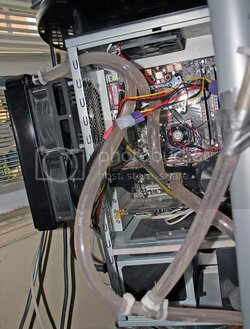
This photo shows the look after modding the P180. The loop is cloudy because there are still bubbles in the loop at the time the photo was taken. Also note the 1/2" T which is actually the OD not the ID. The ID of this T normally purchased anywhere, is 3/8" which is smaller then 1/2", creating restriction...a lot of restriction.
---------------
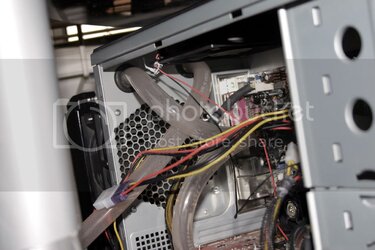
This is a close up of the 2 holes that I drilled. If you noticed I switch the order of how it enters the rad only because the tube would kink if I used the normal method. In all this worked best.
--------------
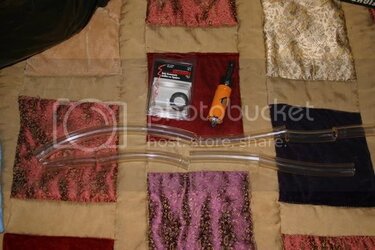
this shows the tools I used as well as how much tubing I cut which is 2' 2"
--------------
In order to fit the rubber hole gormments I had to drill a 1" hole in order to accommodate 3/4" gormment. Keep that in mind if you want to drill holes in your case. Also note that you want to buy a metal/wood not the wood kind. You will know you have the right tool because it costs more
Needless to say its still a work in progress...
Ok, after about 1 hour 40 minutes bleeding (T line in loop)is complete and I took some temp readings (using the 3/4" OD 1/2" ID T). Before bleeding was roughly 6.5 to 7 hours on average with the 1/2" T with the 3/8" ID.
Before, with the extra 2' 2" of loop and 1/2" T with 3/8" ID (small hole) readings are as follows:
Ambient is 25C
-x1900xtx OC 733.5 GPU and 833 MEM
idle 33C and 41C using RTHDTIBL
VC temps is 38C
-660 OC from 3.6 to 4.36GHz
idle 37C and 42.5C using Prime95
MB temps is 27C
Now, with 2' 2" less tubing in the loop making it roughly 6'-7' with 3/4" T with 1/2" ID
AMBIENT TEMPS ARE 30C
x1900xtx OC 733.5 GPU and 833 MEM
-idle temps 35.6C
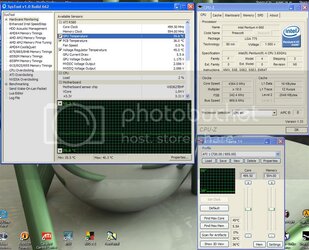
-Load temps 43.6
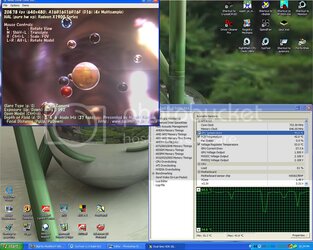
-660 OC from 3.6 to 4.36GHz
-idle temps 38C
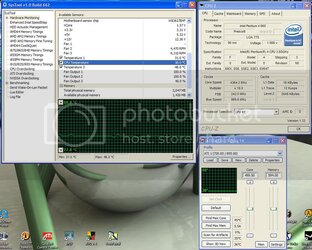
-Load temps 44.5C
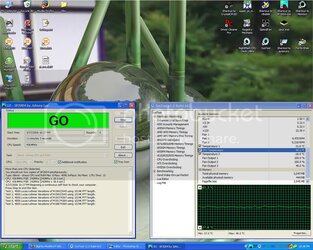
In all in overall improvement even though there is disparity of 5C hotter on ambient, load temps for:
x1900xtx = 2.6C difference with ambient temps being 5C hotter
660 OC 4.36 = 2.0C difference with ambient temps being 5C hotter. Again, the only difference is:
-2' 2" less tubing
-only using distilled water this time
-used 3/4" T with 1/2" instead of 1/2" T with3/8" ID
That is basically all that I have changed in this WC setup
Also, some good info regarding DD's Maze4 & the x1900xtx from personal experience
-you need to loosen all 4 blots and try to keep them all at the same height or simply remove them all and start over from stretch.
-if you start over from stretch you need to count the number of turns for the first bolt, then place the 2nd bolt diagnal the 1st bolt or crisscross. Then count the same number of turns you used for the first bolt. No more then 3-4 turns please!
-do the same for 3rd and 4th bolts, in criss cross fashion.
-tighten the 1st 2 bolts (1st and 2nd) in a crisscross fashion with 3 or 4 turns ONLY
-tighten the 2nd set of bolts (3rd and 4th bolts) in a crisscross fashion with 3 or 4 turns ONLY
-now go back to the 1st bolt turn it another 3 or 4 times and do the same for the 2nd bolt.
-repeat this process with the 3rd and 4th bolt.
-DO NOT OVER TIGHTEN. YOU DON"T NEED TO TIGHTEN UNTIL YOU CAN'T TURN IT NO MORE...t
-In all each bolt should have around 7-9 turns each. This is what I have counted but I used a x1900xtx and this number can vary. However you should only worry about tightening down the bolts when all 4 bolts are properly torqued. Then you can do 1 full turn of each of the 4 bolts until all have the same level of stress when you turn them. This is the best method that I found. Unless there is a torque alan wrench you can buy???
Why do it this way? It's been my experience when one bolt is to tight you warp the card if you do not apply the same amount of pressure (aka turns on each screw) on all 4 screws. This is because you do not have the necessary slack when tighten down the WB on the gpu (such as springs) and with each turn (when contact is made with the screw and the video card) you are actually apply pressure on the VC with the WB. All you need to do is place the card on it's axis (horizontal position) at eye level. Also, you will notice that its a bit more difficult to place it in your PCI slot and it will not line up properly. This also can cause your WB to not have contact on certain portions of the GPU while other portions have full contact...
Last edited:
 but I am not done with it just yet I want to everything inside the case.