• Welcome to Overclockers Forums! Join us to reply in threads, receive reduced ads, and to customize your site experience!

Project custom wood case II- Danger Den

Overclockers is supported by our readers. When you click a link to make a purchase, we may earn a commission. Learn More.

voigts

Member
Joined
Feb 11, 2005
Location
Tennessee
I built a custom wood case a few months ago (http://www.ocforums.com/showthread.php?t=449062) that I have been using. I spent untold hours designing this case from the ground up with the specific goals in mind of making a case that would naturally deflect any leaks away from any hardware and that would like a piece of furniture and not just another computer case.

I enjoyed the project and learned a lot of techniques from it. I also found however after building that there were some things I didn’t like about the case. I particularly didn’t like not being able, no matter what I did, to really integrate the radiator into the case layout well. I also disliked that bleeding/filling was not as easy as I would have liked. And I also did not the like the fact that it is very heavy. I don’t go to LAN parties or such, but just picking it up to take it outside and blow out the dust takes some real oomph. Tubing routing also had a few challenges due to case layout and wiring routing. So, I have been chewing on the idea of making another case.

I have been looking more and more in recent months at the Danger Den custom wood cases that they have on their site (http://www.dangerdenstore.com/product.php?productid=201&cat=1&page=1) , and I like what I see. They look very classy and professional. I read in a thread sometime back that they start at about $800 and go up. Well, I don’t have $800, but I calculated that I can make a case very similar to those customized for my setup. In order to be able to integrate the rad well, I decided I would however have to change rads from my car rad. After doing some research on XS, I could see that the best rad on the market is the Thermochill PA line. DD had a 20% coupon going, so I bit the bullet and bought a new PA 120.3 with the coupon for $105 shipped (not a bad deal if you ask me).

I spent a lot of time magnifying and studying DD’s pics to figure out how they make their cases. I can’t go as tall as those due to the compartment in my oak roll top desk, so I settled on having the PS and Rad both on the top of the case, and just make the case deeper than theirs, which would fit my desk. The dimensions are 26 1/2" deep x 19" high x 9 1/4" wide.

Since I have worked the mostly with Pine, and since it is a lot less expensive than Oak or the like, I settled on using 1’x10” (actually ¾” x 9 ¼”) select Pine from Lowes. This is very nice wood that has no knots whatsoever.

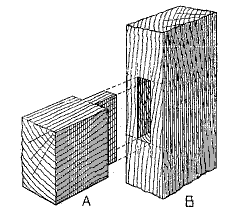
By looking at the joints on the corners, I figured out that what they did is use what is called a mortise and tenon joint.

25-mortise-and-tenon.gif

This kind of joint makes for increased gluing area and strength as the pieces fit into each other. It also makes for a very clean looking joint and allows for the way that the corners are rounded out to fit the acrylic side panels. I have never done this kind of joint before, so I figured this was a good time to leam. Fortunately, when I recommended to my wife the router that I wanted for Christmas a few years ago, I opted for one that has two interchangeable bases, one of which is a plunge base. I haven’t used the plunge base before, but it was pretty much common sense once I figured out how to get the main dust encrusted base out of the router.

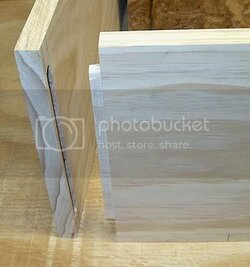
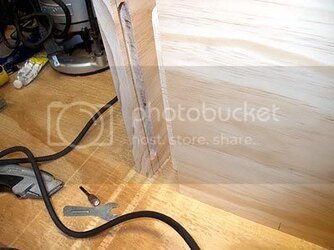
I decided to go with a ¼” mortise. So, using the router, I set up a jig with pieces of wood clamped to my workshop table and plunged out a groove on all of the ends leaving 1” on both sides of the groove. I used a table saw to cut out the tenon joints, and used a rotary tool to round the tenon edges to match the groove for a tight fit.

MortTen2.jpg

MortTen1.jpg

It worked very well and to my pleasant surprise, I ended up with some nice joints. I did mess up the first one a bit, but I decided to put it at the bottom rear of the case where it won’t make a difference anyway. Later after I had cut all of my holes, I used a square and clamps to glue and clamp the case together making sure it is square and let it dry overnight.
 
Last edited:
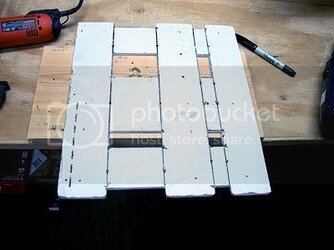
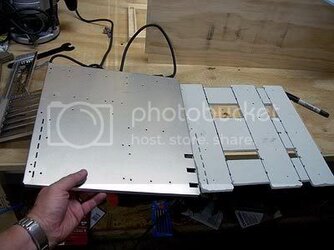
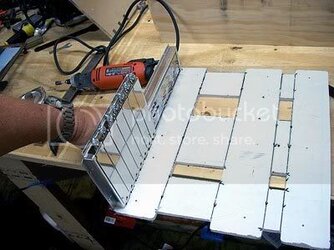
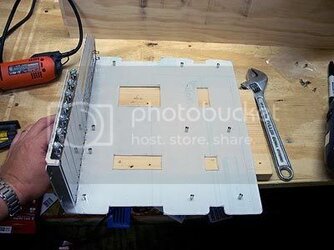
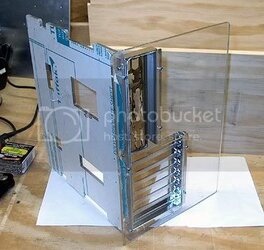
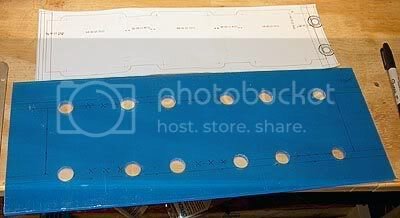
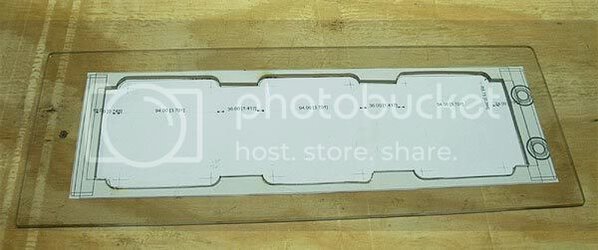
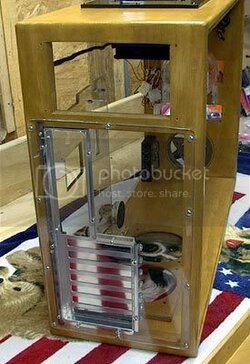
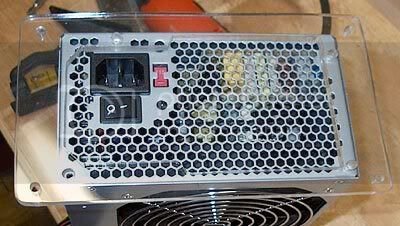
I really like the look of the motherboard tray that they make, but the more I looked at it the more I realized there was just no practical way for me to make that in its entirety. So I decided to use just the PCI slots and MB connectors section from a MB tray that I ordered from performance-pcs (http://www.performance-pcs.com/catalog/index.php?main_page=product_info&cPath=210&products_id=3387) and make the back panel and actual tray out of acrylic. I had a sheet of 3/16” polycarbonate that I had bought off of ebay that I decided to use for this. This stuff is harder and less flexible than regular cast acrylic, so it is ideal for this. I wanted plenty of holes for wiring routing, so I cut holes in the tray. I used regular pop rivets to secure the metal PCI panel to the rear panel and the side panel, and drilled out and drove a few screws from the back panel into the side panel, and then also glued the joint with acrylic solvent. I am very pleased with how this turned out and it is very solid. I also cut out a 3/16” acrylic mount for the PSU to go with it.

mb1.jpg

mb2.jpg

mb3.jpg

mb4.jpg

mb5.jpg
 
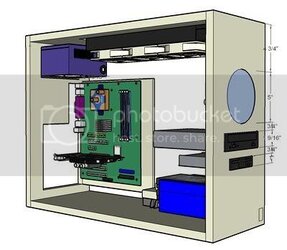
At this point I was trying to decide where to place the rest of my components before I started cutting holes. Using the handy dandy program Sketchup and parts from the sketchup components collection (http://scc.jazzle.co.uk/) and models from the last case, I modeled out a couple of possible scenarios. I wanted to make another 5” fan hole res like the one in my last case as I really like the look and function of it. So I drew out and placed my components keeping in mind tubing routing.

sketchup.jpg

I then measured and cut out the holes for the MB tray, the PSU, and the rad on top. When I got to the front however, I had some decisions to make. I hadn’t included a fan intake into my sketch, and I decided that I wanted one to blow on the hard drives. I was going to cause a problem however cutting a fan hole as it really wouldn’t leave enough room for the depth of the rad and fans, the res in front, and the DVD drive. So I made the decision to move the power switches and go without a floppy drive. I just figure for the once in a blue moon when I need one I can just temporarily hook one up.

A friend of mine at work let me borrow his scroll saw. One big problems I had on the first case was in cutting out rectangular holes in the case with a jigsaw. A jigsaw works fine for plain, straight cuts with no corrections, but if you try to go back and slightly alter a hole or get a precision cut, the blade has a tendency to bend which results in holes with crooked sides.

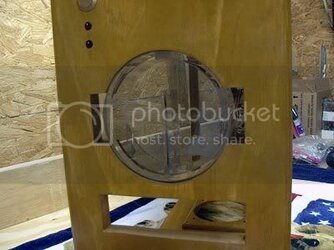
This became a major headache when trying to cut precision holes like for the DVD drive. The scroll saw made it possible to cut very, very accurate holes. I used it the cut out the DVD drive slot. I used my drill press with an adjustable bit to drill the fan hole. I made a mistake however and drilled the hole on the wrong end of the front which messed up my measurements for the res hole. I had to have the res down far enough from the top to clear the rad and fans. So after much consternation, I decided to go ahead and drill the rad hole in the DVD slot hole and find a way to make it work. My drill press however wouldn’t reach the spot the res hole needed to go, so I used the scroll saw to cut out the round hole. After trying a couple of ideas, I ended up using a piece of the same smoked grey acrylic I am using for the sides to fill the entire res hole and corners. It took a lot of cutting and trimming to make this work.

resCoverFront.jpg

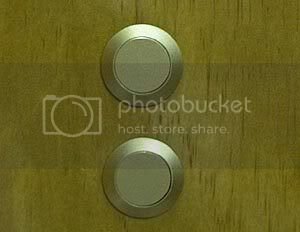
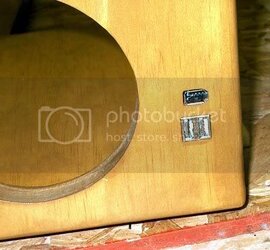
I wanted to find switches like the ones DD uses. I used some buttons Radio Shack on the last case and they just look cheap. I looked everywhere. Most places call them “vandal resistant switches” and charge $20 ea for them (ouch!). After much searching to find out what they are called and where to find them, I found them from MNPCTECH.COM (http://www.mnpctech.com/Vandal_Resistant_Switch.html) for only $4 ea. I wanted mine gold, so I just simply painted them. These switches are very nice.

switches.jpg
 
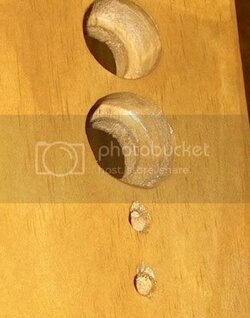
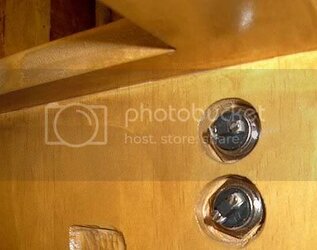
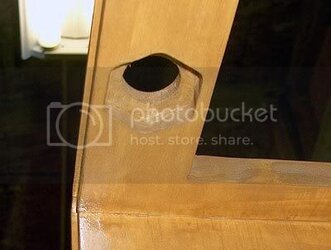
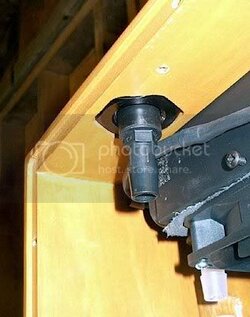
I used a trick I learned from the first case to mount these. Using a wood boring bit, you first drill out a hole large enough for the nut and just deep enough to be able to thread it onto the switch, and then drill out the smaller switch body hole in the middle of the larger hole. This way you can mount a switch that only has about ½” of thread into ¾” thick wood.

switchHoles1.jpg

switchHoles2.jpg

I used this same trick to mount the fillport. I bought a Delrin fillport from ebay as the seal screw in my Danger Den one in the first case started to corrode after on a couple of months. With the fillport however having such a large nut and the hole being right next to the rad cutout, I didn’t want to take out more wood than I had to. So I drilled out the large hole about 3/8” deep and then the small hole the rest of the way. I then traced the edges of the nut and reamed them out with the rotary tool with a drum sanding bit to make a hole that fits the nut. This also makes it easy to thread the fillport.

fillport1.jpg

fillport3.jpg

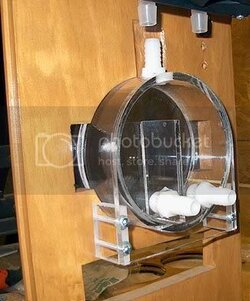
I made another res like the one in my last wood case for this one. When I had the pieces laser cut, I ordered 3 sets. I made it out of 1/4” acrylic solvent welded with IPS weld-on number 3. The bottom barbs each have a hole drilled through the threads to make draining easier. I cut off the top thread to the thickness of the acrylic so that all of the air will go out of the top. I again used wood thread inserts to make screw holes for the res to mount into.

resMount.jpg

When I leaktest my reservoirs, I use a waterbed fill kit to hook them up to the kitchen sink and test them under faucet pressure. Standard faucet pressure here is about 50psi. I tested mine with the faucet about ½ open for 2 hours and even banged it around a bit. If it doesn't leak under this pressure, it isn't going to leak.

LeaktestRes-1.jpg
 
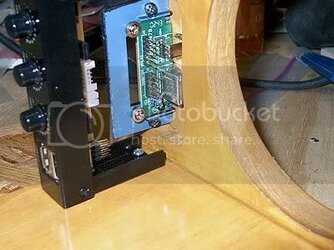
My plunge router again came in handy to mount the USB/firewire board. I couldn’t just drill holes to get the right depth for the ports to come through the front due the board. They only stick out about ¼” from the board. So I took the plunge router and cut out a ½” deep inset for them. I bought one from Directron that mounts into a 3.5” bay, cut off the plastic front of the mount, and used that plastic front for a template on the wood. I drilled two holes used the wonderful scroll saw to make almost exact holes for the ports. I mounted a fan controller right behind the USB ports. I basically just wanted it to be able to get my fans down to 4v easily. I don't adjust fan speeds so I opted to just mount it internally instead of cutting more holes in the front.

usbFront.jpg

usbFanContRearView.jpg

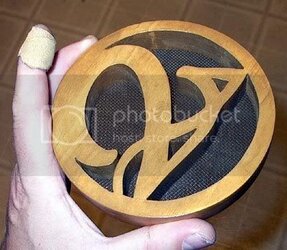
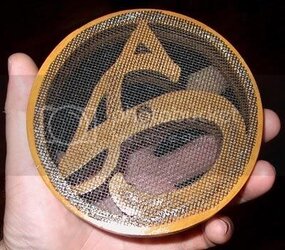
The crown jewel of this project is the front fanhole grill. I made one for it, but just wasn’t satisfied with it. I looked at the pics of the one DD cut out of the case wood itself (--pics of DD fan hole grill) and really like the looks of it. I however want mine to be removable from the front for easy cleaning. A neat idea came to mind to make an initial for the fan grill. Of course I was going to use “V”. I found a nice font, drew it up in Photoshop to match the size of the fanhole, printed it out, cut it out, and then traced it onto a round piece I cut using carbon paper.

V.jpg

I drilled holes and used the wonderful scroll saw to cut out the letter, and with a bit of sanding using the rotary tool, the result is something I am very pleased with. I then just gorilla glued some mesh to the back of it to catch dust.

Vfront.jpg

Vback.jpg
 
Last edited:
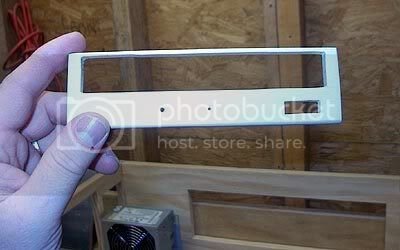
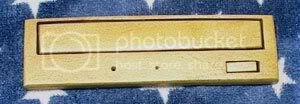
One other thing I never did like on the first case is that I never did stealth the DVD drive front. So using the scroll saw, I traced and cut out a wooden face complete with button onto ¼” wood and made a wooden DVD face. I am just going to use very strong double-sided tape to hold it onto the drive.

dvdCover1.jpg

dvdCover2.jpg

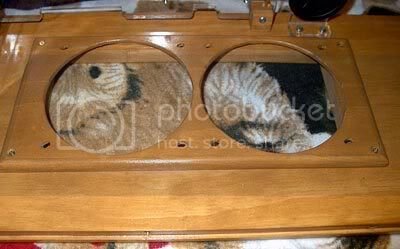
I also wanted to make a filtered air inlet in the bottom of the case. I probably won’t mount fans there, but I cut it to fit two fans anyway so that I can if I decide to later. The top and bottom fan mounts are made out of 3/8” pine. Since the fans are 1” thick and the case is only ¾” thick, I used the plunge router to cut just under ¼” out from the middle of the mounts so that fans and some foam would fit between them with the mounts on top and on bottom.

fanCoverBottom.jpg

fanCoverTop.jpg

I used the router with the plain base on a router table to route out the slots in the sides for the acrylic side panels. I measured and made sure not to cut all the way to the ends on the front and back so that I could get a smooth round groove.

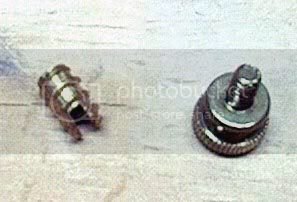
I wanted a way to be able to reliably hold the side panels to the wood. I used #6 screw wood inserts for the side panel mounting holes. I got some really slick knurled brass screws from mcmaster for this and they work great.

knurledScrew.jpg
 
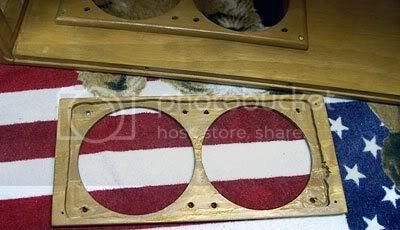
I made a top rad mount so that I could have the fans pushing. I got a great template from a guy on XS, and used it to cut out a mount out of acrylic. I then painted it black.

radMount1.jpg

radMount2.jpg

radMount3.jpg

top.jpg

I also made some acrylic drive mounts. I don't have it pictured here, but I did drill out and cut out slots on the DVD mounts. I haven't cut the hard drive mounts because I don't know the exact spacing of my DD hard drive blocks. I will mark them and drill them out when I put things together.

driveMounts.jpg
 
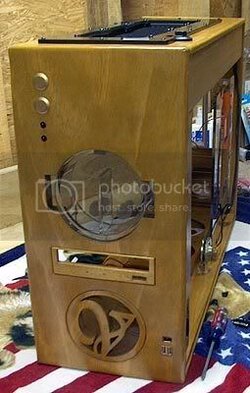
After a LOT of sanding, staining, resanding, restaining, resanding, polyurethane coat #1, more sanding, polyurethane coat #2, more sanding, polyurethane coat #3, and a good wipe down with furniture polish, the result is a nice smooth, shiny old English oak colored finish. I actually intended to use more of a golden oak color, but I decided to go with the English Oak stain as it came in water based form. Water based stain dries in like 3 hours vs. overnight with oil, and cleans up so much easier. I used left over water based poly from when I refinished my living room floor a while back.

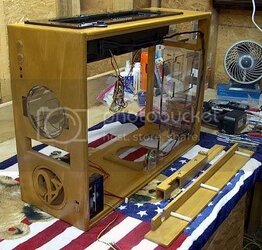
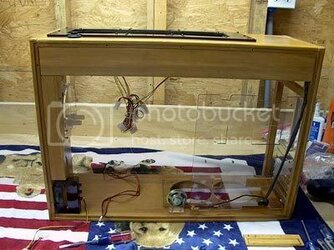
An issue that was a real problem in the first wood case is that of wire management. I gave a lot of thought as to how to route and hide wires with this case. One advantage of having the case 9 1/4” wide is that with the PA120.3 centered, it gives me about 2” between it and the side of the case. On the back side of the case, this allows for me to route my wires all behind the rad. I wanted to make them out of view however. I made an L shaped piece out of 2 1/4” thick pieces of the same pine (ripped from a 3/4” board) to fit behind the rad on the backside to hide and support the wiring. I used nylon spacers glued together with gorilla glue to fit the 2 3/16” depth of the L so that I could use a 3” #6 screw through the L and nylon spacers into a wood thread insert to hold the L straight. I made another piece down the front side I_I shaped that uses wood inserts and 2 1/2” #6 screws to attach to the side to hide wires going down the back front side to the bottom of the case.

Lside.jpg

LonSide.jpg
 
Last edited:
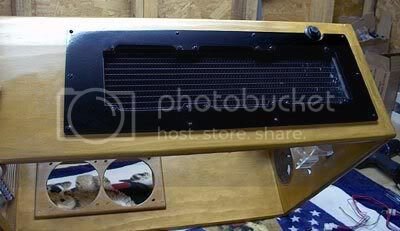
I have been debating about using my Fortron Blue Storm in this case as I want to change to red instead of blue as I think red will go better with the wood case color. I already bought 6-3 light led clusters and some red Toyota antifreeze (pentosin) for this. The cluster lights are a real improvement from cathodes as they are so much easier to wire, put out almost no heat, last about forever, and can be run continually. I saw last night on Anandtech deals an Antec Neopower 480 for only $60 from Outpost. The new version of this that Outpost is shipping has all of the cables sleeved in black. I also like the fact that the cables are very long, which will be great as this case is very long. I was going to run into the problem with my Fortron of some of the cables not being long enough, particularly the SATA power cables.

I also ordered a bunch of black male and female molex connectors from Ebay so that all cables can have black connectors. When I ordered the brass knurled screws from mcmaster, I also got a bunch of black heatshrink so that I can covered cables in black. They have it very cheap.

The case itself is finished. I now I have to wait a week or so before I get to start tearing apart my current case and move into this one. This case isn't perfect, but I am very pleased with the final product, and any flaws are minor at most and are barely visible. Making one like this really makes you appreciate the Danger Den wood cases a lot. They have the advantage of using laser cutting for all of the acrylic, which I don't have. But just from a wood working perspective, they have some really serious equiptment to make their cuts so straight and perfect.

frontWdvdCover.jpg

rear.jpg

psuMount.jpg

So what do you folks think of it so far?
 
Last edited:
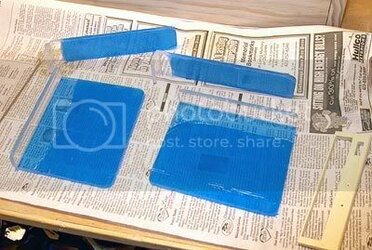
That looks amazing. Great work voigts.

If you really don't want any wires showing, you could make strips of wood and glue them together at a 90 degree angle, forming gutters. You could them run all the wires inside these and stick them in corners of your case. Then maybe hold them down with some hidden clip. As you can see, I haven't thought very much about this. =)
 
voigts said:
Thanks. How's life in Canada these days?
its sweet, my watercooling turned to ice, the summers are that cold :D

if Asus rma's my P4P800, and i can find a cheap cpu, i may just have to build a wood case...more or less something that fits into my desk, but it will be wood. you case is one of the best woody's ive seen.... :D
 
atomic ferret said:
That looks amazing. Great work voigts.

If you really don't want any wires showing, you could make strips of wood and glue them together at a 90 degree angle, forming gutters. You could them run all the wires inside these and stick them in corners of your case. Then maybe hold them down with some hidden clip. As you can see, I haven't thought very much about this. =)

Thanks a lot :)

If you look at the two pics on post #8, your idea is exactly what I am trying to do. I made an "L" shaped piece with 3-3" screws going through nylon spacers that screw into wood inserts on the back side of the case behind the rad, and a 3 sided box down the backside front corner. That way the only wiring visible should be whatever I run behind the MB, and the SATA and IDE cables from the MB to the drives. This "L" piece also will give me plenty of space to hide any excess wiring. Although I didn't take a picture of them, both sides of the case are out of clear acrylic.

hainer36 said:
its sweet, my watercooling turned to ice, the summers are that cold :D
Yikes, that COLD! Way too cold for a Tennessean! Can anyone say "ice" cooling?
 
Very nice job! I think wood cases are a nice change of pace (I have made two so far), but yours is nicer than either of mine so far. Nice job...

Junebug
 
Back