-
Welcome to Overclockers Forums! Join us to reply in threads, receive reduced ads, and to customize your site experience!
You are using an out of date browser. It may not display this or other websites correctly.
You should upgrade or use an alternative browser.
You should upgrade or use an alternative browser.
The Console Project by Navig
- Thread starter Navig
- Start date
- Joined
- Jul 14, 2005
- Location
- Jax, Florida
Outstanding work. I can't wait to see the finished product.
- Joined
- Dec 7, 2003
- Thread Starter
- #63
Maybe just a very rough quick cost analysis:
$12 - Stock mdf
$25 - Hard drive rack and psu plate
$40 - stock plastic
$30 - hardware and aluminum stock
$20 - paint
$127 - total
Anyway, completed the cutouts for the back panel:

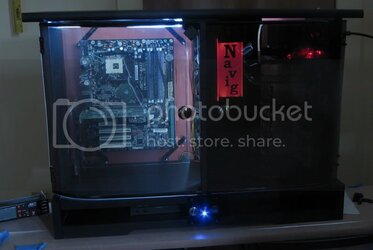
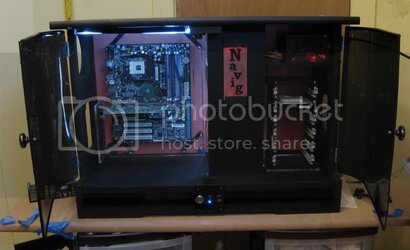
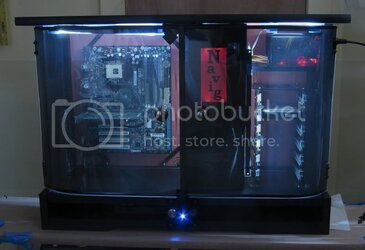
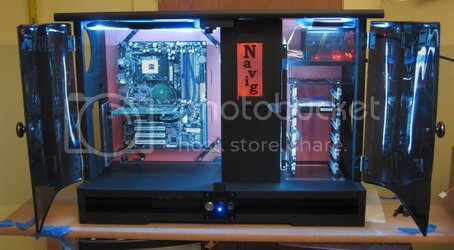
And that's about it, except for aesthetics and lighting. Here's a series of current pics:
A long-exposure pic of the logo:

Wide open!

PSU angle:

I/O side. I've run out of black thumbscrews, so I'll need pick up some more to mount my bay covers.

Glimpse of the fan intakes:

And the backside of the system:

And finally a quick demo once again of the front doors and logo in action. The logo looks a bit dim, but its mostly that this camera needs very bright lights to capture video:

$12 - Stock mdf
$25 - Hard drive rack and psu plate
$40 - stock plastic
$30 - hardware and aluminum stock
$20 - paint
$127 - total
Anyway, completed the cutouts for the back panel:
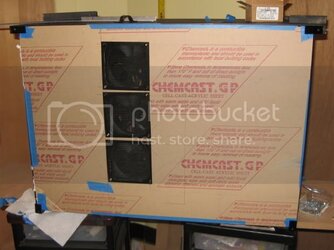
And that's about it, except for aesthetics and lighting. Here's a series of current pics:
A long-exposure pic of the logo:
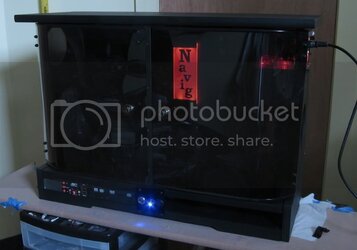
Wide open!
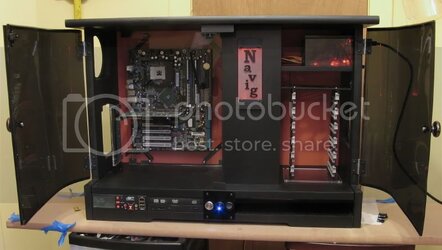
PSU angle:
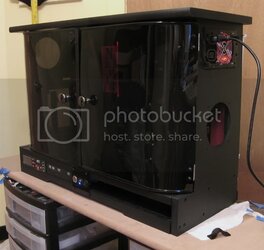
I/O side. I've run out of black thumbscrews, so I'll need pick up some more to mount my bay covers.
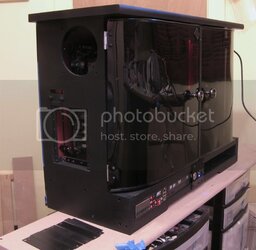
Glimpse of the fan intakes:
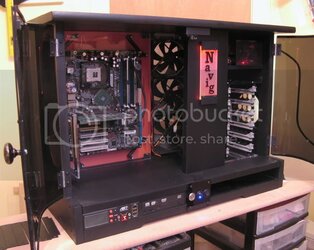
And the backside of the system:
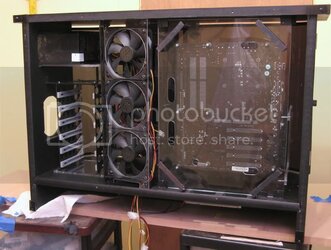
And finally a quick demo once again of the front doors and logo in action. The logo looks a bit dim, but its mostly that this camera needs very bright lights to capture video:
- Joined
- Dec 7, 2003
- Thread Starter
- #66
- Joined
- Feb 20, 2007
- Location
- Germany for now.
wow that is just beautiful... and again is ask
when can i expect shipment?
when can i expect shipment?
- Joined
- Jul 14, 2005
- Location
- Jax, Florida
Wow, beautiiful!!! Amazing work my friend.
- Joined
- Jul 14, 2005
- Location
- Jax, Florida
So when do you ship over to my house.
- Joined
- Dec 7, 2003
- Thread Starter
- #73
Okay, all the lighting is hardmounted and wired. Here's a little video demostrating the front face features of this case:

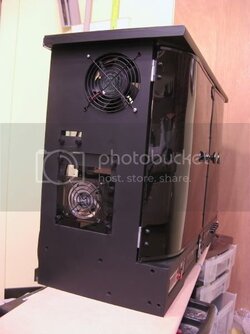
I've decided to add an additional 80mm exhaust panel over the unused pci slots, to aid in gpu exhaust.
Then I've got to make the mount brackets for my optical drives, which arrived today.
IP35 pro should be arriving soon, as well as a nice new IFX 14.

I've decided to add an additional 80mm exhaust panel over the unused pci slots, to aid in gpu exhaust.
Then I've got to make the mount brackets for my optical drives, which arrived today.
IP35 pro should be arriving soon, as well as a nice new IFX 14.
- Joined
- May 25, 2007
- Location
- everett, wa
looks fantastic. like nothing i've ever seen. i really like that you can turn the lights on and off. if you need to leave it alone to do some long drawn out process, you may as well turn them off and save some electricity.
- Joined
- Feb 20, 2007
- Location
- Germany for now.
awsome as always navig!
- Joined
- Dec 7, 2003
- Thread Starter
- #76
Okay, these are the final 5.25 bay components:

Happy?
The bay component are mounted by screwing a bracket stop to each of the components. They then slide in and mount with thumbscrews, like so (case is upside down):

Alright, stay tuned for my money shots, then I'll finalize and install my components, then some more money shots.
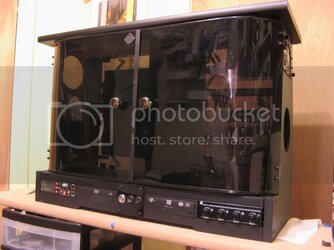
Happy?
The bay component are mounted by screwing a bracket stop to each of the components. They then slide in and mount with thumbscrews, like so (case is upside down):
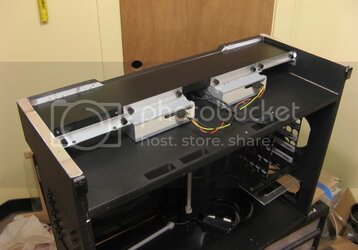
Alright, stay tuned for my money shots, then I'll finalize and install my components, then some more money shots.
- Joined
- May 25, 2007
- Location
- everett, wa
- Joined
- Feb 20, 2007
- Location
- Germany for now.
Navig said:Happy?
I am now quite content as that thing was an eye-sore!

all the black and orange w/ a blue light or two then WWWWHHHHIIIIITTTEEEEEEEEEEEEEE!!

- Joined
- Dec 7, 2003
- Thread Starter
- #79
Hi all,
Its now pretty much done. I was in the depths of wiring mania, as well as producing my Thermalright IFX-14 review. I include a link because this review is a preview of the hardware and setup going into this case.
Anyway, took some time fixing the resistance on a new sunbeam fan controller, then laying out all the wiring. Remember, that's 5 120mm fans, all requiring custom cabling, 7 LEDs and 4 cold cathodes on 3 switches, not to mention all the cabling for the guru panel (lcd, bios switch, audio, USB, and firewire):
Here are a lot of them hanging out:

Really at this point, I'm ready to install the actual components, then button up the wiring and cable arrangement!
Also, installed a gpu cooling exhaust panel:

Its now pretty much done. I was in the depths of wiring mania, as well as producing my Thermalright IFX-14 review. I include a link because this review is a preview of the hardware and setup going into this case.
Anyway, took some time fixing the resistance on a new sunbeam fan controller, then laying out all the wiring. Remember, that's 5 120mm fans, all requiring custom cabling, 7 LEDs and 4 cold cathodes on 3 switches, not to mention all the cabling for the guru panel (lcd, bios switch, audio, USB, and firewire):
Here are a lot of them hanging out:
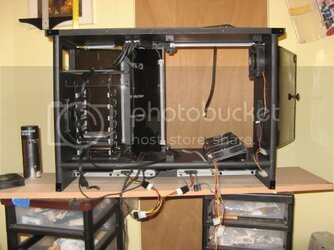
Really at this point, I'm ready to install the actual components, then button up the wiring and cable arrangement!
Also, installed a gpu cooling exhaust panel:
- Joined
- Dec 26, 2004
I love all your projects man, looks incredible.
Great work!
Great work!
Similar threads
- Replies
- 38
- Views
- 6K
- Replies
- 71
- Views
- 17K
- Replies
- 20
- Views
- 4K
- Replies
- 15
- Views
- 2K
