• Welcome to Overclockers Forums! Join us to reply in threads, receive reduced ads, and to customize your site experience!

DTT3500 needs to "warm up"...

Overclockers is supported by our readers. When you click a link to make a purchase, we may earn a commission. Learn More.
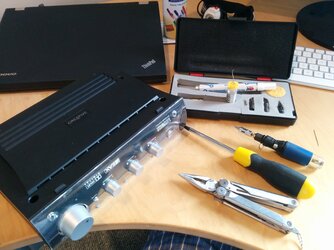
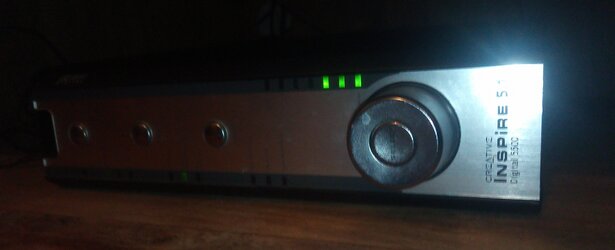
First I have to apologize for the poor image quality, I forgot my SLR so had to use my Nokia N82... :shrug:
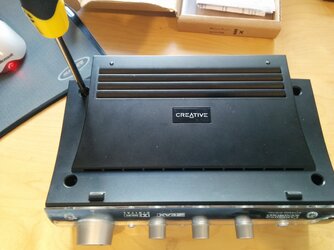
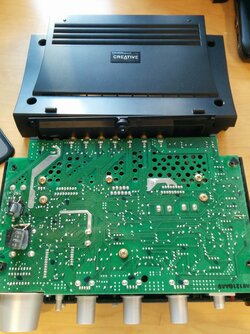
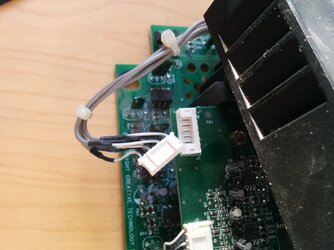
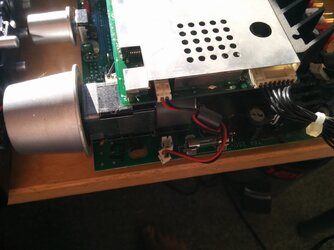
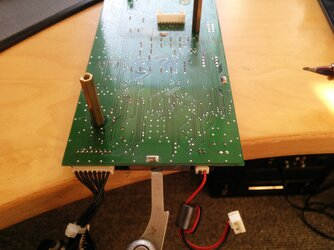
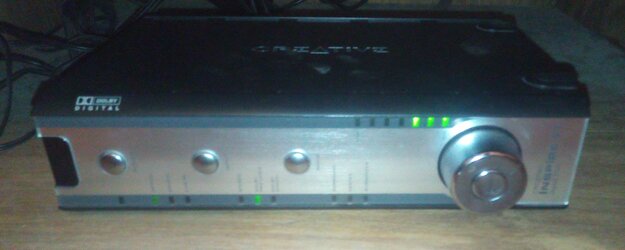
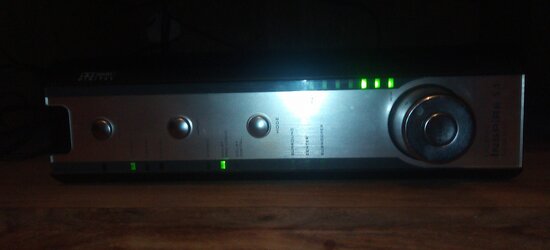
The first image shows the system with only back and topcover removed, 2 screws in back and four in topcover

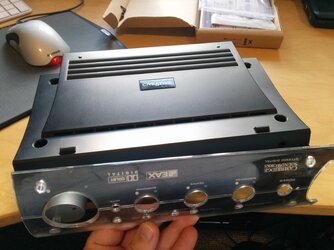
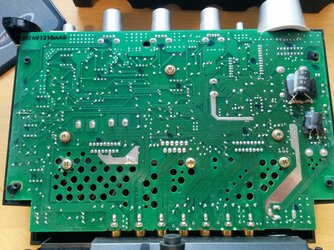
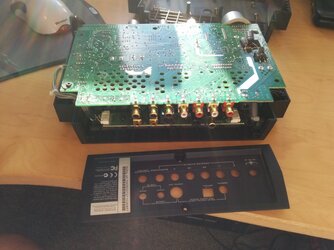
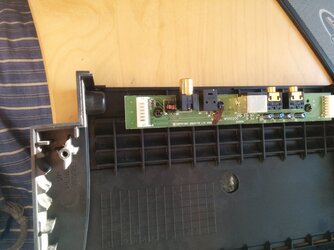
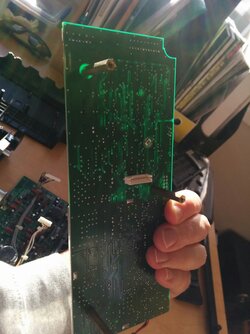
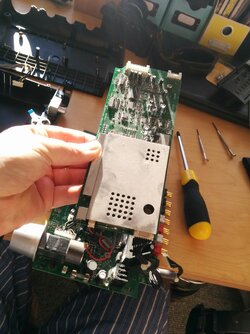
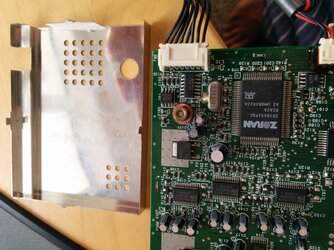
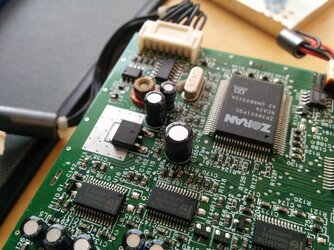
In the second pic some cables have been removed and the PCB lifted up.
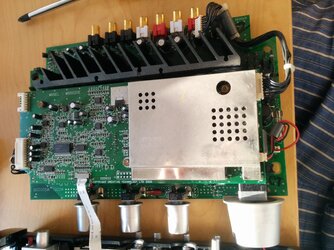
The metal faraday cage must be removed for the caps we are looking for.
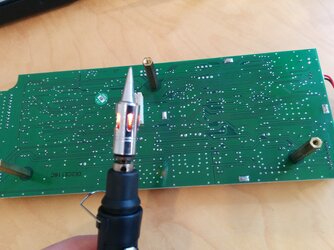
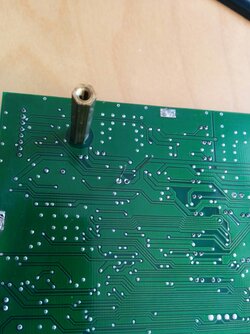
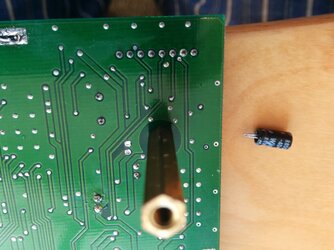
First unscrew the PCB with the metal faraday cage on it, there are 3 brass screws on the back holding it, desolder the cage carefully at the four points it is attached to the PCB with...

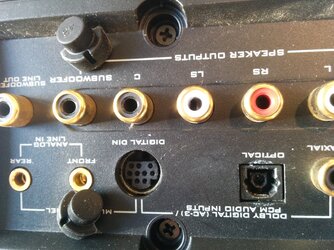
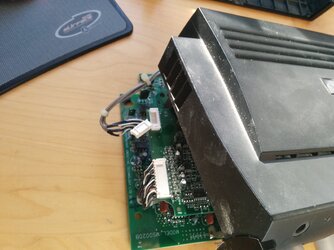
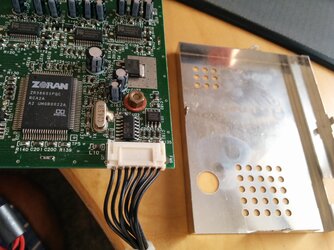
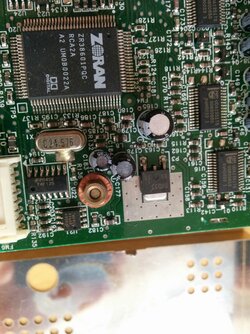
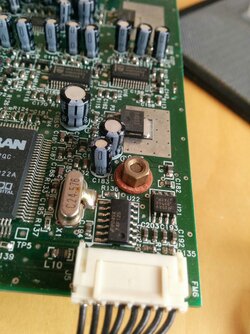
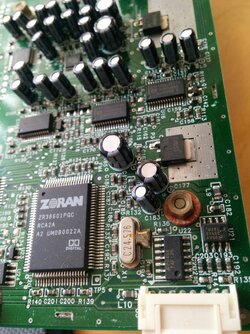
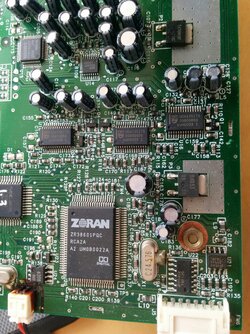
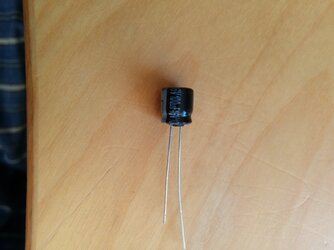
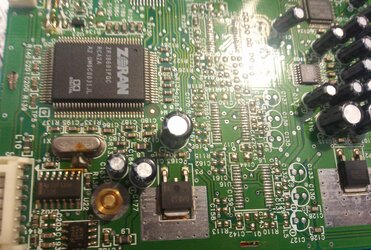
The next picture shows the 3 caps you need to change. (Next to the Zoran Dolby Digital chip) All are 16v one is 100µF, the other 47µF and the last one is 22µF... The big ones are Jamicon SS series and the 22µF is a Wincap R85SM(M)
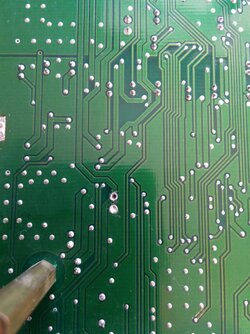
Desolder these 3 caps and _gently_ push a small needle through the holes while heating them with the soldering iron, let the solder cool a second or two then gently pull the needle out so you have a free hole for the new capacitor (you do this because capacitors are very heat sensitive)
Now put the new caps in and solder them in place.

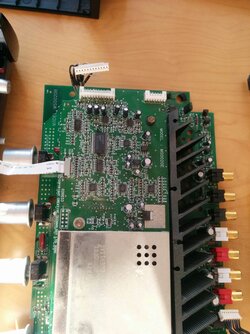
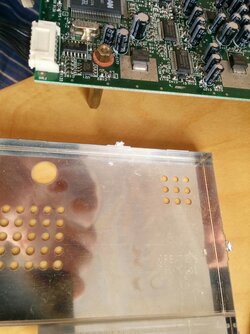
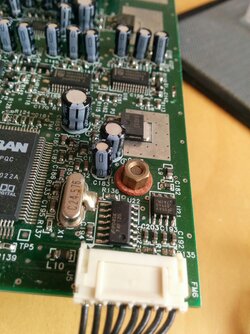
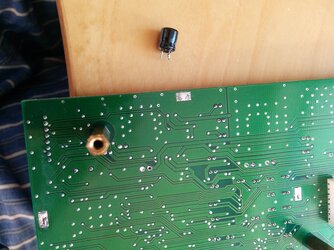
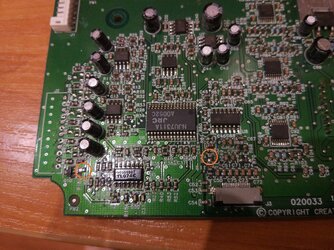
The last pic shows the replaced caps, after this mod the Dolby Digital light became lit permanently, and the sound produced with the X-fi XtremeMusic and Dolby Digital Live addon in Crysis Warhead was very emmersing in all it's 5.1 glory ;)


Thank you very much friend from Chile, I found elsewhere that had home capacitors 100μF and 47μF, change only these two and my DTT3500 stay like new. I really appreciate your help and I hope other forum friends serve them your excellent contribution.

Best regards,

Felipe :)
 
This is a pretty old thread, but I thought I should note ANOTHER successful repair of my beloved DTT3500 surround sound system.. Those three capacitors are relatively hard to get to, but the work was well worth it…
The following DIGIKEY part numbers were the ticket:
P15790CT 22uf@16 7MM FOR DTT3500 REPAIR $0.40000
P15794CT 47uf@16 7MM FOR DTT3500 REPAIR $0.48000
P833 100uf@16V 7MM FOR DTT3500 REPAIR $0.25000


THANK YOU!!
 
I know this thread is old, but I just signed up to make this post: I just fixed my fathers old, old DT3500 system and it works BEAUTIFULY again! This is absolutely amazing! Thanks a lot for everyone :)

Obligatory relevant XKCD http://xkcd.com/979/
 
I'm just about to embark on this repair, I had a question to those that have successfully done this, did you all use the same manufacturer of capacitor, or different? I can't locate the jamicon ones here in NZ, but I can get Panasonic ones of the same specification, should I be ok with these?
 
Blinwaffle, you will be fine with the Panasonic caps. Just make sure ESR and tolerance are the same. I would say a 5% difference is your max in difference between the two caps.
 
cappacitors

I'm just about to embark on this repair, I had a question to those that have successfully done this, did you all use the same manufacturer of capacitor, or different? I can't locate the jamicon ones here in NZ, but I can get Panasonic ones of the same specification, should I be ok with these?

Hi, i have now repaired my DTT3500 :))))) YEAH! I had the problem with crapy sound from speakers and nonfunctional optical port. There was broken conductor near by oprical port. And i replaced of coure all three conductors under the faradai cage. And all Works perfect. What its the best, i try bought Panasonic conductors from US. But shipping was 60USD :). I wisit shop with Electronics parts in my city (Bratislava/Slovakia - http://www.gme.sk/ ) and I bought all 4 conductors (not Panasonic, but with the same parameters). Price?? 0,16 Eur all :) :) :). THANK This forum. (my 100uF cappacitor was 7.5mm high, but still useable. I`m not verry good in repairing things, but this is really simple repair. Trick with needle is perfect. You mus by patient and be careful when soldering. Thats all.

I wish you good luck by repairing.
Peter.

sorry for english, im not good, but the gist is, you can use any conductors with the same parameters as original conductors have.
 
Finally got round to doing this today, worked an absolute treat, thanks to all posters for this thread, you guys are legends! much appreciated! I took some pics of the process I'll add them to this post tomorrow.

IMG_20150920_072730.jpg IMG_20150920_072832.jpg IMG_20150920_072922.jpg IMG_20150920_073103.jpg IMG_20150920_073303.jpg IMG_20150920_073337.jpg IMG_20150920_073706.jpg IMG_20150920_074002.jpg IMG_20150920_074006.jpg IMG_20150920_074119.jpg IMG_20150920_074124.jpg IMG_20150920_074233.jpg IMG_20150920_074418.jpg IMG_20150920_074607.jpg IMG_20150920_074612.jpg IMG_20150920_074802.jpg IMG_20150920_075305.jpg IMG_20150920_080420.jpg IMG_20150920_080425.jpg IMG_20150920_080429.jpg IMG_20150920_080436.jpg IMG_20150920_080445.jpg IMG_20150920_080454.jpg IMG_20150920_080456.jpg IMG_20150920_080635.jpg IMG_20150920_080640.jpg IMG_20150920_081353.jpg IMG_20150920_081402.jpg IMG_20150920_081417.jpg IMG_20150920_082156.jpg IMG_20150920_083003.jpg IMG_20150920_084812.jpg

Here are the caps I ordered (I got mine from element 14):

1902049 5 ECEA1CKA101 Product Range:KA Series; Capacitance:100µF; Capacitance Tolerance:± 20%; Voltage Rating:16V; Diameter:6.3mm; Capacitor Terminals:Radial Leaded; Packaging:Each; ESR:-; Height:7mm

1901998 5 ECEA1CKS220 Capacitance:22µF; Capacitance Tolerance:± 20%; Voltage Rating:16V; Diameter:5mm; Capacitor Terminals:Radial Leaded; Packaging:Each; ESR:-; Height:5mm; Lead Spacing:2mm

8766916 5 ECA1CAD470X Product Range:AD Series; Capacitance:47µF; Capacitance Tolerance:± 20%; Voltage Rating:16V; Diameter:6.3mm; ESR:-; Height:5mm; Capacitor Terminals:Radial Leaded; Lead Spacing:2.5mm
 
Last edited:
Finally got round to doing this today, worked an absolute treat, thanks to all posters for this thread, you guys are legends! much appreciated! I took some pics of the process I'll add them to this post tomorrow.

I am about to attempt this fix, which caps did you go with (the Panasonic ones are the easiest brand I can get)?
 
I am about to attempt this fix, which caps did you go with (the Panasonic ones are the easiest brand I can get)?

pm me your address niklz, I ordered 5 of each of these capacitors, in case I got it wrong, i'll send you the three you need mate.
 
I registered to say thanks to all of you who posted photos and part numbers for the capacitors.
I just replaced those 3 on my DTT3500 and audio no longer cuts out. It sounds like it did years ago!
 
Last post a day before my birthday this year! This is going to be the longest running thread in the history of this forum. Subscribed to post be able to post this as well. I am going to undertake the repair of my trusty old DTT3500 as well. Not sure when I'll be able to complete it, because it is freezing in my workshop now (well not literally freezing, but cold as ice). So, when the good weather kicks in, I'll see whether I can fix this puppy. It'll be my first real big electronic repair. I am only accustomed to building Arduino sized boards, but no repairs yet. I'll keep you posted. For now already thanks for the pics and advice. I hope I'll be listening to my trusty DTT3500 soon!
 
O.M.F.G.! It worked. Had to wait a couple of days for the parts to arrive, but it worked like a charm! No pops, clicks or 'warm-up' time even the Dolby Digital light comes on! Full 5.1 bliss! Squeeeeees!!!!:clap:Many thanks for all the help and I hope this thread my save many DTT3500's in the future!
 
Same story...DTT3500 started popping etc and would only be "fixed" by restarting it after a wait...I'd seen this post and knew it was possible but pushed it off thinking I could find a replacement receiver/amplifier for the speakers...I came close but it's apparently VERY hard to find something that can replace this unit...ended up FINALLY trying this out (bought a soldering kit and the Digikey parts as listed in the thread) and was able to put this together in 3-4 hrs...probably not the cleanest soldering job (that FARADAY cage and the size of the caps SUCKS...I tried the needle technique with 50% success in getting a nice hole that offered no resistance to the cap...was it the needle? the technique?...i just usually ended up with a needle that was too hard to pull out of the hole) but finally got it all soldered and put back...booted it up and YES....DOLBY DIGITAL light, OPTICAL works again, no more pops....simply amazing that 3 caps and a few hours was what it took to solve this issue after over a decade of issues. Thanks to all posters and for keeping this thread alive!
 
Just wanted to add my +1 to this thread. Confirmed that customer's DTT3500 was having same symptoms with digital audio inputs. Replaced three caps under the shield as detailed above, and problem solved. Thanks, y'all!
 
Signed up just to say thank you to all the people that contributed to this thread another DTT3500 saved thanks to the information here.
 
Hello guys. Just registered to the forum to thank you all and specially the original author of this threat. I got so happy to came across it. I own a Creative Inspire 5.1 5700 sound system. I am not an expert but I believe that the decoder/amplifier of this system is very similar (if not equal) to the one used in the DTT3500 system.

My story: I have been using my 5700 for gaming only, starting on my PS2 all the way until recently with the PS4, always via optical connection. After all this years working great, the decoder just stopped working abruptly. Only the optical inputs (maybe the digital ones) fail to work, the analogs stay normal. But my problem is quite the opposite: it works when it is "cold", and starts failing (no sound and a crackling noise when volume is at max is very noticeable) when it gets "warm". It usually fails after 1 hour or so, but sometimes after a couple of minutes. After, if I unplug it from the wall, wait a little bit (5-10-15 minutes) and turn it on again, the sound comes normally again. However, after this resurrection, the time it takes to fail again is shortened, usually several minutes. If I want it to hold again like 1 hour, it has to be turned off for several hours (I made the test letting it off during the night - unplugged from the wall).

So, although the symptoms are slightly different than the ones presented in this threat and the decoder itself may be a little different also, I will try this repair job (in fact, I will give this task to a profissional). I hope it works because I really like this sound system. For the sake of curiosity and cause other people may find this information relevant and useful, I will provide feedback.

Thank you all again,
Best regards.
 
Last edited:
Hello.

Just for the record: I changed the capacitors of my decoder (Inspire 5700) but it did not work. The integrated circuit layout is not 100% the same, it has some similarities though. In my case there are more than 3 capacitors near the digital processor. I changed them all but the problem persisted. Maybe the problem is caused by another set of capacitors, I don't know.

Thank you,
Best regards.
 
Hi! I'm restoring my dtt3500 now. Can you take a photo of the part of the converter board (where is place the Zoran processor). I have lost 2 resistors. Or tell me the resistors nominal. Thanx! Greats from Russia))
IMG_20181104_162637.jpg
 
Last edited:
Hi

Delighted to say replacing the 3 capacitors also worked for my Creative Inspire 5500. I had to get help with the soldering, very tricky if you're not used to it.

All connectors held in place by hot glue: used Iso propyl alcohol to remove them (worked great).
2 connectors either side of board plus 1 on bottom, prise out gently.

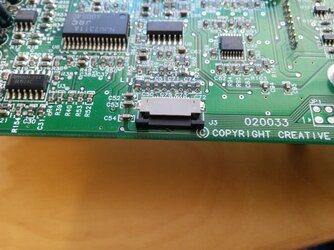
Ribbon cable had me stumped for a while: it puled loose when I was dissembling, so I didn't know how to put it back in. It's NOT a lift up type zif connector: there is a little black piece at the front which needs to be pulled back slightly (like a sim tray), and the ribbon is then inserted and the connector clips it in place when closed again.

Hope this helps someone else, and thanks for the info: my surround speakers are now working perfectly again!
IMG_20190103_091057_749.JPG
IMG_20190103_091114_709.JPG
IMG_20190103_091136_645.JPG
IMG_20190103_091210_819.JPG
 
Just signed up to give thanks to everyone in this thread.

I had the same problems with the sound cutting in and out rapidly for a few minutes on power-on; last night I replaced the three capacitors, and the one next to the optical-in port which had leaked just like Blinwaffle's, and the amp now works perfectly.
 
Back