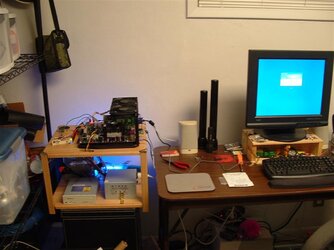
I just built my ghetto version of naviqs bench rig..well its 90 percent done..I gotta setup a decent switch panel, just using some bits ganked out of some tear downs...
Fully functional, I have to decide on the mounts and locations yet and style of mount for the hd and or optical cages..
Harder then it looks..I hate wood......
Built using solid red oak plank, quite rigid...clear coated only...
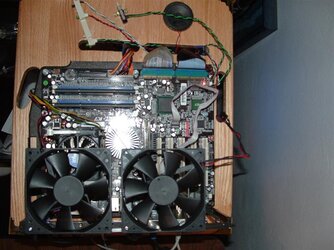
just took number 8 spot on the p4 board with this old rig..half busted...rofl..
mobo works fine, except for the pci slots....using a ten mb usb adapter sucks!
i was actually plotting something similar for my bench. since budget is a major concern for me, my plan was to chop up several old cases and weld. perhaps after i make a nice enough mock up, i can truly make a custom setup using the canabalized set as kind of a pattern. i REALLY dig what you made and the possiblities in El Grande are endless, especially for a guy like me who may build/assemble PCs 4-5 times a month for other people. nice work
The DIY station continues to be on ongoing project (a lot of the development has moved over to the For Sale thread). I'm on my eighteenth build! One of my stations traveled the world and ended up working for the winning team for the Tomshardware overdrive overclocking competition.
The typical sized station is 470mm x 380mm. The height to the top of the posts behind the PCI brackets is about 450mm. The height to the top of the first tier is about 250mm.
I ship with the PCI bracket folded down at the level of the top tier. In such a configuration, I ship in 16" x 20" x 12" boxes. The typical shipping weight is about 13 lbs.
How hard is it to move around?
Not sure what you are asking in this question.
1) Everything is hard mounted, so you don't have to worry about components falling off the station, except maybe for your loose DMMs.
2) There are no sides to protect your components, so random blows and kicks will hit your components. So I wouldn't recommend kicking around a benching station.
3) I can and have added handles. I can make custom plastic shells, if that is desired.
4) If you desire long distance cargo transporting, the point is, you ship the station without components in a box, and you ship all your components in their own boxes. When everything arrives at its destination, the beauty of my station is that you can go from my station in a box to ready for install in 1 minute, and then you can go from components to a running computer in 10.
The stations are sturdy and can be man-handled. For example, I once built a station for a tester who liked to test his heatsinks in both the horizontal and upright positions. So I merely added feet to one side of the station, and you can just reach out and flip it on its side, components installed and all:
Try that with any other benching station out there!
This site uses cookies to help personalise content, tailor your experience and to keep you logged in if you register.
By continuing to use this site, you are consenting to our use of cookies.
")