• Welcome to Overclockers Forums! Join us to reply in threads, receive reduced ads, and to customize your site experience!

How to fix the 'double-click' problem on your G7 mouse.

Overclockers is supported by our readers. When you click a link to make a purchase, we may earn a commission. Learn More.
You are correct that the spring wears after some use and your method for fixing it would work but there is a much easier fix.

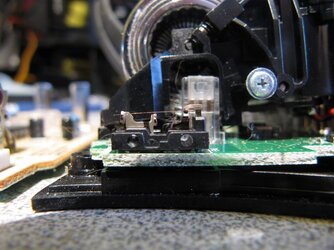
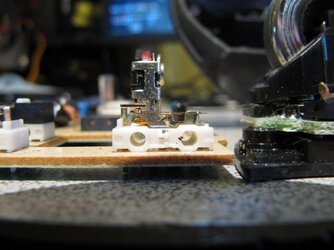
If you carefully remove the circuit board you will notice that there is an upper and lower board. The upper board is only supported on one side. The side directly under the left micro switch has no support at all. When you press down the board flexes a bit which causes a rebounding action of the board. This "bouncing" effect is what causes the multiple click registrations. When the micro switch is new the inner spring has enough tension to resist this bounce but after some wear it can no longer make up for it. Simply adding some rigid spacers between the boards on the left side will firm up the upper board removing the rebounding potential and make the micro switches base solid.

I took a couple of plastic zip ties and cut the bulky ends off to use as spacers. You could use any rigid non-conducting material as a spacer but I found that my zip tie ends were just the right size to fit snuggly in the gap between the boards. A little hot glue may be required to hold the spacers in place but mine fit tightly enough that no glue was needed. After putting in my new spacers the mouse works perfectly once again without the need to disassemble and repair the micro switch.

I followed Stitch140 example and signed up to thank u for your easy and quick help. I fixed my steelseries ikari optical with some plastic zip ties too, and it worked perfectly fine.
 
Last edited:
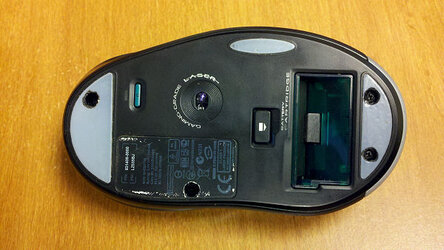
Also registered just to say thanks... fixed my out-of-warranty MX Revolution thanks to your guide!

Only bit of extra advice I can offer is to work in a clean corner of your room because the parts tend to go flying out when you detach them!
 
This is awesome! I have two mice, the G7 and MX700 that need repair. I knew the problem was in those little black boxes, but didn't think you could get them apart. /me breaks out the razor knife

Thanks!
 
I thoughts I'd register to post this software fix to the double click issue (it seems to be working for me), in case you don't feel like opening up your mouse.

http://answers.yahoo.com/question/index?qid=20090706001648AAMLoBc (it's the 2nd response)

The software is called MouseFix
http://www.danieljackson.co.uk/fun/old/
Thanks a bunch buddy. I have non-Logitech G7 mice that have the same problem (and I couldn't figure out how to physically fix them), and this fix worked great.
 
Does this work with Win7 64 bit?
It would seem to in Windows 7 x64. I haven't had a double-click problem problem after a day of running the program, but it's hard to say whether or not it's thanks to the software or the mouse. Too bad the software doesn't have a status window to tell you whenever it blocks a premature click.
 
I've following suit with others and created an account in order to say thank you for this thread. I've had a logitech mx620 mouse that's been having double clicking issues for months and I finally got sick enough of it to try and find a solution.

There are other guides out there to do this crap, but none that are quite so clear as this one.

There's just one thing I wanted to point out. Later in the thread, Feeman posted observations which were quite helpful for me.

I had a ***** of a time getting the spring back into place until I read his suggestion to curve the spring into place then gently push the tab down into click position.

I kept trying to pull the spring up from the bottom and mangling it, so this technique worked wonders comparitively.

Also of note for any mx620 users out there, the spring looks slightly different than the springs in this thread. Specifically, it's very close to flat and the leaf part doesn't have much of a curve to it. I ended up having to pop open the right click switch to compare against after I'd tried different ways of bending it to fit into place.

Anyways. TL;DR version. Thank you for making this guide. It's immensely useful.
 
Well, after about 4 times fixing my G7, with less time between each fix, I figured I'd try the mousefix software. It helped for about a week.

Given the progressively shorter time between fixes, I figured metal fatigue was getting me. So, I opend up an older cheap mouse I had and de-soldered a switch from it and used it to replace the switch in my G7.

Seems to be working fine at the moment.

You do need to be comfortable with a soldering iron, but it took less attention to detail to replace it than it does to open it up and rebend the spring.

The old mouse has 2 more switches I can pull if the current one dies.

But my G7 should last until some other component dies, or I can no longer get batteries for it.
 
Another person in the "created an account just to say thanks". I was just about to go insane when I found this. Worked like a charm. Although with my MX revolution I had a hard time getting the leaf spring off so I just squished it in place.

So thanks for this post, saves me from a mental institution.
 
Ugh. I ruined my micro-switches trying this. And one of the copper things was tensioned then flew across the room and I can't find it for the life of me :(

Easier to buy a pair of new switches for $3 and solder 'em in if your coordination really sucks :)
 
Ugh. I ruined my micro-switches trying this. And one of the copper things was tensioned then flew across the room and I can't find it for the life of me :(

Easier to buy a pair of new switches for $3 and solder 'em in if your coordination really sucks :)

Hehe. mine just took a similar flight.. can't find it :(
 
I got my hands on another G7 with broken mouse wheel, so on a whimp that the mouse button doesn't double click i just changed the insides (the stickers were messed up), and seems to be working. now I have my old one double clicking without one of those leaf springs (the right button is fine, left missing spring), the shell is good too and maybe you could use something else. PM me if anyone would need spare parts.
 
Two additional hints

I have two additional hints that simplify this process considerably:

1) Do not remove the teflon sliders, just poke your screwdriver through to the location of the screws. No real ill effects, and has the added benefit of making the screws "captive."

2) Before prying the top of the switch off, cut a small piece of sticky tape and place it on the fiddly white button, so that it remains in place for the duration of the repair.

Also, if one mangles or loses the little metal bit in the switch, there are guys on ebay/amazon selling the switches pretty cheap, so you can just do a transplant. In my case it was my right button that was acting up, which was impractical to desolder.

Thanks a million for the solution to this.
 
Signed up just to say thanks, mouse had developed a weird fault on the right click, whereby in games it was most notable, now fixed (did both buttons for good measure) SO happy to be able to keep this mouse - it's the best I have ever had!
 
Add me to the "signed up to say I'm a satisfied customer" list! :D My MX Revolution was giving me fits because of random unexpected double-clicks and I bought a Performance MX to replace it. This mouse is a step back from the MX Revolution in my opinion so I longed for a way to fix my beloved. Thankfully found this thread!

The main problem I had was getting the copper spring back into place because I didn't pay attention to how it was placed before I removed it. I found this video helpful to illustrate how it's supposed to look,
. You have to pause it in the middle. Thanks to all the others who suggested additional hints. Pushing down slightly on the curved part of the spring until it catches is what finally did it for me.
 
Already had an account here, though this is the first use it's seen in probably half a decade :D Big thanks for saving my beloved MX700 from the garbage can!
 
Thank You!

Registered with Overclockers expressly for the purpose of thanking you for this tutorial (although it's something I was planning to do anyhow, as this forum is fantastic). Thanks to your instructions (and great photos), my favorite G7 is now as spry as ever and no longer registers erratic double-clicks.

One thing I would mention about removing the little "black box" is that the catch is at the *bottom* of the front and back (against the board). Where your knife is positioned in the picture, it looks like it's in the middle on the side edge. Also, be very aware that the little gray button will fly out once the black box is removed! Your mouse won't work without it, so use caution.

Also, if you're using an Xacto knife, you can simply carve the holes for the screws. This will prevent having to get new pads on the bottom and does not adversely affect mouse movement.

g7_holes.jpg

High five to everyone who fixes their things instead of throwing them away at the first sign of problems.
 
Nice work to everyone who fixed their issue with the mouse by doing this.

I have to say, I had a similar problem with a G500 and I put in a RMA request with Logitech and they just sent me a brand new one, no need to take it apart.
 
I spend 4 hours yesterday trying to bend the cooper spring in a proper shape so here are my observations.

To remove the cover from the micro switch look at the big side of it, with an x-acto knife pry the corner of the of the parallelogram where the external case meets the base of the switch, this is where you have to insert just a bit the knife and with a small rotating motion push the small side of the cover a bit away and then a bit up so it will be released from the switch base lock, do the same on the other side. To remove the cooper spring press on the concave part in the middle of the spring downwards with a toothpick or a jewelers screwdriver so it will unlock from the groove (there is a grove in the middle of the middle protrusion, this is where the curved bit of the spring goes with the 2 small extrusions of this spring part on either side), then it is simple to remove it by rotating the back of it (near the battery sideway and then lifting the other side from the switch base protrusion.

Observe the spring the "straight part" must have a bend on the side away from the battery like the photo I attach if this is flattened out after all the use this is where you should focus more than fixing the curvature of the bend part of the spring (when the spring is straitened the length of it increases so the bend part cannot keep proper tension while in the groove. Use a pair of tweezers to bend the spring in the proper place.
Reposition of the spring, this time insert the front hole of the spring in the front protrusion (away from the battery) on the base of the switch hold it with 2 fingers of one hand while at the same time pushing it towards the battery and then with the tweezers hold on the back part of the spring (the flat surface) curve the whole spring a bit upwards to shorten its length and put it between the 2 contacts on the back of the switch base (battery side). Now the edge of the middle concave part must rest on top of the middle protrusion and not under it (if it ends under you have to start all over) make sure the spring runs straight in relation to the base and in the middle of it, with a toothpick push the concave bit of the spring juuuust a bit so it locks in the groove in the middle protrusion, check sideways to ensure all is right. Now while holding the spring in the middle of the base check that all is working fine by pressing with the toothpick on the the middle point where the white button goes you must hear a clear "loud" click and feel a springy reaction from the spring).
...
x2sy2o.jpg


Trying to fix my MX Revolution, I don't think it's that curve the problem, I'm pretty sure there wasn't any to begin with.

(Click for HIGH RES) H3jCpl.jpg

46WL8l.jpg (old HP mouse for reference)
 
Back