• Welcome to Overclockers Forums! Join us to reply in threads, receive reduced ads, and to customize your site experience!

FEATURED The Water-Cooled System picture thread v2.0

Overclockers is supported by our readers. When you click a link to make a purchase, we may earn a commission. Learn More.
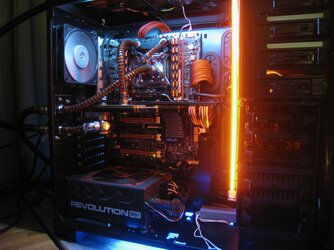
So to start, watercooling is something I've always wanted to do, but up until recently it hasn't been cost effective enough to do. After my cousin upgraded his, it got me back on the must build new watercooled system kick, then I decided hey, it'd be fun to build my own case. Sooo what you see below is what I JUST finished.

Quick Rundown:
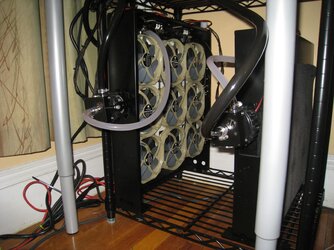
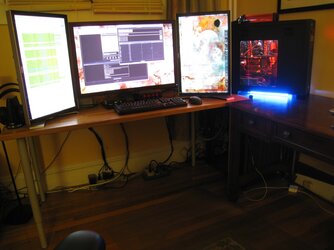
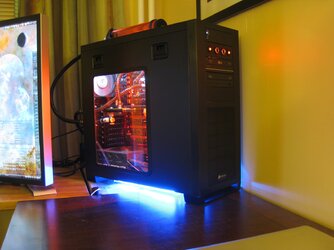
First is the side picture of the finished case, second is the main compartment, third the front, and finally the rear. I will mention that I had originally planned to have a white/red themed case (thus the front grills), but after I found the red stain, I couldn't keep the rest of the bright red, but I'd already picked up those fan dust covers, so it is what it is :)

For details on the entire install, you can see the whole photo history and notes while I built it here (http://bit.ly/AbZxiK). Took me a few months designing it with my cousin, and another few months to build it. Here's the components:

Intel i5 2500k
Asus P8P67 Pro 3.1
4x 4GB G.Skill 1600 DDR3
XFX Radeon HD 6870 2GB
2x OCZ Agility 3 120GB (RAID 0)
OCZ ModXStream 700W
XSPC RX360 Watercooling Kit (+ Rasa GPU cooler).

View attachment 107464

View attachment 107465

View attachment 107466

View attachment 107467
 
Last edited by a moderator:
Couldn't tell you why, but i really like the wooden case thing. This one is very well done. Very nice work.
 
Really nice work, the only thing I could possibly see changing would be to add 2x 45deg adapters and swap a few of those hoses around. I would go in CPU right port(45*) out through CPU left to in GPU left, then out GPU right(45*). That should allow you to shorten your hoses out and eliminate all the tubing cris crossing.

On another note with those fan cutouts this should totally be a Trinity APU build. However im sure that the 2500k is killer!

I also watched your slide show good stuff man. That sweet wood computer makes your desk kinda look cheezy tho.
 
So this is not mine, I had nothing to do with it, and so on.
But....
Check this out: http://www.extremetech.com/extreme/124677-how-to-cool-a-pc-with-toilet-water

not-sure-if-gusta-face.png
 
All of these are inspiring. To this day I can't believe some of the stuff I see. Bobnova, that's just odd! lol All of these pics gave me insight and ideas of how to improve my setup. Congrats to all and inspiring at least one of us you all succeeded! Thanks to the best bunch of oc'ers and modders in teaching me what I know!:thup:
 
Sorry for the poor quality with the pictures, but I hope it gets the idea across. Custom build, first attempt, and complete beginner with building projects.
Wood base, acrylic top, recycle pieces from microwaves and lots of blue :).

Ok, you liar, stop trying to make us think that is your first build. That is too incredible to be your first build. :chair:

Jokes aside, wow, for a first build... THAT CAN'T BE YOUR FIRST BUILD! It's... too cool. Love how the metacrylate shell looks. Worst thing is the hole right next to that Samsung BD drive. And just a tip, I'd add two more blue LED fans to make it look more "balanced". :thup:

Really, if that's your first build, I can't wait to see your next one.:shock:

The reason for the hole was to be come a drain port... needless to say a broken T line screwed that up and I've been to lazy to go about and setting it back up. With the proper plug that hole doesn't stand out so much. Thank you very much for the comments and suggestions I appreciate it!

When you say, two more LED fans you mean on the front, attached the the rad? The reason behind the single is because the center one happened to be so freakin' bright I thought it would be TOO much blue hehe. But I'm curious to see how it would look.
 
sp33dball: Can you take any better pics? I'd like to put it on our facebook page, but I only post higher quality images. Looks great!
 
When taking pics of stuff behind acrylic its important to have alot of indirect lighting so you can avoid using your flash. Also if you have access to a tripod that will make your pics come out alot clearer.
 
sp33dball, great build! Kinda reminds me of those super villains that have a glass dome for a head with their brains exposed :p If that makes any sense. Love the Liquid Fusion res!
 
Back