-
Welcome to Overclockers Forums! Join us to reply in threads, receive reduced ads, and to customize your site experience!
You are using an out of date browser. It may not display this or other websites correctly.
You should upgrade or use an alternative browser.
You should upgrade or use an alternative browser.
PROJECT LOG Gaming in tight spaces - MAX11Lv3
- Thread starter MIAHALLEN
- Start date
- Joined
- Jun 5, 2011
Hi Mia, I think one of the rewired connections in the power supply might have loosened up while you was putting everything together, this has happened to me before.. That'd be the first place I'll look..
This is a sweet sexy build, please keep us posted.. I'd love to see how the temps are in this, I was thinking of something like this for my next project, looking for a small 580 rig that I can pack to friends house to game...
ironically, I'm going to have a spare 580 bitspower block laying around real soon..
- Joined
- Aug 29, 2007
- Thread Starter
- #44
So, these are the pictures I neglected to post yesterday. Its late now, so I'll have to fill in descriptions tomorrow.
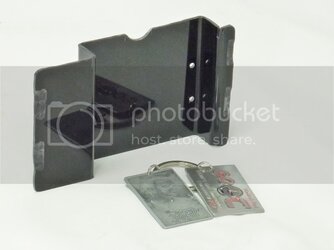
These are the brackets I made for the reservoir and the pump.

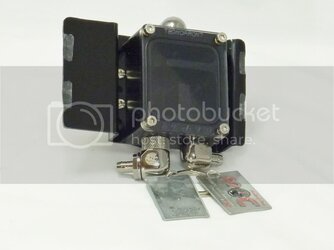
Reservoir mounted.

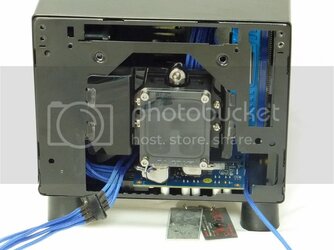
The bracket attaches to the case with the clips originally intended for the front fan filter.

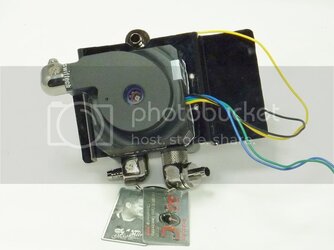
The pump mounts to the back side of the bracket.

The SSD was screwed directly into the motherboard tray.

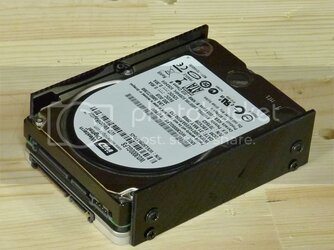
And I made some custom brackets to keep the HDD clinging onto the mounted SSD.

Like this:

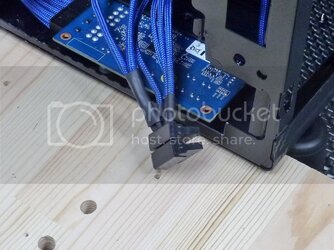
I had to rewire this connector to power both drives...and I also tapped into the 12V and ground lines to power the optical drive, the LEDs on the bottom, and the pump.

Here's how it looks with the SSD & HDD mounted.

Added in the reservoir & pump bracket.

This is probably a better angle.

One more for good measure.

With the optical drive mounted, things fit fine except for the fill port...the SSD & HDD stuck out just a hair too far, so the fill port had to go. I'm going to mount a toggle switch there instead which will control the LEDs on the bottom, so they can be turned off when not wanted.

"Its almost hard to believe I got it all to fit!!!
Leak testing commences!


These are the brackets I made for the reservoir and the pump.
Reservoir mounted.
The bracket attaches to the case with the clips originally intended for the front fan filter.
The pump mounts to the back side of the bracket.
The SSD was screwed directly into the motherboard tray.
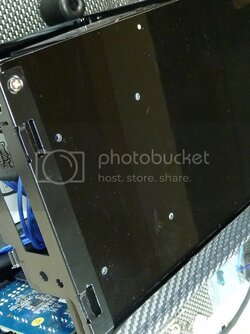
And I made some custom brackets to keep the HDD clinging onto the mounted SSD.
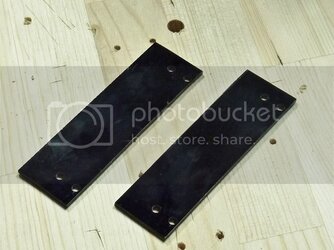
Like this:
I had to rewire this connector to power both drives...and I also tapped into the 12V and ground lines to power the optical drive, the LEDs on the bottom, and the pump.
Here's how it looks with the SSD & HDD mounted.
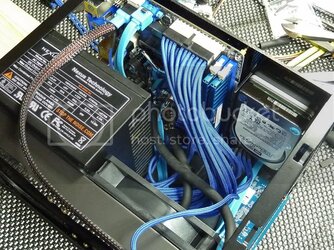
Added in the reservoir & pump bracket.
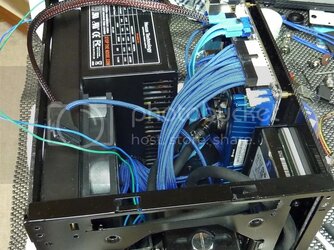
This is probably a better angle.
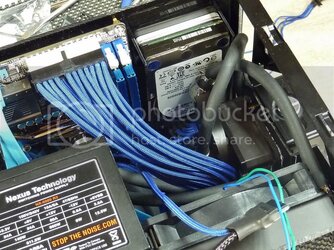
One more for good measure.
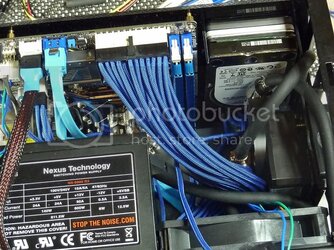
With the optical drive mounted, things fit fine except for the fill port...the SSD & HDD stuck out just a hair too far, so the fill port had to go. I'm going to mount a toggle switch there instead which will control the LEDs on the bottom, so they can be turned off when not wanted.
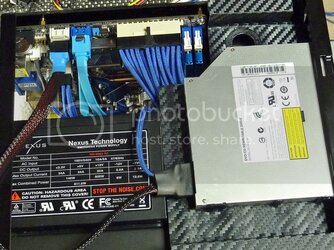
"Its almost hard to believe I got it all to fit!!!
Leak testing commences!
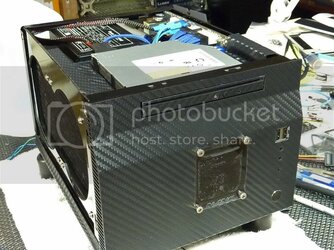
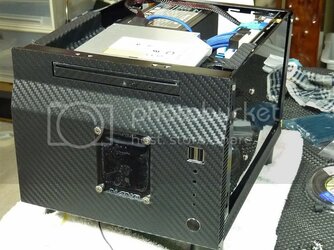
Last edited:
- Joined
- Nov 15, 2010
- Location
- Livingston, Scotland
looks good. out of curiosity, how did you attach your hard drives? this is the one aspect of my build im still working on. dont want to use the huge cage.
- Joined
- Nov 15, 2010
- Location
- Livingston, Scotland
OHHHHH ofcourse, theres screw holes in the bottom of HDD's


- Joined
- Nov 4, 2011
- Location
- Melbourne, Australia
wow. just. wow. Awesome work there - It kind of reminds me of going to the circus and seeing a mini drive around and then 83 clowns jump out of it!
great work!
great work!
- Joined
- Aug 29, 2007
- Thread Starter
- #51
wow. just. wow. Awesome work there - It kind of reminds me of going to the circus and seeing a mini drive around and then 83 clowns jump out of it!
great work!
I'm sigging that

- Joined
- Jun 3, 2003
- Location
- Tampa
Man that is an awesome mod .... congrats!
MB
MB
- Joined
- Jun 5, 2011
"Gaming in tight spaces"...
oh that's "tight"... !!!
How are those neoprene tubes compared to the standard tygon | Promochill flavors? I was considering going that route, they have some sick bend radius from what I've seen and no more looking at cloudy tubings..
Thanks for the offer, I'd definitely look you up if I go a similar route, I'll even cover any expenses incurred.. I will copy a few ideas from you though, hope you doing mind.. but I don't like cloning a exact copy.. Gotta be a bit original, that's the best part about water cooling, no 2 systems are alike...
- Joined
- Aug 29, 2007
- Thread Starter
- #54
So, I mentioned during my last update that this project had run into two major problems. A water leak of which I was unable to identify the source. And the PSU's failure to power up with the system installed.
I'm happy to to say that my friend Norbert and I have successfully worked through each of the problems (as well as a few more) and the system is now complete! Read on for the details
We started off with the arduous task of breaking the system down to get access to the PSU.

Next we probed each of the pins on the 24pin connector, and everything was spot on. However, as we re-assembled the rig piece by piece and testing after every single change. We found that the PSU fan would not spin when we closed up the PSU due to the wires which had been cut short earlier. So we shortened them a bit more.

I also grabbed an extra 12V, 5V, and ground line to run to the LEDs, the pump, and the optical drive. I had previously planned to tap those lines into the SATA connectors, but it ended up being a mess, so this would help clean up wiring a lot!

Then we reassembled to being leak testing again, so that we could hopefully identify the cause/source of the leak. It didn't take to long to figure out that the hose had been punctured somehow up near the lower rad line. And cutting off the last 15mm of that line solved the leak problem....Yeah!!!

Then, curiously...after getting everything put back together, we found the PSU refused to run again which really got us scratching out heads. It took quite a bit of time and before we probed the PCIe connectors and found that I had swapped one of the 12V with one of the ground lines uggg....luckily we swapped them around and everything was happy once again. Nothing dead, phew!

This is what the layout looks like prior to putting in the optical drive tray....it's a really tight squeeze!

So, we finally had the rig running properly and started getting things set up correctly in the OS.....oh crap, I spoke too soon, the last thing I wanted to see at this point was poor temps....but the GPU was idling at 70C at stock speeds

So, once again we broke the system down enough to get a wrench in there and found the GPU block bolts were way too loose (how could I have missed this earlier, eeerrrr ). Anyhow, I tightened up the bolts, and got back into Windows....yeah! GPU now idling at 30C....much better

The CPU now idles just above ambient and the GPU at about 8C above ambient. I'm not very impressed with this motherboard's overclocking abilities. It allows for Turbo mode overclocking only. So right now I have it set to Turbo up to 4.3GHz, but with a full load it drops back to 3.4GHz and even still throttles a bit down to 1600MHz to protect the VRM (I suppose). Oh well, hopefully the BIOS will improve in the future. I tested with v1.1 and v1.2. The CPU load temps are in the upper 50s and lower 60s.
The GPU was overclocked to a modest 900/1050, the GPU only needed 1075mV to get there, and the load temp equalizes in the low 60s after 20 minutes of Furmark burn in testing. Very good!
Unfortunately, Norbert is being relocated right now, so time to test the system was cut short. But I'm hoping he can run a few benchmarks for me so I can give you a better idea of the performance potential. Until then, I'll leave you with some final pictures of the rig


Thanks again for everyone's comments and criticisms...until next time

I'm happy to to say that my friend Norbert and I have successfully worked through each of the problems (as well as a few more) and the system is now complete! Read on for the details
We started off with the arduous task of breaking the system down to get access to the PSU.
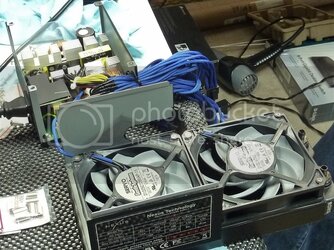
Next we probed each of the pins on the 24pin connector, and everything was spot on. However, as we re-assembled the rig piece by piece and testing after every single change. We found that the PSU fan would not spin when we closed up the PSU due to the wires which had been cut short earlier. So we shortened them a bit more.
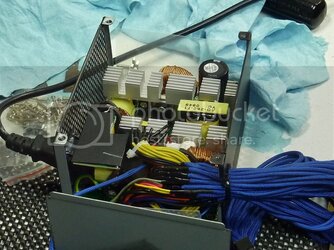
I also grabbed an extra 12V, 5V, and ground line to run to the LEDs, the pump, and the optical drive. I had previously planned to tap those lines into the SATA connectors, but it ended up being a mess, so this would help clean up wiring a lot!
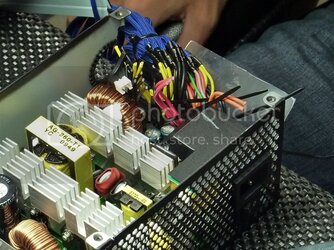
Then we reassembled to being leak testing again, so that we could hopefully identify the cause/source of the leak. It didn't take to long to figure out that the hose had been punctured somehow up near the lower rad line. And cutting off the last 15mm of that line solved the leak problem....Yeah!!!
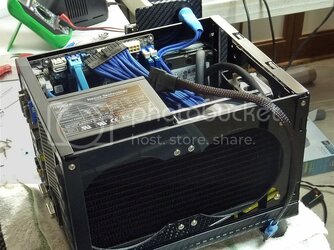
Then, curiously...after getting everything put back together, we found the PSU refused to run again which really got us scratching out heads. It took quite a bit of time and before we probed the PCIe connectors and found that I had swapped one of the 12V with one of the ground lines
 uggg....luckily we swapped them around and everything was happy once again. Nothing dead, phew!
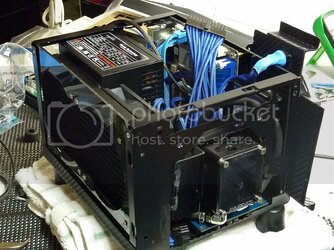
This is what the layout looks like prior to putting in the optical drive tray....it's a really tight squeeze!
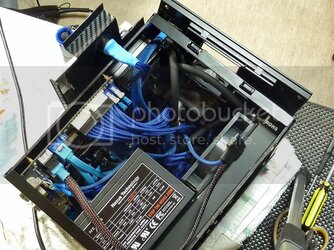
So, we finally had the rig running properly and started getting things set up correctly in the OS.....oh crap, I spoke too soon, the last thing I wanted to see at this point was poor temps....but the GPU was idling at 70C at stock speeds
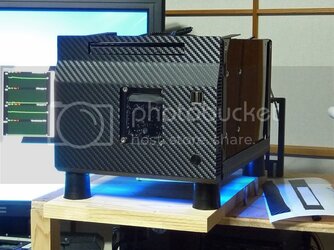
So, once again we broke the system down enough to get a wrench in there and found the GPU block bolts were way too loose (how could I have missed this earlier, eeerrrr
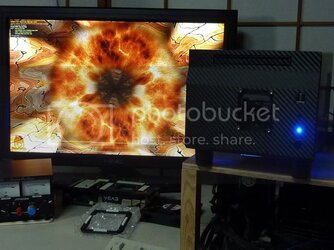
The CPU now idles just above ambient and the GPU at about 8C above ambient. I'm not very impressed with this motherboard's overclocking abilities. It allows for Turbo mode overclocking only. So right now I have it set to Turbo up to 4.3GHz, but with a full load it drops back to 3.4GHz and even still throttles a bit down to 1600MHz to protect the VRM (I suppose). Oh well, hopefully the BIOS will improve in the future. I tested with v1.1 and v1.2. The CPU load temps are in the upper 50s and lower 60s.
The GPU was overclocked to a modest 900/1050, the GPU only needed 1075mV to get there, and the load temp equalizes in the low 60s after 20 minutes of Furmark burn in testing. Very good!
Unfortunately, Norbert is being relocated right now, so time to test the system was cut short. But I'm hoping he can run a few benchmarks for me so I can give you a better idea of the performance potential. Until then, I'll leave you with some final pictures of the rig
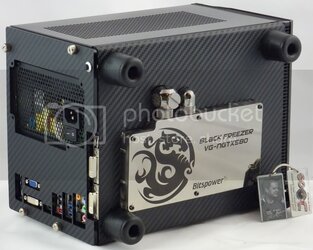
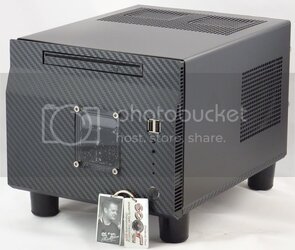

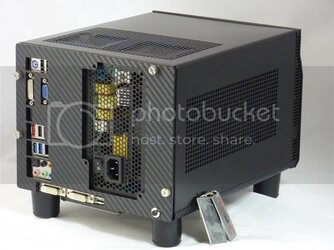
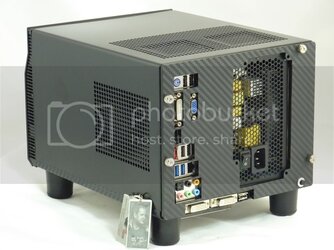
Thanks again for everyone's comments and criticisms...until next time

- Joined
- Nov 4, 2011
- Location
- Melbourne, Australia
awesome! It all looks great! I wrapped my (Jerry built) NAS in Carbon Fibre contact - I love the look of it! Are you thinking of wrapping the top/sides in it? I would dremmel out the ventilation holes, wrap it all in contact and some how fill the vents with modders mesh - but that's just a suggestion!
Once again, Great work!
Once again, Great work!
- Joined
- Aug 10, 2010
- Location
- Sunshine State
Miah... Please switch the rear thumb screws for black ones before you ship this baby to my house.
Thanks
Sebas

Thanks
Sebas
Similar threads
- Replies
- 50
- Views
- 1K
