-
Welcome to Overclockers Forums! Join us to reply in threads, receive reduced ads, and to customize your site experience!
You are using an out of date browser. It may not display this or other websites correctly.
You should upgrade or use an alternative browser.
You should upgrade or use an alternative browser.
PROJECT LOG [Cyprus 29] Cooler Master HAF935 :Update 2 : 3/24/14 : Structure up, more copper
- Thread starter OrangeClockwerk
- Start date
OP
- Joined
- Mar 6, 2014
- Thread Starter
- #24
Hey guys! I managed to start my custom reservoirs going. Im starting trim on the top one and I think I am going to redo the bottom one as one of the seams did not glue solid and I am having some leaks.
I have also been busy with the CNC, its almost finished now, just need the spindle and some odds and ends. Once its done I can put my money towards buying the rest of the components for this build.
Anyway on to the update! Hope you guys enjoy it!
First thing is that I greatly appreciate the help from my sponsors, they are the foundation of this project!

Here we go! I got my motherboard tray locked in place now with some aluminum cubes.


I also went through and started removing the rivets and replacing them with rivet nuts so the case will no be assembled with screws rather than rivets. It makes things much cleaner and easier to break down and assemble.


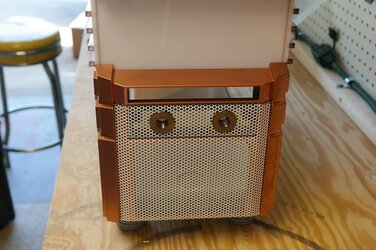
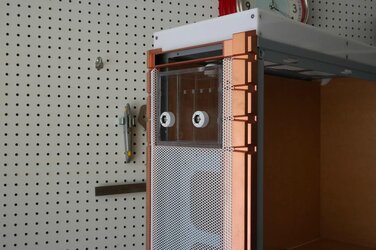
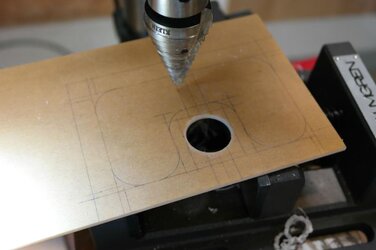
Next up I modded the bottom case bezel to hold two bulkheads and a little window to the bottom res. Two tubes will go from the top res and bring water down to the bottom res.
I used the step drill to cut the holes out.


>>>
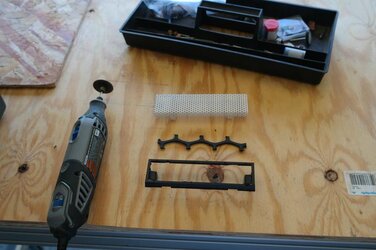
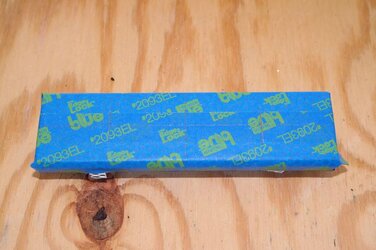
Then cleaned them up with the dremel and put in the bulkheads.


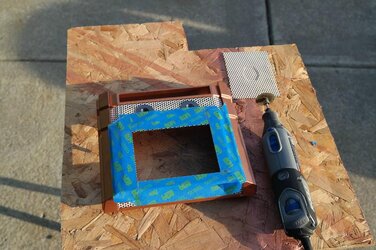
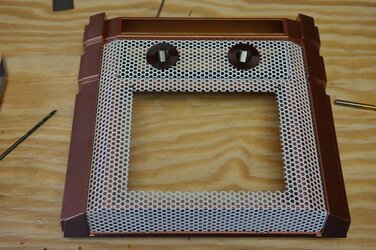
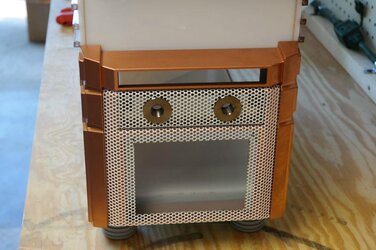
Next I cut out a window, I am not sure what trim to go with yet, white or copper. I might actually make acrylic trim for a more professional look.


Now Ill show you the top reservoir. I am leaving the bottom res out because I am most likely going to remake it. Its only about 20$ in acrylic per reservoir without the trim.
So I got the acrylic and some more syringes and a new needle from McMaster.

>>>
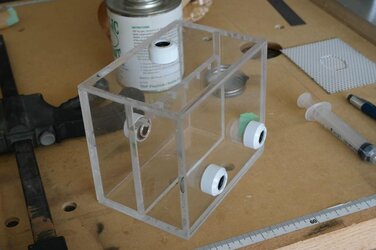
I took the acrylic and cut it down to the correct sizes and made rabbit joints on the ends to make them more leak resistant when I glue them.


I cut grooves in the mid plate that the water will flow over to hopefully keep the water a little more even.


>>>
After all the panels were cut and rabbited I got to work getting the fittings in place.


After drilling it was time to tap the front fitting holes. A good trick is to run the tap through a block of wood then into the acrylic. It keeps the tap straight and prevents cracking of the acrylic.


Once the front were on I did the back return and top fill fitting.


Quick set in place to get an idea of it, and then lay everything out to glue.


>>>
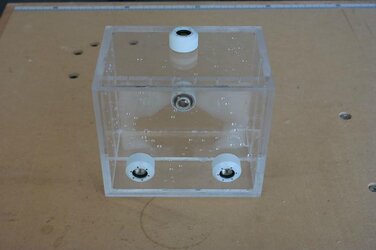
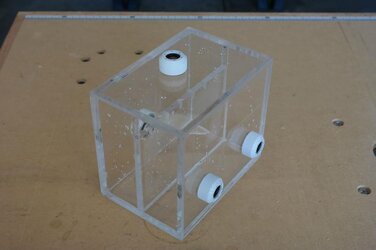
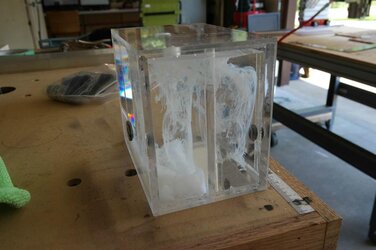
This res glued together rather well.


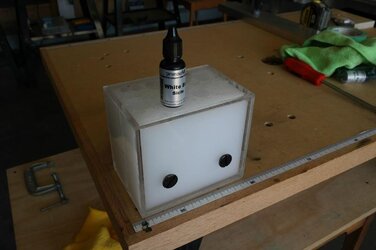
Final res without the trim.


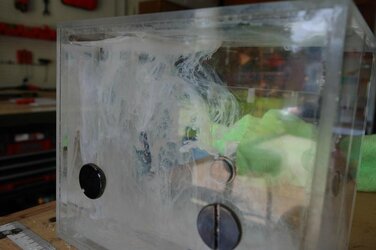
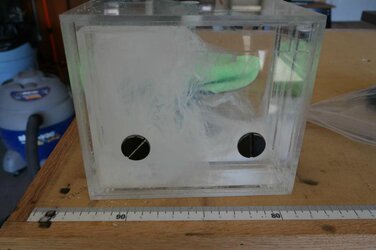
Filled it with some liquid and let it sit over night. It passed the test.


>>>
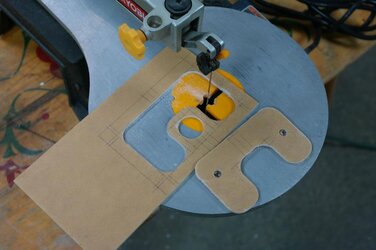
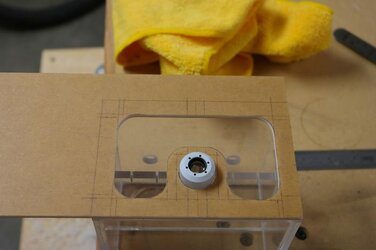
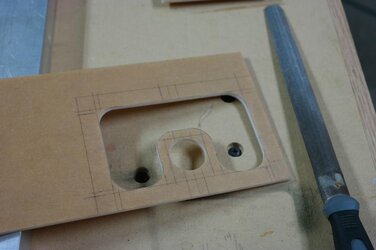
Even if it leaked a little the trim will block all the seams with another layer of reinforcement. Here is the first trim panel I set up. I am bringing it up and around the fittings on all panels of both reservoirs. The trim will also be masked off and painted copper once glued on for a white-copper-white-copper contrast.


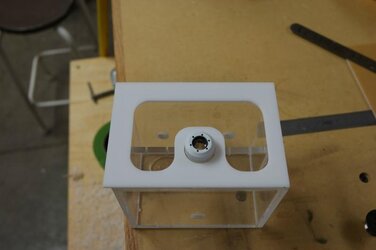
Here is the trim in its glory. I am going to glue it square to the bottom right and flush cut the overhang. Then get it done.

Well thats what I have for now. Hope you enjoyed it! Always love some feedback! I plan to have both reservoirs trimmed, mounted and connected for the next update. There are only a few things left that I can do before installing hardware, its finally getting to that point!! The CNC was eating my funds but after this friday I will be able to spend money on components. I already have my hardware decided and water loop as well. If you want to stay up to date on my progress daily check out my modding page Clockwerk Case Mods. Until next time modders!!
I have also been busy with the CNC, its almost finished now, just need the spindle and some odds and ends. Once its done I can put my money towards buying the rest of the components for this build.
Anyway on to the update! Hope you guys enjoy it!
First thing is that I greatly appreciate the help from my sponsors, they are the foundation of this project!

Here we go! I got my motherboard tray locked in place now with some aluminum cubes.
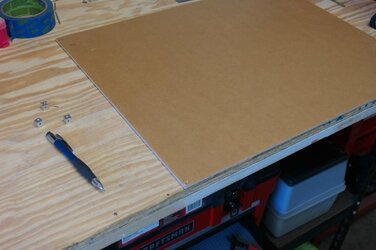
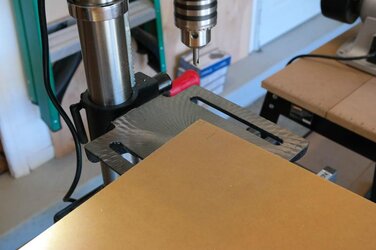
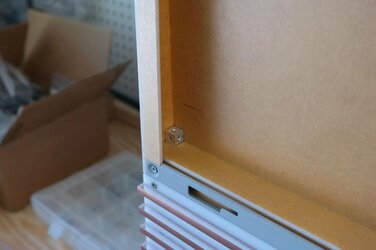
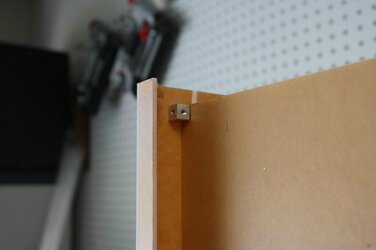
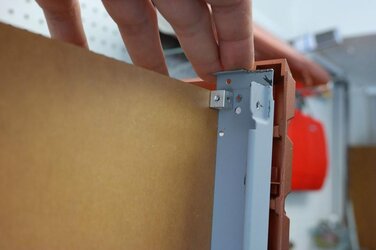
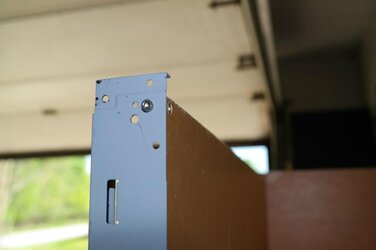
I also went through and started removing the rivets and replacing them with rivet nuts so the case will no be assembled with screws rather than rivets. It makes things much cleaner and easier to break down and assemble.
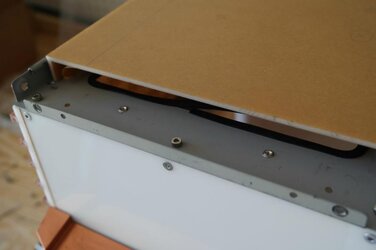
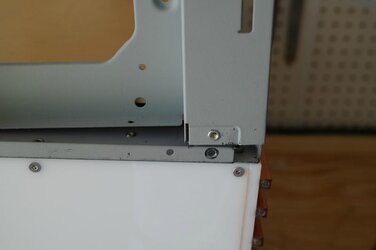
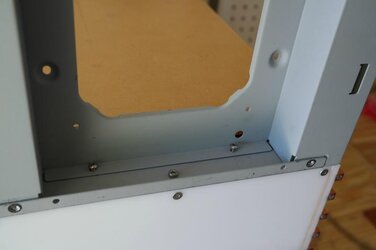
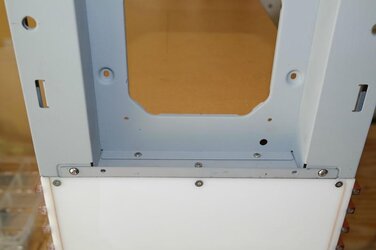
Next up I modded the bottom case bezel to hold two bulkheads and a little window to the bottom res. Two tubes will go from the top res and bring water down to the bottom res.
I used the step drill to cut the holes out.
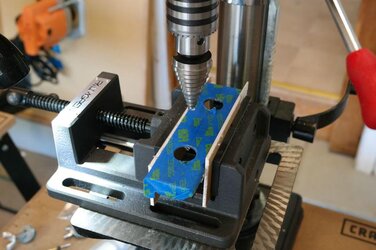
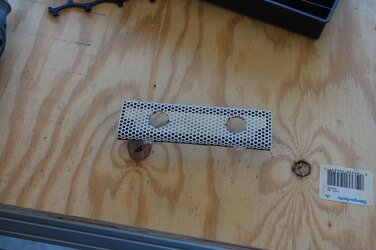
>>>
Then cleaned them up with the dremel and put in the bulkheads.
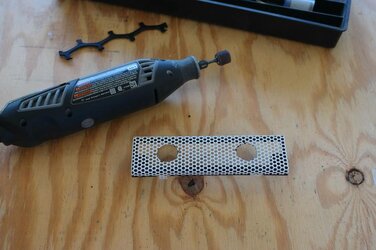
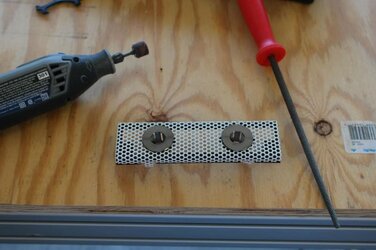
Next I cut out a window, I am not sure what trim to go with yet, white or copper. I might actually make acrylic trim for a more professional look.
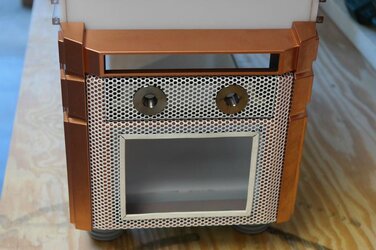
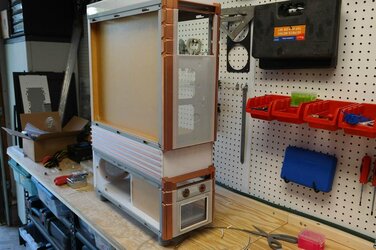
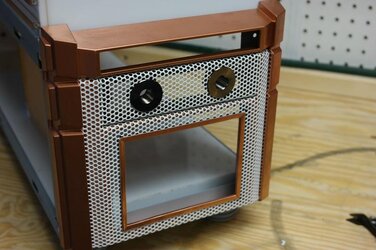
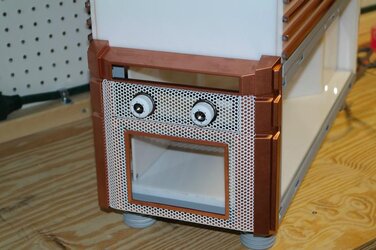
Now Ill show you the top reservoir. I am leaving the bottom res out because I am most likely going to remake it. Its only about 20$ in acrylic per reservoir without the trim.
So I got the acrylic and some more syringes and a new needle from McMaster.
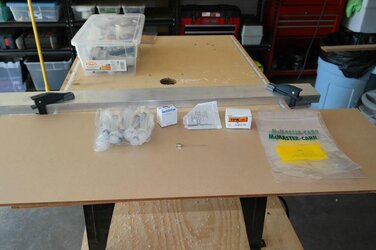
>>>
I took the acrylic and cut it down to the correct sizes and made rabbit joints on the ends to make them more leak resistant when I glue them.
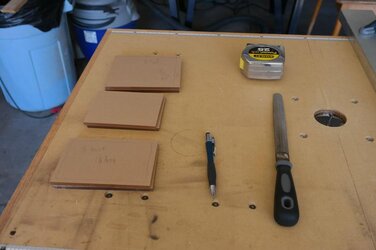
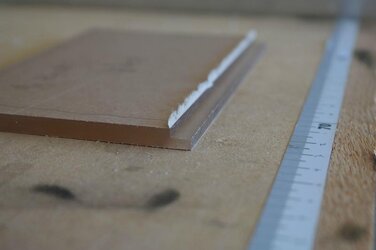
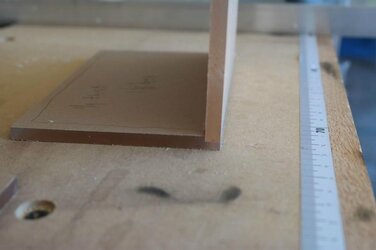
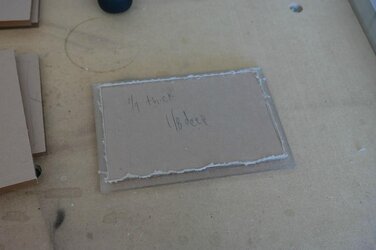
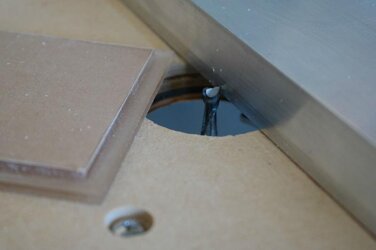
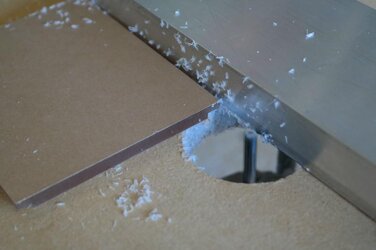
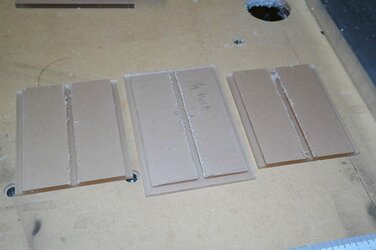
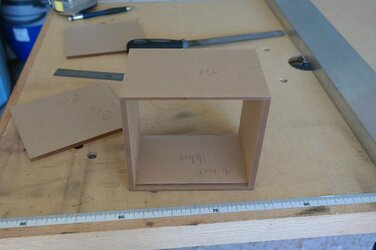
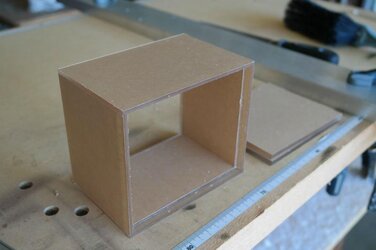
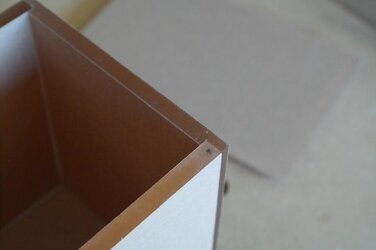
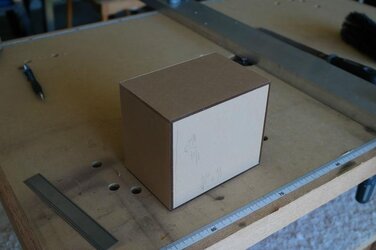
I cut grooves in the mid plate that the water will flow over to hopefully keep the water a little more even.
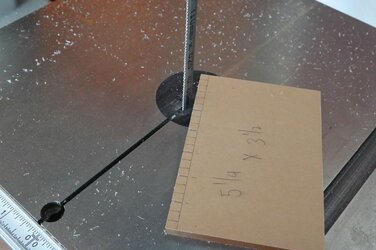
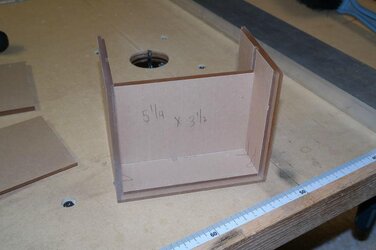
>>>
After all the panels were cut and rabbited I got to work getting the fittings in place.
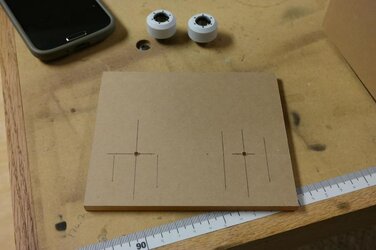
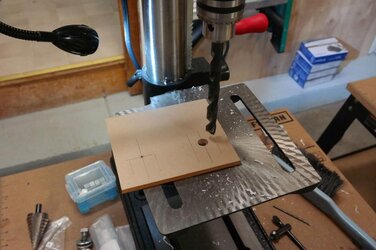
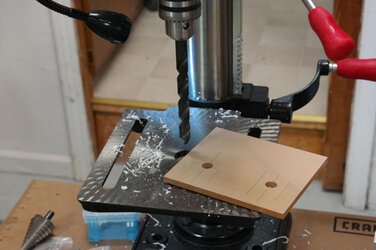
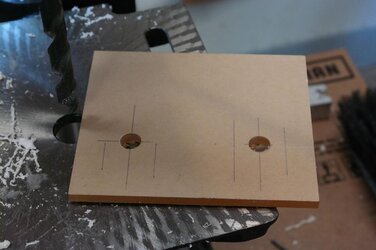
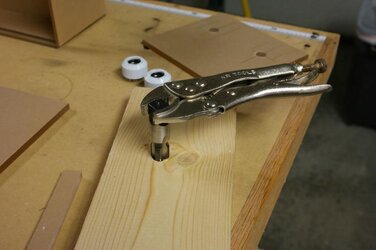
After drilling it was time to tap the front fitting holes. A good trick is to run the tap through a block of wood then into the acrylic. It keeps the tap straight and prevents cracking of the acrylic.
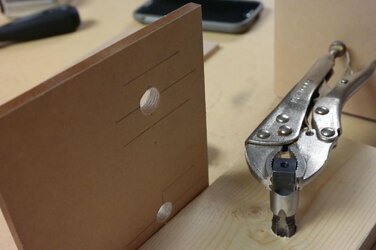
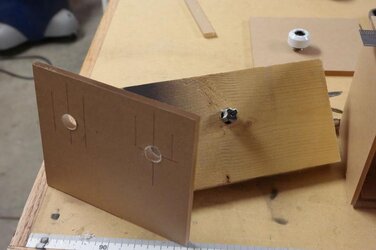
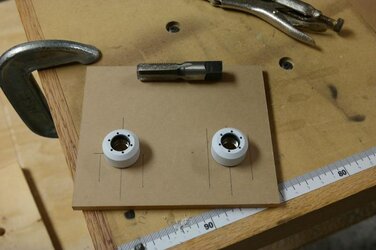
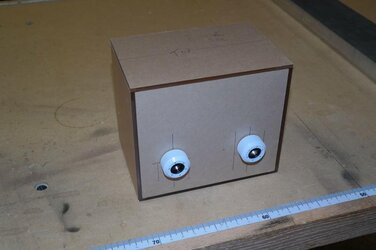
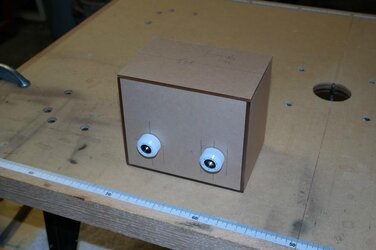
Once the front were on I did the back return and top fill fitting.
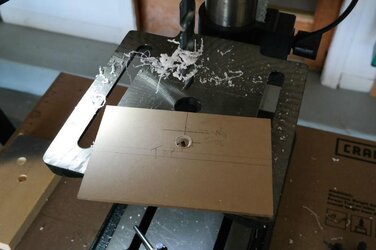
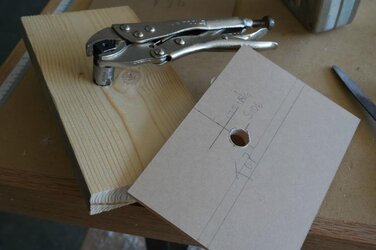
Quick set in place to get an idea of it, and then lay everything out to glue.
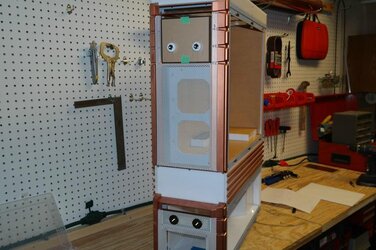
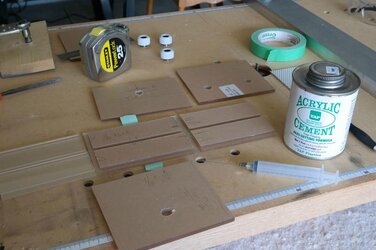
>>>
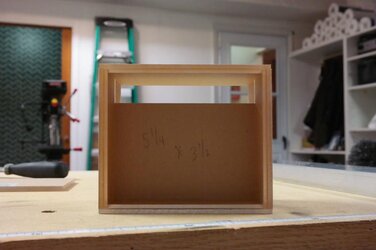
This res glued together rather well.
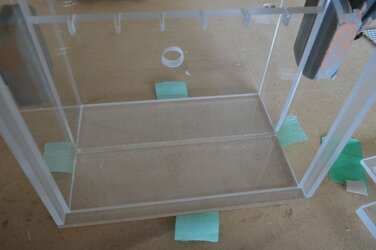
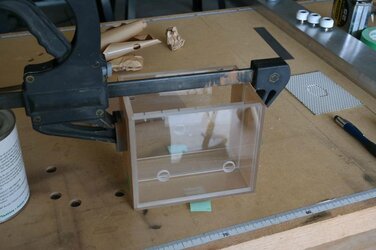
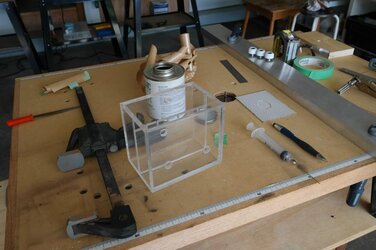
Final res without the trim.
Filled it with some liquid and let it sit over night. It passed the test.
>>>
Even if it leaked a little the trim will block all the seams with another layer of reinforcement. Here is the first trim panel I set up. I am bringing it up and around the fittings on all panels of both reservoirs. The trim will also be masked off and painted copper once glued on for a white-copper-white-copper contrast.
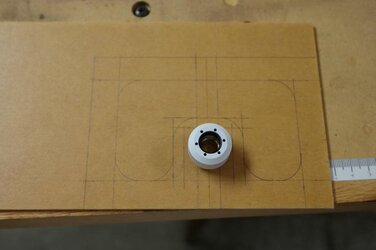
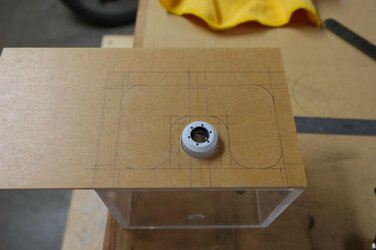
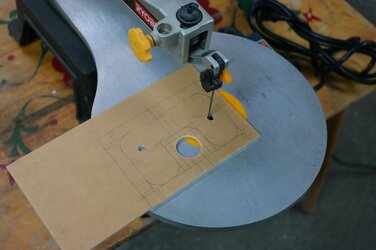
Here is the trim in its glory. I am going to glue it square to the bottom right and flush cut the overhang. Then get it done.
Well thats what I have for now. Hope you enjoyed it! Always love some feedback! I plan to have both reservoirs trimmed, mounted and connected for the next update. There are only a few things left that I can do before installing hardware, its finally getting to that point!! The CNC was eating my funds but after this friday I will be able to spend money on components. I already have my hardware decided and water loop as well. If you want to stay up to date on my progress daily check out my modding page Clockwerk Case Mods. Until next time modders!!
OP
- Joined
- Mar 6, 2014
- Thread Starter
- #25
Update 8 : June 24th : Reservoir trim done! PETG installed!
Hey everybody! I got a whole lot of update here today! Hope you all enjoy! I have a ton of photos so lets get right into it!
First and foremost thanks to my awesome sponsors! You guys are truly amazing!!

Alright first thing I got some more parts in. Mod/smart sent me in the power and reset switches along with spools and spools and spools of PSU pins for sleeving my own cables!! I am now stocked and I love it!


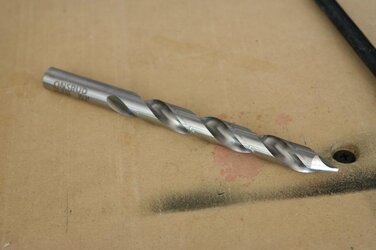
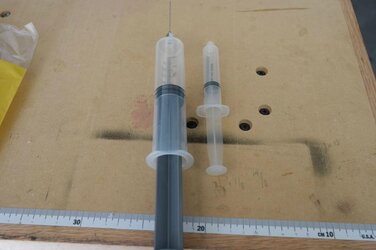
I recently had inquiries to make custom handmade reservoirs for some peoples builds after sharing pictures of mine. So I picked up a new 15/32 plastic drillng bit and a new syringe. These larger syringes are the way to go, they don't jam up and explode solvent everywhere.


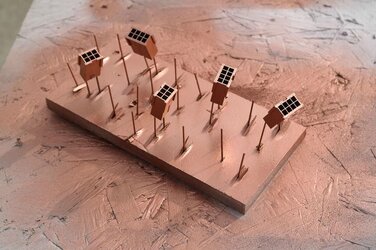
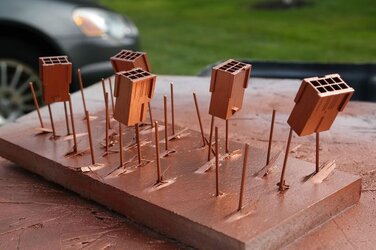
Alright some modding! I painted the connectors needed to get my power supply sleeved, I hope to get that sleeved for next update.


Speaking of sleeving I found this paracord online and the color is called rust, it is really really close to the metallic copper. I think I will use it for some accent striped between the white.


Alright now into the reservoir work, there is quite a bit of it =D
First up was finishing the bottom reservoir. First cut all the pieces the drill and tap what needed to be, then glue together.


Then fit it together, glue it, and leak test it. This one is much better than my first. I had a dulling router bit and it was just a crap finish the first time, I didn't even share it. This one glued up mint with no leaks!


Next up was trimming both reservoirs. I have tons of photos as I shared every day but I am going to kind of broaden it out so my update doesn't have 150 photos of me cutting on the scroll saw haha


When I cut the trim I would do one axis at a time and flush cut the trim even with the edge on my router table.


After all the trim was on I was really happy with the way it came out! In the next update I should have the trim painted and installed correctly.


Next up was mounting the reservoirs. The top res is fastened to he motherboard tray and the bottom one is now flush with the front face of the bezel after some modding =D. I have to attach it with a screw or 2 when I have it exact. The bottom bezel will get some more detail treatment eventually.


Next up I didn't like using the mesh panel drive bay port cover for the bulkheads, it didn't seem professional or rigid enough. so I made one from acrylic and it is currently in place with some 3m mod tape, I will probably glue it in after the bezel is done and repainted but it looks much nicer than had before.


Now I am ready to run a couple PETG tubes from top res to the bulkheads.


Some soapy water for the rubber insert.

I made my own jig to bend tubing at the exact length it needed to be.


It was worth it because the tubes are nearly identical. I have a little trimming to tweak them to perfect but Ill do it later.


This is where I am now! I am super happy with the way its looking! I can't wait to get some hardware in this build!


Well thats where I am at for now! I hope you all enjoyed the update! If you want to follow me daily dont forget to check out my facebook page Clockwork Case Mods! Also remember I still have aluminum case cubes available and I have people now inquiring about custom reservoirs, so PM me on my page if you would like something made! Cheers!
Hey everybody! I got a whole lot of update here today! Hope you all enjoy! I have a ton of photos so lets get right into it!
First and foremost thanks to my awesome sponsors! You guys are truly amazing!!

Alright first thing I got some more parts in. Mod/smart sent me in the power and reset switches along with spools and spools and spools of PSU pins for sleeving my own cables!! I am now stocked and I love it!
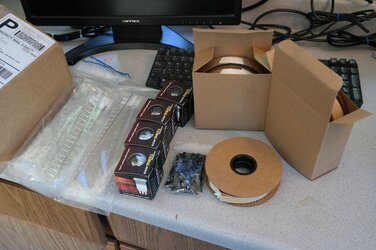
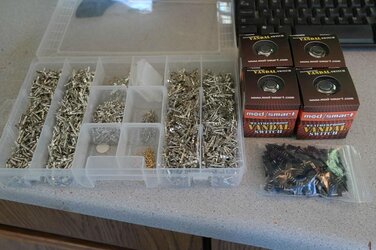
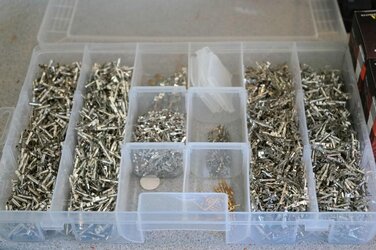
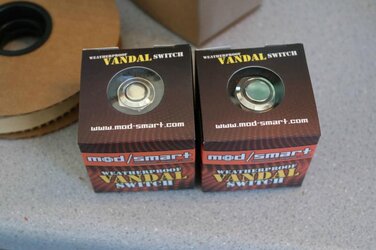
I recently had inquiries to make custom handmade reservoirs for some peoples builds after sharing pictures of mine. So I picked up a new 15/32 plastic drillng bit and a new syringe. These larger syringes are the way to go, they don't jam up and explode solvent everywhere.
Alright some modding! I painted the connectors needed to get my power supply sleeved, I hope to get that sleeved for next update.
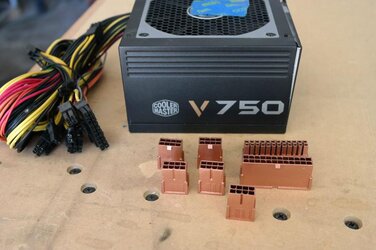
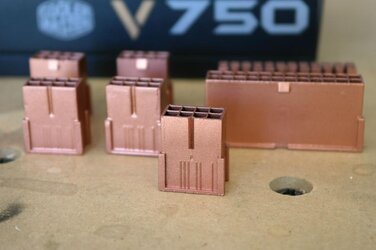
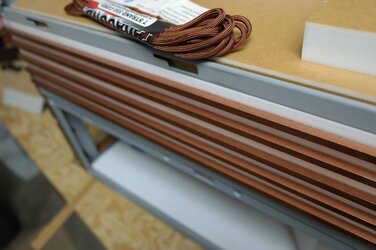
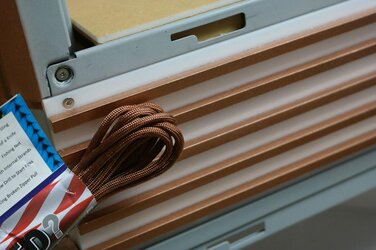
Speaking of sleeving I found this paracord online and the color is called rust, it is really really close to the metallic copper. I think I will use it for some accent striped between the white.
Alright now into the reservoir work, there is quite a bit of it =D
First up was finishing the bottom reservoir. First cut all the pieces the drill and tap what needed to be, then glue together.
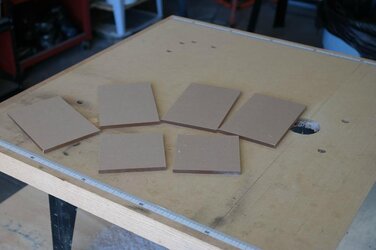
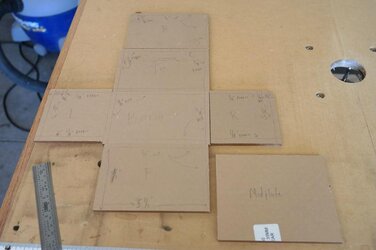
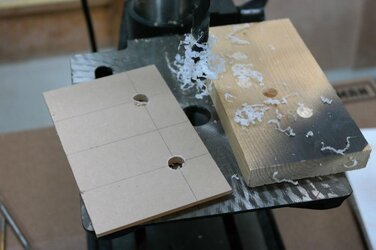
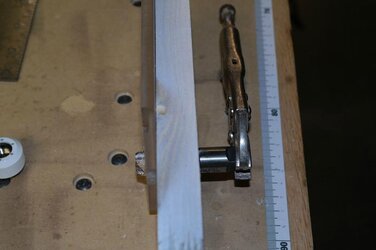
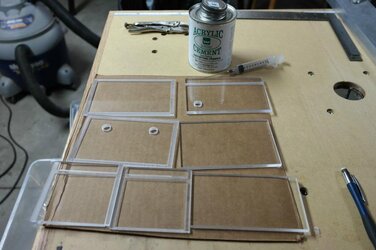
Then fit it together, glue it, and leak test it. This one is much better than my first. I had a dulling router bit and it was just a crap finish the first time, I didn't even share it. This one glued up mint with no leaks!
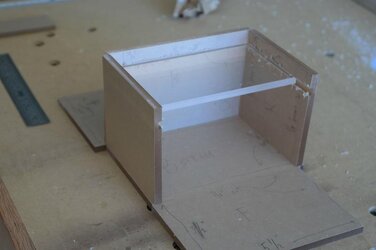
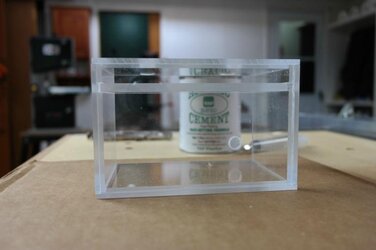
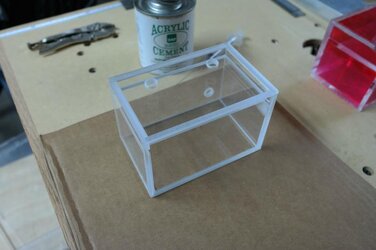
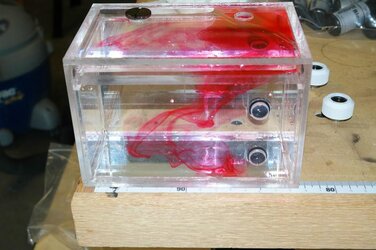
Next up was trimming both reservoirs. I have tons of photos as I shared every day but I am going to kind of broaden it out so my update doesn't have 150 photos of me cutting on the scroll saw haha
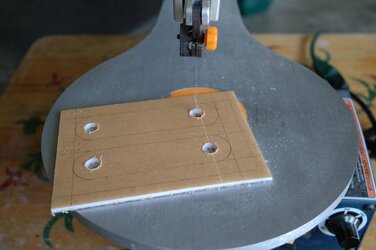
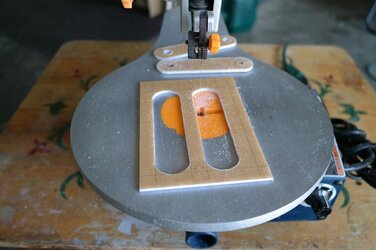
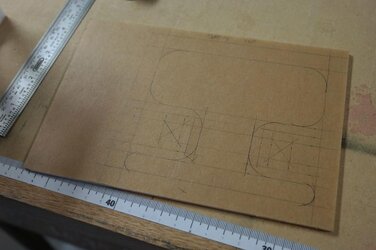
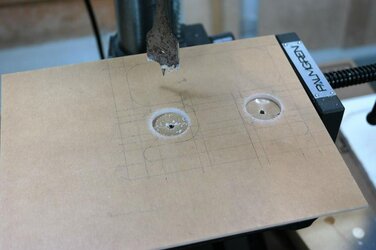
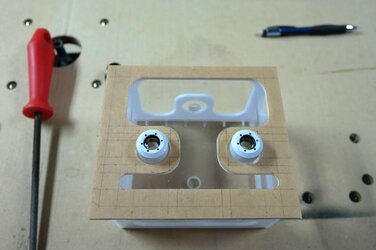
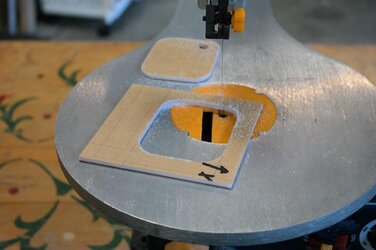
When I cut the trim I would do one axis at a time and flush cut the trim even with the edge on my router table.
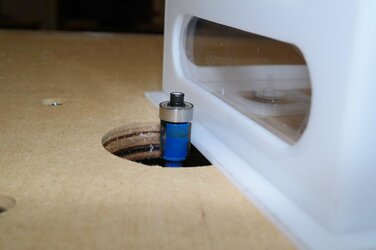
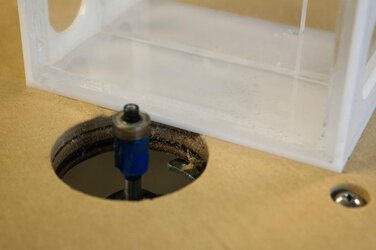
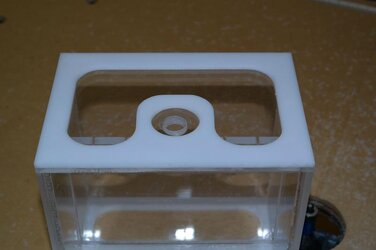
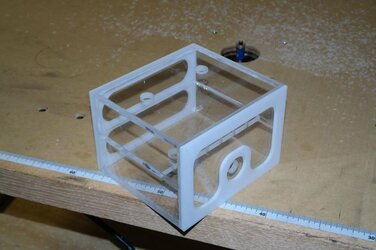
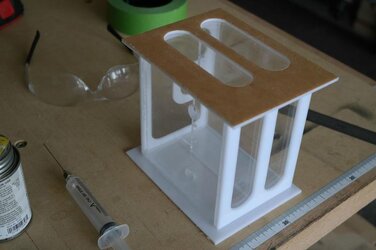
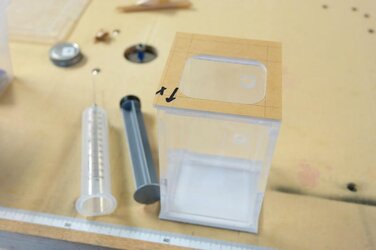
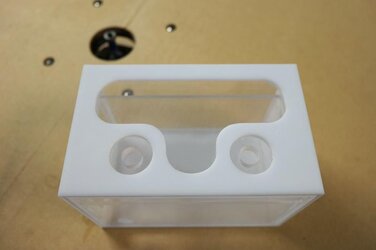
After all the trim was on I was really happy with the way it came out! In the next update I should have the trim painted and installed correctly.
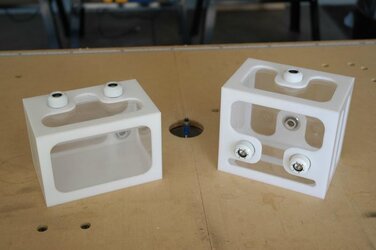
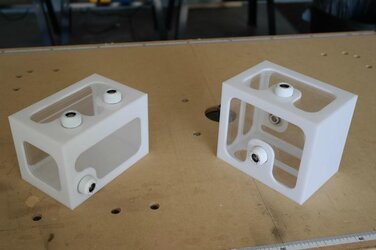
Next up was mounting the reservoirs. The top res is fastened to he motherboard tray and the bottom one is now flush with the front face of the bezel after some modding =D. I have to attach it with a screw or 2 when I have it exact. The bottom bezel will get some more detail treatment eventually.
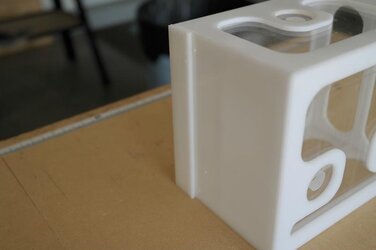
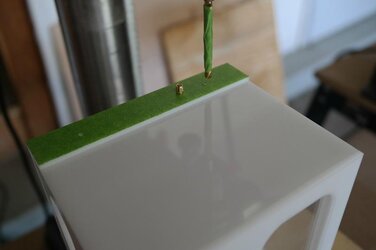
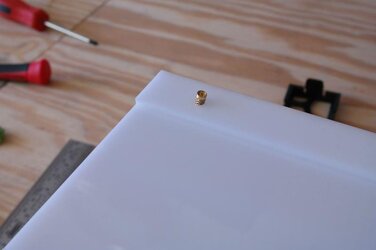
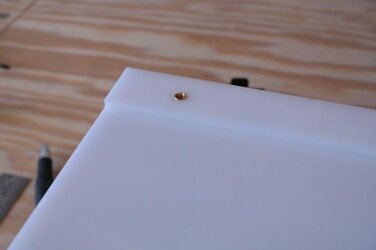
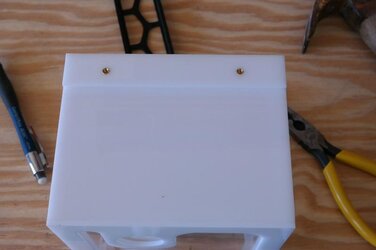
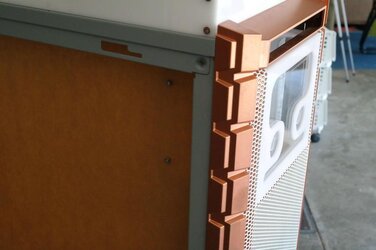
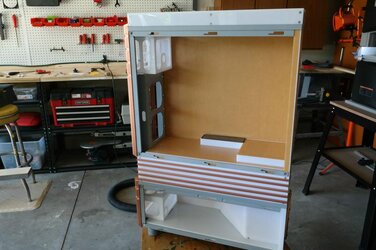
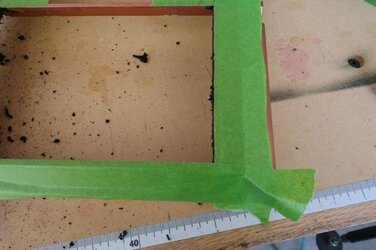
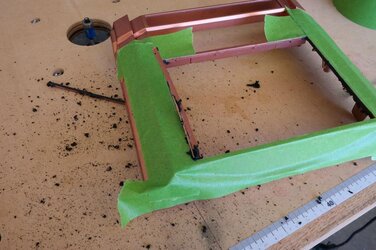
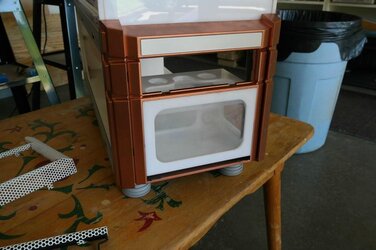
Next up I didn't like using the mesh panel drive bay port cover for the bulkheads, it didn't seem professional or rigid enough. so I made one from acrylic and it is currently in place with some 3m mod tape, I will probably glue it in after the bezel is done and repainted but it looks much nicer than had before.
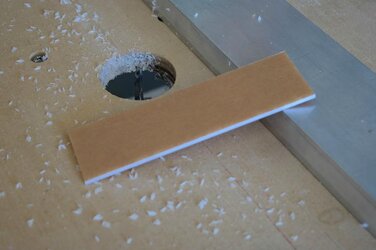
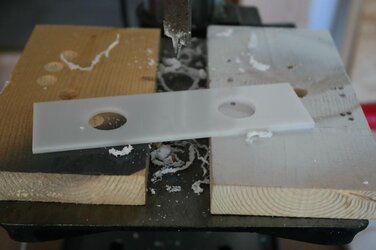
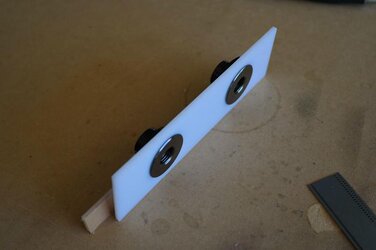
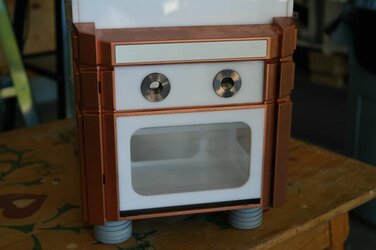
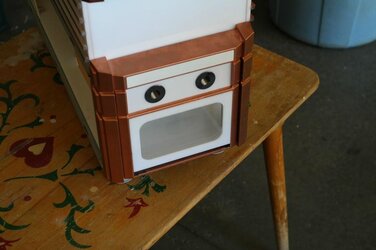
Now I am ready to run a couple PETG tubes from top res to the bulkheads.
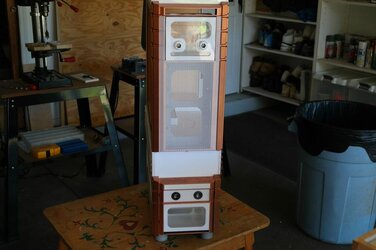
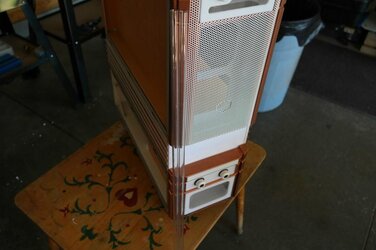
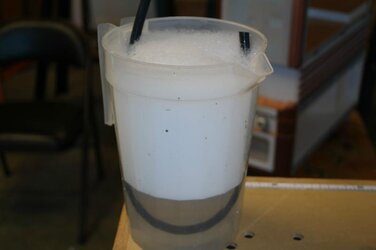
Some soapy water for the rubber insert.
I made my own jig to bend tubing at the exact length it needed to be.
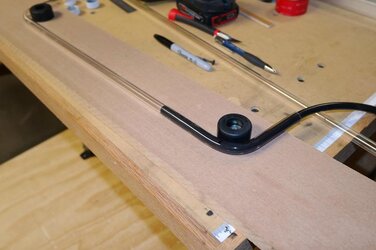
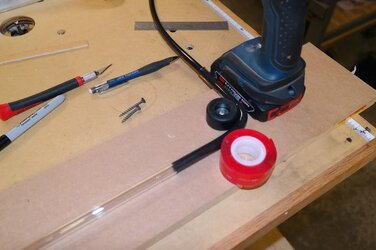
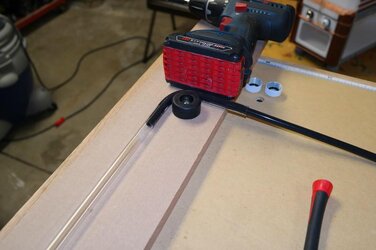
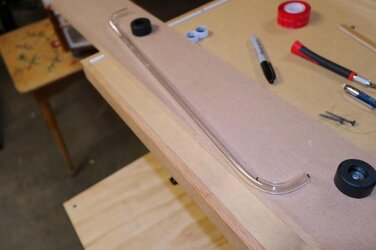
It was worth it because the tubes are nearly identical. I have a little trimming to tweak them to perfect but Ill do it later.
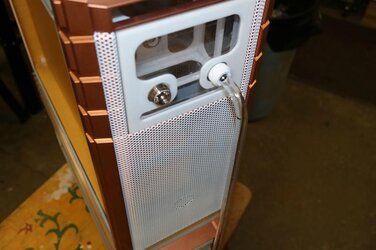
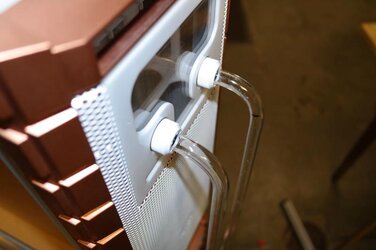
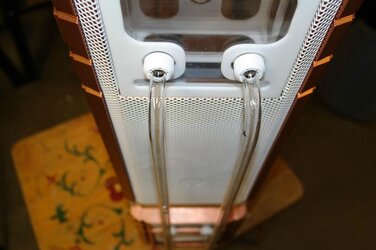
This is where I am now! I am super happy with the way its looking! I can't wait to get some hardware in this build!
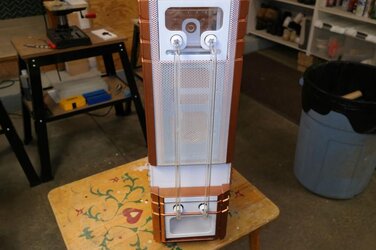
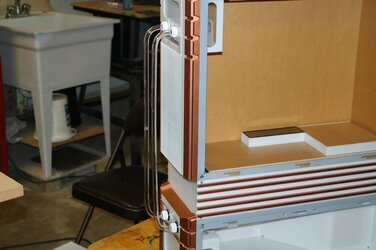
Well thats where I am at for now! I hope you all enjoyed the update! If you want to follow me daily dont forget to check out my facebook page Clockwork Case Mods! Also remember I still have aluminum case cubes available and I have people now inquiring about custom reservoirs, so PM me on my page if you would like something made! Cheers!
- Joined
- Aug 29, 2013
- Location
- Irvine, CA
the two tube out front looks sick. and love the Reservoirs
OP
- Joined
- Mar 6, 2014
- Thread Starter
- #28
[x] Update 9 : July 10th : z97, Power supply mod, Swiftech sponsors build!
Hey there everyone! Very exciting news for the build, Swiftech has jumped on board and sponsored the build with the rest of the watercooling parts I needed!

Very excited, things are just getting better and better! Now I can afford to put 2x 780s in the build and I will cool them with the Komodo blocks!
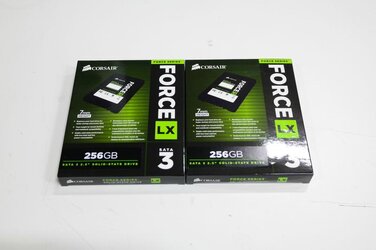
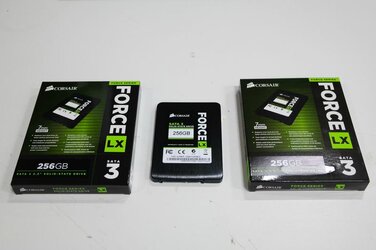
I delayed the update 2 days waiting on some parts to arrive to photo out and add into the update. I Also recieved my prizes from my article in Custom PC magazine, one of those prizes being 2x 256gb solid state drives from Corsair, which I will be using in this build in Raid 0.
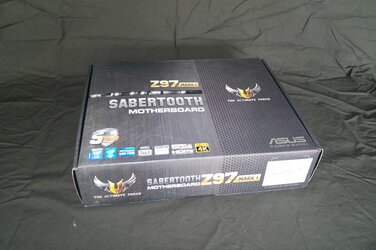
Another item in is my Asus z97 Sabertooth board which is absolutely awesome! I wanted a solid motherboard that is good for modding and this one is the best of both worlds! The main modding I did was on my power supply for this update, my case is tore down and I am doing another round of details as I build it up, so the next update will be a lot of that.
Before I get ahead of myself lets start the update! First thing first thank you very much to all of my sponsors, you guys are awesome! Very grateful to be where I am today!

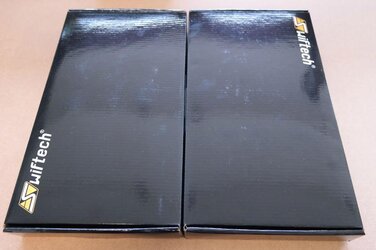
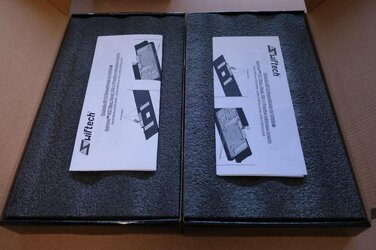
Okay here are the parts that came in Ill start with the Swiftech goodies!

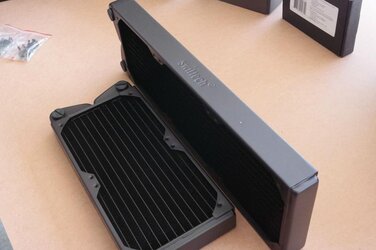
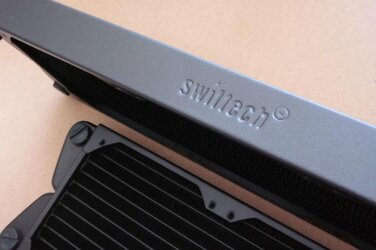
First the radiators, a dual and triple 120mm. The dual is for the front under the bay waterfall and the triple is for the ceiling exhaust. These will be painted copper.


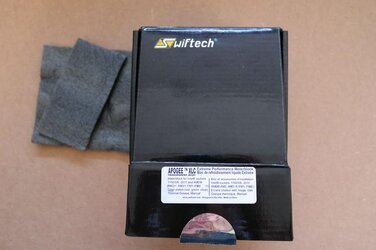
Next up is this beautiful CPU block, the Apogee XL, right now this has got to be the best looking CPU block on the market, that is my opinion. I chose the clear acrylic, and Ill be modding it white and copper with the white LED.


Love this =D

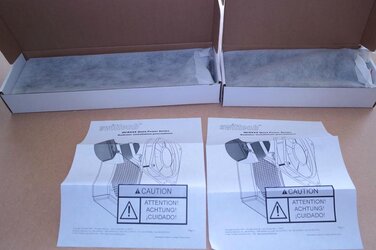
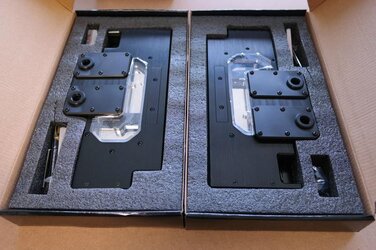
Now the new Komodo-NV GPU blocks! These boys are very clean with an industrial feel! There is an LED panel inside with removable filters for the colors. I didnt mess with that yet, I will have in depth more detailed photos of the hardware again when I do the modding on all of it.


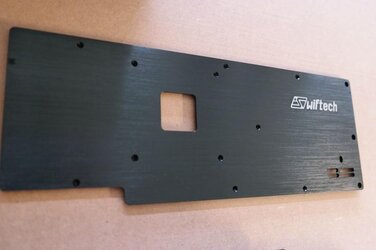
The backplate, another toy to mod!


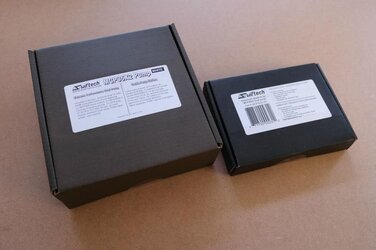
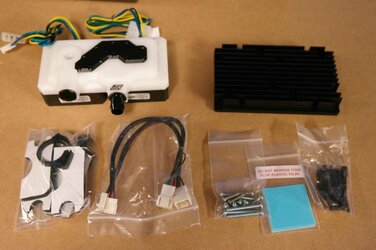
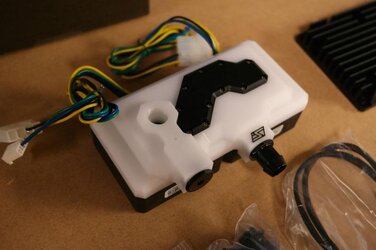
Next up is the pump! I am using the MCP35x2. Its the PWM double DDC, I figured I need at least 2 pumps for good flow through all the hardware and through 2 waterfalls. Also I got the heat sink just incase.


Then I threw on some pf the Primochill revolvers and took some group photos. SEXY! lol yeah modders like myself are weirdos and find hardware attractive haha!


Alright thats all the parts from Swiftech for now, I took a couple shots of the solid states from Corsair.


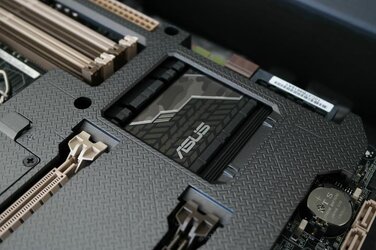
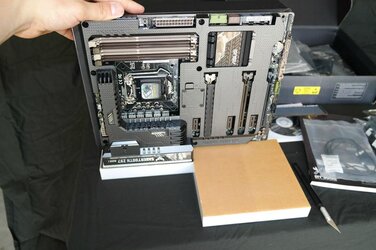
Alright up next the Asus Z97 Sabertooth! Very rugged PC board, when they say its TUF they mean it!! Just holding it it feels more sturdy than other motherboards that feel fragile when holding it.


Here I held the board up on my IO panel I made.

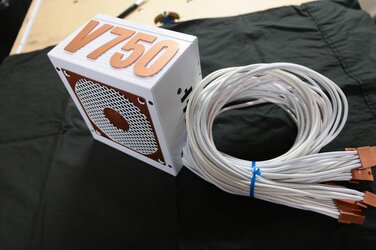
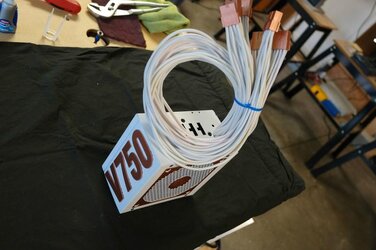
Okay now that you were properly introduced to the goodies on to the modding of the update! I did quite a bit of work on the Cooler Master V750 Semi-modular Gold Rated power supply. Not only did I paint it to the theme, I also cut the GPU power cable daisy chain jumper off and spliced the cables inside the power supply creating 4 independent 8-pin GPU power plugs.
First up some sleeving.


Okay here I separated the GPU wires, cut them off, cut them in half, and resoldered them on 2 per lead.


This is what I ended up with.


Then I cut the switch cables and power receptacle cables, removed the board and the switches from the case to paint.


Primed and painted the shell starting with the top.


I LOVE how the top worked out!


The bottom I had to open the wire hole.


Then painted and reinstalled the plug and switch.


Now the finishing touch is the new V750 on the side since I painted over the original. I cut it out with the scroll saw on 1/16" aluminum.


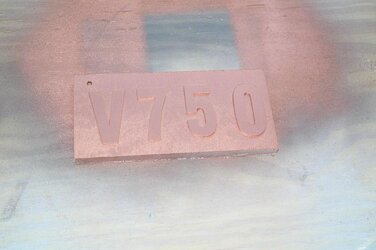
After filing it down I painted it copper, and glued it on the side, now the PSU mod is complete and I think it lokos pretty damn good. I got a couple paint smudges but I have touch up paint to cover up and you can barely tell. The side of the PSU with the V750 on it will be seen through a clear acrylic window in the bottom case middle panel.


Well that is all I have for this update! I am days away from finishing my CNC which has been stealing a little modding time from me. I need to install my limit switches, bolt down the table top, fill the spindle loop, and wire the spindle and I should be wrapped up on that for the time being and I can go full blast on this Cyprus build. Glad to finish as there are some cool ideas I have for this build that I can make on the CNC. Also don't forget catch daily updates on my Facebook page Clockwerk Case Mods if you would like. I Share my daily work there and recently started taking a couple daily modding photos and sharing them on Instagram, my handle is orangeclockwerk on instagram. I am also trying to get things going on Twitter where I also go by @OrangeClockwerk. Well thats all now! Until next time, you know where to find me!
Hey there everyone! Very exciting news for the build, Swiftech has jumped on board and sponsored the build with the rest of the watercooling parts I needed!

Very excited, things are just getting better and better! Now I can afford to put 2x 780s in the build and I will cool them with the Komodo blocks!
I delayed the update 2 days waiting on some parts to arrive to photo out and add into the update. I Also recieved my prizes from my article in Custom PC magazine, one of those prizes being 2x 256gb solid state drives from Corsair, which I will be using in this build in Raid 0.
Another item in is my Asus z97 Sabertooth board which is absolutely awesome! I wanted a solid motherboard that is good for modding and this one is the best of both worlds! The main modding I did was on my power supply for this update, my case is tore down and I am doing another round of details as I build it up, so the next update will be a lot of that.
Before I get ahead of myself lets start the update! First thing first thank you very much to all of my sponsors, you guys are awesome! Very grateful to be where I am today!

Okay here are the parts that came in Ill start with the Swiftech goodies!
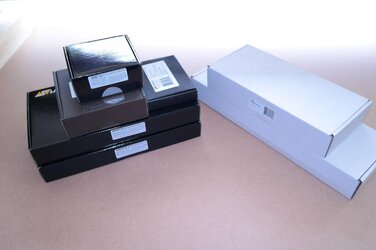
First the radiators, a dual and triple 120mm. The dual is for the front under the bay waterfall and the triple is for the ceiling exhaust. These will be painted copper.
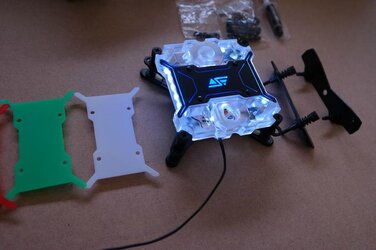
Next up is this beautiful CPU block, the Apogee XL, right now this has got to be the best looking CPU block on the market, that is my opinion. I chose the clear acrylic, and Ill be modding it white and copper with the white LED.
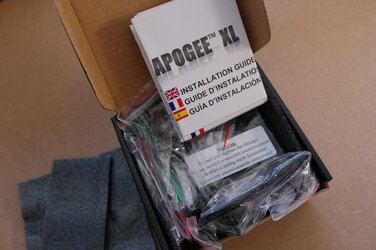
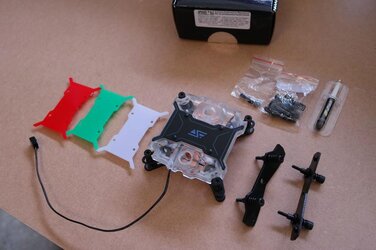
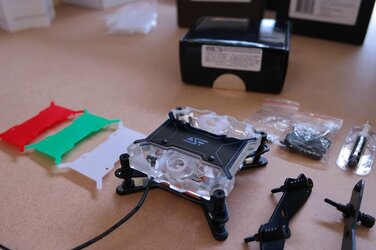
Love this =D
Now the new Komodo-NV GPU blocks! These boys are very clean with an industrial feel! There is an LED panel inside with removable filters for the colors. I didnt mess with that yet, I will have in depth more detailed photos of the hardware again when I do the modding on all of it.
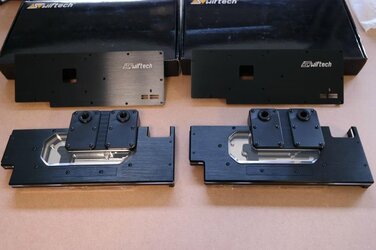
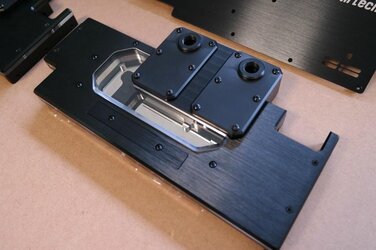
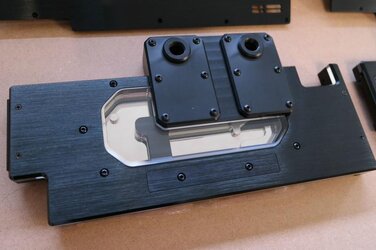
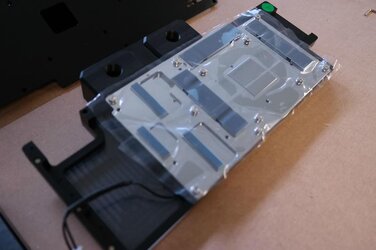
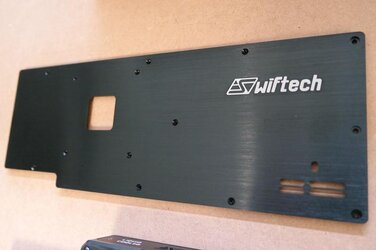
The backplate, another toy to mod!
Next up is the pump! I am using the MCP35x2. Its the PWM double DDC, I figured I need at least 2 pumps for good flow through all the hardware and through 2 waterfalls. Also I got the heat sink just incase.
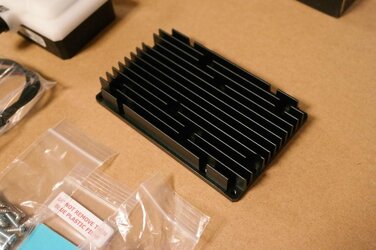
Then I threw on some pf the Primochill revolvers and took some group photos. SEXY! lol yeah modders like myself are weirdos and find hardware attractive haha!
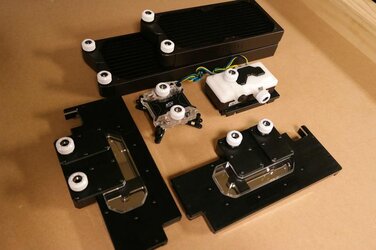
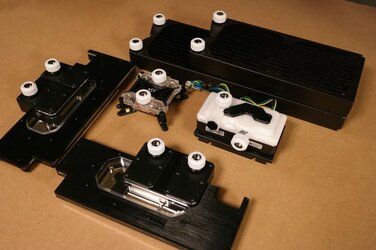
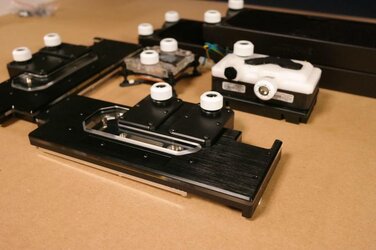
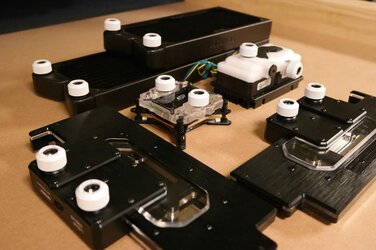
Alright thats all the parts from Swiftech for now, I took a couple shots of the solid states from Corsair.
Alright up next the Asus Z97 Sabertooth! Very rugged PC board, when they say its TUF they mean it!! Just holding it it feels more sturdy than other motherboards that feel fragile when holding it.
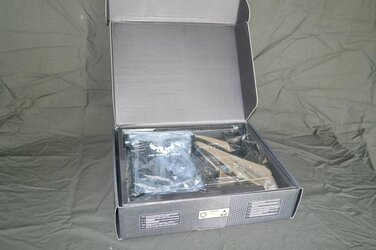
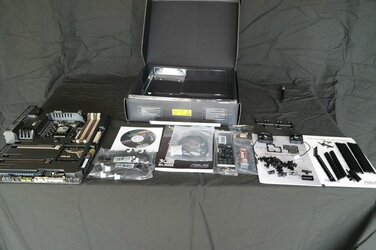
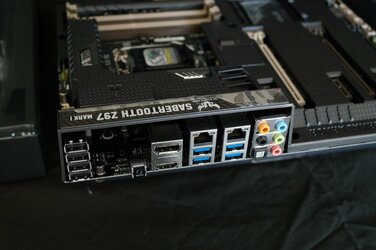
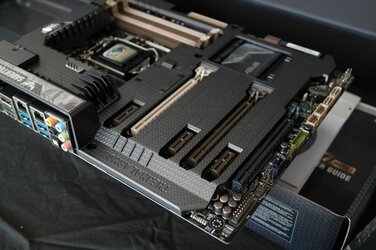
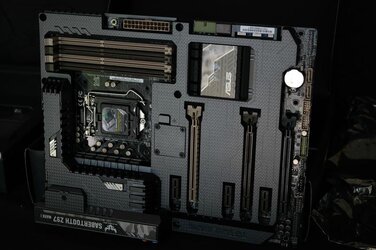
Here I held the board up on my IO panel I made.
Okay now that you were properly introduced to the goodies on to the modding of the update! I did quite a bit of work on the Cooler Master V750 Semi-modular Gold Rated power supply. Not only did I paint it to the theme, I also cut the GPU power cable daisy chain jumper off and spliced the cables inside the power supply creating 4 independent 8-pin GPU power plugs.
First up some sleeving.
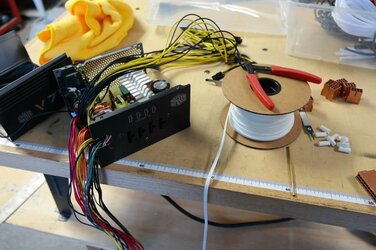
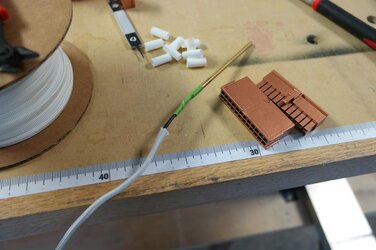
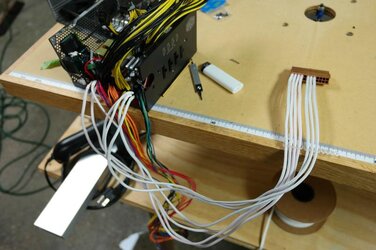
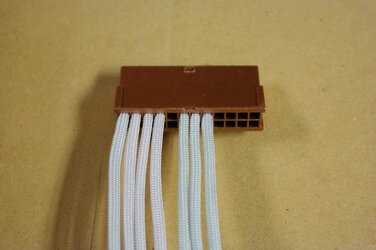
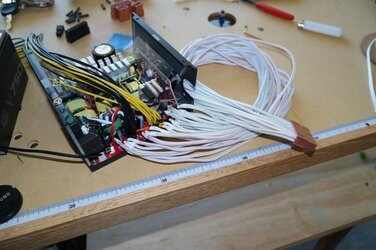
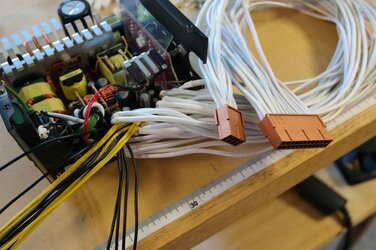
Okay here I separated the GPU wires, cut them off, cut them in half, and resoldered them on 2 per lead.
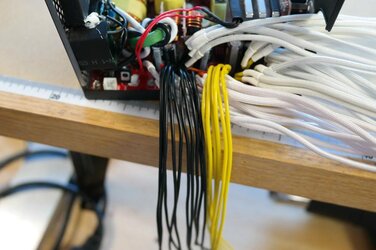
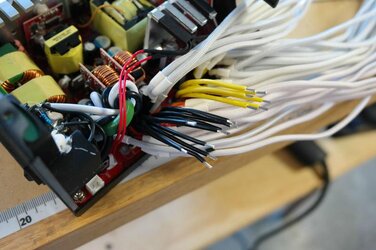
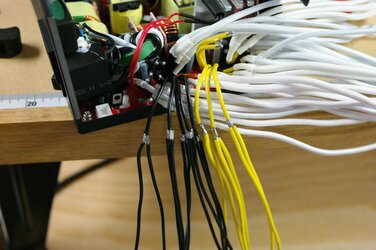
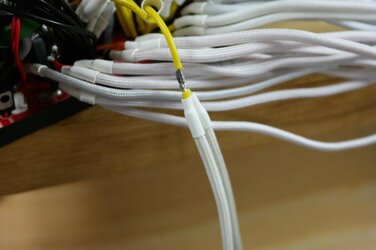
This is what I ended up with.
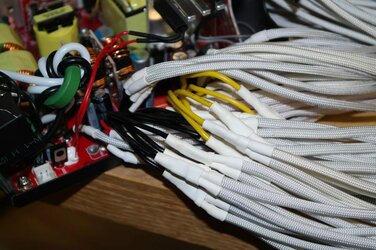
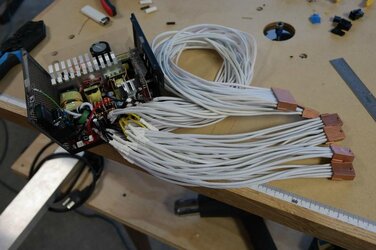
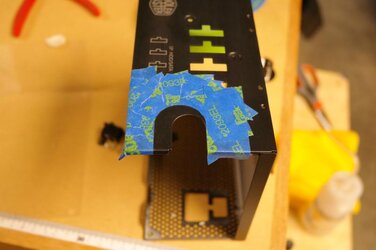
Then I cut the switch cables and power receptacle cables, removed the board and the switches from the case to paint.
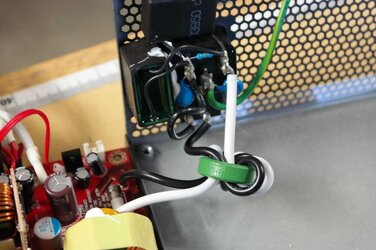
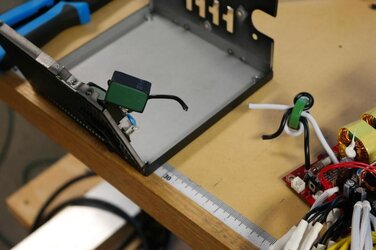
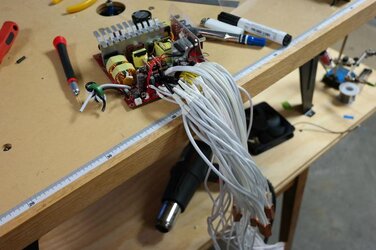
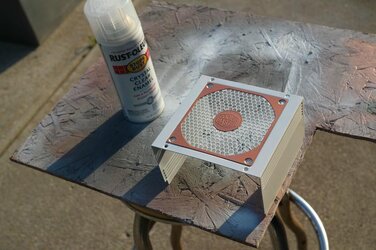
Primed and painted the shell starting with the top.
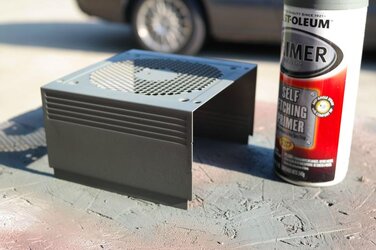
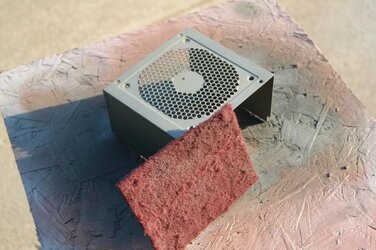
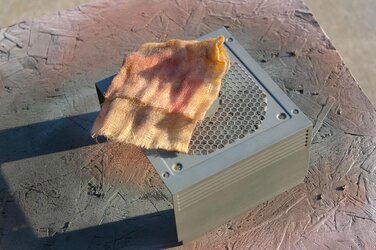
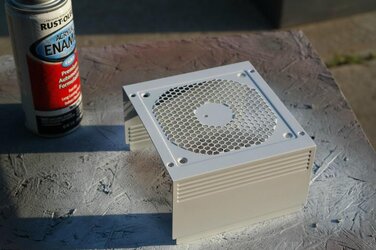
I LOVE how the top worked out!
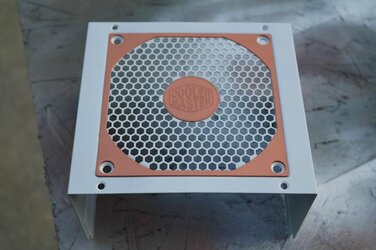
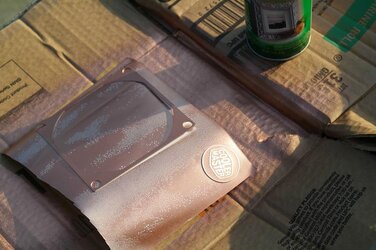
The bottom I had to open the wire hole.
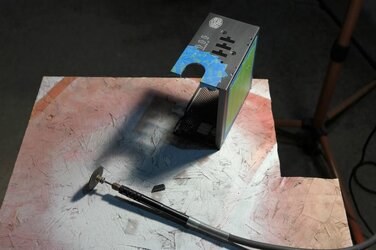
Then painted and reinstalled the plug and switch.
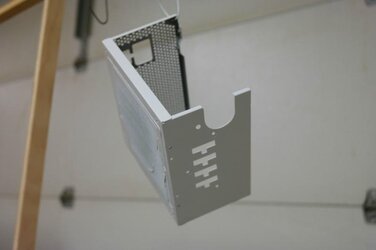
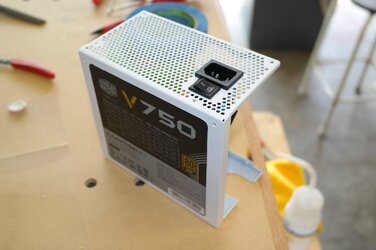
Now the finishing touch is the new V750 on the side since I painted over the original. I cut it out with the scroll saw on 1/16" aluminum.
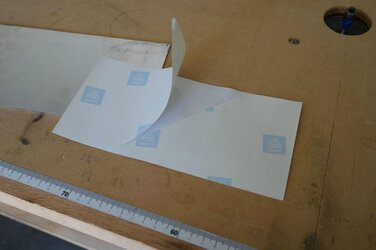
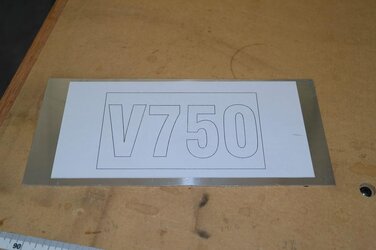
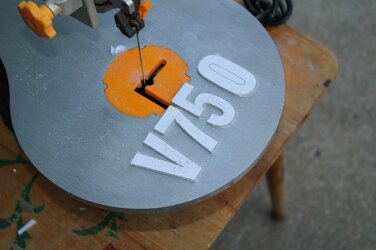
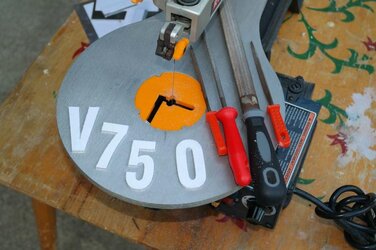
After filing it down I painted it copper, and glued it on the side, now the PSU mod is complete and I think it lokos pretty damn good. I got a couple paint smudges but I have touch up paint to cover up and you can barely tell. The side of the PSU with the V750 on it will be seen through a clear acrylic window in the bottom case middle panel.
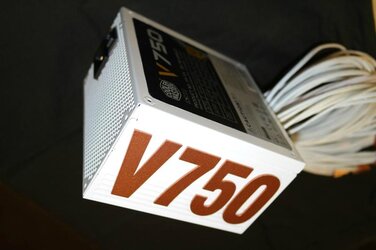
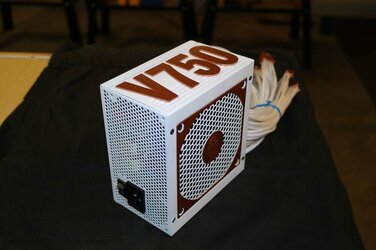
Well that is all I have for this update! I am days away from finishing my CNC which has been stealing a little modding time from me. I need to install my limit switches, bolt down the table top, fill the spindle loop, and wire the spindle and I should be wrapped up on that for the time being and I can go full blast on this Cyprus build. Glad to finish as there are some cool ideas I have for this build that I can make on the CNC. Also don't forget catch daily updates on my Facebook page Clockwerk Case Mods if you would like. I Share my daily work there and recently started taking a couple daily modding photos and sharing them on Instagram, my handle is orangeclockwerk on instagram. I am also trying to get things going on Twitter where I also go by @OrangeClockwerk. Well thats all now! Until next time, you know where to find me!
Last edited:
- Joined
- Aug 29, 2013
- Location
- Irvine, CA
Psu came out amazing. Those swiftech blocks are crazy cool
OP
- Joined
- Mar 6, 2014
- Thread Starter
- #33
[Cyprus 29] CM HAF Stacker : Update : July 28th :Copper Modding! CNC time!!
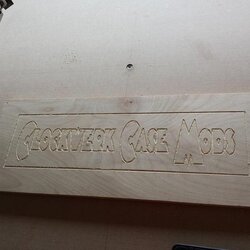
Hey guys!! Another forum update! I stretched a little long this time to make sure I had solid content as I have been working hard to finish up the CNC and it is now finally cutting after 6 months! Here is the first test cut with a engraving bit!

I am very excited to say the least! I didnt plan to have this ready for the completion of Cyprus29 so now I get to add a layer of CNCed details to the case! Its going to be awesome! I can now retire the router table, Its got me through to this point and helped me create some awesome stuff by hand. Ill probably still use it here and there though.
Anyways more goodies from the CNC in the next update! Lets get on with this one!
First a quick shout to my sponsors you guys rock! I have a Primochill hardline tubing jig on the way for my bends I cant wait to use it I have seen it work wonder!

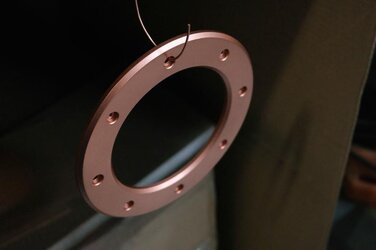
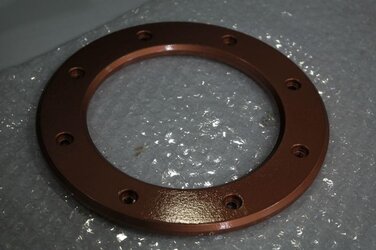
This update is primarily painting. I first repainted the MNPCtech billet fan ring.


The I took all the sexy Swiftech gear and modded it to theme. I have to mod my pump and a GPU block yet but the first GPU block and the CPU block came out fantastic.
I built up the pump and I am going to add a fan to the heatsink and a frame around the base.


The first parts to catch paint were the radiators.


They came out super clean!


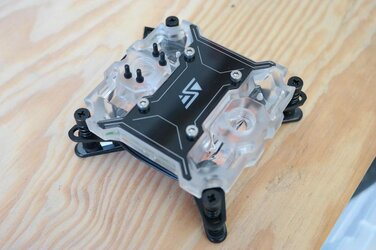
Next up to the plate was the Apogee XK Cpu waterblock.
I drilled out the plugs for the mod plate and tapped them to M3. I dont recommend this if you aren't confident in yourself, one slip and you pop right into the center of the block and its ruined! Luckily I made it out alive =D


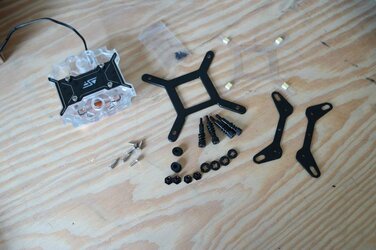
Then I broke it down for paint.


I also sleeved the power cable for the led boards with the Mod/Smart Maxcord.


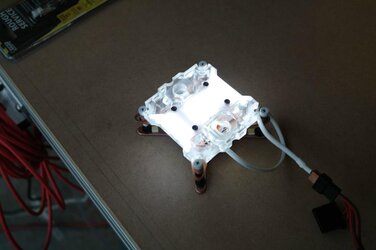
I was happy with the turn out! I'm going to use the CNC to mill a cut out in the top panel and paint it copper so white light shines through.


Next up is the GPU block! First was the tear down process. These are some hardcore water blocks, not the standard 2 layer block there is about 5 or 6 haha.


Okay after that process it was time for paint!


Here I drilled out for M3 screws again from the little philips that come with it, then counter sunk this plate.


Back to paint!


Here is another screw replacement for m3 for the Gpu logo plate. =D


Now back to paint haha!


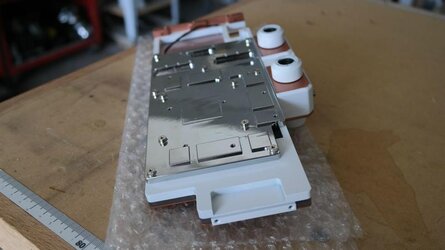
Last up for paint was the back plate.


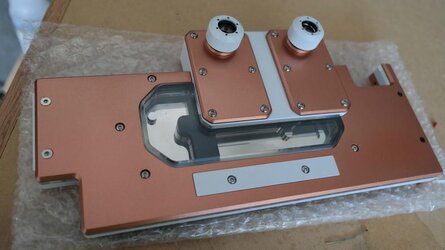
After everything was painted I reassembled it and holy crap! They don't even look like the same waterblocks!!! I also switched out the black alloy screws for stainless steel screws, I think they matched better. I Can't wait to get these on some 780's and in the build!


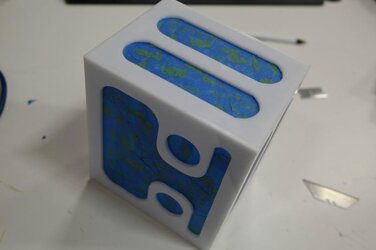
Hard to top those blocks but I want to show you the painted reservoir really quick! I got the bottom one in primer, the top one is complete and ready for install though and thats what I want to show. The reason I painted after glueing it on is that the weld-on glue is very strong and would smear the paint right off.


It was a real paint to mask off inside the pocket the trim created but well worth it in the end!


Well that wraps up another forum update don't forget you can catch daily updates and CNC work at my Facebook page Clockwerk Case Mods! Thanks for watching!!
Hey guys!! Another forum update! I stretched a little long this time to make sure I had solid content as I have been working hard to finish up the CNC and it is now finally cutting after 6 months! Here is the first test cut with a engraving bit!
I am very excited to say the least! I didnt plan to have this ready for the completion of Cyprus29 so now I get to add a layer of CNCed details to the case! Its going to be awesome! I can now retire the router table, Its got me through to this point and helped me create some awesome stuff by hand. Ill probably still use it here and there though.
Anyways more goodies from the CNC in the next update! Lets get on with this one!
First a quick shout to my sponsors you guys rock! I have a Primochill hardline tubing jig on the way for my bends I cant wait to use it I have seen it work wonder!

This update is primarily painting. I first repainted the MNPCtech billet fan ring.
The I took all the sexy Swiftech gear and modded it to theme. I have to mod my pump and a GPU block yet but the first GPU block and the CPU block came out fantastic.
I built up the pump and I am going to add a fan to the heatsink and a frame around the base.
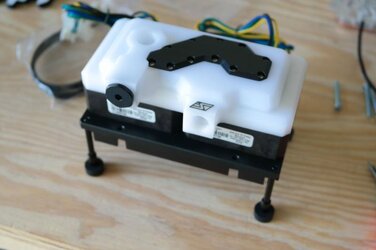
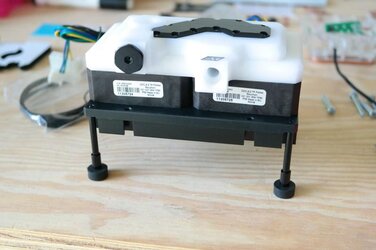
The first parts to catch paint were the radiators.
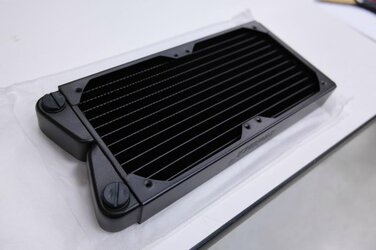
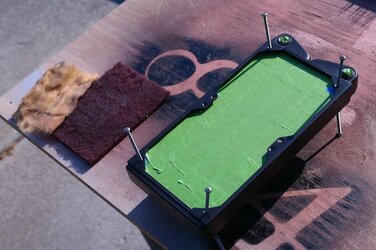
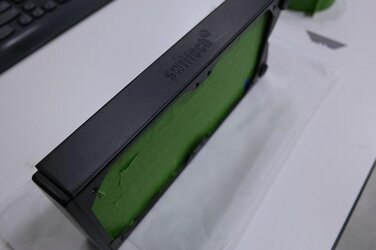
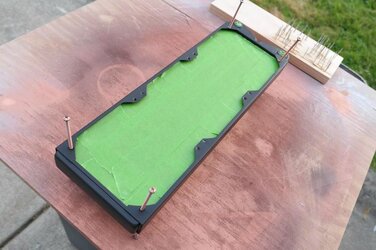
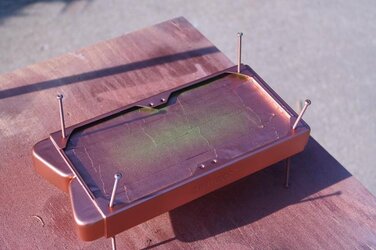
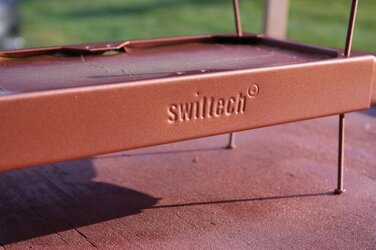
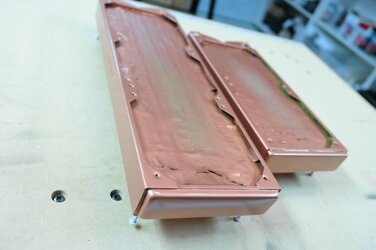
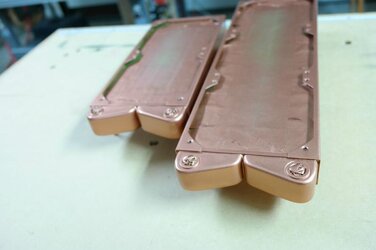
They came out super clean!
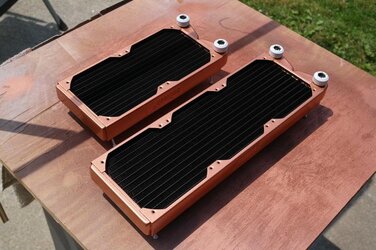
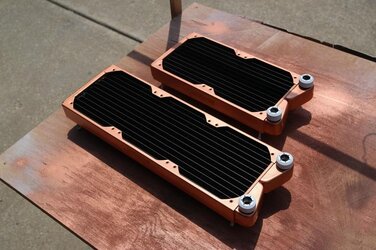
Next up to the plate was the Apogee XK Cpu waterblock.
I drilled out the plugs for the mod plate and tapped them to M3. I dont recommend this if you aren't confident in yourself, one slip and you pop right into the center of the block and its ruined! Luckily I made it out alive =D
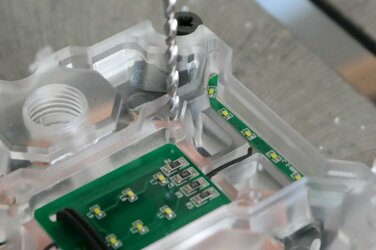
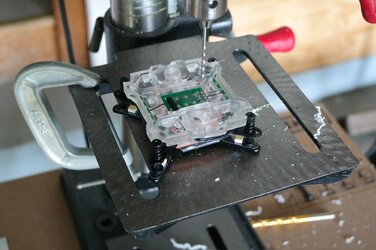
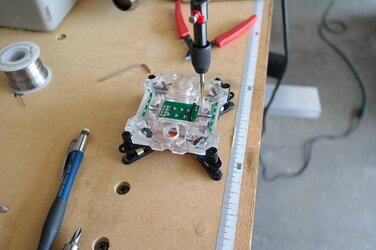
Then I broke it down for paint.
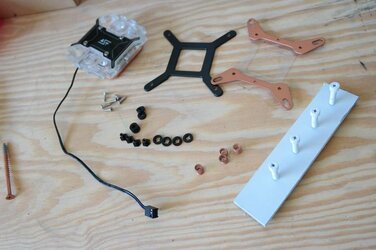
I also sleeved the power cable for the led boards with the Mod/Smart Maxcord.
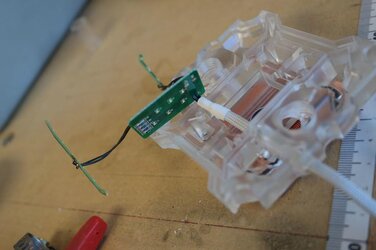
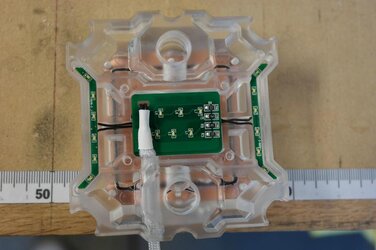
I was happy with the turn out! I'm going to use the CNC to mill a cut out in the top panel and paint it copper so white light shines through.
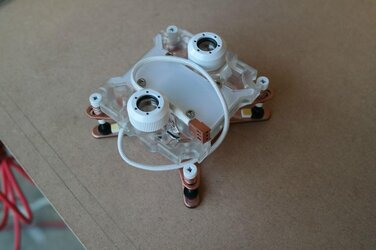
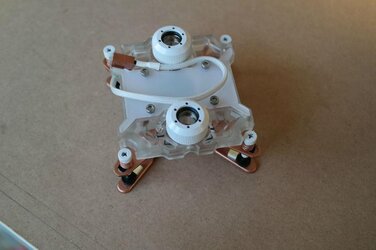
Next up is the GPU block! First was the tear down process. These are some hardcore water blocks, not the standard 2 layer block there is about 5 or 6 haha.
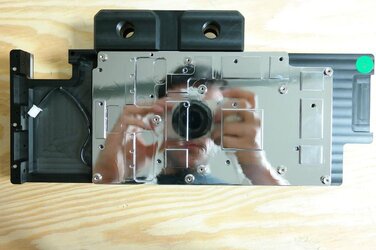
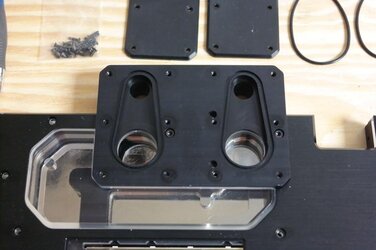
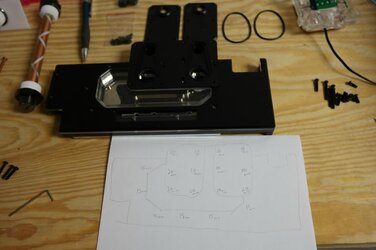
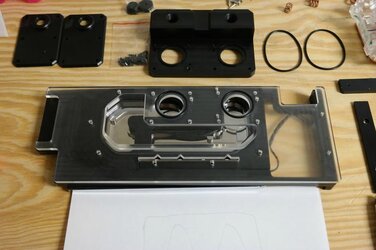
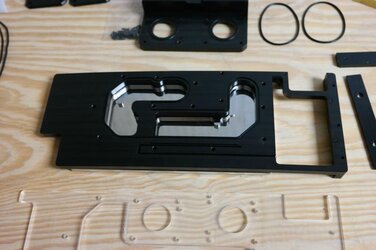
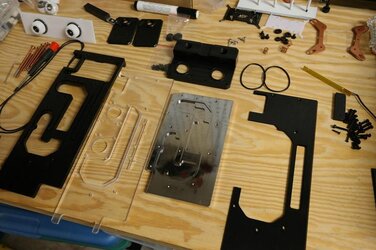
Okay after that process it was time for paint!
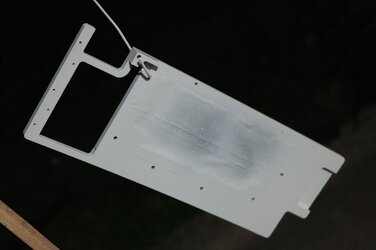
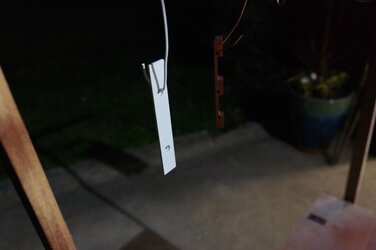
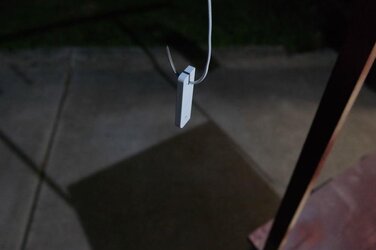
Here I drilled out for M3 screws again from the little philips that come with it, then counter sunk this plate.
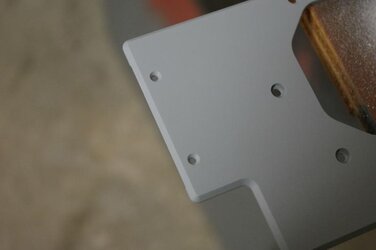
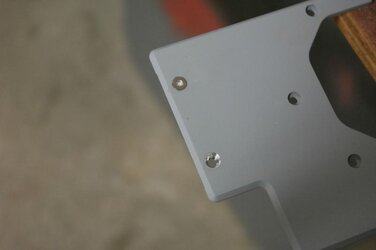
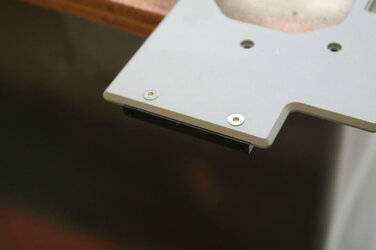
Back to paint!
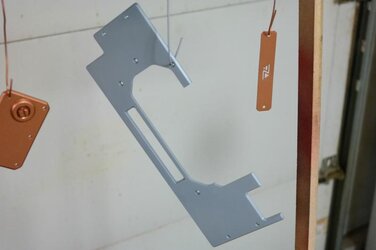
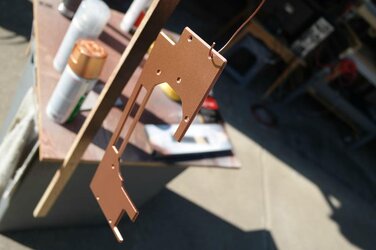
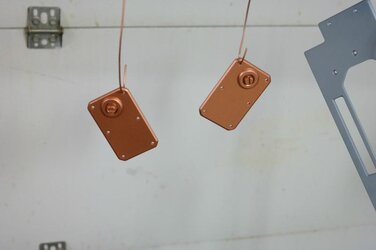
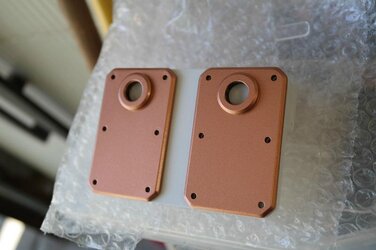
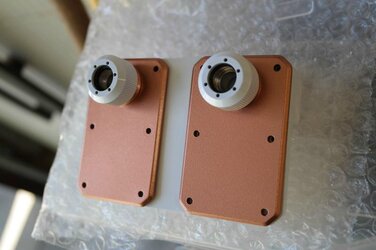
Here is another screw replacement for m3 for the Gpu logo plate. =D
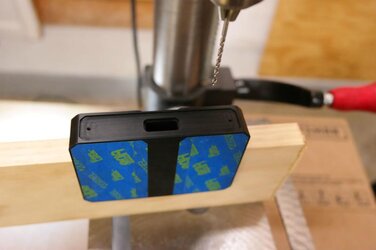
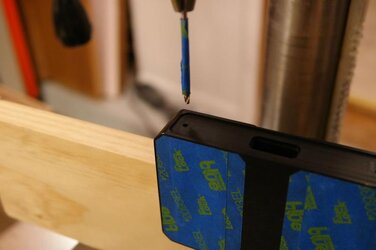
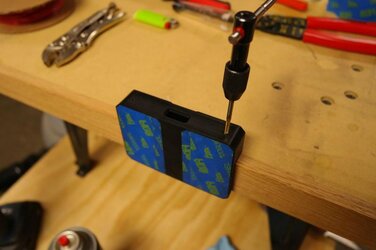
Now back to paint haha!
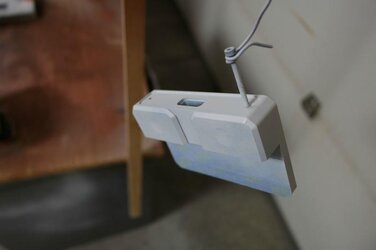
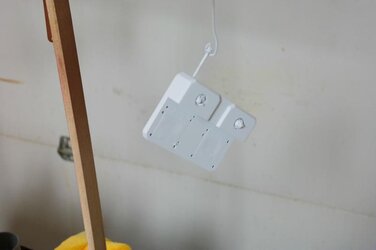
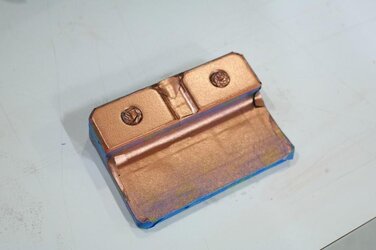
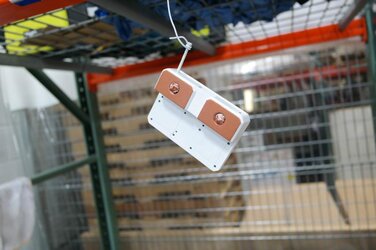
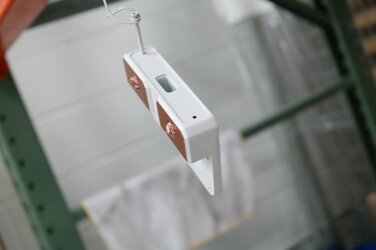
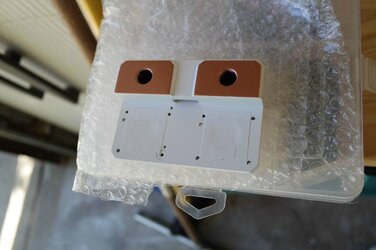
Last up for paint was the back plate.
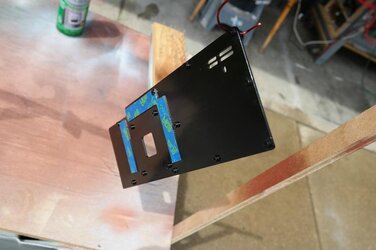
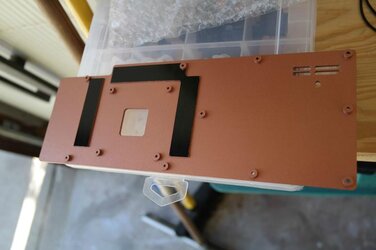
After everything was painted I reassembled it and holy crap! They don't even look like the same waterblocks!!! I also switched out the black alloy screws for stainless steel screws, I think they matched better. I Can't wait to get these on some 780's and in the build!
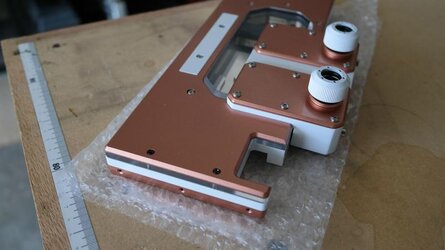
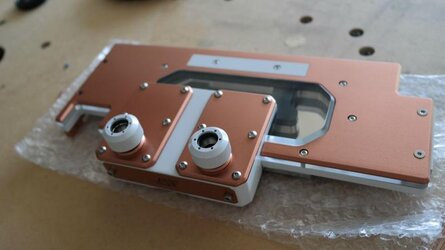
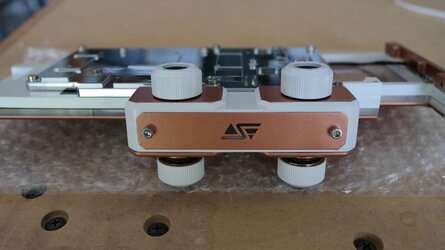
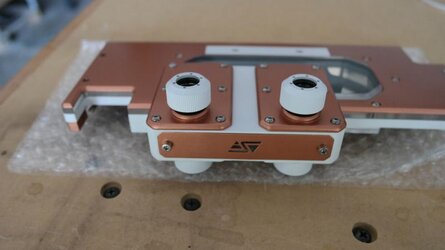
Hard to top those blocks but I want to show you the painted reservoir really quick! I got the bottom one in primer, the top one is complete and ready for install though and thats what I want to show. The reason I painted after glueing it on is that the weld-on glue is very strong and would smear the paint right off.
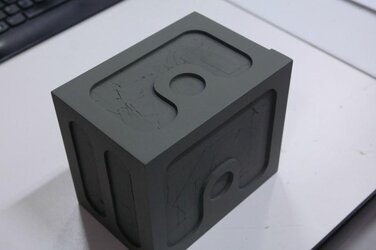
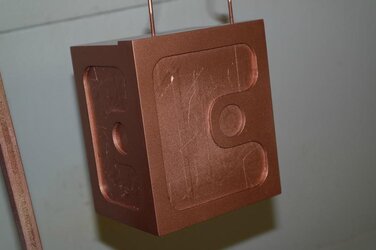
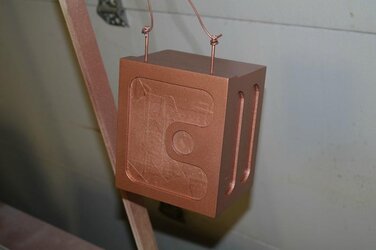
It was a real paint to mask off inside the pocket the trim created but well worth it in the end!
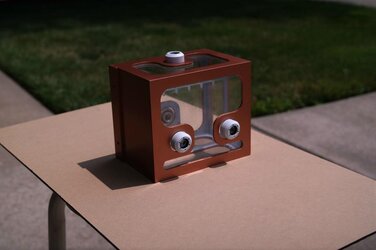
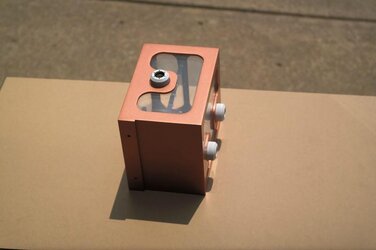
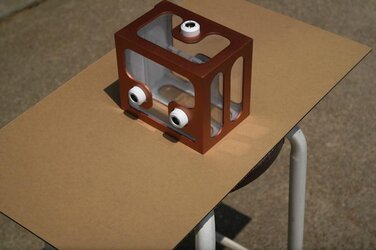
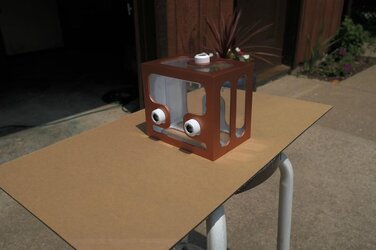
Well that wraps up another forum update don't forget you can catch daily updates and CNC work at my Facebook page Clockwerk Case Mods! Thanks for watching!!
OP
- Joined
- Mar 6, 2014
- Thread Starter
- #34
[Cyprus 29] CM Stacker : Update 8/19 : Painting, SSD panel, Video!
Hey everyone!! Sorry for the delay in updates, even on my Facebook page its been slow the last couple weeks, I had a lot going on, I had client work, I also had to finish the CNC and get it tweaked and in working order. Now my workload has cleared, I got a new camera and I am back in action on this project! I also decided to start doing video logs for my builds! I recently got a Canon Rebel T5i and it takes amazing photos and videos, so I figured why not, more skills to add on my resume haha. I will start posting my forum updates as a mix of video and photo. Ill be taking 15 photos and embedding a youtube video. Im going to run with this and see how the response is for now. Anyhow, I hope everyone appreciates the time I took to film and edit the videos, I have a lot to learn yet, but I don't think I did all that bad for the first go at it. I am going to do more audio commentary and less invideo explanation as it tends to drag on the clock. Anyways on with the update!
First and foremost as always, thanks to these awesome sponsors! you guys really exceeded my expectations and are helping to make an awesome build come to life, this would of been extremely difficult without your support!

I got a few more items in from Mod/Smart and Primochill! Some more Maxcord paracord, and heatshrink, and a jig for bending rigid plastic tubing! This jig is insanely impressive! Way larger that I imagined it, and should work wonders here shortly when I start installing tubing!


As I said before I had been super busy over the last few weeks, but I managed to get my bottom case reservoir finished, make a window to my PSU, trim my IO panel, and make a LED lit solid state panel.
I used my CNC to cut out these little rhombus shapes, and painted them copper, to give a blade effect on the IO panel. when the MB is modded white and copper it will all blend together very well I think!


I also slapped some paint on the bottom reservoir and it ended up just as nice as the top res, they should look pretty sweet paired up in this rig!


I got a new bottom case mesh also from a friend Shane on facebook, and fixed my bottom bezel up.


The last thing I did was get the SSD mounting panel made. I just have to cut out my Corsair sails on the CNC, paint them copper, and glue them on the SSDs.

Thats all for the photos, here is my first video update!
Sorry well I was intending to embed the video into the forum for my update like I have for the other 10 forums I shared on, I cant seem to get it to work so I will just share the link, its 100% safe. If anyone has a tip on embedding the video Id appreciate it so I can fix this.
Cyprus 29 - HAF Stacker - VLOG - Update 1 *Click*
I hope youliked the update! Cheers guys see ya soon!
Hey everyone!! Sorry for the delay in updates, even on my Facebook page its been slow the last couple weeks, I had a lot going on, I had client work, I also had to finish the CNC and get it tweaked and in working order. Now my workload has cleared, I got a new camera and I am back in action on this project! I also decided to start doing video logs for my builds! I recently got a Canon Rebel T5i and it takes amazing photos and videos, so I figured why not, more skills to add on my resume haha. I will start posting my forum updates as a mix of video and photo. Ill be taking 15 photos and embedding a youtube video. Im going to run with this and see how the response is for now. Anyhow, I hope everyone appreciates the time I took to film and edit the videos, I have a lot to learn yet, but I don't think I did all that bad for the first go at it. I am going to do more audio commentary and less invideo explanation as it tends to drag on the clock. Anyways on with the update!
First and foremost as always, thanks to these awesome sponsors! you guys really exceeded my expectations and are helping to make an awesome build come to life, this would of been extremely difficult without your support!

I got a few more items in from Mod/Smart and Primochill! Some more Maxcord paracord, and heatshrink, and a jig for bending rigid plastic tubing! This jig is insanely impressive! Way larger that I imagined it, and should work wonders here shortly when I start installing tubing!
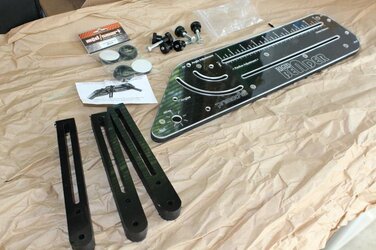
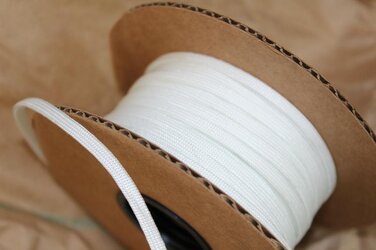
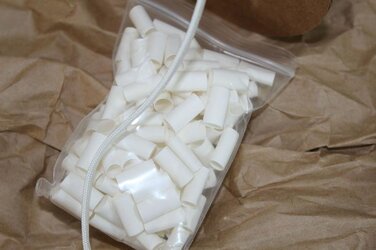
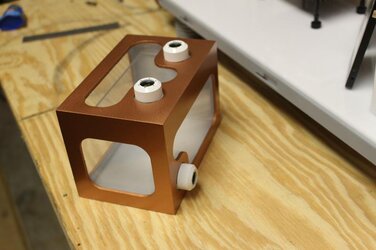
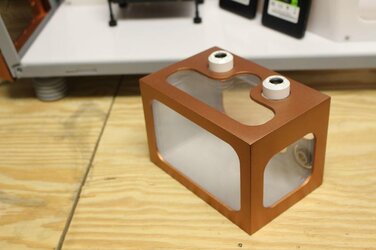
As I said before I had been super busy over the last few weeks, but I managed to get my bottom case reservoir finished, make a window to my PSU, trim my IO panel, and make a LED lit solid state panel.
I used my CNC to cut out these little rhombus shapes, and painted them copper, to give a blade effect on the IO panel. when the MB is modded white and copper it will all blend together very well I think!
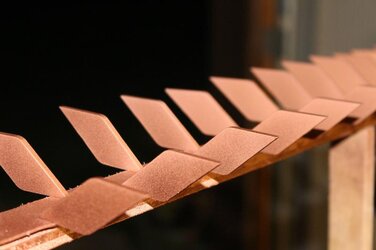
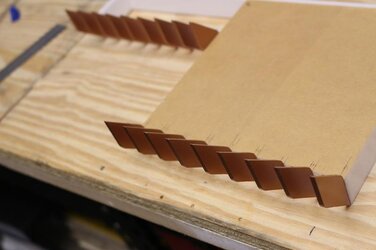
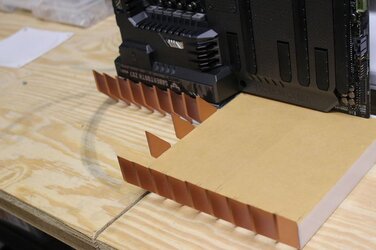
I also slapped some paint on the bottom reservoir and it ended up just as nice as the top res, they should look pretty sweet paired up in this rig!
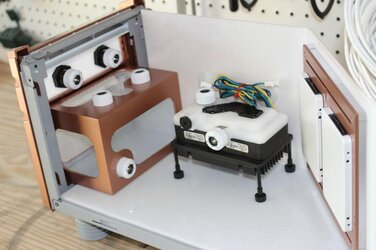
I got a new bottom case mesh also from a friend Shane on facebook, and fixed my bottom bezel up.
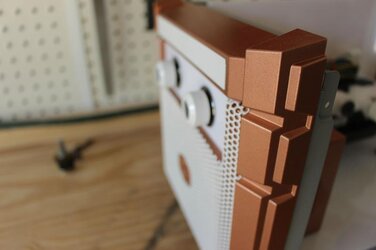
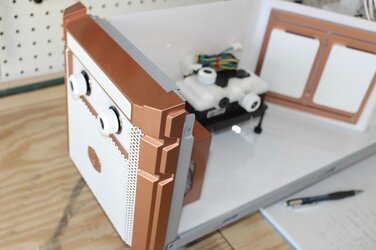
The last thing I did was get the SSD mounting panel made. I just have to cut out my Corsair sails on the CNC, paint them copper, and glue them on the SSDs.
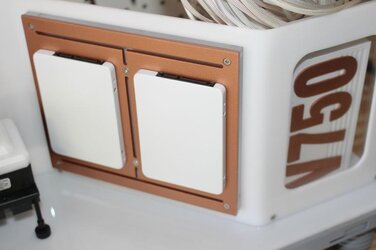
Thats all for the photos, here is my first video update!
Sorry well I was intending to embed the video into the forum for my update like I have for the other 10 forums I shared on, I cant seem to get it to work so I will just share the link, its 100% safe. If anyone has a tip on embedding the video Id appreciate it so I can fix this.
Cyprus 29 - HAF Stacker - VLOG - Update 1 *Click*
I hope youliked the update! Cheers guys see ya soon!
Last edited:
OP
- Joined
- Mar 6, 2014
- Thread Starter
- #35
[Cyprus 29] CM Stacker : Update 9/7 : Finish SSD panel, rear panel, pump enclosu
Hey guys back with another update, I have about 15 photos and another video update. After this update I will have a few shorter videos rather than one longer video and they will be in a play list, that way I will have more videos on youtube more frequently to view, and also I can group them into playlists.
Also i would like to thank everyone who voted for Cyprus29 for Mod of the Month in July 2014, I appreciate it a lot, Im glad to see people noticed the hours and hours of work I have put in this project! Cheers to you guys!
In this update I finished the corsair logos for my solid state drives, I made a new rear panel for the lower case, I also made and enclosure for my Swiftech MCP35x2 pump, and lastly I didnt photo it but I made a new IO panel with blades that fit inside the case
First off thanks to my sponsors, with out you guys this project wouldn't be nearly as awesome!

Okay first think is the new IO panel here is a couple shots


Here is the new rear panel with the MNPCtech billet fan ring. Copper modded of course. I also added a different mesh, I used the larger holed MNPCtech mesh instead of the small hole version it comes with.


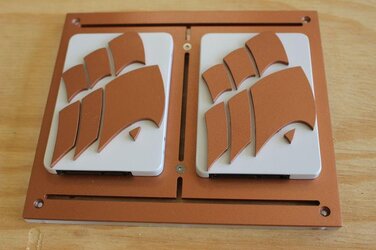
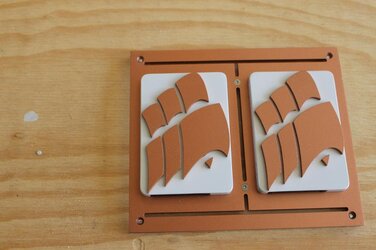
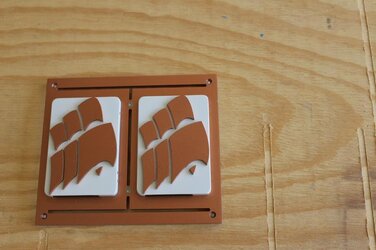
Now the juicy stuff! Here is the Corsair SSDs I finished by adding acrylic cutouts of the sail logo.


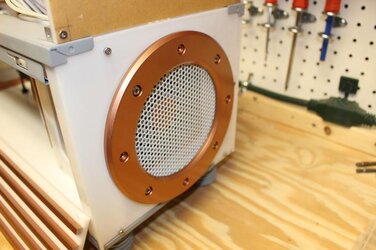
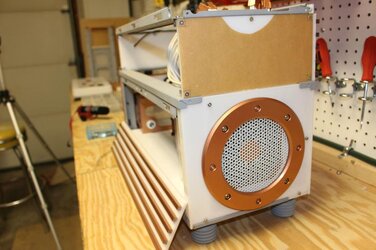
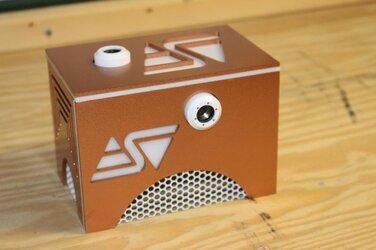
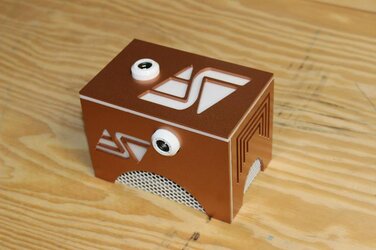
Last my favorite part of the update and maybe my favorite thing in the build so far, the custom enclosure for the Swiftech MCP35x2 pump. I wanted to do something I have never seen and a complete enclosure for the pump sounded like a great idea!


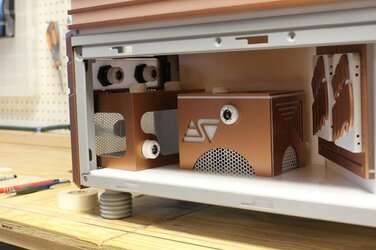
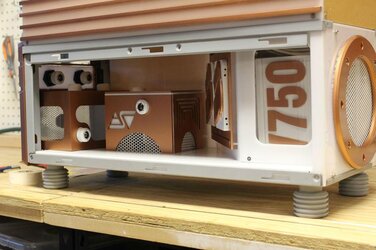
Here are a few shots of the bottom case now as it sits.


Now here is the video footage of the build process. As I said before the next update will either have a few videos embedded in or a video playlist embedded in. I want to try to get the videos at a 15 minute maximum.
Cooler Master - HAF Stacker- Cyprus 29 - VLOG - Update 2 - Click to watch!*
Well thats it for now, as I said please bare with me as I get adjusted to this video thing, I think its an awesome way to bring modding to you guys and I just need to get better at doing it, I pick up on things pretty quickly so it will get a lot smoother sooner than later! Until next time take care and mod on!
Hey guys back with another update, I have about 15 photos and another video update. After this update I will have a few shorter videos rather than one longer video and they will be in a play list, that way I will have more videos on youtube more frequently to view, and also I can group them into playlists.
Also i would like to thank everyone who voted for Cyprus29 for Mod of the Month in July 2014, I appreciate it a lot, Im glad to see people noticed the hours and hours of work I have put in this project! Cheers to you guys!
In this update I finished the corsair logos for my solid state drives, I made a new rear panel for the lower case, I also made and enclosure for my Swiftech MCP35x2 pump, and lastly I didnt photo it but I made a new IO panel with blades that fit inside the case
First off thanks to my sponsors, with out you guys this project wouldn't be nearly as awesome!

Okay first think is the new IO panel here is a couple shots
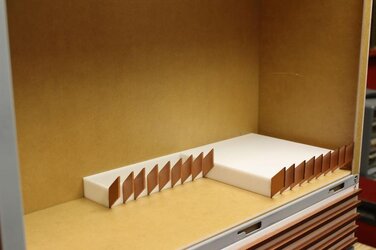
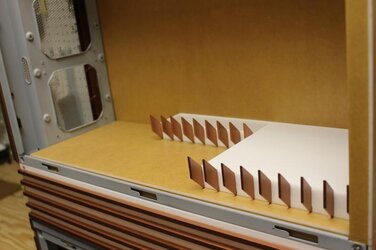
Here is the new rear panel with the MNPCtech billet fan ring. Copper modded of course. I also added a different mesh, I used the larger holed MNPCtech mesh instead of the small hole version it comes with.
Now the juicy stuff! Here is the Corsair SSDs I finished by adding acrylic cutouts of the sail logo.
Last my favorite part of the update and maybe my favorite thing in the build so far, the custom enclosure for the Swiftech MCP35x2 pump. I wanted to do something I have never seen and a complete enclosure for the pump sounded like a great idea!
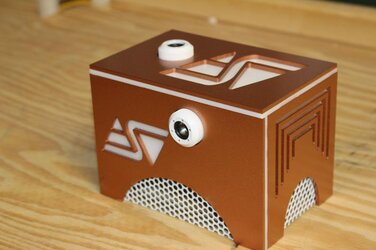
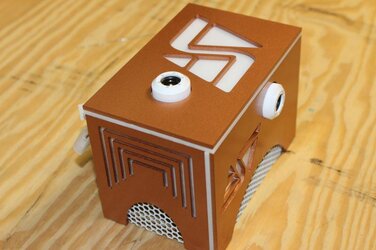
Here are a few shots of the bottom case now as it sits.
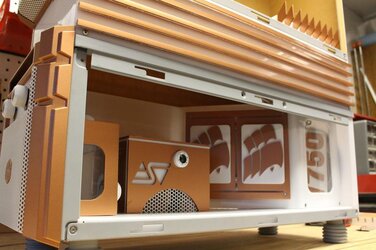
Now here is the video footage of the build process. As I said before the next update will either have a few videos embedded in or a video playlist embedded in. I want to try to get the videos at a 15 minute maximum.
Cooler Master - HAF Stacker- Cyprus 29 - VLOG - Update 2 - Click to watch!*
Well thats it for now, as I said please bare with me as I get adjusted to this video thing, I think its an awesome way to bring modding to you guys and I just need to get better at doing it, I pick up on things pretty quickly so it will get a lot smoother sooner than later! Until next time take care and mod on!
Hanoverfist
New Member
- Joined
- Oct 5, 2014
- Location
- Belle Fourche
Nice Work Here OC..

Similar threads
- Replies
- 25
- Views
- 2K
- Replies
- 8
- Views
- 2K
- Replies
- 73
- Views
- 4K


