• Welcome to Overclockers Forums! Join us to reply in threads, receive reduced ads, and to customize your site experience!

Build diary: Networking my house

Overclockers is supported by our readers. When you click a link to make a purchase, we may earn a commission. Learn More.

Cjwinnit

B&
Joined
Feb 1, 2003
Location
UK
Hi all.

I am now the proud owner of a pile of bricks! (The other half and myself have bought a house).

It's a bit old and we're redecorating. Whilst the carpets are up and the walls are stripped I figure that it's an ideal time to add a bit of wiring. Plan is to have a few Ethernet ports in each room and in a few spare places in the house. I'm also running a few points for multichannel sound. No huge plans for AV.

Wish me luck! Never done stuff like this and it's a steep learning curve.

Apologies if my narrative seems wooden - part of this is to keep me accountable. The build has already started as of the OP post date and I need to remind myself what to do!
 
Last edited:
-= The Canvas =-

4 bedrooms upstairs, lounge, dining room, second front room and kitchen downstairs.

Each bedroom shall get three Cat5e wires. Two will be properly terminated and the third shall be spare. The dining room and kitchen shall get similar treatment.

The lounge shall get five cables (4 terminated, one spare) to the TV/Entertainment corner, which is where the cable internet enters the house. The wall socket which houses this shall also house coax/aerial cable and speaker connections. There shall also be another socket in the opposite corner of the room with one terminated Ethernet port and speaker links.

The second front room shall get four cables (3 terminated, one spare) and perhaps a Coax.

The dining room and kitchen shall receive two Ethernet ports. The house shall also be fitted with sundry ports as I see fit.


-= The Kit =-

Planning on 24 ports to start with. Have 550 metres of building-grade network cable to play with in two reels.

-= The Budget =-

Tiny.
 
Last edited:
-= Diary Entry for November 11th =-

Two bedrooms have been re-wired with AC power and we have been able to fit back-boxes with Cat5! Now that the carpets are down we have to continue with the rest. The cable ends in the two bedrooms need dressing but we'll get there in the end. There is still a lot to do - the cable has been laid underfloor for all four bedrooms but two of the rooms haven't had their sockets cut into the walls yet.

I'm also finding out all the secrets this house has to offer - most of the walls I've cut through have been solid brick!

Laid about 150 metres of cable so far. About 400 left.

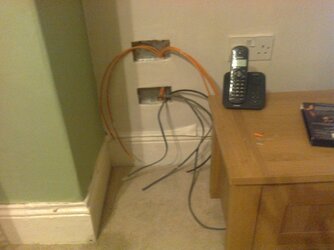
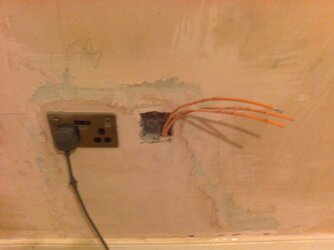
Cue obligatory picture of network cable sticking out of unfinished wall:

Photo0325.jpg

Note crazy three-prong AC socket! Yes, I'm not in Kansas, in fact I never was.
 
Last edited:
I did my new apartment when I moved in. For me the lines were already there for phone usage (yup cat 5 apts only 8yrs old) pulled them thru the wall on the other side of the onQ and made my own patch panel to run my switch to. Works like a charm and cost wise the punch downs and patch cables along with wall plates only cost me 29$ bummer of the whole deal was the morons butchered the run into the living room where i have my tv mounted and welp I had to go with a home plus for it instead, but hey it works fine.
 
Update:

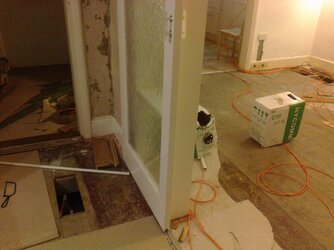
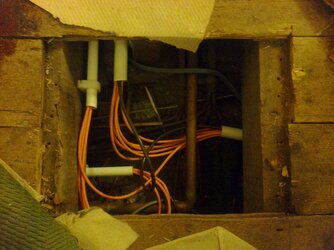
Had electricians doing work - got to borrow the hammer-action drill with chisel! Party time!

Also pulled up lots of floorboards - Cat5e is going through piping.

Chaos!

Photo0327.jpg
 
I recently bought a house and did wall drops in each room, I located the modem and router on a top shelf in my garage and put security cams all around my house, currently I only have 1 monitor for the security cams but soon will add more, it is pretty fun modding your home (much larger scale than just a computer case)...keep up the good work
 
Rented a breaker drill a few days ago to get the last few holes drilled - mostly a success except for the lounge.

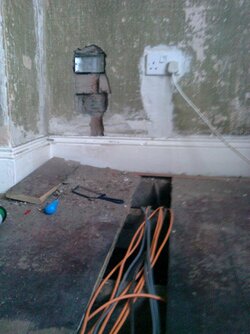
I was planning to put in one massive wall socket that would take 8 modules, but once I pulled up the floorboards I found a "mystery" mains AC cable near where I wanted the socket. Decided to put the socket on the main wall instead of the fireplace (in the picture below the big socket would have been on the little bit of wall on the left) but the main wall isn't suitable for a deep big box (it's a semi-detached house and a box that deep may have gone through!).

Instead, I've put in two standard double-boxes that will take 4 modules each and aren't as deep, and will link them together.

See below. The cables trailling the void in the floor are going into the wall sockets above.

Photo0332p.JPG
 
Update:

The carpets are down!

Managed to borrow a few friends to help run the remaining Cat5 through the conduit and we finished around December. Bought a bucket of ready-mix light concrete and filled in all the holes (for a first-time amateur I think I did well!). The lounge and dining room are now painted and carpeted, as is the hallway.

I plan to leave these carpets down and undisturbed for the next 10 years at least. Time will tell if the cable install is good. Very exciting!

Below is the "after" picture to the previous posts' before. Though my cementing went well I think I got tired during the wallpapering:

Photo0346.jpg

The plan for these two sockets is for the top socket to have 4 Ethernet ports and the bottom socket for AV (I ran five Cat5e to the top as you can see - one spare in case one was broken. I have redundant cabling everywhere in the house for this reason. Might do some environmental sensing with it...

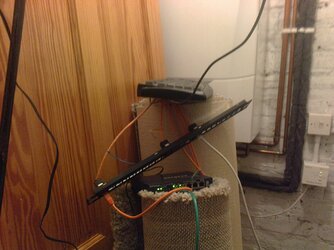
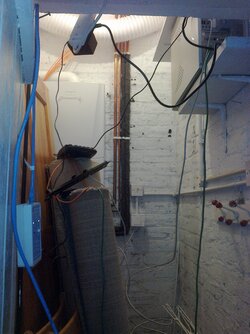
The downstairs cable run meets in the utility room. I've put Keystones on three of the lines and and have linked the router to a Proxy, connecting the lounge to my study. It's barebones at the minute but it's a start. I think it's coming together quite nicely. All I need now is time to finish dressing the cables and to get round to buying a 24-port switch :D

Photo0345.jpg

You can see a little more clearly in this picture the numbering system - I used a Base 2 color-coded numbering system. green=1, yellow=2, red=4, blue=8 and black=16 with zip-ties.
 
Last edited:
Lies!! the correct colour combination WE used was green=1, yellow=2, red=4, blue=8 and black=16 (saved it on my phone when we were laying them). other than that looks like it's correct :p don't forget the lovely proxy server that's in the back as well!
 
Lies!! the correct colour combination WE used was green=1, yellow=2, red=4, blue=8 and black=16 (saved it on my phone when we were laying them). other than that looks like it's correct :p

Doh! Very true. Can't believe others know my network better than me. Glad one of us was paying attention at any one time :)

Don't forget the lovely proxy server that's in the back as well!

Perhaps this picture will illuminate ;) Server on top-left:

Photo0348.jpg
 
Last edited:
Update: 26-port switch arrived today!! Will take more pics and will show.
 
Back