• Welcome to Overclockers Forums! Join us to reply in threads, receive reduced ads, and to customize your site experience!

Pump head pressure???

Overclockers is supported by our readers. When you click a link to make a purchase, we may earn a commission. Learn More.

t1nm4n

Member
Joined
Jun 12, 2005
Location
Texas
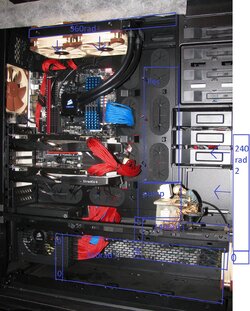
I have a technical question, I don't really understand head pressure of the pumps. I guess I should ask this more plainly. I have a corsair 900d and plan on a 4 rad set up. res > pump > 360 rad > gpu x2 (parallel) > 240 rad > 360 rad > cpu > 240 rad > res. I understand it might be a bit tricky with running the hose, I thought about doing acrylic hose, but as this will be my first lets not get too carried away, ill stick with decent tubing for now. The question we've all be waiting for is how much theoretical head pressure will it take to pump sufficiently through this setup, will I need a dual pump config or set up dual loops for best performance? I have read we should have 1/2 - 1.2 gallons per minute flow is this still a good info? I am looking at a D5 variable speed pump, looks like it has good characteristics for flow in lengthy loops. All this is in the planning stages, but as this is my first I thought it be best to get your cudos on a well thought out plan or the ridicule for a complete waste of your time in reading this.

Also I have a question, I plan on using all Noctua fans for their high static pressure and having them blow into the case and that allowing the case to exhaust air though it's many openings, would this be a bad idea ( old question of or - case pressure I know, but has there been a good answer yet)? This 240 and this 360 are the rads I am thinking of using. Mainly I'm wanting these cause it will make adding drain locations easier and allow me to test temperatures in and out of the rad much easier without adding un-needed inserts into the lines and thus adding more head pressure, if im wrong in thinking this please let me know, might be complicated, but it seems pretty straight forward to me.

Here is the worst paint rendition of what I'm looking to do:
customloop2.jpg
 
Why not just go 480 on the bottom (non-PSU side) and a 240 on the PSU side while either going with a 360 or 480 up top but if you choose the 480 up top you'll lose the top bay. More than enough heat surface to run the system at a quiet setting. I would advise on having a look at thicker rads since those are pretty slim. My favorites are the Black Ice SR-1s or the newly SR-2s and Alphacools UT60 or Monsta (80mm) rads. Just be careful if choosing the Monsta as all rads don't need to be one. lol Having one for example and the rest 60mm is fine and should give you some room for your fans as well. Also have the front, top and sides as intake since they're all filtered while each rad will get fresh cool air and use the unfiltered back as exhaust with a single fan back there. I've been doing it and worked great for me other than being over raded. (I know, no such thing but diminishing returns makes its mating call.)

As for the pump, a D5 or DDC can handle all that but at a higher setting. If you went dual, you could run it at a lower setting and have the redundancy at hand as well. The standard efficiency for a loop is between 1.0-1.5 GPM.

It comes down to you on how you want to go with this and spend.
 
Last edited:
4 rads? Naaaa... Do two. Quad on the bottom, thick one, and a tri up top. Plenty pelt surface for your dual gpu and single cpu setup. I run essentially the same.thing on only 5x120mm.
 
Hmm, well, maybe a dual loop is what I should go for then. I'm not a big fan of the dual top pumps and I don't want to run the pump any harder than needed to achieve the right amount of cooling, I'm kinda of set on these rads cause since this is my first I want to monitor temps as things heat up and cool during gaming sessions and tinkering with OCing. I would rather get the temp from the intake side and exit side of the rad rather than have more breaks in the line, keep the lines as straight and clutter free as possible. I want to see first hand how the ambient affects the rad temps and how those affect the cpu and gpu temps.

I understand how important the volume and surface area of a rad are important, This will be more like my experimental rig that I punish from time to time with +24hr gaming sessions or stress tests that last for days
 
Loop temps...temps within the loop, will not vary more than 1-2c at any point anyway. So in that light, monitoring intake and exit if the loop is kind of pointless.
 
Loop temps...temps within the loop, will not vary more than 1-2c at any point anyway. So in that light, monitoring intake and exit if the loop is kind of pointless.

+1 :thup:

Earth is right. If you want to focus on Delta-Temps than that should be more feasible. The testing has already been done for us for years now. We just do the math and see what were aiming for as in D-T and noise level. The rest is history.

Also, I would recommend sticking with a single loop.

Dual pump tops? What you got against pumps in serial? lol Best ever when it comes to head pressure and constant flow. Works like a charm. My dual MCP-35xs can keep a constant 1.0 GPM in a fairly complex loop around 40% PWM. Mind you I keep my rig on almost 24/7 let alone gaming and folding.
 
Pump head pressure is a rating a bit like CFM for fans in that it is a maximum figure that will not really apply to real life. A pump (or fan) makes maximum pressure at zero flow and maximum flow at zero pressure. Of course neither of those will apply to a real life application and will always be somewhere in the middle. The max pressure generated by the pump will fall in a curve as flow increases from zero flow to max flow.
Head pressure can also be indicated as a distance. This is the height that a pump can fill a vertical tube before the pressure generated by gravity will bring flow to zero.
There is an example of that in this video
You can see the more powerful pump fills the tube faster and higher. At the start resistance is near zero so flow rate is very high. As the tube fills and resistance increases flow slows. If the tube was taller it would stop. A D5 could fill a tube to a height of over 4m or 15ft

At the same time each component of the loop adds resistance to flow. As flow increases the resistance or pressure drop of each component rises.

To simplify things, for pumps people generally look at the pressure the pump can produce at 1GPM / 4LPM because that is recognised as a good target for cooling performance and ease of bleeding air from loop components.
You then look at the pressure drop of each component of the loop at the same 4LPM and add them up, if that combined number exceeds the pump pressure then the system flow rate will be under 4LPM. If it is under the pump pressure flow will be over 4LPM

For your loop, most radiators are very low pressure drop so the number of them does not have a large impact. Running the GPU blocks in parallel reduces the pressure drop impact they have because the flow rate through each one is reduced.
So, without knowing details of models of blocks etc, a guesstimation of pressure drop for your system would be about 3PSI at 4LPM. That is well under the 4.8PSI @ 4LPM that the D5 produces so system flow rate will be over 4LPM.

If you provide more details we could give you a better estimate but either way its good, and a single pump would be fine.
 
Last edited:
@ Earth
Point taken, it would be pointless for me to see the temps of each rad as they will all be roughly the same. But I do want to stick with a rad that has additional ports for me to set up a drain solution instead of QD's or some other complicated ritual, just seems like a wise idea to me.

@GTXJack
I want to stick with a single loop, its just seems like an easy thing to maintain. Dual tops aren't a problem, I was planning on using the pump I listed up top, but I was concerned I would have too much loop for that pump res combo to handle on a low setting. Just cause I have a 500Hp motor doesn't mean I should run it at 500Hp all day, won't last long, so why buy a pump that can do something only to have it fail sooner rather than later? But I tossed the idea of that res and pump for a more practical approach with this pump top, and if my measurements are correct I should have room on the support for the removable HDD rack in the 900d ( I hope).

@Jack
I plan on using full board EK GPU blocks for the 290x's and an EK Supremacy EVO block, thought about doing the VRMs on the mobo but not sure I want to do that this time around, with easy draining it wont be hard to do it at a later date ( I would like to go acrylic in the future, also). I knew that much about head pressure, but I probably didn't make that clear, what I don't know was how to add up all the components in the plan and figure out how much pressure they will create so I can plan on what pump to use. I'm sure there are some known numbers for people who have done this before or have been around the scene longer than myself. After reading your assessment the new pumptop might be extreme overkill, but this is still in the planning process, I'd rather not buy stuff I can't/don't need or won't/can't use.

I do appreciate the info and ideas you all have given, to add more volume to the system I will add a 480 at the bottom along with the RX series from XSPC instead of the thinner EX series , looking at this Primochill res and using the Lamptron fan controller.

On a different note, I won't be putting colored dyes in my loop when it's up and running, wow there are some nightmare threads all over the internet about using anything other than distilled water and some sort of biocide.

OK, fair enough, the question was pretty open so was just trying to cover the basics. For the pressure drop of components we rely on testing for as much as we can and have to simply make educated guesses as to the rest.

For a while now Martins Liquid Lab and Stren's Extreme rigs testing have been the go to sources of test data.
There is some good recent testing here http://www.overclock.net/t/1501978/ocn-community-water-cooling-test-thread
that covers some previously untested parts and gives a good basis for a pretty accurate estimate of the pressure drop of most loops, especially EK.
They are pretty consistent with their CPU and GPU blocks in that you can say around 1 PSI for each. When used in dual parallel setup the restriction will be around 1/4 of the combined figure.
So that gets us to around 1.5PSI with your proposed loop.
Motherboard blocks are sometimes referred to as being all high restriction, but I assume that must be based on historical experience with older models. Current and recent EK and Bitspower models are very open internally, almost just like flattened tubes, instead of the restrictive micro fin features of CPU and GPU blocks. As such they are relatively low drop components. I would guess at around 0.5 PSI
That gets us to about 2 PSI.

For rads, most thin ones like the EX are about 0.5 PSI and thicker ones like the RX about half of that. Figure around 1 PSI for four of them and the tubing.
So somewhere around 3 PSI at 4LPM

Of course you always need to be aware that there are exceptions to all rules and some of the other brands can produce very high drop components.

Also, I'm not a fan of parallel setups unless they are genuinely needed, for example quad GPU's setup in Series / Parallel hybrid, or very restrictive (German) water blocks. It just isn't needed or really beneficial with most modern dual GPU setups and overall is just more hassle. They are always more difficult to bleed.
With two current EK GPU blocks I would go series all the way. If you prefer it for your own reasons thats all good too of course.
 
Last edited:
Running the GPUs in series is easily do-able, I would of thought it was easier to drain fill in parallel for some reason but as I have no experience it was just a thought. and I guess it makes sense, there wouldn't be any advantage with HF blocks if I had a 1.5 gpm loop and ran them para I would only be getting .75gpm on each block so I might not have optimal heat absorbtion. I do plan on OC'ing the cards more so than the CPU, so that might turn out to be a bad idea to go para, series it is.

I did read through a couple of Stren's reviews, (I'm pretty sure these are the ones) and there was a lot of info, forgot his name, but his testing of cpu blocks and TIMs really impressed me. I never saw his reviews here on the forum, just happened to run across them on accident, probably why I couldn't remember how to find them.

I will go witht he RX series of rads instead of the EX multiport, the RX have additional ports that I can use for drain and fill purposes, and EarthDog was right, its added hassle and pointless to monitor each rad, plus I'm not a fan of excess wires, was just a thought, kinda glad it was pointed out to be a flawed thought, reduced the plan build some.

Again I do appreciate the help, advice and ideas.
 
Hi t1nm4n,

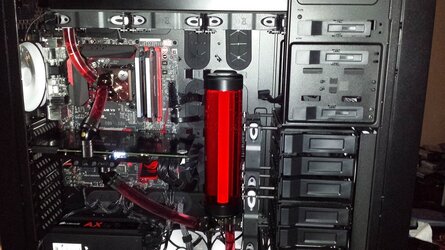
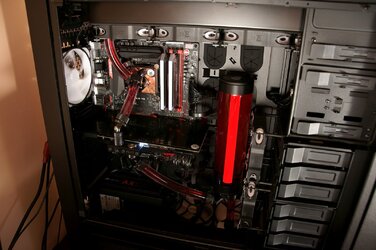
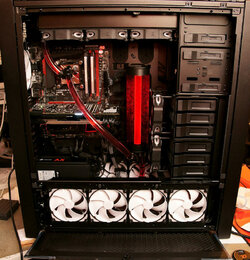
Here is my 900D build - similar to yours albeit kitted out with only the one GPU but a second one would be an easy addition.

You might grab some ideas for yours.

First of all, since you have chosen such a large case - use it to the max. I utilised an Alphacool 480 UT60 up top and a 480 XT45 in the side opposite the power supply. Since you have such a long case - use the length to your maximum advantage.

You do lose one of the drive bay slots up top but with so many left its not usually an issue for most. This will also mean that you can dispense with the 240 rad up front so just use the front as a fresh air intake.

I have arranged all the lower and front fans to blow air into the case. Top rad fans push air out through the rad and out through the top grille and I kept the rear fan as exhaust but changed it out for a 120mm variant rather than the stock 140 - You will see why in a sec...!


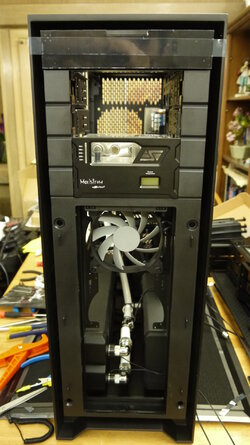
Below is a quick pic of my assembled loop in action:

**Note that you can only spot one main tubing run ie you cannot easily see the return run of tubing.

ydD9FD.jpg


tHl5Yi.jpg


Some testing in the very first days of the build - No GPU block fitted at that stage:

tw9a.jpg


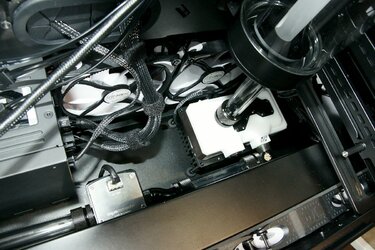
Construction phase - Note that I selected a Swiftech MCP35X2 [Dual DDC] pump - very impressed with this pump, it is very compact and I only need to run it at low PWM rates which still results in a lot of flow but its silent even with all my fans running around 750 rpm. You can also see part of my bottom 480mm rad which is bolted in on the side with its 4 fans.

Note that output of pump traverses straight towards the rear of the case [via Aquacomputer flow sensor - complete cooling system is managed via an Aquacomputer Aquaero6XT]. This run connects to the inlet of the lower 480mm rad which is positioned at the rear of the case.

610kk.jpg


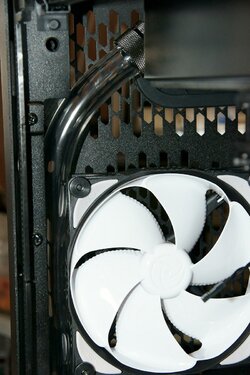
Now remember that I had mentioned about that hidden return run of tubing..... Well the tubing is tucked away in the LH [when viewed from front] rear crevice/corner of the 900D's case - The tubing runs up the very rear corner of the case and it squeezes up past the upper rear case fan. This is why I chose a 120mm fan for the rear fan as the stock 140 is too wide to allow the tubing to be tucked in against the very edge of the case. Tubing then connects up onto the rear ports of the top 480mm rad. Overall I think it results in a fairly clean looking run for the loop as this particular long run of tubing is effectively hidden from view when looking through the main perspex window.

ls1d.jpg


Bottom rad outlet - You can see how the tubing is tucked into the very corner of the case and it effectively becomes hidden from view.

4iobw.jpg


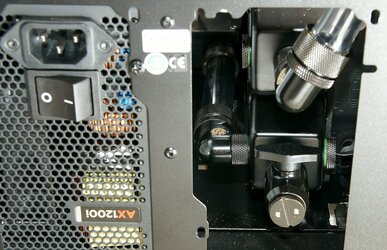
Another shot of the rear bottom - Note the small ball valve/tap which facilitates draining - This works extremely well especially as it is situated at the lowest part of the loop and is easily accessible due to the removable plate. It makes draining/mtce of the loop a real breeze rather than a hindrance.

4lzn.jpg


Hope you find some of my post useful and good-luck with your 900D build....!

BTW - Just in case anyone asks... Coolant is an automotive glycol based concentrate diluted with distilled water [approx 10% coolant and 90% distilled]. I prefer running these due to their anti-corrosion properties.
 
Last edited:
Dye in the loop.. arrrrrrrrrrrrrrrrrrrrrrrrrrrrrgh! :p

No PC type dyes have been utilised in my loop....:)

Note that this particular loop has been running for only just over 6 months. However I only drained it the other day to delid. CPU block which is copper is still shiny and not tarnished internally - Tubing [Primochill Adv] and res are still xtal clear.

I have never had issues with automotive coolants over the years. I simply do not utilise PC specific dyes or coolants in my systems, always stuck with diluted automotive coolants and have never had trouble with my blocks corroding, tubing staining, clouding or gunking up ever.

If you can manage the toxicity issue with glycol then they are a great option for a PC loop. I don't think I have come across a thread anywhere which has shown that automotive coolants have caused problems for a PC loop.

The particular coolant I utilise is not formulated primarily as an antifreeze solution as it is specified to be used in above 0C temps only. It is formulated more so to operate as a corrosion inhibitor as its primary function:
 
Last edited:
@Flat-6
I like it. Thank you so much for the pics, it made things so much more clear and gave me something to compare things too. I hope you don't mind. what do you think of the aquearo 6 controller?

So after reading and some more reading, I have come to this conclusion, my original plan was a waste of money and probably not as well thought out as I had thought. More radiators doesn't mean better cooling, more volume would be a better investment with the money on two rads instead of 4, so for less than I planned on spending I'll put a UT60 480 in the bottom and up top. I didn't think there was room for me to locate a drain port using a 48 on the bottom and for some reason I had it in my head I would have to relocate the I/O panel to put a 480 up top, Might have to move some wires around, but the loss of a bay or two wont hurt being able to keep the to HDD cages.

I like the characteristics of that dual top. I don't like how they look so I didn't want a dual top visible in my computer, but if it's on the floor of the case (without a rad on the PSU side of the bottom I gotz room) I don't a have a problem with it. I know its a lousy reason to have discounted the dual top pump solutions, but I got to stare at the thing, so it better darned well be appealing in some fashion, lol. So without knowing it I was creating a headache for myself with how I was going to run all the tubing and keep it as clean as possible, now it seems more feasible; Pump > bottom rad > GPU > GPU > CPU > top rad > res. Using two UT60 480 rad should be more than sufficient to keep things cooled even in the middle of a Texas summer.

Should I get a fan controller, or are modern MBs capable of running a couple of fans per header? I think I remember reading it should be ok, but I can't find any documentation for the MB I have that gives a definitive answer as to it's rated wattage or amperage, but I that's another problem for another day.
 
I'll put a UT60 480 in the bottom and up top.

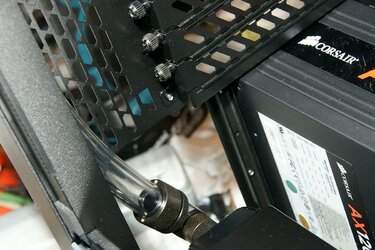
You will want to go with a 45mm thick rad at the bottom not a huge 60mm unit. Reason being is that there is very little room between the power supply and fan if you go with a 60mm thick rad. This is why you see an Alphacool XT45 in the bottom of my 900D and not a UT60. UT60 480mm fits up top nice and snug with one set of fans. If you wish to go push/pull then you may want to opt for a 45mm thick rad as well otherwise your fans will overlap the top edge of the motherboard and it may foul on some motherboards if they have tall components/connectors up in that area.. With a single row of fans such as in my build a UT60 fits well with some room to spare.

With regards to the dual pump top - main reason I opted for a dual pump housing is that I can afford to wind the drive level for the pumps right back while still maintaining excellent/high flow rates yet with next to no noise... :)


Should I get a fan controller, or are modern MBs capable of running a couple of fans per header?

Most mobos are still limited in how many fans you can drive off each header. The Aquacomputer Aquaero is a professional piece of kit. If you can afford it do not hesitate to go down the Aquaero route. It will control not only the fans but your pump(s) as well. The software that drives the Aquaero is extremely capable and all other controllers do not even approach 10% of the Aquaero's capabilities. There is a dedicated thread on the Aquaero over on overclock.net - A good read if you have not seen it previously...... http://www.overclock.net/t/1474470/ocn-aquaero-owners-club

Currently my Aquaero measures the water temp via a screw in temp sensor in one in each of my rads and calculates the average. It also measures the incoming ambient temp next to one of the front fans. It then subtracts the ambient temp value from the water temp to calculate the 'delta' temp of my system at any instant in time. It then ramps up or down my fans and pumps to maintain a certain delta that I have set. This way my fans and pumps are in a fully automatic mode with no user input required. If I am not loading up the CPU or GPU heavily my whole system runs extremely quiet - If I elect to run say a game with my system fully overclocked, my fans will smoothly ramp up as the delta temp increases and approaches my set value. When I exit the game the fans etc will slowly ramp down resulting in a quiet running system again.


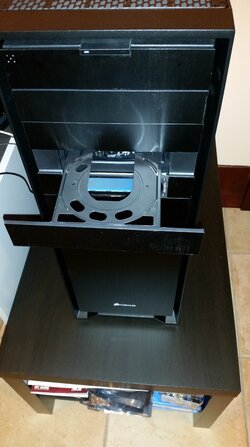
One thing with the 900D I did not like was the fact that the front optical/drive bays are sunk in slightly and result in a recessed mounting arrangement for the drives or other devices such as the Aquaero unit. With a bit of modification [Cutting, Filing etc] you can flush mount an optical drive [look up stealth drive mod] and also the Aquaero unit to preserve the sleek front panel look of the case.

The drive is the easiest to modify... Simply remove the drive's front facia and the attach the 900D's brushed aluminum panel to the sliding tray via the correct thickness of double sided tape. There are a few examples posted online on various forums etc on how to do this.

Note that protective clear film was still on the front aluminium panels when I took this pic so they look a bit average in the photos.

UkfQKP.jpg


Modifying the Aquaero was a bit trickier but still relatively simple to do. If you look at the unit carefully, the front display is user removable [4 screws]. Its position relative to the PCB is set via some spacers and the positioning of its own mounting brackets. I simply positioned the spacers on the other side of the brackets added 4 nylon washers which spaces the front panel forwards by a few more mm... This results in a perfect flush mounted finish with the 900D's front panels.

I also cut the 900D's dummy front panel into 3 pieces with a fine hacksaw. The two edge pieces are cut to the exact size so that they fill the left and right recesses adjacent the Aquaero unit. These two are simply held in place with double sided tape [a couple of layers worth depending on thickness to achieve that perfect flush finish].

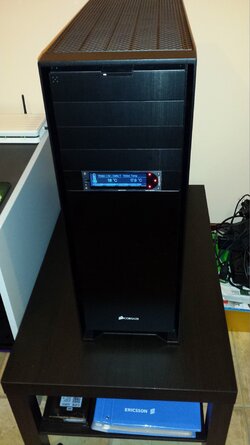
Final product - Aquaero unit installed in lowest position and optical drive stealth mounted just above it.

flDnEq.jpg
 
Last edited:
@Flat

That is a nice looking rig, I have been playing with the idea of stealth'ing my optical drive, just hadn't gotten around to it, done it a few times years ago with the last build I had done, say back in 2001 or so. I have been playing around with the aquearo software in the hopes of getting familiar with it thinking I might get the controller. I do like it's functionality and relative ease of use. I don't like that I have to run a second program so that the software suite can see the values of MB sensors though. I might not be doing something right there either. I will check out that thread on the other forum.

As for the UT60 on the bottom, I figured it would be tight, but thanks for making the comment, it got me thinking and I hadn't looked at the dimensions of the new PSU that will go in this case so back tot he drawing board on the bottom rad. Good thing plans are allowed to change, it's great to have forums like this were you can sound out ideas and people with hands on experience can lead down the right path.
 
Here's a pick I took a couple years ago when I was adding some changes to the rig (New case). Both radiators at the bottom are Black Ice SR1s @ 54mm with 25mm fans in push as you can't see from that angle, already installed. I use a Corsair AX1200i to give you an idea.

13346937314_a90c12f92e_o.jpg
 
@GTXJack
From that pic, it almost looks there might plenty of room for a UT60 with only push fans on it on the window side of the case. Don't know why it never crossed my mind to put the fitting towards the face of the PC which would allow me to drain from the front of the pc, making draining a lil more easy, only wanted to put two intake fans there as a rad would interfere with the bottom location I believe. I don't think I will need any fans on the PSU side of the bottom rad location.

Just a side note, how much space in underneath the rad? I was thinking I could take the Cage supports I removed and cut them in half so as to fit under the rad. Or I'll just buy some thin guage steel and bend as needed put some rubber matting to keep from any vibrations wearing the metal down and support them that way, just thinking of how I could use the left over parts and not waste as much.

@Flat
That link to the Aquearo thread has some interesting information, thanks for the link. I did like how you set up the two fans on the inside of the HDD cages, I'm guessing that was to increase airflow over the drives? Might have to borrow that idea from you.
 
I should note I have done some changes since than on this new build. I actually have the fittings on the longer 120.4 rad on the left side switched to the other side across the PSU. It was a tight fit trying to screw the fitting on there while not trying to scratch up the PSU case. I had added a middle point between both rads as I setup a drain valve heading out the front. I will be taking a picture of it soon as I get time to finish up as its a complete mess atm.

I also was very interested in the AQ6 but ended up putting an end to that project since it needs some modding to get my MCP-35X2 pumps to work on it and my Koolance flow meter. If I could go back, I would have purchased all Aquaero products like the pumps, temp sensors, flow etc to work with the AQ6. I just didn't feel like going through a whole ordeal of what works and what doesn't. Even heard the Swiftech D5 pumps had issues working with that controller.
 
@GTXJack
I did like how you set up the two fans on the inside of the HDD cages, I'm guessing that was to increase airflow over the drives? Might have to borrow that idea from you.

Not so much for the drives [although it assists in their cooling] but more so to maintain some level of airflow over the motherboard and graphics card within the large expanse of this case. With fans running at relatively low RPMs, due to the large expanse within this case you can end up with pockets of air which have no forced airflow and you end up relying on convection currents - Not the best option when you have some hot summer days/weeks here Downunder...! These fans assist in maintaining airflow from the front to the rear of the case.

For instance, even though the GPU has a water block fitted, the rear of the card which has a metal back plate affixed to it still gets quite hot when over-clocking and over-volting. It relies on some form of air flow to keep it cool as it is basically a heatsink. Even the motherboard has its voltage regulator section which can generate a reasonable amount of heat and some airflow over these components is a good idea, especially when ambient temps creep up.

You will note that the fans are mounted on standoffs - I found that with the fans mounted up close to the actual drive cages a lot of droning type noises were being generated due to the airflow being blocked somewhat from the cage frames themselves. Placing them on some standoffs cured that issue.


I also was very interested in the AQ6 but ended up putting an end to that project since it needs some modding to get my MCP-35X2 pumps to work on it and my Koolance flow meter.

MCP-35X2 will plug straight into the Aquaero 6 - It is 100% compatible with it and you should have no problems with it, as you probably noted I use the same pump [Maybe you are thinking of the PWM version of the D5 pumps which require two resistors and a diode to get them to work correctly due to a slight design issue with PWM driven D5's?].

The Koolance flowmeter on the other hand is not directly compatible. In hindsight you would have been much better off purchasing Aquacomputer's flow meter which is a much higher quality device, slightly more expensive but a much better product and it just plugs staright in to the Aquaero 6. http://www.frozencpu.com/products/1...lphacool_Heatmaster_53068.html?tl=g30c229s582 That was the path I chose for my build and the combo works extremely well.

Martin over at Martin's liquid labs performed a review on the same Aquacomputer flow sensor some time ago... http://martinsliquidlab.org/2012/01/21/aquacomputer-water-high-flow-sensor-meter/
 
Last edited:
Back