• Welcome to Overclockers Forums! Join us to reply in threads, receive reduced ads, and to customize your site experience!

Proj Bruce Lee and my mutation into a Pin head (Prologue)

Overclockers is supported by our readers. When you click a link to make a purchase, we may earn a commission. Learn More.

SwartHack

Babysitter for OCF Lounge Day Care, Still a bad-as
Joined
Apr 3, 2015
Location
Planet Earth
Greetings proj builders of the OCC!

After some serious reflection and meditative therapy, for good or bad, I have decided to start a proj log here.

I feel inclined to explain how I actually got here, so this preliminary post is more of a preamble.

4 months ago, never would have imagined that I would be a member of a site like OCC. It all started with my HP Envy. I wanted to upgrade it for business purposes. More RAM, more Disk, the standard stuff. I also decided to upgrade the processor to the max supported for the mobo. It was running an i5-4430 and threw in a i7-4790. Well during this process I hosed the cpu socket. I managed to find a replacement mobo and had to rip the rig apart to fix it. DUring this process I stumbled onto PC modding. I was mesmerized. I have always loved playing with hardware, but was totally oblivious to the extent you can go with custom mods. I was hooked, broke out the dremel, hacked a window in my HP Envy, did a few simple mods. During this process I also started to dabble in electronics and integrating a simple IC into the HDD activity LED. I also stumbled into Arduino and am getting into that, but I am getting ahead of myself. Hacking up the HP Envy was fun, but it was not enough, I wanted to go from scratch. So here I am.

This project is already in process, but not finished. I will post a few messages/pics detailing what I have done up until now, then progress accordingly.

I hope Bruce Lee is worthy of a proj log on OCC.

Back soon...
 
I look forward to seeing how your build turns out, but as an FYI, the acronym for our website is generally OCF, not sure where OCC comes from.
 
just remember, once is never enough.
once you start cutting, hacking and actually butchering stuff, you just can't stop............
 
hmm, sorry for misuse of acronyms. I had seen OCC somewhere as Over Clocking Community.
 
No worries, it falls back to this website being called OCForums (or OCF for short) :)
 
Proj Bruce Lee and my mutation into a Pin head (Prologue-Amended)

So thanks for the interest and encouragement all!

Have to amend my story a little. During this process I will refer to the HP Hack, which is the HP Envy I referred to in my initial prologue. I prototyped quite a bit on this box before I dove into a this proj with all new and handpicked components. The point being after I upgraded the processor, what did I have sitting on my desk?? but the i5-4430. What to do? So yeah, the only used component in this proj is the proc. Which is good for now, but I know I will need to max it out eventually, of course...

IMG_0565.JPG

Hardy har har!!! Sorry HP! NOT!

Hasta la proxima
 
Cable Connectors: molex, dupont, kk, JST oh my!!!

So here we go with a review of some of the custom wiring I got into to start this project. Basically my intention was to integrate into the HDD activity coming off the motherboard to run some effects. Yeah, not an original idea, but for me it was a grand start. And what eventually led me here. I did know I wanted to be able to control these effects with a switch. I also knew I wanted to create custom cable components for my wiring. I wanted this cabling to be very component based so it would be easy to make changes and switch things around. I also wanted just a two-pin connector. I didn't want to use the 4 or 3 pin fan connectors that get used for all sorts of thing, I also didn't want to use 2 pin Molex, they are bulky and ugly. I also didnt want to use the dupont/kk header sockets as they are flimsy for hanging wire-to-wire harnesses. So what did I find, I found JST!

So JST plugs and sockets. They are pretty cool and manageable. The also lock together. They make all kinds and I identified the SM series as their free hanging wire harness product. I get them here:

http://www.newark.com/jst-japan-sol...connector-receptacle/dp/69C4944?ost=SMR-02V-N

This is the housing receptacle. If you are interested in JST you will also need the housing plug: SMP-02V-NC, and the contact pins (BYM-001T-P0.6) and sockets(BHF-001T-0.8BS).

So, cool, I had the technology. I ordered up a bundle and got to cutting, stripping and crimping. After I finished my prototype on the HP Hack, I looked at it and the parts of Bruce Lee laying around and realized that the white sockets, although functional, were not going to cut it for the big build. I needed black! But alas after a phone call to newark.com, they declared they did not exist, but I had seen them on some pre-wired harness for some component or another. I also knew JST was big into RC. They had to exist and I had to find them.

Long story, many web searches, had to resort to the phone. I found a few suppliers of the ellusive SMB (B for Black) components, specifically SMR-02V-B, SMP-02V-BC. The suppliers I found all had minimum orders of one type or another where I would literally have to buy hundreds. I can't tell you where I found them, but the guy I talked to just ended sending me a free sample of 30.


So here is a rundown of the JST components I created to implement my initial HDD activity effects. All the sleeving is done by the SwartHack himself. Break out the heat gun and dont burn yourself!

The switch. Cool led switch from Performance-PCs. http://www.performance-pcs.com/catalogsearch/result/?q=MMT-PCISWITCH-RD. It comes in different colors. Don't order the cabling if you get this, it sucks.
switchBk.JPG

The Y splitter
wireYbk.JPG


The signal T
signalTbk.JPG

rewired manufacturer power cables
connectsBK.JPG

more hacking manufacturer cables
connectsBK2.JPG

The elusive Serial Y splitter (more on this later)
serialY.JPG

And my optoisolator IC chip (more on this later)
chipswitch.JPG

And what does it look like all together, with the light components plugged in?
Here is my prototype on the bench. I forgot to take a picture of the black production version before I started to hook it all up. But the idea is the same.

Basically for now I have a three light laser LED: http://www.newegg.com/Product/Product.aspx?Item=N82E16800888056
and a led meteor light kit, http://www.newegg.com/Product/Produ...8052&cm_re=logisys_led-_-00-888-052-_-Product.
How much can I actually run as I want to add more, stay tuned? V=IR people:)

fullrig1.jpg

IMG_0429.JPG

So that's it for Cable Connectors episode. Stay tuned for the next episode. Using Optopisolator ICs and Making Smoke, Motherboard Electronics 101 or Blowing Up an LED in Your Face.

Salud!


Thanks Jim!!!
IMG_0467.JPG
 
Very nice start. I'm still interested. :)

edit: Using masking tape or painters tape is a lot easier to use when laying out your cuts. Not only does it peel off easier than duck tape but they are easier to mark on.
 
Electronics 101: ICs, Making Things Smoke and Exploding LEDs

Hello all!

As I know everyone has been waiting with bated breath and anticipation for the next chapter of this riveting saga, I do apologize for the wait.

I have been distracted by other projects and endeavors. But worry not fellow OCF peasants. Here is the next installment.

When we last left, the hero was about to discover electricity...

Ahh, electricity.... its like a fine woman, something I will never understand completely...

So I finally figured out that I needed to use a simple opto-isolator IC chip to successfully run or control anything from the HD activity. So I simply Y'd the HD activity wire, got a soldering iron and went to town. You can review most the details of this at this thread, so I wont go into it too much here, just give you the highlights.

http://www.overclockers.com/forums/...using-an-4N27-Integrated-Circuit-for-12v-LEDs

In short you wire the HD indicator wires to pins 1 and 2 on the chip and it controls a switch between pins 4 and 5. So you hook up a 12v power to 4 and 5 and you are off to the races.

The optoisolator comes in a number of flavors. Here are two I have used.
chips.jpg

The differences being how much juice they can handle. There is a limitation on the amps that can cross 4 and 5. Check out the specs. More on that in a bit...

Here is the chip rig in process. I used a socket to solder the wires, so I didn't fry the chip, plus it looks cooler.
socket1.jpg socketchip1.jpg

So up to this point I am working on my bench, then go and wrangle with the wire harness in the PC and plug it all it, and fire up the PC. I was trying to get measurements with my multimeter, but nothing made sense and nothing worked quite right. So I figured I needed to get a Bench DC power supply and get this stuff tested before I stick it in the rig. Sounds sensible, right? Well my first mistake as sparky. Highlights to me my vast misunderstanding of electricity.

So I know I need to get a variable voltage rig, look around a bit and decide on this:
https://www.amazon.com/gp/product/B0002MQGI6/ref=oh_aui_detailpage_o09_s00?ie=UTF8&psc=1
psdc1.jpg

Before you laugh your *** off when you realize its 2 amps fixed current.

So it arrives and I am all excited to hook up my rig on my bench. All along I have been trying to figure out exactly how many amps one LED uses and how much I can run off the 12v current. First thing I do is attach a mock up of my rig on a breadboard to the leads, multimeter in hand, and hit the power switch and...

POP, BANG, FIZZLE

The LED in my circuit literally blew up, the only thing left was the wires sticking out of the breadboard. All I could find were these tiny bits of glass everywhere. I am still finding them. The IC overloaded and smoked up.

BTW - I was not wearing safety glasses and got lucky

I was like, what the hell! took some time, sat down. And realized that this is what I really needed:
https://www.amazon.com/gp/product/B00FPU6G4E/ref=oh_aui_detailpage_o05_s00?ie=UTF8&psc=1
psdc2.jpg

This is a great Bench PSU, especially at the price and I would highly recommend it. It has changed my life!

At this point things are starting to make more sense to me. I decided to take a tangent and got a few velleman kits. I not only assembled the kits, but tried to understand what and how they were actually doing. This has opened up a huge door for me, then I got an Arduino Uno and my mind was blown. As my application for this project is very simple, it has opened my mind to unlimited ideas for future projs.

This kit is cool as it builds on the info provided in the thread I referenced above. There are a bunch of cool kits. I am working on some of the Clock ones to better understand the use of programmable chips like the 89C2051 microcontroller that comes with the clock kits.
http://www.amazon.com/gp/product/B005PFBILA?psc=1&redirect=true&ref_=oh_aui_detailpage_o03_s00
kit.jpg

The last big thing I needed to overcome and understand was the voltage drop across the IC and the difference between parallel and series circuits. Yes, a basic concept of electronics and very easy to illustrate, but what is really going on. I had Y'd my HD indicator and it was firing the IC switch, but the original HD indicator LED in the front panel barely lit up. The IC was sucking juice (Voltage drop) on the parallell Y connector I had made.
wireYbk.JPG

well with my new Bench PSU and using a secondary power source I was finally able to mock up both sides of the IC connections and prototype away. I eventually figured out I needed to wire the IC and the HD LED in series, and I also figured out the LED has to be first in the series and the IC second. For this I engineered a Y series splitter:

serialY.JPG

At this point, its like a huge breakthrough. The IC switch fires and the front panel HD LED is full strength. So now I can control whatever 12v component I want.

So, how much can you hook up to the 12v side. I am still in the process of trying to create a failure, Right now I have three LEDs in series with a 120 ohm resistor. It is pulling about 60 mA. The specs on the NTE 3040 indicate 100mA. Once I get a chance I will try to max it out and report on the results.

That's about it for now. Stay tuned for the next episode "The Official Bruce Lee Parts List" or "Going Broke Shopping PC parts Online"

Until then...

Cheers
 
Hello all my OCF oHmmies!!!

Ah, I crack myself up. If you don’t get that, then go R = V/I yourself!

OOOHHH, electrical burn! I am the funniest mother lover I know. Ahh, sigh, well let’s get to business…


This is it!!!
Where the rubber meets the road, the meat and potatoes, the true grit of any proj. The Parts!

If you have been following up until now, you must already realize that this cannot just be a simple listing of parts, oh no!!!

The following is actually a look into the inner depths of my psyche, the actual essence of the process that led to my higher achieved awareness and my eventual mutation into a PinHead!

But beware!!!!

Any such journey is fraught with peril and confrontations with dark shadows that may be better left undisturbed. So please, proceed with caution. I cannot claim any responsibility for any reader's resulting mental health and/or stability, bank balances, credit limits and rating.

You have been forewarned...

So when we last left, the hero was recovering from electrical burns. In his dismay while looking at the burns covering his body, he took solace that he knew he had a purpose, and a high credit limit.

His story and its evolution can only be told in a progression of days, where the first day starts before awareness and total consciousness are achieved by the valiant technician.

Not all parts are used in the actual creation of Bruce Lee, but all the parts did lead to his creation.

I am not listing specifically where I got the parts. I must admit I mostly use Amazon as I am prime and get the 2day free shipping on most items. I also use NewEgg, Performance-PCs, newark.com, among some other obscure ones I must be forgetting. I will not bore you with all the parts from newark.com. It’s mostly all the JST supplies and other pins, connectors, ICs, etc. Check out newark.com if you don't know it. It will blow you away.

I will also provide some simple review remarks along the way where applicable and links if the product is interesting to look at.

I have included price paid for your interest and my accountant.

Let’s have a contest.
Count how many fans I bought, how many could be used and how many I have left over. First correct response gets a fan of their choice and a bonus SATA III cable. (This is case fans only! Do not count CPU fans!)


I will refer to some parts for the HP Hack proj, which as you may know is where the whole thing started...

[fade and blurr to memory flashback....]

Day 1
It all starts one day, while the upgrade of my current production PC was pondered. I had some plans, needed some more disk space, more memory. In looking into the motherboard I saw that, “low and behold”, it could also take a processor upgrade as well. It had been awhile since I had played with some hardware.
1 Intel Core i7-4790 Processor $285.
2 Seagate 2TB Desktop HDD SATA 6Gb/s 64MB Cache 3.5-Inch Internal Bare Drive @ $76.65/each.
8 misc. SATA III cables $16.​

*Notes*
These go into HP Hack. I take the i5-4430 out and use it for Bruce Lee. Yeah, Yeah I know. This is the only used part in Bruce. If Blaylock has his way we will eventually end up burning it out anyway. Regardless, I cant not eventually put a new i7 in Bruce

Day 3
During the wait, our intrepid technician discovers the world of PC modding. Spends many hours on-line, intrigued, he plans how to incorporate some modding into his current upgrade activities.
1 80mm Blue and Red Magical LED Computer Cooling Fan, $15.95.​

Day 13
Processor in hand, I realize I am a little short supplied, and the fan that came with it will not work on my HP mb. And gosh dang all git out if I didn’t need a 90mm instead of the 80mm. I am going to have to get these fan sizes figured out. I also envision the future and HP Hack is born.
1 Zalman LED Copper CPU Cooling Fan CNPS7500-CU LED, $29.99.
1 ZALMAN Ultra Quiet Fan Series F2 LED (SF) 92mm Blue LED Case Fan,$12.99.

1 SilverStone Strider Plus ST50F-P 500W ATX 12V v2.3/EPS 12V 80 PLUS BRONZE Certified 100 % Modular Active PFC Power Supply (Black), $71.99.
1 SilverStone PP05 Short Cable Set, $30.20;
1 Silverstone Tek Sleeved 3x SATA + 1x Slimline SATA Cable, $11.99.

EPDM U-Channel Rubber Extrusion, 0.062" X 1/4" Base, 0.062" Leg, 0.312" Overall Depth, 10' Overall Length, $13.86;
Grey Tinted Clear Acrylic Plexiglas (Smoked) Sheet 24" X 24" X 1/8", $16.80.

2 of Dremel EZ409 1-1/2-Inch EZ Lock Thin Cut blade $9.97;
1 - Dremel EZ402 EZ Lock Mandrel $8.15.​

*Notes*
I did not use the smoked plexi and got some clear from HomeDepot. The U-channel I got worked OK, I should have got something narrower. Don’t get the Thin Cut blades unless you are much better at me at metal cutting. They just evaporate and disappear. Use the normal metal blades.

Day 19 - The Big Day
During the previous 6 days, our diligent apprentice toils in the workshop with sparks flying. Pulling cables, yanking, cutting. He feels alive. Fortified with renewed purpose and credit, without thought or regret takes the plunge as easy as falling down a well……..
Aerocool Qs-202 Midi Tower Case, f37.49 + f46.79 shipping!!
https://www.overclockers.co.uk/showproduct.php?prodid=CA-029- AE&tool=3

MSI Micro ATX Z97M-G43 motherboard, $109.99
http://us.msi.com/product/mb/Z97MG43.html#hero-overview

Zalman CNPS9900A LED Ultra Quiet CPU Cooler, $44.05.

2 Kingston HyperX FURY 16GB Kit (2x8GB) 1866MHz DDR3 CL10 DIMM (1 red @ $139.79/1 blue @ $129.99).

3 HGST/Hitachi Ultrastar 7K3000 2TB 64MB 7200RPM 3.5, $61 each.

NZXT Aperture M Internal 5.25-Inch Mesh Card Reader with 2x USB 3.0 (8c-aper000-w0b), $38.79

EVERCOOL FAN-LD9225B-EC1 92mm Tri-Color LED 92mm Tri-Color LED Light$11.99;
120mm Computer Case Cooling LP4 Adapter Fan Blue LED Dynamic Bearing Silent Rosewill,$8.99;
Corsair Air Series AF120 CO-9050015-BLED 120mm Blue LED Quiet Edition High Airflow Fan,$14.99;
APEVIA CF14SL-B4C 140mm UV multi-color LED fan w/3-pin and 4-pin connectors and black grill,$11.99;
Corsair Air Series AF120 CO-9050015-RLED 120mm Red LED Quiet Edition High Airflow Fan,$14.99;
Rosewill RFBL-131411B - 140mm Computer Case Cooling Fan - Transparent Frame & 4 Blue LEDs, LP4 Adapter, Fluid Dynamic Bearing,$12.99

LOGISYS Computer LDKMTRD1 Single Red Meteor Light Kit,$9.99;
LOGISYS Computer LDKMTBL1 Single Blue Meteor Light Kit,$9.99; LOGISYS Computer MDLED1RD RED LAZER LED,$6.99;
LOGISYS Computer MDLED1BL Blue Laser LED,$5.99​

*Notes*
Hardy har har, yes I paid more in shipping for my Case. Remember my goal was a Micro ATX mb form factor with a MidiTower form factor, which has posed many challenges. Stay tuned for more on this. I really, really, really liked this case and couldn’t find it anywhere else. Next proj I am having some locals build a case for me…

The MSI mb is awesome, super bang for the buck. Love the built in Command Center. Can’t wait to actually get into the overclocking and push this thing a bit. The built in Fan control is great, but only has two sysfan connections. More on this in later episodes…

The CPU fan is super cool, and very effective in the initial limited use. It is very large and has forced me to alter my plans a couple of times. Going water cooled next proj.

The RAM is super good and rad looking.

I normally would have gone Seagate on the HDs but NewEgg had a promotion I couldn’t pass up. I have since put a SSHD in HP Hack and it’s awesome. From now on only SSHD and SSD. Bruce has an empty M.2 slot, so will eventually get a SSD for the boot drive.

The 5.25 card reader/USB 3.0 is cool. I’d like to find a cool LCD temp/fan monitoring display. The mb has USB 3.0 and I only use the card reader occasionally and could get an external. More on this below…


Day 20
Phew, the exhausted but tenacious engineer in training musters his strength and another credit card, for he knows he does not have all the basics he needs to get started. His case is on the boat floating over the pond. It would reach his door soon. He must act.
LG 16X Blu-ray M-Disc CD DVD BDXL BD Burner Drive with FREE 1pk Mdisc DVD + Cyberlink 3D Playback Burning Software + Cables & Mounting Screws WH16NS40, 91.99.

2 of 3 Pin Sleeved Fan Cable extension 12", $4.10;
2 of Silverstone Tek Sleeved PWM Fan Splitter Cable (CPF01), $11.38;
3 of Silverstone Tek All Black Sleeved PWM Fan Power Extension Cable (CPF03), $6.99;
2 of Sunbeamtech PL-RS-PCI Rheosmart PCI Fan Controller, $11.97.

StarTech.com PCI Express to Mini PCI Express Card Adapter (PEX2MPEX), $33.99;
7260NGW Intel® Dual Band Wireless-AC 7260 802.11ac, Dual Band, 2x2 Wi-Fi + Bluetooth 4.0, $38.98;
Half to Full Height Mini PCI Express(PCI-E) Card Bracket Adapter, $4.29;
New Laptop Notebook Wifi Bluetooth Internal Antenna, $10.99;

Microsoft Windows 8.1 - Full Version, $101.79.​

*Notes*
Pretty Nice Player/Burner. Was hard to find!!?? Was shipped from China.

More fan management stuff. Trying to figure out how to manage all fans with only two sysfans on the MB. Stay tuned…

Yeah, yeah, I know. Wifi???? Had the slot open for the adapter. This is a cool approach as it is all internal and the antennae works awesome if installed correctly.

And my offering to MS, lest I be damned to their fiery pit…

Day 30
The days are passed toiling with sweat on the bench, creating and perfecting the mods on HP Hack. Waiting….
ModMyToys Premium Vented Black PCI Bracket with LED Rocker Switch - Red LED Switch,$12.94;
ModMyToys Premium Vented Black PCI Bracket with LED Rocker Switch - Blue LED, $4.99;

LED Motherboard Header Splitter,$4.95;

Intel Network 7260.HMWG.R Revised WiFi Wireless-AC 7260 H/T Dual Band 2x2 AC+Bluetooth HMC Free Mounting Screws Included, @32.50;
New A Pair of Laptop Notebook Wifi Bluetooth WWAN Broadband Internal Antenna, $9.99.​

*Notes*
These are super cool switches. Check the pics from previous posts. DO NOT pay for the wiring/sleeving. It is lame and does not even include a negative. You have to completely wire the switch correctly for the LED on the switch to work.

This splitter is wired in parallel and basically useless, depending on your application.

Dang, got the wrong wifi card and antennae. Got the right ones.

Days 45-65
Still patiently toiling away. The case is wallowing in customs at Miami/Dade. But the process has taken hold. More things are needed
1 x LOGISYS Computer CLK12BL2 12" DUAL COLD CATHODE KIT, 1 x LOGISYS Computer CLK12RD 12" Cold Cathode Kit Light $17.98;

KORAD KD3005D - Precision Variable Adjustable 30V, 5A DC Linear Power Supply Digital Regulated Lab Grade, $95.00

Aleratec SATA III 3 Cable 6gb, Transparent Blue, Straight to Angle with Clip, 20-Inches. 6-Pack Combo, $8.99; 5 Pack Monoprice 18-Inch SATA III 6.0 Gbps Cable with Locking Latch and 1 x 90-Degree Plug (108783), $8.55

Aerocool Streamliner 140mm LED Case Fan - UV Blue Frame UV Blue blades $7.18
Rosewill RFA-120-BL 120mm 4 Blue LED Case Fan, $8.28.
SilenX Efizio 120x25mm 15dBA 74CFM Blue LED Fan,$12.99;
Aerocool Streamliner 140mm LED Case Fan - UV Gray Frame UV White blades, $7.18;

Aerocool CoolPanel III Fan Control/Card Reader, $39.95

USB 3.0 20-Pin Internal Header Adapter Cable (Low Profile Connector) MDY-IHEC-USB3-LP, $14.99;​

*Notes*
I include the KORAD as it represents a very significant point in my physiological and existential mutation into a full fledged PinHead.

USB 3.0 adapter required for this mb and case. See future episodes…

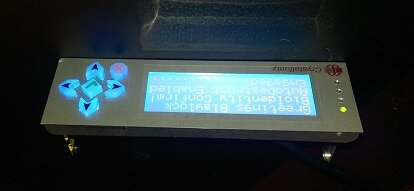
As indicated previously, I really wanted a cool LCD display for Fan and Temps, that could have some USB 3 or card reader. The CoolPanel is an antiquated piece of sod.It requires to wire everything through the panel. You do not need front panel control for Fans anymore. But would like to see current speeds/temps. Cant seem to locate this product. Any ideas anyone? I am considering taking on building one using an Arduino possibly. Could be a money maker! Anyone?

Yeah, more cables and fans.

Day 66
*Notes*
Incredibly awesome. Thanks OCF GPU forums for steering me in the right direction. Why wait until now for worthy graphics card?!?! Well that is a story for another time. Needless to say I got the new Witcher and Batman for free with the purchase and have been distracted gaming, uh er testing the card.

Day 67-present

So as we leave our hero today, he finds himself enlightened in mind and wallet. But all has been for a greater good and lofty purpose. He is surrounded by the spoils of his efforts and lusts after the tasks at hand. Drunk with all the knowledge he has amassed he tears into the pile….


Stay Tuned for the next episode.

“Micro ATX and Midi Tower Form Factors” or “How Did You Fit All That In There?” or “That’s What She Said”.

Don’t forget the fan contest.

Postscript
I know all this info will take you many hours to process. Please take your time and don’t be afraid to ask questions. I am taking a sabbatical to the desert for a walk-a-bout. Hopefully I will finally find my true spirit animal! Or at least its HEX representation. Back in a few weeks…

Hasta Entonces!!
 
Last edited:
Blaylock - the i5 is currently in Bruce and kicking ***.

That Aquacomputer Aquaero controller/LCD is definitely cool, but still like many others where you have to hook everything up to it and utilizes temp probes. What I want, and am pretty sure does not exist, is something that monitors/displays only, and gets all the fan/temp/power info from the system. So basically you would have a display (touch preferably) that the only control would be toggling between different display options/settings. The only connection to the unit would be a serial connection of some sort and power. Basically something like SpeedFan with an front panel display.

Basically the closest retail option I can dig up is this from the HTPC world:

Nmediapc Media Center Programmable LCD, 5.25in Internal Bay PRO-LCD-B

nMEDIAPC PRO-LCD Media Center Programmable LCD - OEM

Actually seems pretty cool and possibly functional, depending on how adaptable it is. It does not specify how its programmable. And the display is pretty weeny.

I have works with CrystalFontz displays and APIs before and ....

Holy Mother of the Cleetus cousins!!! CrystalFontz!!! why didnt I think of that before!!!!

Check this out!

https://www.crystalfontz.com/produc...2Y0cOGDBLZTnI_GF5YVnV0PnSb0nlYqwMMaAtOA8P8HAQ

I discover this mid post! I gotta go, back later...

Oh Blaylock - Is that total fans leftover? That is the number we are looking for.

Salud
 
So a quick update my fellow OCF zealots before I leave for my walk-a-bout...

Yes! CrystalFontz!

As I mentioned, I have worked with them before. I ended up with this one in a 5.25" bracket
https://www.crystalfontz.com/product/CFA735TMLKR

It seems that the kits only come with character displays. They have some really cool graphic displays as well. I am going to start with the character display and once I figure out the specific form factors will look into creating my own 5.25" bay bracket.

So, ok, this is going to be a proj in itself, and an ongoing one as well. Obviously this is not a plug and play product, but have no fear SwartHack is here!

Quick bit of info...
I have a significant programming background and am kinda chomping at the bit to dabble in this, specifically with a little C#. Creating/Running the menu interface is easy enough. you just have to decide the design. You can basically go n-th levels. The fun part will be setting up a little code to read all the info. There are also options were you could use the key pad to set/write things as well. The options are limitless. Crystal Fonz has cool open source examples and there are a ton of C# samples for reading system/hardware info. Even in the character displays there are cool sleep/visualizations modes you can run as well.

So, they disclaim on their site that orders are subject to a 90 day lead-up. I assume this is for big orders. I paid the 2 day shipping but have not seen any order processed verification. Keeping my fingers crossed.

So, if you are reading this and are interested in helping me come up with something meaningful, then I will be open to all suggestions and feedback. Obviously any code generated would be open source. Look for this upcoming yet unnamed proj where I will be officially soliciting ideas and feedback.

Until then all my fellow denizens of the seedy OC underworld, until then...
 
Enter The Dragon

Greetings all!
As you may infer, I have returned. And I find myself slightly disenchanted and melancholy for a number of reasons.

The first being that I think my spirit animal is the Thunderbird. It is considered a supernatural bird of power and strength, which I can’t argue with, but it at least follows me around as I can’t seem to go out into the wilderness without getting really rained on.

The second is the lack of interest in free swag. Seriously, if you win one of my contests I will actually send you the prize. So, based on the only entry from Blaylock, He wins! And was technically correct as far as I set out the rules. I actually have 12+1 fans left over, but that includes the two I replaced that came in the case. The 80mm I ended up using as an internal drive-bay fan. So, yeah 12 fans! Not sure how it happened, and the funny being I am still not happy with all the fans. So Blaylock, send me a PM with your info. I will send you the fan of your choice

So, ahhh, I can shake it off. Every creative mind on its journey to genius must overcome their doubts and inadequacies to achieve greatness.

So fear not proselytes, interlopers of all things technology. Break out your Thesaurus and dial up Wikipedia.

As for those who still tarry, be it either wayward search links or feigned interest, I will try not to disappoint with the delivery of my unique prose.

Also those that are literally challenged with normal words and can now only read Hex and Binary, this post is for you. “IT HAS LOTS OF PICTURES”, and I will actually spare you with too many of those wordy things.

The following is a pictorial of different phases of construction. If you have actually followed up till now, you may realize that this proj log started kinda mid project. So I had the System up and about 80%, but recently did a tear down for a couple reason, so I kinda embellish on the actual progress, but you get the idea.

So the basic guts...

IMAG0028.jpg IMAG0030.jpg

Note the wifi antennae. One reason I had to tear down. This setup requires the correct installation of the antennae, with the leads installed in the case ceiling and routed below the mb and away from sources of interference. e.g. PSU.

Wrap up the PSU, and a little other SwartHack style. Bruce did like Disco.

IMAG0032.jpg IMAG0033.jpg IMAG0035.jpg


Da Mobo! Da gCard!
IMAG0036.jpg IMAG0042.jpg

This is why you install adapter before installing mb. I tried to Elmer Fudd the adapter after I had installed the mb. Check out the pins. Another reason I had to tear down. Managed to fix them!! Ho Hack!!
IMAG0053.jpg IMAG0055.jpg IMAG0056.jpg

Had to ditch the modular bay to fit the gCard
IMG_0562.JPG


Putting stuff in. Fashioned a cool new gCard strap.
IMAG0058.jpg IMAG0060.jpg IMAG0062.jpg IMAG0063.jpg


The SwartHack system and one last component I had to engineer.
IMAG0066.jpg IMAG0078.jpg

More stuff going in. Note the mini PCIe adapter with the wireless card. Also putting in the SwartHack switch
IMAG0067.jpg IMAG0070.jpg

The chip that began it all! All Wired in.

IMAG0084.jpg IMAG0082.jpg

Back Panel with vented blank where mini PCIe adapter is.

IMAG0072.jpg

A little cleaned up in the back. It closes!

IMAG0086.jpg


LED controller boxes
IMAG0092.jpg

And Finally!!! You!!! The Reader! After all this, you can..

ENTER THE DRAGON

IMAG0119.jpg
IMAG0098.jpg
IMAG0101.jpg
IMAG0104.jpg
IMAG0108.jpg
IMAG0114_BURST002.jpg

If you are not one of our many peers, colleagues and brethren still using old MaBell and listening to their Ham radio for the latest Alien sighting and government conspiracy reports, then you can see Bruce in action (111 mb):

http://1drv.ms/1HEGEYg

Ah, so where to go from here? Well, those who hunger for more of my quick whit, clever cynicism and colloquial vernacular please don't fret. I will follow up with the Epliougue and what we have learned as soon as I can compose my welling emotions, collect my whirling astral essence and gather my thoughts. Until then I leave you all with one last thought. The possibilities are endless and scary in the wrong hands!!!!

IMAG0125.jpg IMAG0121.jpg

Cheers!
 

Attachments

  • IMAG0121.jpg
    IMAG0121.jpg
    28.9 KB · Views: 411
You're a man of many kind words Mr. Swarthack. I love the Crystal Chrystalfonz screen. It adds a really unique touch to this build. The flashing red and blue lights are over the top and would likely cause me to have a panic attack or an epileptic seizure. Lol however it is a creative touch that I haven't seen in a build before and for that you get an A+.

If I may offer a constructive bit of opinion, I would consider sleeving the PSU cables red and blue to match the build theme. Overall this is a really nice build with the flavor that only you can provide. A bit obscure at times but entertaining. I do have to admit there may have been a word or two that I had to glance over. Lol

Well done sir.

P.S. I'll PM you my addy. Seems the only way I can win anything is by default. Lmao
 
Winner Winner!!! Fans, Fans, Fans and Fans...

Post Disclaimer
In this post, there are a lot of those wordy things we use by combining different combinations of characters from a language’s alphabet, in this case English. If you are challenged by inferring understanding and meaning from these glyphs, I apologize.

Disclaimer for those for whom it is too late
496e207468697320706f73742c207468657265206172652061206c6f74206f662074686f736520776f726479207468696e67732077652075736520627920636f6d62696e696e6720646966666572656e7420636f6d62696e6174696f6e73206f6620636861726163746572732066726f6d2061206c616e6775616765e280997320616c7068616265742c20696e2074686973206361736520456e676c6973682e20496620796f7520617265206368616c6c656e67656420627920696e66657272696e6720756e6465727374616e64696e6720616e64206d65616e696e672066726f6d20746865736520676c797068732c20492061706f6c6f67697a652e20

So I find myself back with pen in hand. The Blood Oath and Civic Duty to OCF weigh heavily on me. I feel, NO, I KNOW!! it is my community obligation to provide this bonus chapter to explain the whole cluster of Fans. I was saving it for the “What We Learned and Where We Go from Here” episode, but it in fact not only necessitates explanation here, but deserves it.

****Quick side-note/reply****************
Ding Ding Ding Ding!!!

Winner Winner Voltage Spinner!

Blaylock-Fan of your choice is on the way! And don’t forget the bonus SATA III cable from the white elephant box.

Yes, please! Always open and want feedback, prefer the constructive kind. But if you want to tear me down, bring it on ;) Will be soliciting more of this in “Were we go…”

Thank you for bringing up the thing I am most insecure about, the PSU cables. Might as well point out that big zit on my forehead too. Will bring this up in the “Were we go…” chapter

And YES, my original intent was aesthetics and visual effects. And it is a little much, as per design, hence the rocker switch and SwartHack system. Just flip the rocker switch to enable/disable effects.

And the CyrstalFontz, yes!!! I wish I could say it was an integrated part of the project at this point, but it represents an entire new thread I believe. Actually an entire world of possibilities. I don’t think it is beyond our capabilities to actually realize a true self-destruct function. The Rodeo Cowboy button! More of my musing on this in “Were we go…”

***end side-note/reply*****

....back to the current intent of my quill…

So to keep it brief, and not rehash already trodden ground. It started with HP Hack. I wanted a LED case fan. I bought the wrong size, the 80mm. Which is now an internal drive bay fan. Pretty cool application I thought.

So, I got the right one, a nice 90mm Zalman. I actually ended up tossing the stock HP case fan I took out.

The sequence of buying events in the parts episode shows I was buying fans before I actually had the case. No biggie, fans are inexpensive for the most part, give me a few options. I knew the case specs. 2 140mm and 2 120mm.

So I get the case, take out the stock fans 1 140mm (front in) and 1 120mm (back out). AeroCool sharks, which are awesome fans, just no LEDs. I put in a 140mm multi-color LED in front and a 120mm clear white case/blade blue LED Zalman in back. No probs. In top (in), I mussed about a bit, and ended up with 120mm Rosewill clear blue case/blades. Which is still in there but may need to go. Please wait patiently for the “What We Learned and Where We Go From Here” chapter for more on this and Fan control.

Here is where I get clustered.

I finally get the case. My plan for the panel fan (out) was a 140 mm clear case/blade blue LED…. But

{sung like the sesame street song}
Which one of these things is not like the other???
{back to clever prose}

If you look at the case from the link in the parts episode and Bruce’s case. What is the difference?

Yes! The fan vents on the panel are reversed. Why?

Well, in a blind zeal of aesthetics, I manage to ignore the simple physics and geometry I am dealing with. The Zalman CPU fan is too tall and the panel will not fit, not even close. Arggg..

So in my dismay, I devise the hack. We don’t want the fan over the CPU anyway, I can easily reverse the plexi and do so. I am very pleased. The bottom/top plexi mount holes are wonderfully symmetric and allow me to do this easily, the side holes not so much. If you look carefully you can see I am missing the mount pins on the sides. Need to fix this

Home free, right?

Well the 140mm does not work here either as it buggers up on the PSU now! Arggg…

I compromise as you can mount any size fan on the panel. I realize 120mm will clear the PSU.

Couple rejects fans ensue…
“I wanted clear cases and blades damnit! These are smoke.”,
“ You call this an LED?!?!”,
“This cable is a POS, you call this sleeving!?”
and so on….

I finally got another 120mm clear case/blades blue LED. Mounted fine, looked weeny and lame.

I put on a 120mm grill on the outside for effect, looked better, still weeny.

I tried a couple of the round frame Corsair 120mm, cool fans, looked better, but frames were black dammit again! and the round footprint didn't work.

I whine to myself, “I want a cool 140mm clear, low profile fan that will fit, waa waa”

Low profile, now there is a thought. Hmm....

an lo and behold believers, enter the Thermaltake Luna 140mm x 15mm Slim Led blue case fan. (This is what is currently pictured in Bruce). I was pleased but not 100%. Not a huge fan of the fan’s (get it) blue corner tabs, even though they match. So I ordered the Luna 140mm Slim Led White, which had the grey corners. Although the white LED was cool with the holographic case linings, The grey corner tabs looked very out of place, so I went with the blue and that is where we are at right now. Still looking for a clear case/blade lowpro 140mm fan. I don’t even care if it’s LED or not…

Phew! OK, got that out there

Stay tuned for the upcoming epic epilogue of the project, which does not actually mark an end, but only a new beginning…

Hasta Entonces…
 
Epilogue – Where do we go from here!?!?

Greatings all my OCF brethren!

And also greetings to any cyber wanderer who finds themselves unfortunate enough to somehow have landed here.

“I was searching for a Bruce Lee T-Shirt damnit! Not a dumb computer some lame-o hack calls Bruce Lee!!??”

I credit about 95% of my views to these wayward interlopers!

So, on with the business at hand as I am obliged by my OCF civic duty to finalize this project, kinda…

My first order of business is a TODO list.

Final Artistic Touches

Case Decal
I really wanted to go out with a bang and include an updated picture of this and will when I eventually get the printing figured out.
I wanted to put a really cool decal of a blue flaming dragon Chinese character (Bruce was known as “The Dragon”).

First challenge was coming up with a design. I looked around for graphic design/printing services and everyone wants significant $ to do any kind of document creation.
SO I went the Photoshop route and here is what I came up with after a number of hours online checking out Photoshop tutorials.
Not sure why it came in so big. Its supposed to be a 5x7. I want to place it on the black surface next to the panel window.

DragonFire.jpg

I am a total hack at photoshop and never been inclined towards graphics design. If anyone has any input or advice on my photoshop skills, please do tell.

My plan is to have it printed as a clear decal, so basically the black background would be clear. I also plan to have it die cut.
Should be cool, but I am not 100% happy with this design. That outer glow is messing with me. Could take hours of playing with renders, gradients and filters in Photoshop.

PSU Cables
As was so rudely pointed out by Blaylock, my psu cables have something to be desired.

I thought I was getting the shizzle when I got the Silverstone PSU with all the fancy wrapped cables.
But it ends up with most all that fancy sleeving hidden in the back while we still have the ugly wires visible where it really counts.

So any suggestions here besides creating my own PSU cables?

I obviously have the skills, but interested in any options. If I am going to create my own cables, where do I start?! I haven’t looked but assume there must be some kits out there.

Fan Control
After all the fans I went through, I still have some Fan issues. It basically is because I am splitting two mb sysfan sockets to run 4 fans.
YES, YES I KNOW, there is a ton of info on this, but the Silverstone splitters I got were supposed to allow this. I got the 4pin splitters and am using 3 pin fans. I did notice mention somewhere I needed to use 3 pin splitters and am going to try that. I am not sure if it is a limitation on the MSI control center as it only sees two fans, or may just be designed to only see two fans. I have not tried SpeedFan yet as I would like to avoid it based on number 3. One big symptom I have is one fan does not start by itself!? If I am working and the case is open I just nudge it and it goes. If the case is closed I have to blow on it to get it going!? Not sure if it’s the fan or the splitter and a voltage problem. I have not yet tried a different fan.

CrystalFonts
As you may have noticed I have become interested in these displays to provide a really cool custom look and even cooler functionality. The issue here being programing. There are a number of off the shelf software config tools by CrystalFonts that provided a nice level of display functionality. They also illustrate the endless options for display info. What I am looking for is a more custom/menu system for not only display but execution.

I plan to start a new thread for this topic soon. My intent was to post here in the alternative modding. Maybe as another Project or maybe just open up a topic to see if there is interest. I did do my due diligence and searched for any existing/previous threads on CrystalFontz. Although there are a number of them, none are very current and don’t specifically address the implementation of them.

If you are interested in participating in the design and/or programing of a cool CrystalFonts integration, then please watch for the upcoming thread where I will be officially soliciting interest.

And Finally and Most Importantly!!!!!!!!!!!!

During this process I have learned much and come far.
My mental conscience has far evolved past recognition and my spiritual essence has come one step closer to complete oneness with all things.

I now know the pin layouts of many different chips, sockets, adapters, etc. and what they actually mean. This knowledge tastes good...

I have soldered, crimped, shrunk, burned and exploded and have the scars to show for it...

But what have I really accomplished?????

Basically I have a really fast computer with a bunch of flashy lights and stuff. NEAT-O!!!!

It really comes down to, “What am I going to do with it besides play all the cool games I got when I bought my gCard.”
I am not a gamer and did not get into this project to build a gaming machine. Although do enjoy it for short periods of time.
Historically I am a software guy and my production machine reflects that: web server, databases, RAID, software development environments, etc.

I originally bought into the project thinking I would just sell it when done. I don’t think I can do that, at least not yet.

So, I have obviously noticed that this place is more than just about builds, components and flashy things.

I would be interested in participating in some of the other shadowy and cryptic goings-on that others are involved in.

Also activities besides gaming that will utilize my GPU power. Put my GHz to use so to speak…..

Any suggestions……?

Also, I very much appreciate any feedback, be it positive or negative. If there is a question please ask and I will do my best to address it without actually answering it ;)

Once I equip Bruce with a customized CrystalFontz, I will update the post with a picture

And so we end here! For now……

Hasta la Vuelta

IMAG0114_BURST002.jpg
 
Back