• Welcome to Overclockers Forums! Join us to reply in threads, receive reduced ads, and to customize your site experience!

Codename XmasList project

Overclockers is supported by our readers. When you click a link to make a purchase, we may earn a commission. Learn More.
Hacking The Details...

So this is it, right? I am already to go!
I got the G7/6700k on TheBianch.
I got all the parts and fittings.
EVERYTHING!

But wait!
As I look pondering...visualizing it all, I have one glaring problem I can't live with.
And its the biggest run in both loops...
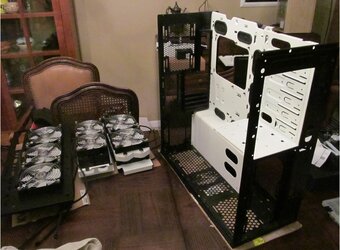
So here is the story of what is hopefully the last major Hack on this case...

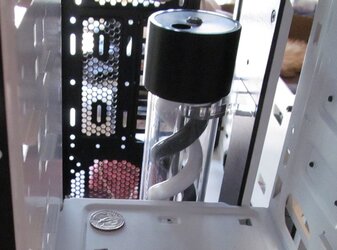
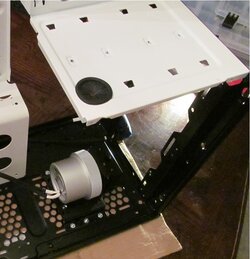
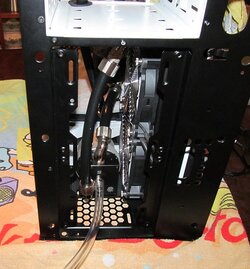
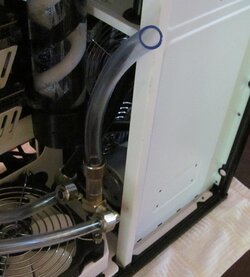
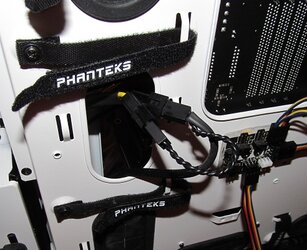
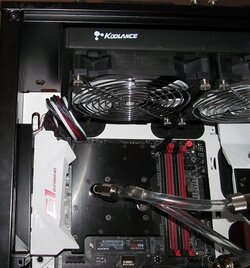
Basically, I need a port hole for the run. I could run it over the outside of the edge, but...
NOT! You have to Hack the Details!!
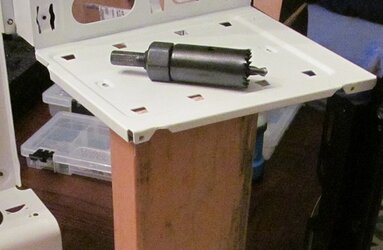
So the quarter is the intended hole.

IMG_1697.JPG

IMG_1703.JPG

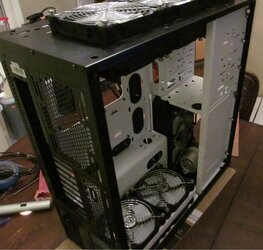
So I love this case more and more every day!
I was WTF, how do I get in there to even do this!?
Well, as I mentioned mefore, very few rivets in this case
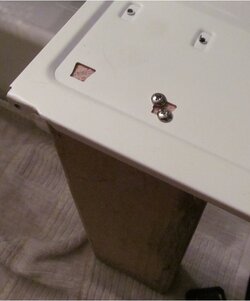
See all the screws?


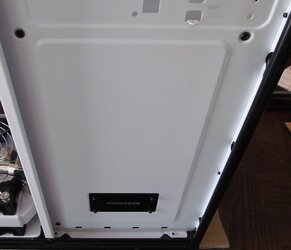
IMG_1707.JPG

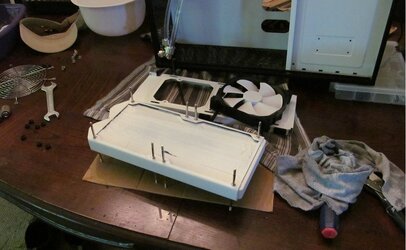
And 25 screws later...
IMG_1712.JPG

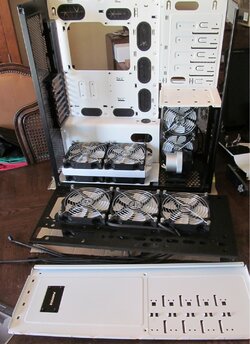
The whole ding-dang-a-lang top comes off without having to remove the rads/fans!!
Sweet!!

IMG_1719.JPG

So now to work.
So OK, I know that bit is not designed to cut metal.
I don't think it will cut anything anymore:D
I will leave out where I had to relocate downstairs
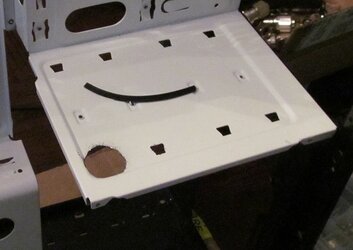
and really hack out this hole with secret tools and methods.
read: "needle nose pliers, dikes, rat tail file, cursing and finally some dremel action"

IMG_1726.JPG
IMG_1729.JPG

I was gonna use this u-channel stuff that I got sometime ago that has the preasure activated adhesive.
Well for something this small, it does not work!!!
It is pretty stiff, and when you start to work it and bend it, it activates from the generated heat and is impossible to work with.
So made a bigger hole and swapped over one of the factory rubber port grommet thingys
Turned out ok. I other port is not visible and will be fine for wires/etc.

IMG_1732.JPG

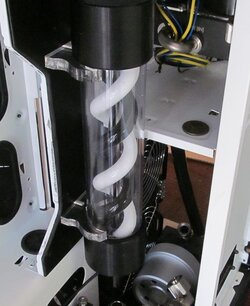
Was able to finally mount the second pump appropriately, kinda...
Its not a factory mount point for the pump bracket.
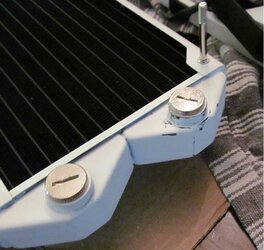
Its actually on rad mounts for an optional rad location.
The two default factory pump bracket locations were eliminated due to set-up.
So, again had to improvise...

IMG_1735.JPG

And 25 screws later....
IMG_1739.JPG

So, that was kinda a process and took some time, but in the end I think worth it.
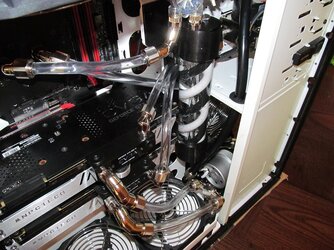
Now I can FINALLY make that run, and plumb this rig.

Hasta la Proxima
 
Very nicely done Swart. Keep this up and you'll lose your Hack status. We'll have to start calling you SwartModder. Gotta love Phanteks cases. It sure does make it easy to work with when you don't need to drill out rivets.
 
Sneak Peak

So with the declaration of FatherTime, there are a few mods that must take place.

Sneak peak of front panel fan cover I am working on:
panelcover1.JPG
panelcover2.JPG


Then gonna etch this on the front.

hourglass.jpg

The effect in aluminum should be something similar to:
panel2.jpg

Stay tuned for more sneak peaks at FatherTime theme mods.
The Gigabyte G7, et. al. remain on TheBiatch for now, and probably will until the end of the current NN. 3/5.

Prost!
 
Time Marches On...

Well, he we are in June, last update was over 4 months ago. Goodness!
As some may know, part of this is not due to lack of interest,
and we have been putting the hardware to the test on TheBianch.

And NN9 is going to be the last one for me, so I figured I keep warming up to the new hardware.

IMG_1682.JPG

IMG_1676.JPG

IMG_1693.JPG

Here are some, if not most of the subs I have made for NN8 & 9.
Obviously not breaking any records, or scoring many points, but I am pleasantly delighted. Especially since this gear is able to anchor the NNs 8 &9 without much effort.
And where I did put in the time you can see paid dividends.
And just getting to know the new hardware/platform/etc. I think will benefit much once I go to working with it in a case.
So in all its splendor...

40642f007dd779c1ad50b95fbfc17320f685366f.png
d01dc1f5e54b69b49e9d8f03e1a017a1fb0097c5.png


Cheers & Jeers!!!

EDIT: Stay tuned...
 
Yippe Yee Dilly-o

So here we go! I said to stay tuned, and I meant it, dangnabit!
I swore to myself that once the Gigibyte Z170X came off The Bianch, I was not going to farck around!

Truth be told I was pretty concerned.
Getting back to work on the Father Time proj was a little humbling and discouraging.
I started around Noon today with the goal of filling/bleeding the first loop (monoblock).
I thought I was pretty much ready to go, just crank her on feed her the fluid and bing-bang-boom.
Well here I am at almost midnight posting this update. I can't say I've been at it all day.
I walked away numerous times to other things out of frustration.
As I worked through the process, I constantly second guessed every decision I made previously...
and just about everything that could go wrong/happen did. Well, not everything!!!

Here is the run down.
I am not going to go through every emotional breakdown I had during the day.

IMG_1996.JPG

So here I am ready to go,
got those components pre-installed with fittings/tubing accordingly,
installed them in the case and went through all the fittings 3 times.

IMG_2000.JPG

IMG_2008.JPG


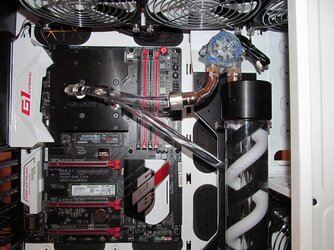
Then, Shazam! Don't that look purtie !?
Mobo looks mighty fine in that case...

IMG_2011.JPG

Hook it up Boss!!!
I got enough juice here to blow one of Blaylock's breakers.
I am kinda worried about that in this old shack I live in.
Thinking I need to try and isolate it on one circuit??!!!

IMG_2021.JPG

IMG_2015.JPG

Priming the pump...
IMG_2027.JPG
Most my day sucked because I didn't know I had to do this!!!
and jump the PWM on this model, Swiftech MCP655-PWM.
It does not run 100% by default.
I thought my shiat was jacked or something!!!??
Thought that everyone was right...
That I had too much stuff and elbows and stuff.
I hung my head...
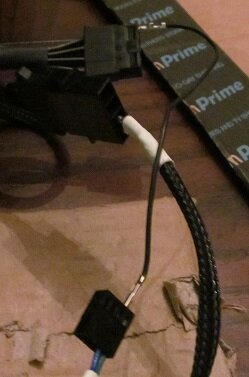
Then got on the hack-n-go, looked up the manual for this rig,

which led me to a this tidy piece of required hackineering

IMG_2038.JPG

After that it was all go. 100% on this little fella is superb.
You can't even see the flow-meter spinning.
It is cranking though here. Not a drop yet. 2 hours.
It will look super cool with the appropriate lighting effects.
In the end my despair was resolved with success.
I hope to get as good if not better temps/stability as I did on The Bianch.

IMG_2031.JPG

So what is different from this last picture to the originals. Which thing is not like the other. Anyone?
Actually not sure you can actually tell from these pics, but...
So yeah, I had to flip the res, after I had filled it. It occurred to me to try and drain it.
I actually meant to mount it the other way in the first place due to the available fill port there.
but I figured I could just slip my finger in there to cover the hole real quick when I detached the fitting.
Well, I will attest to the good flow design of this res. It emptied through that 1/4" hole before I had a chance to even move the fitting aside!
Like Shiat through a goose. (Lochekey knows what that means:D)
Thankfully I was well prepared for such gumby events.


So stayed tune for:

Get Those gCards In!
...
Metallurgy 501

or
Where is Grandma?

Tots Zien!!!
 
Looking good Swart. Metallurgy 501? hmmm. OK I'm curious.

P.S. I have 20A breakers in my office area so I can theoretically pull 2400W with each breaker. You'll need to build a second rig and run them near full load to trip them. :)
 
Blaylock said:
You'll need to build a second rig and run them near full load to trip them.
20 AMPs! Yeah, to blow one of your breakers. My breaker box is from the 1970's.
It actually has a little crank handle you have to turn.
I'll have to put my Sparky hat on.
Its one of those places where you have new and old wiring all hacked together, kinda scary...
I guess we'll see if I can actually gobble up most that juice and put it to the test.
Or just burn the place down. I better update my home inventory video...

Salud
 
Meet GrannyHack!!! & SwartHack Give-away Contest

Alright Everyone, grab your scrapbooks, hodge-podge, knitting needles and oxycotin.
Its Arts and Cratfs time with my Granny Hack.
Say hello to everyone Granny.

"Hello all you OCF Hack Richards!", har cough har...

Granny!!!!
Please forgive her, although her dementia sometimes makes her adorable, she can be a handful.
She used to work at the NSA as a cryptographer in the 50's, but because of the mind control drug induced dementia, doesn't remember anything.
But she can knit one hell of an itchy sweater.

Grandma, go sit over there and macramé something...
-----------------------------------

So, I have been busy enough to cover all three tease topics from my previous post. We now all know where Grandma is…
This is going to be a long post! Lots of pics as usual, but I feel inclined to share some, only some, of the emotional process.
After sooo much time and thought, to accomplish so much in such short period of time.
This entire post is a lesson in foresight and/or lack thereof.
Also, because I am shameless and have a low self esteem and need the attention...

In order to promote this post, I am bringing back the:

SwartHack Give-away Contest

I tried in the past, but Blaylock would have taken everything. Ask him, no joke here.
I will send prizes postage paid via snail-mail. Maybe I have enough traction now to attract more guessers.
In this post there will be three questions/clues posed to the reader.
Be the first to answer all three questions and win the grand prize!

part4 (19).JPG

Other prizes awarded for correct answers and bonus questions.
Including "things" from the “Ditty Box” for total losers.

part4 (18).JPG part4 (17).JPG

Winners announced next week.
Only one post response per person please.
Please edit responses to change or add guesses.
Good luck!

-----------------------------------------------------------------------------
And GrannyHack actually brings us into part 1 of this post.
This illustrates one instance where I had enough foresight to perform this task before mounting up the second loop reservoir and making it inextricably un-extractable.
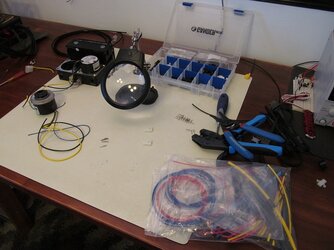
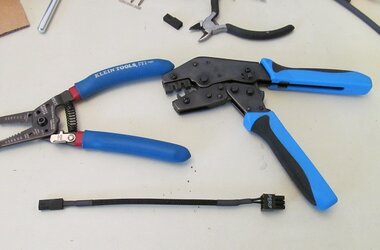
So its craft time. Actually grab your crimpers, plugs and pins…


part4 (1).JPG

Some may already know of my distaste for molex 4-pin plugs and re-working to eliminate them from all my builds when only a two-pin connection is required.
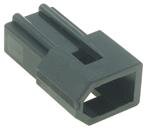
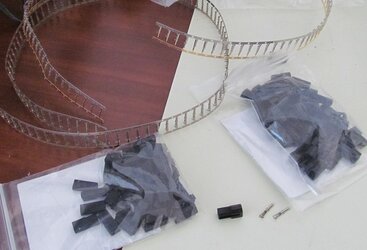
In lieu of my usually preferred plugs, I opted for these Molex Jr rigs I found some time ago. What is SwartHack’s “usually preferred” two wire plug?

MOLEX-03-06-1023.jpg

But I haven’t used them on anything really cause they are white.
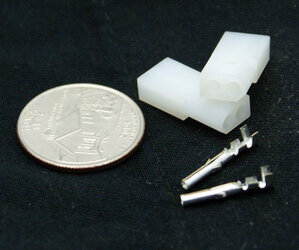
I was in a quandary, as I obviously can’t use white, and I need to use these plugs to accommodate the large gauge of these pump wires, 18 awg.
These are great because they will work from 18-24. The other ones can’t take the 18 awg. More like 22-26 and are more suited to other applications, e.g. lighting,etc.

Viola, I had looked before, but here it is:

housing.jpg

If you are interested in using these sometime:
http://www.mouser.com/Search/ProductDetail.aspx?R=03-06-7023
http://www.mouser.com/Search/ProductDetail.aspx?R=03-06-6023
Get the 02-06-6101 and 02-06-5101 pins.

This set-up right now is temporary, with the white plugs, to get the loops charged/bled.

part4 (2).JPG

part4 (3).JPG

part4 (4).JPG

I ordered the black ones for when we put it all together.
I still have not decided on sticking with these pretty decent all black factory PSU cables, or go with something else..

Metallurgy 501
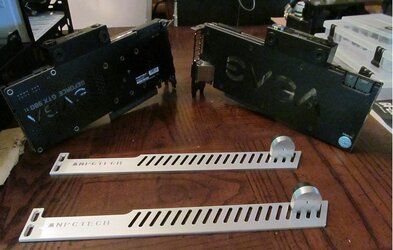
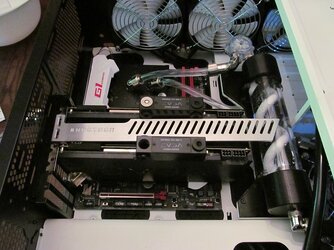
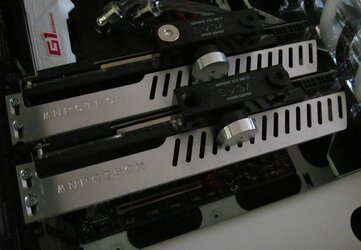
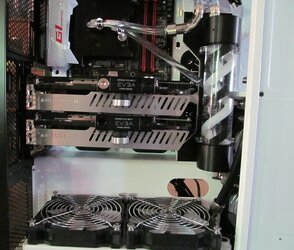
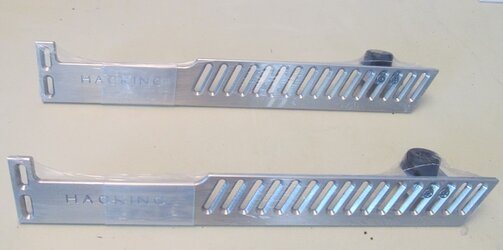
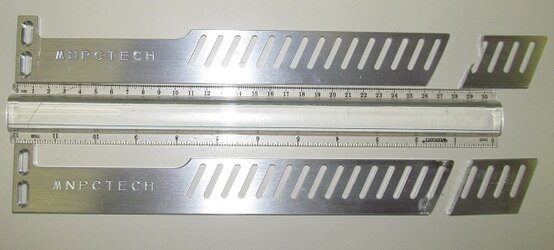
So I have been looking for gCard braces for sometime. I’ve known about these ones from mnpctech.com, but kinda spendy.
But the acrylic/plastic ones I have found didn’t suit my needs. I wanted METAL. SO I ended up getting these to go with those.

part4 (26).JPG

Har funny har, so they were too long.

part4 (27).JPG

But I kinda figured they would be as I had to mod so much to get that helix res and gCards to fit.
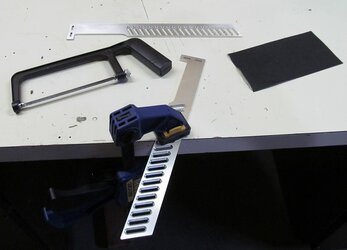
To the basement!!! and lets fire up the acetylene torch.

part4 (28).JPG

part4 (29).JPG

I kinda mussed up the brushed finish but that can easily be fixed.
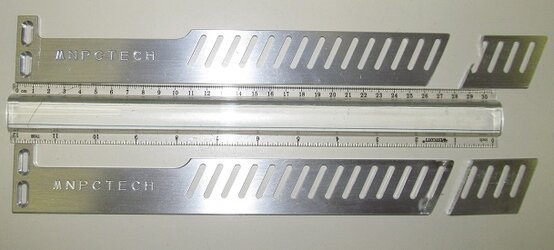
Then I got confused because the support pad grooves were on the wrong side?!?
The pad is supposed to mount under the bracket, not on top?!
So I shoot MNPCTECH an email asking why the grooves are on the wrong side. Well, Bill Owen of MNPCTECH, who I have done some business with before responded that I had ordered the non-referenced brackets and should have ordered the referenced ones! Dooohhh!

part4 (5).JPG

part4 (6).JPG

Well in Hack fashion this put me back in touch with Bill, great guy!, who doesn’t do one-off jobs anymore. I guess store business is good.
I ordered the correct brackets and he agreed to customize them for me, including lettering. What are SwartHacks new GPU brackets going to say (they both will say the same thing and can’t contain more characters then the current lettering)? AND, What else has MNPCTECH previously done for him? (yes, two parter)

The following is a pictorial of the previous few days, with some lessons learned illustrated and commented on.

Know when to walk away! What is wrong with this picture?

part4 (8).JPG

Yeah, I was trimming the top tube, but clipped the bottom one.
Now way too short. It was late and went to bed.


All hooked up and ready to fill. Primed bottom res and filled res up.
If you can see in this pic how high the water naturally rises. Basically to the bottom level of the res.

part4 (9).JPG

This is a good thing and a bad thing.

part4 (12).JPG

View attachment 180264

I am ready to fire up the pumps, block and roll!!!!!

part4 (11).JPG

part4 (15).JPG

part4 (16).JPG


BUT...
!!!WHAT HAPPENED!!!


Uh, yeah er, hardy har.
So flushing fluid all over the place. Total mess. Took me awhile to realize one major factor.
I had never gone back over the bottom rad install. It had been awhile and obviously I previously didn’t intend to leave it, as the bottom res IN fitting was not tightened, and I didn’t check. Double Dooh.
AND the tape from the painting was still on. I had left it on to protect the fins. Triple Doooohhhh.

And I totally hacked this trying to get this fitting off.

part4 (21).JPG

Only after did I realize I should have just taken the fans off to get at it. Too many Dooohhs…

Which I did in reverse to get everything back together. I did touch up the rad before reinstall.
But freaking smudged paint on the dang fan housing. I left it.

part4 (23).JPG


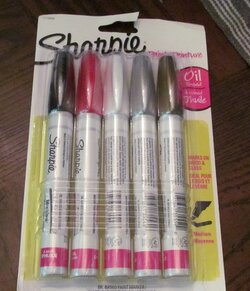
These special sharpies are gonna come in handy, are coming in handy.

part4 (22).JPG

They don’t gap-fill very well, the paint is super thin. I used a hot gun and like three layers to hide the scratches, freaking pain.

FINALLY – got it all back together and refilled similar to before. Thinking the pump power should just push that water right up into the top rad. Well, it didn’t. Pumps just whined away.
I had designed this loop so it took full advantage of gravity. By placing the pump just above midpoint. it doesn't need much to pump up too the top rad.
Here gravity and Potential Energy take hold and drops the water all the way to the bottom rad in the fat-boy black tubing (13/16 id/od).
The increase in head at the split point ensures no cavitation or recirc on the gpu loop.
The power of the pump and the extra push suck it all back into the res for another trip.

Well all and good when its running, but the displacement of water below to air on top made it impossible for the pump to move the water.
It actually did just sit there and recirc through the gpus cards. Just like all the nay-sayers and non-believers said it would.

In retrospect, a top rad with a fill port would have been nice.
Well, per the usual process, I tilted every direction, lightly bonking it when setting it down. Back and forth, etc. Nothing!
The only direction I really couldn’t move it was upside down, which is what I perceived it needed.
So I just picked it up over my head and shook it around.
Once I put it down, there was an enormous rushing sound and I couldn’t keep feeding fluid fast enough.

This pic shows the remaining air after about 3 res refills.

part4 (25).JPG

part4 (24).JPG

This is actually running/flowing nicely. I dont have a visible flow meter on this loop.
I do have a temp/flow sensor that I have on TheBianch and am trying to figure it out.
It will go right before the split to the gCards

Topped it off, turned the pumps down and ran it for about 3 hours. I had 5 700ml bottles of the good stuff from Koolance.
I bought them over 6 months ago (wishful thinking). In time I will start making my own, especially when I open the loops up to introduce external chilling.
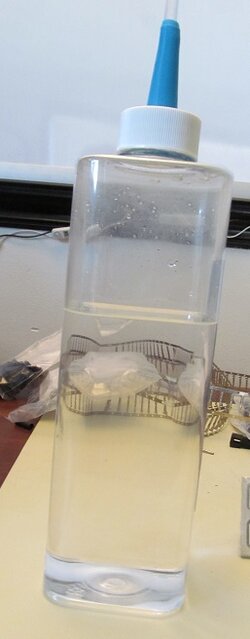
How much coolant does SwartHack have left over (it is less than one bottle) in mL. Closest wins.
If Blaylock is the only guesser or no-one gets them all right, well "You'll get nothing and LIKE it"

Phew, that's it. Next, need to get everything powered up and start dialing in the PWM hub and some initial cabling.
This is a huge step and massive achievement for me personally. Hopefully it benches well.
But there is a ton of work left!!!

Thanks to everyone who helped me get to this point!! I could never have done it without Overclockers.com and OCF.

Cheers

066 111 110 117 115 032 081 117 101 115 116 105 111 110 013 010
57 68 61 74 20 6d 6f 76 69 65 20 69 73 20 74 68 61 74 20 6c 69 6e 65 20 66 72 6f 6d 3f 20
01010111 01101000 01111001 00100000 01101001 01110011 00100000 01110100 01101000 01101001 01110011 00100000 01110000 01100101 01110010 01110100 01101001 01101110 01100101 01101110 01110100 00111111 00001101 00001010
-.... .---- ----- ..--- --··-- .... - ----. .---- . -. ..- .--- -.-- .- -.. --- -
 
Looking great as usual Mr. Hack. I'll refrain from dropping guesses just yet. I have it 2/3's figured out but will allow the others an opportunity this time around.
 
Lets see if there are anymore guessers?? Initial interest seems to have waned.

BTW-got the black molex plugs. I love the USPS and wished more people used them effectively.
Priority mail $8. Ordered last Thursday. The closest UPS/FEDX was ~16 for ground.
You can buy the plugs individually, but minimum order of 100 on the pins?!?

IMG_2187.JPG

And don't sleep on the Bonus Question!
And the super secret super grand prize!!!

Salud
 
Slightly disappointing nobody besides Blaylock wanted to play along. Sorry Blaylock:-/
309338509-smails.jpg

Answers:

Part 1: JST connectors
http://www.overclockers.com/forums/...d-(Prologue)?p=7821420&viewfull=1#post7821420

Part II
IMG_2195.JPG
http://www.overclockers.com/forums/...List-project?p=7903084&viewfull=1#post7903084

Part III
Dunno, would have had to measure it out.
IMG_2192.JPG

Bonus Question - ascii
What movie is that line from? - hex
Why is this pertinent? - binary
todayjune19th,2016 - reverse morse-code

Caddy Shack. Final round of 116th U.S. Open

There was some cool shiat in my "Ditty Box" and I was going to announce the Bonus prize,
one of these. I'd have even thrown in the cut piece...
part4 (29).JPG

oh well, I'll stick to just the facts and nothing but the process from now on.

Stay tuned for:

Can't think of anything clever to say...
 
Scrambled up in knots...

well, pre-sleeved connectors anyway.
And I am scrambling to get Father Time wired up and running to throw in the ring for the cup.

Speaking of which, I think my letter/invitation to all-expense paid trip to the Annual gig got lost in the mail or something.
I was sure ED, ATM or some Senior was goona comp me, not sure what happened to it.
I thought appearances by the most recent top 20 world-wide novices, and top 200 Enthusiasts was included with this gig?
I guess I'll just have to do better.

So Scrambling, a few quick updates and a pending unanswered question.

So, per the unanswered question, please
see...
http://www.overclockers.com/forums/...p-Dual-980ti-Hydro-Copper-8x6-pin-connections

And yeah, I am scrambling to get it wired, but decided to make custom cables for this rig.
I knew if I just plugged it in all ugly and stuff It would take forever before I re-did it.

I am not doing the front-panel or any lighting/effects right now.
I am concentrating on the primary required hookups. Plus getting all the danged fans wired.

I ran out of the splitter I was cannibalizing to hack to fit, but got the top rads (the hardest) done and the initial wiring to the PWM hub.
I am not going to worry about sleeving and tiding right now. All those fans cables will disapear in one nice tidy sleeve.
For now just running/cutting the routes I know I want to take.

Here are a few pics

IMG_2197.JPG
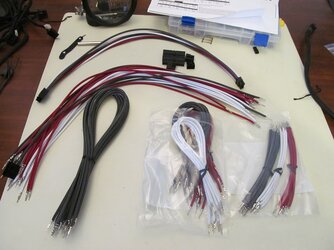
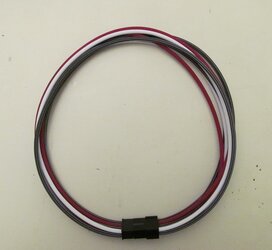
The pre-sleeved wires.
Few buyers notes here. The lengths vary by +/- 3mm.
And they come pre-wired for extensions, not replacements.(A very important fact I ignored)
So not sure exactly what I am going to do, but in the end I will need some combs or something to address the length issue.
IMG_2185.JPG

PPC said they would take them back, but still not sure...

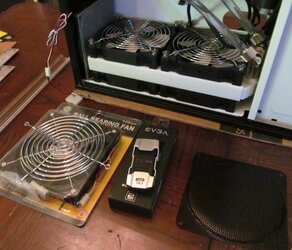
Got this misc stuff. Note the dry fit fan in the background with the mesh grill.
Thinking about the back mesh for the outside.
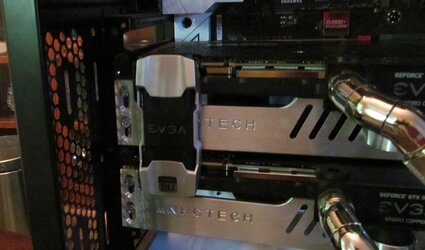
And chill little SLI bridge. I guess it lights up too!!!
IMG_2188.JPG

IMG_2192.JPG

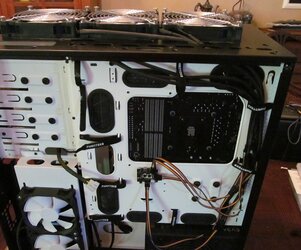
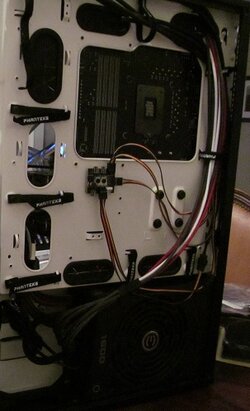
Here is the backside so far. Note PWM hub and top rad-fans routing.
Everything will get sleeved/shrinked/cleaned/tidied in awhile.
I just want to hear what this baby sounds like when all 18 or so fans fire up!!!

IMG_2193.JPG

So somebody please field my question in GPU forum.
I kinda need to know before I start making PCI-E cables....

Eskerrik Asko
 
Hey Swart,

I'm surprised you see seeing that much variance in your wires. You may want to try and group like sized wires together so that your cables come out more even.

You mentioned cable combs to help keep things organized, have you considered stitching the wires with thread instead. I kinda like the look of it personally.

You should write a letter to the manufacturer about there quality control, when they make the statement "No heatshrink ensures a clean look, and each and every wire is precision cut to the same exact length for optimal results", I would expect them to be spot on.
 
Yes it seems I have missed quite a bit here!
I need to mosy on into the project logs section more often.

Sooooo yeah, making your own GPU wires - it would look much superior to the piggyback style cables that come standard and now that I see what case you have, well, space to hide wires is not an issue :thup: Please sleeve up some custom cables then! They would really look good and I plan on sleeving my PSU cables one day as well.

Oh and holy pictures batman! My interwebz nearly gave out loading this page LOL :rofl: AWESOME! :thup:
Alright kids, gather 'round as we watch Mr.Hack sleeve up cables. Hopefully the doesn't cut himself crimping the ends eh?
 
Silver_Pharaoh said:
My interwebz nearly gave out loading this page...
Hardy har, did you have to crank the handle?

Speaking of proj logs, you ever catch the finale of the White Elephant build.
http://www.overclockers.com/forums/...hant-Project?p=7916670&viewfull=1#post7916670
(I need to post sub results in that thread and still plan on stretching its legs at least with subs for all pertinent Benches eventually...)

Its a long one, but you where there in the begining, before story time, and Blaylock's "What's in the Box?", hardy har, that still cracks me up...
and if you, like many, did not understand or recognize the intent or nature of my satirical attempts at portraying classic anecdotes..
Then you won't understand the the sudden shift in story line and its subtle ironies.
Some reason, I feel you may transcend technical manual reading.
My talents are lost on most this audience, hah har hah har:cool:
Just skip to the pictures and don't miss the video. Listen with sound. If your interwebz can handle it...

Lochekey said:
I'm surprised you see seeing that much variance in your wires. You may want to try and group like sized wires together so that your cables come out more even.
You mentioned cable combs to help keep things organized, have you considered stitching the wires with thread instead. I kinda like the look of it personally.
You should write a letter to the manufacturer about there quality control, when they make the statement "No heatshrink ensures a clean look, and each and every wire is precision cut to the same exact length for optimal results", I would expect them to be spot on.

No **** man! The variance is mostly between the different colors!!! FYI: here is my message and PPC's response.
Still waiting on those pins and gonna try to re-crimp, but not too hopeful...

I said said:
So, hey guys. I am a little bummed. After making the big jump to making my own custom cables, I am a little disappointed in the quality/consistency of the pre-sleeved lengths. It seems there is a variance, especially between colors. I may be being picky, but it ends up in sloppy looking cables., Especially since I am not making extensions. My original intent was to make full-length replacements.... blah blah blah a bunch of other stuff.
then I said said:
....either I send back the lot and go for the real-deal self made sleeved.... but it really was these pre-sleeved/wired rigs that tipped the scales for my decision. Sooooo much time saved. I don't understand, as these rigs are obviously machine made/automated. But if you have +- 2-3 mm either way, it really messes with things.... blah blah

Then they said said:
We do apologize as these cables are mass produced by the manufacture. The sizes can be slightly different from batch to batch. We can accept these back for Full Store Credit to be used towards the purchase of a Cablemod Full Cable Kit that is made for your PSU. We can only make extensions, not cables specifically for any PSU. If you would still like the quote, please send the information to our sales department: [email protected].
Please let us know how you would like to proceed --

I haven't responded yet. I believe I am gonna hang on to what I have and work with it.
But not before I work some credit or deal with them, I believe my balance there has run to "Player" limits, :shock:

I kinda dig these combs or wraps actually. This guy is doing some cool stuff, not doing any custom work right now it seems.
I'd never run across this before??!!!
http://www.ensourced.net/wire-wraps/?sort=bestselling

Anyway, will keep all updated on my progress, hopefully significant, here shortly...

Tots Zien
 
Hey MOD or Senior like types

SP said:
...holy pictures batman! My interwebz nearly gave out loading this page

So yeah, when I do a new post it really chunks along now...
and if I click the little blue guy for latest post, it craps out trying to scroll down all the way.

As I mentioned, I was going to start a new thread when I renamed it, but thought it a tad bit pretentious...
Even for me. :cool:

So I can fork the thread if we need to. Especially since the best is yet to come!!!
Let me know. Thanks!
 
SwartHack;7944041 I kinda dig these combs or wraps actually. This guy is doing some cool stuff said:
[/URL]

Anyway, will keep all updated on my progress, hopefully significant, here shortly...

Tots Zien

Something to consider about the cable lengths is they will need to be different lengths anyhow to account for the bends (not decompression sickness). For the best look homemade cable are the way. I haven't made that leap yet but did buy some 550 cord with plans on "playing around" with it. I know the 550 isn't as durable and doesn't look quite as nice, but it's always handy to have around even if it doesn't work out for me in my case.

So yeah, when I do a new post it really chunks along now...
and if I click the little blue guy for latest post, it craps out trying to scroll down all the way.

As I mentioned, I was going to start a new thread when I renamed it, but thought it a tad bit pretentious...
Even for me. :cool:

So I can fork the thread if we need to. Especially since the best is yet to come!!!
Let me know. Thanks!

It's really up to you. I know the mods frown on having multiple posts of the same thing, however you could make this a discussion thread and have a seperate build log. The difficulty there is keeping the discussion in the discussion thread.

Something like this.

Discussion Thread - http://www.overclockers.com/forums/showthread.php/772413-Just-another-NAS-discussion-thread
Build Log - http://www.overclockers.com/forums/showthread.php/773488-BUILD-LOG-NASgul-NAS-Media-Server

Totes up to you of course.
 
Replacements/Extensions for EVGA 1600 G2 Supernova PSU

We are taking a different tact today.!

After what I have learned over this process needs to be preserved in some sort of meaningful format.
Unlike the other information shared by yours truly.

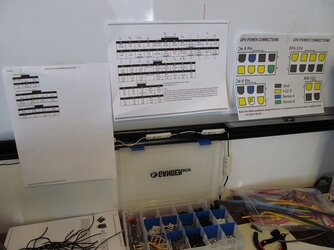
So before I jump in there are a couple of important points that I must make here so they don’t get lost in the content.

ONE – Really understand the difference between “replacements” and “extensions.
I know this sounds like common sense, but it threw me sort-of. Because in the end, I used a combination.
And you will need to be prepared to make or buy shorty adapters if your “extensions” are full length.

TWO- The best approach for replacements, and the one I will do entirely the next time I do this:
Use your stock cables and PSU connectors. Cut to desired length, sleeve, crimp and BANG. Custom cable!
I would not have bought the extensions cables if this epiphany had dawned on me earlier.
Although they are pretty slick to work with if doing extensions.

THREE-Do not destroy your stock mobo and cpu cables. You may need them when all this blows up in your face.
Find/buy substitutes to destroy when planning your cable proj.
Luckily I was granted this conscious awareness seconds before destroying my mobo cable.

FOUR – Have this (pertinent to your PSU) in front of your face and all figured out.

IMG_2319.JPG

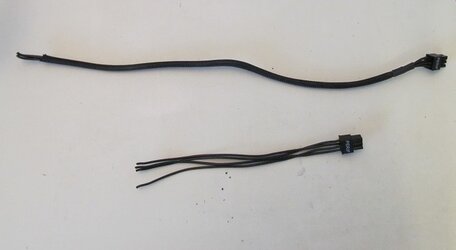
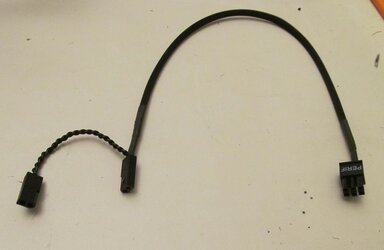
So before I got all hot and bothered to start working on these cables, I needed to finish up the Perf cables for the pumps.
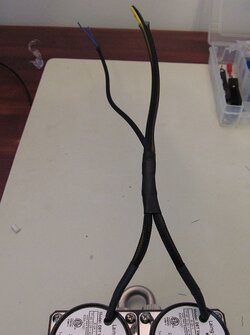
This is a great example of re-using/modding your stock cables and getting a clean look.

IMG_2198.JPG

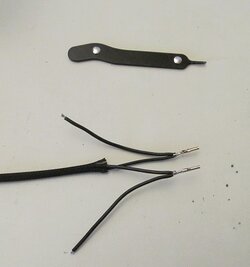
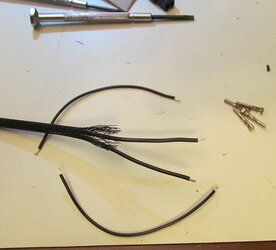
I remove the 5v wires.

IMG_2200.JPG

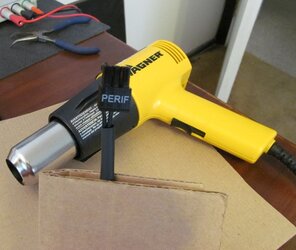
Here is a neat tool so you don’t fry your sleeve.

IMG_2207.JPG

IMG_2210.JPG

Shrink Wrap Tip

Make sure to give yourself plenty room of sleeve under the shrink wrap.
Press form the shrink wrap with your fingers while very hot!
Especially pressing the shrink wrap into the sleeving. You should be able to see shrink wrap pattern under the shrink wrap.
Not all ends require this extreme, but nothing sucks more than while rigging, running, tugging.. to have the sleeve come out of the shrink.


For the dualies, I need a little longer and a double. Threw in a little twisty style.

IMG_2213.JPG

IMG_2216.JPG

IMG_2218.JPG

Now you seem um.
IMG_2226.JPG
IMG_2222.JPG

Now you don’t.
IMG_2233.JPG
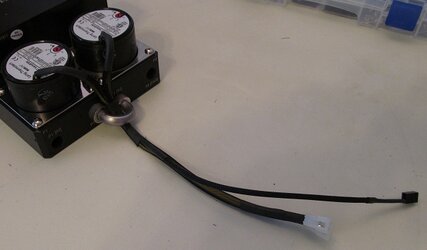
(NOTE-These 2 pin molex minis do not lock together!!
The JST connectors lock tight, but just aren’t for these gauge wires.
I will probably shrink wrap connectors together on final pin-down.)


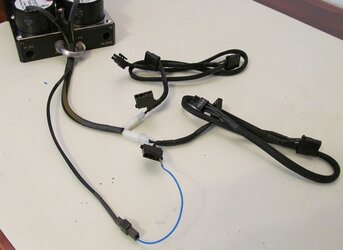
Now that we have the Perf PSU cables done, on to the business!
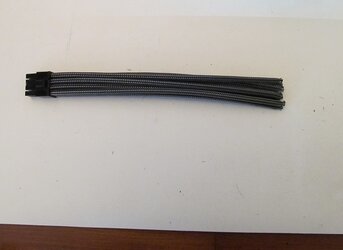
So I first wanted to get the 6x and 8x gCard cables done, as complete replacements.
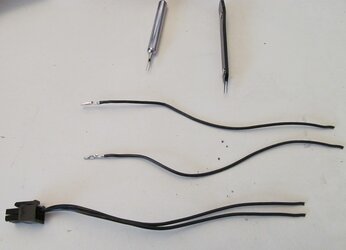
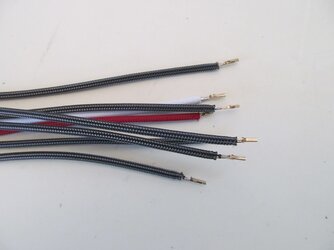
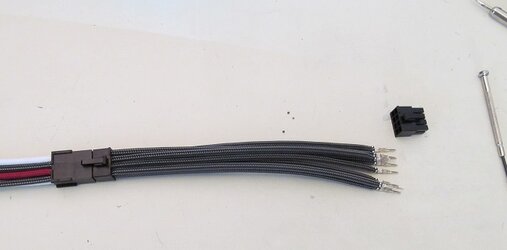
Which entailed re-pinning my pre-sleeved cables to change the pin gender so both ends are female.

IMG_2244.JPG

IMG_2248.JPG

IMG_2269.JPG


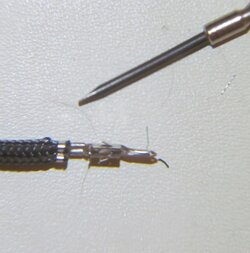
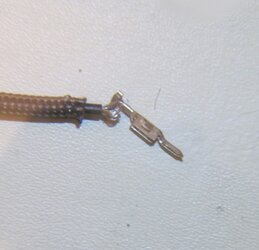
On the re-pinning I gave up trying to re-crimp the para-cord and concentrated on getting good crimps/contact.
The spring in the para-cord make it very unnoticeable. Especially on the PSU side, I will probably run with this for now.
Here is also where I rigged up my special rig to hold the cable while re-pinning andtrying to adjust lengths.

IMG_2275.JPG

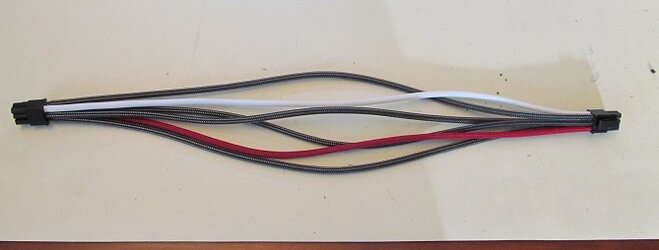
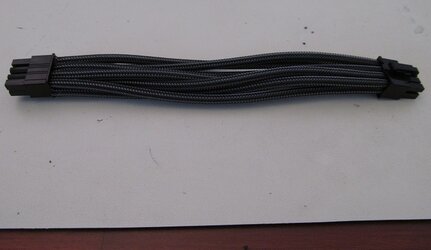
Here is my finished product after adjusting lengths. Its worse!!!

IMG_2277.JPG

Blaylock said:
Something to consider about the cable lengths is they will need to be different lengths anyhow to account for the bends (not decompression sickness). For the best look homemade cable are the way. I haven't made that leap yet but did buy some 550 cord with plans on "playing around" with it. I know the 550 isn't as durable and doesn't look quite as nice, but it's always handy to have around even if it doesn't work out for me in my case.

Paracord rules for everything! I just never thought about it for sleeving.
This is where I gave up trying to adjust lengths and just go with it.

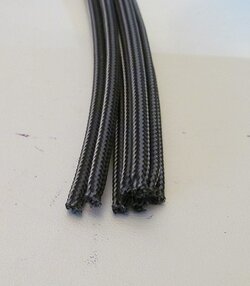
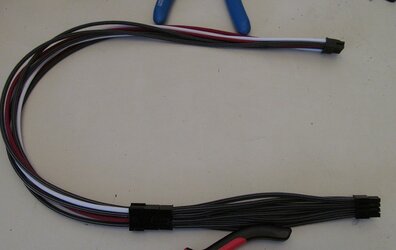
One problem I found with these cables, and a reason they act a little goofy when laid out.
The paracord has a bit too much slack, therefore outward tension. You want some of this, but not too much.

In all my sleeving I have never worked with para-cord, just the usual nylon stuff that has been traditionally used until now, mostly..
And don’t call me Chicken. I got sleeving, I got shrink wrap!!

IMG_2336.JPG

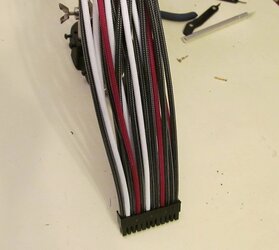
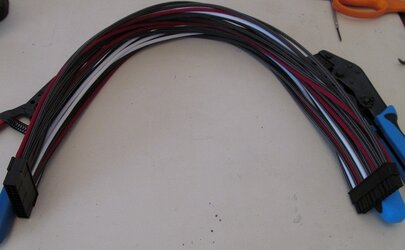
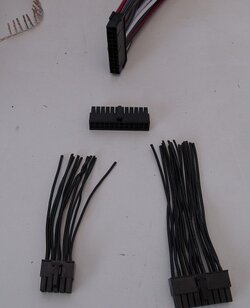
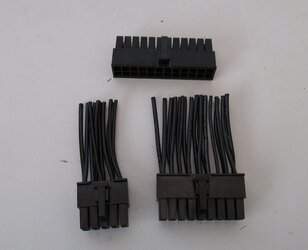
So for the Mobo and Cpu cables I decided to do extension and make my own adapters.
Mostly cause it took about 5 minutes to make these, and they wire straight when using the male connector, so no cross over.
IMG_2282.JPG

These end are pretty even.

IMG_2284.JPG

It went together beautifully. Had to pull one sleeve that had a tweaked pin.

IMG_2310.JPG

IMG_2287.JPG

IMG_2315.JPG

Big plus for pre-wired extensions.
Big minus, the fixed lengths!!


I thought the 170mm (longest available) was long enough for the CPU. Not!
So I used the shorties I got expecting to use on the gCard cables and made an adapter after re-pining them.
Still to short for cable routing but works for now.
Will make a longer one. Note the para-cord stretch after pins are removed.

IMG_2295.JPG

IMG_2299.JPG

IMG_2293.JPG


IMG_2303.JPG

IMG_2306.JPG


So finally the Mobo PSU adapter.
I won’t get into the issues discussed here about the ripple capacitors I encountered here on the stock VGA and Mobo cables.
http://www.overclockers.com/forums/...p-Dual-980ti-Hydro-Copper-8x6-pin-connections

I decided to remove them and go without, kinda.

Since I went with the 8x and 6x for each gCard I don’t have enough cables for the second card.
While I get re-supplied, I am proceeding with the stock cable on the second card.
Maybe see if there is some measurable difference (not sure how that is done)

Here is the genius of re-using a compatible cable, NOT YOUR STOCK CABLE!!
I got lucky. The PSU for BruceLee has its entire stock set! as I used a CableMod “replacement” set.
(I did end up hacking on those on well to customize length. Not one molex connector on entire rig!)
http://www.overclockers.com/forums/...d-(Prologue)?p=7894333&viewfull=1#post7894333

And it happened to have the same 18x + 10x psu connector.
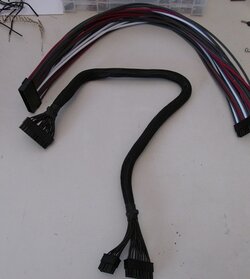
This is what I did with it.

IMG_2321.JPG

IMG_2328.JPG

IMG_2334.JPG

I would actually buy a second/replacement mobo cable from PSU manufacturer to chop (if possible to buy single replacement cable). In order to keep original as back-up.

I really want to finish this today, but my hands/fingers are really sore right now, and I want to be fresh when I do this rig.
You have to do 28 strips + 3 doubles and not farck it up.
So I decided to get this post out instead…

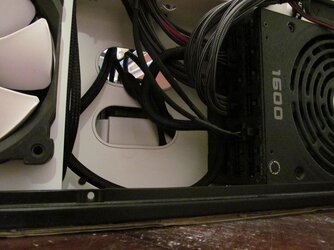
Here are some rough case shots.

IMG_2351.JPG

IMG_2349.JPG

IMG_2348.JPG

IMG_2345.JPG

IMG_2339.JPG

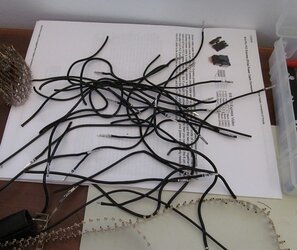
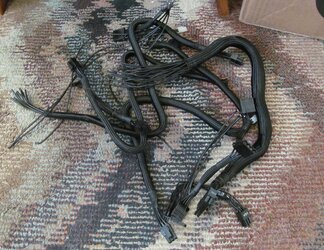
The wreckage.
IMG_2317.JPG

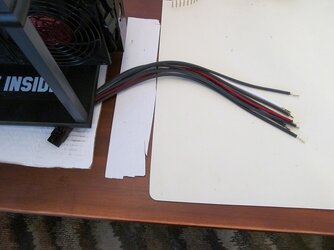
I was gonna use all those wires to make the mobo psu adapter,

IMG_2331.JPG

but I'll hoard most of it.

I get the fan splitters tomorrow and can wire up the other two rad’s fans.
After that it will be close to firing up.
I am not worried about the case circ fans right now.
It’s gonna be a bit before this thing is running all sealed up.

I also got a grip of different wire wraps (black and semi-clear) from this guy:
http://www.ensourced.net/wire-wraps/?sort=bestselling

Makes me want to get a 3D printer again..
See what we can do with things like:

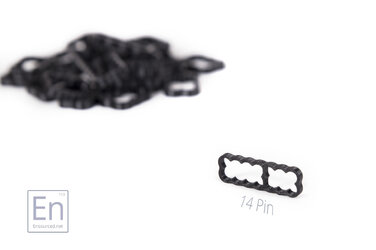
14pin__45712.1446165537.1280.1280.jpg

So, phew!!! Cansado!

Sueños
 
Yours turned out so much better than mine. LOL It definitely gives me more appreciation for some of the professional builds out there.
 
Back