• Welcome to Overclockers Forums! Join us to reply in threads, receive reduced ads, and to customize your site experience!

[Build Log] Will never forget your first time

Overclockers is supported by our readers. When you click a link to make a purchase, we may earn a commission. Learn More.
I learned something important today:

Don't build a custom loop for the first time while you're hung over.

Today I have:

Installed one of the radiator fans backwards, had to remove and reinstall the radiator and fans.
Gouged the hell out of the other radiator because I grabbed the wrong screws. (minor cosmetic issue only)
Gouged some screws pretty bad by using the wrong screwdriver
Realized I had installed both radiators and forgot to replace the rubber shipping plugs with the actual threaded plugs, have to remove them AGAIN because I can't get at all the ports.
Hurt my fist in an inexplicable impact with a wall.

Time for a break.

Never celebrate before the project. Lets hope you didn't damage the rad. Leak test the proper way with only the pumps with power.

Take your time. Its not a race. Just a very cool (pun intended) hobby.
 
Never celebrate before the project. Lets hope you didn't damage the rad. Leak test the proper way with only the pumps with power.

Take your time. Its not a race. Just a very cool (pun intended) hobby.

No real harm done, just a bunch of wasted time and some frustration.

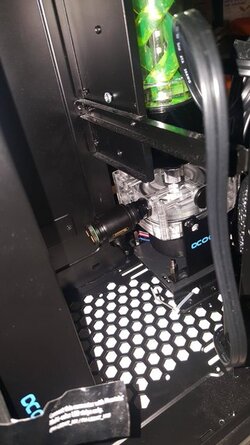
Pump is in, connected with a male-male SLI connector directly to the reservoir. Radiators are installed. Working on the CPU block next.

This was an idea I had for drainage, it's an inlet extra port on the pump. It's the lowest port I'd have in the system, so I connected that ball valve to the end of it. (with a plug on the other end for good measure) It seemed simpler than trying to put a Y-splitter in such a tight area. I didn't realize these SLI connectors can just slide apart, so I am a bit concerned that it could just pop out... but then again the pump should be providing suction on that end, rather than trying to launch it off the end of the fitting. I should probably hop back to microcenter and pick up a solid male:male fitting, but I hate to make that trip for one darn fitting :D

h4X9epml.jpg
 
Not bad so far. Yes, we recommend using solid fittings when connecting from the res to the pump. SLI fittings are usually only used for the GPU's.
 
m80nI57l.jpg
My first tubing run! :p

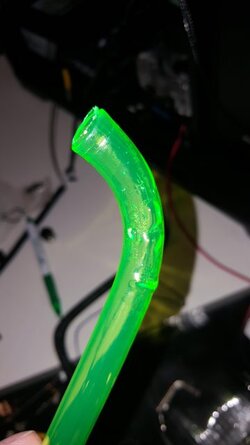
My first attempt at a bend... did not go well. Less heat next time.
This is why I bought a lot of tubing.
PawfNdNl.jpg

Quick hop back to Microcenter to exchange a few fittings, back to work.

Next annoyance:
bYNxXenl.jpg

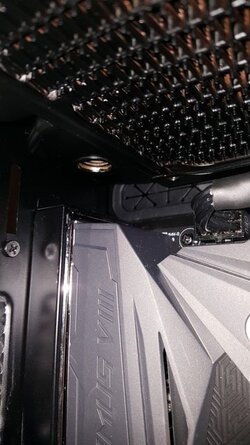
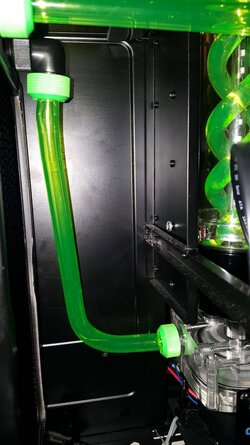
The big plastic shield over the I/O sticks up too far, blocking the the line out from the radiator. I can't shift the radiator further, and turning it around would put the ports into an awkward area. I have a 45 degree angled fitting, and it fits.. but I can't actually screw it in. So I have to remove the motherboard to get that fitting in place. D'oh!
 
Last edited:
Progress!

7IXBUNul.jpg
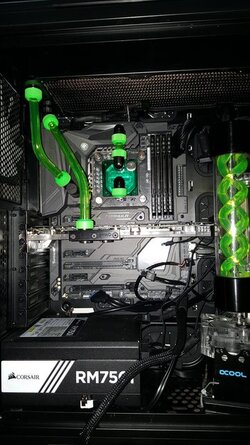
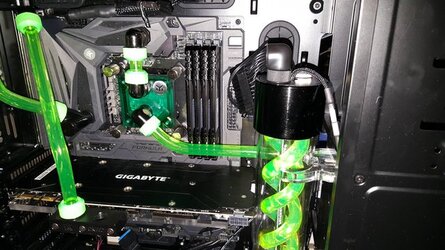
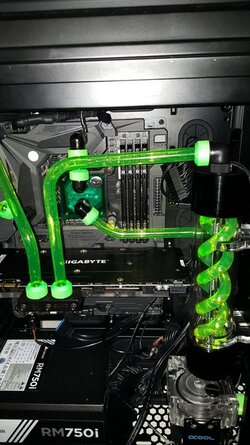
Connecting the VRM to the radiator was a bugger, but I realized I had an extra Y-connector that had a 45 degree angle on one of the ports, and it was tall enough to lift up above the I/O shield. Much easier. Still a tricky bend for a newbie, as was the radiator -> GPU connector. But overall I am pleased with the results.

I tried to get this one to be a 90-degree turn but it was just too tight a radius, a couple attempts came out awful. So I rotated the fitting a little bit and things went a lot smoother. In hindsight, I think I like this better. This runs all the way forward to the front radiator.
5Yhy2ySl.jpg

Just two to go: the top of the reservoir over to the GPU, and hiding in the back going from pump to the front reservoir, which will probably be the trickiest one of the build due to the confined area.

For now: a break for lunch and a little research on decals.
 
Good news and bad news!

The good news is that the last two lines are in.

Y8wcssmh.jpg

Lower front pump -> radiator connection. Not super pretty but this will be out of sight so don't care an awful lot.

jEMwpPZl.jpg

And the last bend, GPU -> reservoir.

edit: crap, I think the GPU block is leaking somewhere too.

The bad news is that I'm the proud owner of a brand new fountain. The CPU -> VRM link (the super tiny straight one) instantly vomited water everywhere. But this is why we test the system with no power to it, eh? Water came down to the power supply, I don't think anything critical got wet but just to be sure I've got a house fan blowing air into the case and will let that go for several hours to get rid of anything the paper towels didn't take care of.

In the meantime, I'll see what the heck was up with that connection.

edit: crap, I think the GPU block is leaking too.

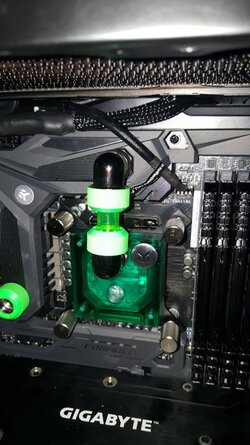
edit2: upon closer inspection, the VRM connection issue is pretty obvious. The tube wasn't long enough, so left a tiny gap that water could jet out. I trimmed it too much when trying to squeeze it in such a tiny space. However, I'm not sure it's possible to fit two compression fittings onto a tube and squeeze it in there. Hrmmm.
 
Last edited:
I wrote GPU block earlier, I meant CPU block. The EK Supremacy Evo was leaking. Not the fitting on it, the block itself. I had read that if you overtighten the screws that hold it together you can crack it, so clearly I was overly cautious. Took it out, tightened down the screws some more, and now it holds water.

Now that I've disassembled half the system, it's time for bed. Two leaks have been handled, hopefully zero to go.

Tomorrow.
 
Man, sorry about your luck Exadeuce. You're absolutely right though. That is exactly why we leak test with out power to anything but the pump. Hopefully you have it all figured out now and don't have any other hang-ups.

Do you plan on putting the short straight piece back on now that you know it wasn't the culprit? I think it looks better that way personally.

Also, it looks like you might have some issues getting to your ram sticks with your lines run that way or is that just the angle of the picture?
 
I would have probably gone from the CPU block out to the VRM on the left, then from the VRM out on top to the radiator, but it is more open the way you have it. All personal preference and how much time and patience you have.
 
Man, sorry about your luck Exadeuce. You're absolutely right though. That is exactly why we leak test with out power to anything but the pump. Hopefully you have it all figured out now and don't have any other hang-ups.
Here's hopin! But hey, learning all this is part of the fun. Once finished, the satisfaction will be that much greater.
Do you plan on putting the short straight piece back on now that you know it wasn't the culprit? I think it looks better that way personally.
The short straight piece was definitely the cause of the fountain. The tube was just too short and didn't actually form a seal, instead forming a water jet!

A tube long enough to seal on both sides is really hard to get in there. The two compression fittings on such a short tube are bonking up against each other, and trying to rotate them in just doesn't seem to fit. I'm going to try again once I put it back together. Tough call, the U-turn is growing on me.


Also, it looks like you might have some issues getting to your ram sticks with your lines run that way or is that just the angle of the picture?
Yes. I could flip the U-tube towards the left or even have it vertical. I think going over the RAM does look better, but that could be a pain down the road some day.

I would have probably gone from the CPU block out to the VRM on the left, then from the VRM out on top to the radiator, but it is more open the way you have it. All personal preference and how much time and patience you have.

I chose the CPU -> Top VRM because I mistakenly believed it would be easier :D

I'll toy around with that method.
 
Last edited:
It's alive!

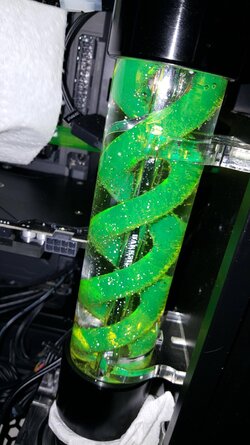
As previously configured, but with no immediately-apparent leaks. Pump is running steady, I'm pleased because the D5 is super quiet. There are a crapload of bubbles but they gradually seem to decrease as it runs. However, I think I've got a minor issue with the reservoir. There's no inlet tube, so water coming in from the top splashes down into the reservoir, creating a lot of noise and bubbles. If I fill the reservoir all the way to the brim, I can decrease this noise. I've poked around and found references to "splash tubes" or "inlet tubes,"but I don't think these are going to work. The helix would block them.

Edit: This seems to improve as I bleed more bubbles. Maybe not a problem after all. Now I need to find what the heck I did with that last plug.

Long-term leak test is running. The helix is a bubble magnet but I suspect that will work itself out eventually.
Imnt6Wp.jpg
 
Last edited:
The bubbles will dissipate after a few days, don't worry about it too much. I really like the classic helix res+matching tube color. Reminds me of those old school neon green coolant builds, very slick.
 
The bubbles will dissipate after a few days, don't worry about it too much.
Yeah, even the couple hours this has been running there's noticeably fewer bubbles. I also tilted the case all around and a TON of bubbles came spewing out of the top radiator.

I really like the classic helix res+matching tube color. Reminds me of those old school neon green coolant builds, very slick.

Thanks! Yeah, it looks pretty snazzy. It'll be even better when the UV lights go on, there's a UV LED strip inside the reservoir and I have another cablemods one I'll have around the top and left side of the case. The case lighting and motherboard LED lighting will be synchronized and on a similar green color.

But for now, patiently waiting.
 
Have had the system running since yesterday. All is well. Tweaking overclocks today. The Gigabyte G1 GTX 1080 seems to clock up as well as can be reasonably be expected, getting 2151Mhz on the core clock, tried to push 2175 but crashed out in Furmark almost immediately. I could maybe tweak a little more but it wont make a real difference. From what I can gather, 2150 is considered to be good for this card. Temperatures wont exceed 36C, I don't have a reader to measure ambient temperature near the case but my thermostat says I'm around 21-22C most of the time. This is also running Intel Burn test at the same time, so the CPU (still at stock setting) is contributing to water temps. (CPU maxing out at about 42C)

And this is with everything almost dead quiet. Fans are all spinning in the 700-800 RPM range. There's a very faint hum from the pump and a tiny bit of fan noise, but pretty much anything else in the home drowns it out. (A/C kicks on, refrigerator compressor, water heater) It's actually hard to differentiate the noise from the PC from the neighbor's A/C if my window is open.

edit: my 6600k seems to have a pretty solid wall at 4.5ghz. Looks like i need in the 1.38-1.39 range to hold it. Core temps in the mid-60s, not bad for high voltage and low fan speeds I think. Not a stellar chip, but it'll do.
 
Last edited:
Case back together, night shot.
3gb8FYHh.jpg
Still needs some bling for the front and side panels.
 
Back