• Welcome to Overclockers Forums! Join us to reply in threads, receive reduced ads, and to customize your site experience!

Whats enough for my build?

Overclockers is supported by our readers. When you click a link to make a purchase, we may earn a commission. Learn More.
1. You can test all the hardware and install everything on a ESD environment. You can have it on a cardboard and such.
2. Once you know everything is working and installed, you can than place them in the case.
3. You will fill the loop with only the pump installed for power via PSU and nothing else. You'll be filling, bleeding and than proceed with a 24hr leak test to make sure you have no leaks prior to powering everything on.
4. If you run out of fan ports for the rad fans on the controller, use the MB fan headers for the case fans.
5. You hope everything goes as planned and have a nice quiet and cooled rig.


You mean Install everything while loose on a cardboard except the water loop!? i didnt get you here
Thanks for your respond and also how clear you explained, i definitely going to jump the pump alone first and have it run for couple hours. i dont know why, but i bought a different PSU for when i want to jump the pump alone, so that way i dont have to unplug everything.
I just got these fans for rads, Fractal Design Venturi HP-12 PWM. look it up see if you are familiar with it. I wanted to custom paint it but apparently i cant, cuz i dont find anything on internet, see if u can help a niga out :attn:
 
1. Yes, outside without the loop installed. Just run with the bare essentials to test out your components and install the OS if you'd like.
2. A couple of hours isn't enough for a full proof leak test. A leak can spring 5 or 10 hours later. It could be a very slow leak, etc. That's why we recommend a 24 hour leak test.
3. As far as the PSU is concerned, going on the assumption it's a modular PSU, you could have just plugged in the molex to power the PSU while having the PSU cables connected to each component but disconnected on the PSU end.
4. Not familiar with those fans. You were probably better off purchasing Helix120 PWM fans like I have. Great budget fans and some might even compare them to the premium and king of the hill AP-15s who of course own both fans. I don't ever advise or recommend on painting fans because I feel you could throw off the balance of the fan if say one blade might have a higher coating concentrate than another. I would just grab w/e color you're looking for from the manufacturer.
5. Read up intro to watercooling since I feel you're forgetting the basics and just rushing to the finish line. There is maintenance to be done and cleaning of the watercooling components prior to installation.
6. I would strongly advise from using that kind of language on these forums.
 
Quick question,

For this tube "Alphacool Plexi HardTube 13mm ID, 16mm OD"
what Silicon Bending Insert size do I need? 12 or 11 or 10mm?
 
Quick Updates, :screwy:

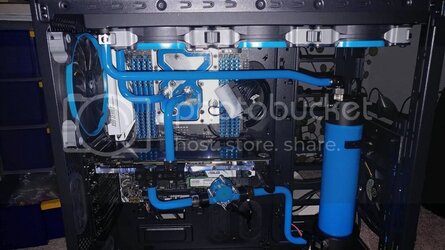
Finally got everything together and started my first build. This process is going to be slow since I have a lot of other things to take care of in my daily bases. :eek:

Couple issues that came up and already took care of,

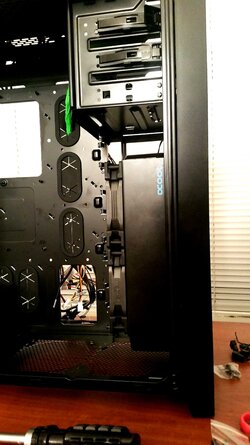
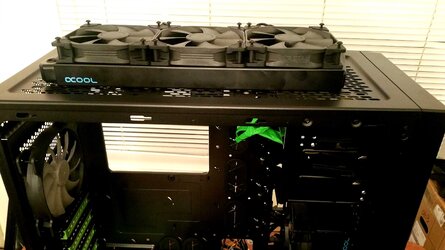
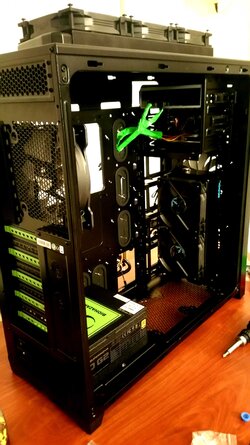
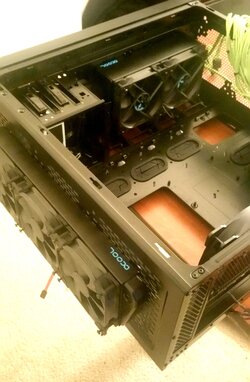
1- I did not have enough room for 360 radiator to be installed from inside, since i added a blu ray to this rig.. (installed outside of the case on the top, going to have some drilling for tubing and wires..)
2- Had spent 3 hours just on installing the CPU block.. for some reason there was a screw type that was missing in the box and i didn't know until i contacted the manufacture and told them i can get this thing right. ( fixed by my own screws)
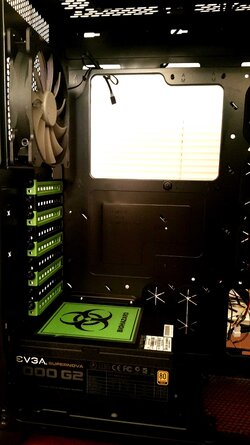
3- couldnt install the 240 in the bottom since its tick and too close to the intake fans and PSU ( installed in the back of the intakes including a pair of exhaust )


** REMINDER **
first time building a system.. all with internet help


20170116_151551.jpg 20170116_174033.jpg 20170116_233853 copy.jpg 20170116_233858 copy.jpg 20170116_233905 copy.jpg 20170116_233914 copy.jpg
 
I won't slam your choice of ram but let me tell you a few facts about RAM in generally. Currently, there are only 3 memory chip manufacturers in the entire world; Samsung (Korean), Hynix (Taiwanese) and Micron (USA). When it comes two ram PCB's there is just as few. That being said, it should be stated that a brand name on a stick of ram is not nothing more than that. taking a peak at gskill, they are a low cost option that in almost al product lines use Hynix ram chip. Corsair depending on product line will have any Samsung chip or Hynix (dominator and vengeance use Samsung) Crucial and ballistix use micron explusively etc.
 
Run that by me again? With facts this time. That statement is BS from head to toe. https://www.google.com/search?clien...e=UTF-8#q=does+g+skill+Ddr4+use+Samsung+chips


I experimented with Z170 when it first came out and bought into the ripjaws 5 DDR 4 hype. Their website boasted Z170 compatibility but to be honest, it game me more problems then any other ram I have ever used. I ran into so many ram timing problems trying to get that 6700k system built; boot freezes, post failures etc. Later after 3 different brand/make motherboards, 3 different CPU's and a brand new replacement set of rip jaws 5, I gave up. That ram was garbage. Personally, before boasting "Highest-End" chips, I'd like to see some proof of it. After all, like many companies, G.Skill doesn't actually make any part of their product and they sell their product in very low budget packaging. G.Skill has been marketing their ripjaws line for some years which comes with a price tag at or below value ram prices. They only recently got into higher end components last year with the full release of their trident line.

The last quality point for me with any RAM is the PCB. For RAM, optimal layer thickness is 6 to 8 board layers which allows for more and better connectivity of circuit lanes. Ultimately means an overall better performing and longer lasting circuit, better heat dissipation and less thermal flex/warping. When I first bought the ripjaws 5, I couldn't help but notice that the PCB seemed thin. At the time of purchase, I couldn't find any details on this for ripjaws but when I compared to known spec memory such Corsair memory in my current X99 build; seen here with 8 sticks of Vengeance LPX DDR, ripjaws seemed a little thinner..

15857726_1269350626442077_1584664692_o_zpswr8qyqbh.jpg


What it all boils down to for me is the old saying; you get what you pay for. Do I think G.Skill memory is the worst thing out there.. No, not buy a long shot. Do I think it competes in overall quality with corsair, crucial etc etc... no I don't.
 
Quick question

The fans i bought have 4 pin female connection while my fan controller has 3 pin male connector..
A simple 3 female to 4 male adapter should work? Or whats the best way to go with in this scenario?
 
Quick question

The fans i bought have 4 pin female connection while my fan controller has 3 pin male connector..
A simple 3 female to 4 male adapter should work? Or whats the best way to go with in this scenario?

You should be able to just plug them and it works. 4pin fans are PWM fans, one pin + one pin groud, one pin speed, and the last pin is for ongo changing speed or whatever. So it should work just right.
 
You should be able to just plug them and it works. 4pin fans are PWM fans, one pin + one pin groud, one pin speed, and the last pin is for ongo changing speed or whatever. So it should work just right.


since my fan controller has 3 male pins for each fan ( 4 fans total ), it has 12 pins sitting very close to each other, so when i hook up my 4 fans, thats total of 16 holes, so the last fans would only get 2 pins from the controller, so i dont know if its really going to work or nah.
if im not clear tell me so then i post some pictures.
 
Quick question

The fans i bought have 4 pin female connection while my fan controller has 3 pin male connector..
A simple 3 female to 4 male adapter should work? Or whats the best way to go with in this scenario?

In a 4 pin fan header you have newer technology than you have in your fan controller. You see the 4th connection is a thing called PWM which looks for a signal from the motherboard to set the speed of the fan at any given second. PWM is automatic fan control. So if number of fan available connections is an issue than I'd invest in a few of these and return than controller.

https://www.ekwb.com/shop/ek-cable-splitter-4-fan-pwm-extended

They allow you to connect 4 fans and utilize PWM control
 
3-pin configurations are Power, Ground and RPM readings. It's controlled by any fan header out there whether its 3 or 4 pin based on voltage control.

4-pin configuration is Power, Ground, RPM and PWM (Pulse-Width Modulation). PWM is a signal that is used as the control signal instead of voltage control.

If you have 4-pin fans, they can be voltage controlled if you don't have a 4-pin aka PWM controller.
 
If you have 4-pin fans, they can be voltage controlled if you don't have a 4-pin aka PWM controller.

I don't know what fans are being used in this build but just want to point out that the new style maglev fans should not be voltage adjusted. They are recommended to have a constant 12v and all control should be done with a pwm signal.
 
Quick Updates, :screwy:

Finally got everything together and started my first build. This process is going to be slow since I have a lot of other things to take care of in my daily bases. :eek:

Couple issues that came up and already took care of,

1- I did not have enough room for 360 radiator to be installed from inside, since i added a blu ray to this rig.. (installed outside of the case on the top, going to have some drilling for tubing and wires..)
2- Had spent 3 hours just on installing the CPU block.. for some reason there was a screw type that was missing in the box and i didn't know until i contacted the manufacture and told them i can get this thing right. ( fixed by my own screws)
3- couldnt install the 240 in the bottom since its tick and too close to the intake fans and PSU ( installed in the back of the intakes including a pair of exhaust )


** REMINDER **
first time building a system.. all with internet help


View attachment 187184View attachment 187185View attachment 187186View attachment 187187View attachment 187188View attachment 187189


So, I've been following this thread for a few days and watching what's going on and I can see you that you have been getting some great help here but I would like to enter in some of my own PC building experience. Gaming quality computers have been my specialty for over 20 years; doing my first ever on a Pentium 150 CPU/ i386 platform, way back in 1993.

Anyhow, I'd like to give you some real feedback about everything. I am trying be as constructive as possible in hopes that in future builds, you take some simple lesson and apply them forward. Especially since this is your first build. So 2 questions to ask yourself when buying parts; form and function based. 1. Does it look good for what I am doing. 2 Does it work good for what I am doing. Reviewing your parts choice, some admittedly seem like they only answer the first question. So let me break them down for you.

First things first... you case... When you bought it, did you know you were putting a water-cooling loop in it? Was there any fore thought placed in expandability or even trying to plumb it?

Next... Your radiator choices... Why a 360 and 240 to cool only a CPU? Look, to cool only that CPU while overclocked, you will run somewhere around 95W of heat output maximum. That heat level is perfectly suited for the 240 radiator all by itself. A 240 can dissipate up to 200 watts of heat effectively. A 360 by itself can dissipate up to 400 watts of heat. You can easily do away with one of the radiators. My honest suggestion to you in this regard is to take the 5.25 bay holders out of the case, and put your 360 down in place of the 240. Plus, if you look back at the photo I posted of my own system, I'm cooling both an overclocked GeForce 1070 founders edition and an overclocked i7-5820k CPU off of a 360 rad when my system produces 370 watts of heat max. Essentially, your cooling requirements are far less than mine.edited out for factual content..

Next.... Tube diameter... For your choice, I may be wrong but it appears that you bought 16 OD PETG. PETG tube is a great choice, however, if you are only cooling a single CPU, 12 OD would provide more than adequate flow for your rig.

Next your PSU.... I'm a especially puzzled by this choice.. 1000 watts. okay.. GeForce 1070 cards draw 150 watts of power max.. even overclocked. Your CPU and motherboard will draw 275 watts or less. My question is why the 1000 watt, way to overkill PSU choice when something like a Corsair AX760 platinum would have been in your reach for the same money. Its a way better PSU than what you have.


Overall... You are in for one hell of a time trying to plumb what will end up being a franken-computer with hard line tubing if you plan to use everything you have and route to the outside of your computer case. I honestly wish you luck. Look, with liquid cooling loops, keep them simple and remember that when it is time to do maintenance, you need gravity to be your friend. Also, remember that as heat rises, it pushes cool temp down. So, when plumbing your loop, place your components so everything will naturally drain completely and that hot parts of the loop are always up and cold parts down if possible. Don't add more components than you actually need in your loop. More component's means more pipe joints and more places for leaks.
 
Last edited by a moderator:
I don't know what fans are being used in this build but just want to point out that the new style maglev fans should not be voltage adjusted. They are recommended to have a constant 12v and all control should be done with a pwm signal.

Had no idea that was the case for those fans but thanks for the heads up. The OP isn't using those fans as far as I can tell from his pics.
 
So, I've been following this thread for a few days and watching what's going on and I can see you that you have been getting some great help here but I would like to enter in some of my own PC building experience. Gaming quality computers have been my specialty for over 20 years; doing my first ever on a Pentium 150 CPU/ i386 platform, way back in 1993.

Anyhow, I'd like to give you some real feedback about everything. I am trying be as constructive as possible in hopes that in future builds, you take some simple lesson and apply them forward. Especially since this is your first build. So 2 questions to ask yourself when buying parts; form and function based. 1. Does it look good for what I am doing. 2 Does it work good for what I am doing. Reviewing your parts choice, some admittedly seem like they only answer the first question. So let me break them down for you.

First things first... you case... When you bought it, did you know you were putting a water-cooling loop in it? Was there any fore thought placed in expandability or even trying to plumb it?

Next... Your radiator choices... Why a 360 and 240 to cool only a CPU? Look, to cool only that CPU while overclocked, you will run somewhere around 95W of heat output maximum. That heat level is perfectly suited for the 240 radiator all by itself. A 240 can dissipate up to 200 watts of heat effectively. A 360 by itself can dissipate up to 400 watts of heat. You can easily do away with one of the radiators. My honest suggestion to you in this regard is to take the 5.25 bay holders out of the case, and put your 360 down in place of the 240. Plus, if you look back at the photo I posted of my own system, I'm cooling both an overclocked GeForce 1070 founders edition and an overclocked i7-5820k CPU off of a 360 rad when my system produces 370 watts of heat max. Essentially, your cooling requirements are far less than mine.

Next.... Tube diameter... For your choice, I may be wrong but it appears that you bought 16 OD PETG. PETG tube is a great choice, however, if you are only cooling a single CPU, 12 OD would provide more than adequate flow for your rig.

Next your PSU.... I'm a especially puzzled by this choice.. 1000 watts. okay.. GeForce 1070 cards draw 150 watts of power max.. even overclocked. Your CPU and motherboard will draw 275 watts or less. My question is why the 1000 watt, way to overkill PSU choice when something like a Corsair AX760 platinum would have been in your reach for the same money. Its a way better PSU than what you have.


Overall... You are in for one hell of a time trying to plumb what will end up being a franken-computer with hard line tubing if you plan to use everything you have and route to the outside of your computer case. I honestly wish you luck. Look, with liquid cooling loops, keep them simple and remember that when it is time to do maintenance, you need gravity to be your friend. Also, remember that as heat rises, it pushes cool temp down. So, when plumbing your loop, place your components so everything will naturally drain completely and that hot parts of the loop are always up and cold parts down if possible. Don't add more components than you actually need in your loop. More component's means more pipe joints and more places for leaks.


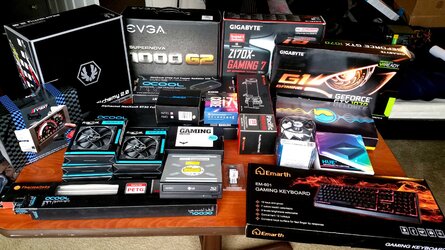
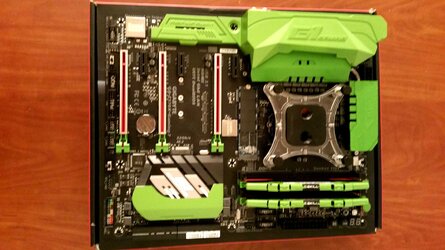
Thanks for the time you are putting in here,


1-My GPU is also a watercooled, and its going be overclocked as much as possible. same as CPU.

2-When i bought the case i already had the map down for waterloop. one thing that is got me messed up was the fact i have room for a 360 radiator (on top) but without the fans.. no matter what i can not fit the fans with the radiators.
I am not going to lie, i knew somethings like this would come up since its a complicated system and its my first time. anyway, that is being sorted out as you can see in the pictures, but next time i know what case size i will need. really thought a full tower ATX is enough room but..

3- 16mm OD and 13 iD, i got a good pump for it to flow it nicely. its Thermaltake D5 res/pump 360. any recommendation on the pump speed? my research is telling me to keep it on 3 always.


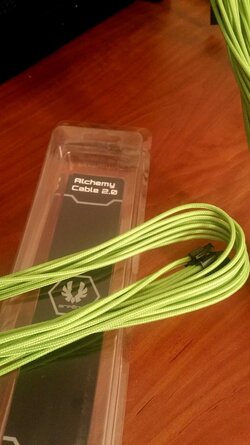
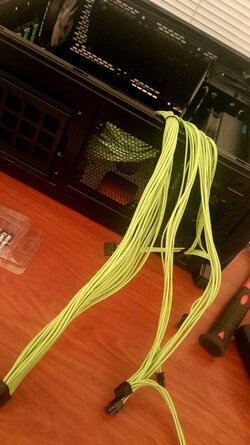
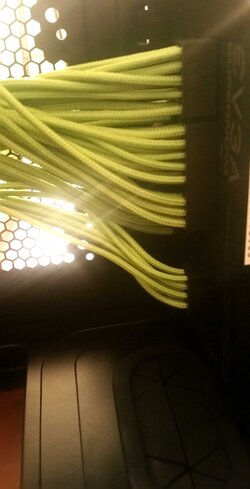
I got to get the fans fixed. they run on 1600-1700 rpm without me being able to go higher even tho it says 1800 on the box. but maybe thats is coming from the fan controller is wrong, Currently installed the PSU with cables, playing around with the cable management before i lay down the case and install the motherB, pix soon


These are the fans: http://www.fractal-design.com/home/product/casefans/venturi-series/venturi-hp-12-pwm
 
He is right, This thread is more focused on the specific components of this rig than the look. But from the very beginning of this project i promised myself that im going to make it as nice as possible since im putting myself into this project. otherwise i have had picked Soft Tubing instead of Hard lol so much easier and leak proof.
Its the challenge i accepted from the beginning. to be honest with you i have the money to buy one ready made, but that is not what i want.


This is the final Monitor that I'm about to purchase just right now, what are the thoughts? Pix posting in few mins

https://www.amazon.com/LG-27UD68-P-...3-1ba4-4f4e-bdcc-0febe090b8ed&pf_rd_i=desktop
 
To be honest, the only thing id change about your setup is the 950 pro m.2. I would replace it with a Samsung SM951 PCIe x 4 M.2 SSD. The burst speed is not as fast as the 950 but the all the time read write on the SM951 a better. Plus, the SM951,, doesn't get as hot as the 950 pro

It might be a tad faster in some aspects but it surely is not cooler. The SM951 came after the XP941 that I got. They both run toasty as the rest of them. You could remedy this with a few heatsinks or a PCIe adapter w/ a heatsink.
 
Thanks for the time you are putting in here,


1-My GPU is also a watercooled, and its going be overclocked as much as possible. same as CPU.

2-When i bought the case i already had the map down for waterloop. one thing that is got me messed up was the fact i have room for a 360 radiator (on top) but without the fans.. no matter what i can not fit the fans with the radiators.
I am not going to lie, i knew somethings like this would come up since its a complicated system and its my first time. anyway, that is being sorted out as you can see in the pictures, but next time i know what case size i will need. really thought a full tower ATX is enough room but..

3- 16mm OD and 13 iD, i got a good pump for it to flow it nicely. its Thermaltake D5 res/pump 360. any recommendation on the pump speed? my research is telling me to keep it on 3 always.


I got to get the fans fixed. they run on 1600-1700 rpm without me being able to go higher even tho it says 1800 on the box. but maybe thats is coming from the fan controller is wrong, Currently installed the PSU with cables, playing around with the cable management before i lay down the case and install the motherB, pix soon


These are the fans: http://www.fractal-design.com/home/product/casefans/venturi-series/venturi-hp-12-pwm

try putting your parts into this configurator and see what it tells you.. It's very accurate.

https://www.ekwb.com/custom-loop-configurator/


I use a D5 PWM pump / 250 res combo pushing extremely high flow through 10 ID / 12 OD PETG. It was what was most recommended by EKWB.
 
Last edited:
Back