• Welcome to Overclockers Forums! Join us to reply in threads, receive reduced ads, and to customize your site experience!

PROJECT LOG Project: Military Tech - A fundraising project in support of veterans

Overclockers is supported by our readers. When you click a link to make a purchase, we may earn a commission. Learn More.

Dalchi Frusche

Member
Joined
Sep 3, 2015
Location
Gardnerville, NV
TestSig.gif
300


** WARNING: This build log, like all the others will take some time because I'm poor :D but with the help of sponsors we will quicken this up. More sponsors = quicker build :thumb:

Good Afternoon my fellow modding enthusiasts,


So I have tossed around the idea of doing a US Military themed mod and build, then doing a raffle drawing here locally charging a small fee for the tickets. The winner would win the build and the proceeds raised from the raffle would be split between the Tri-Cities(TN) Veterans of Foreign Wars posts. I know I won't have any problem getting the local VFW post to get behind the project as I am a member. Other sponsors like Lowes/Home Depot is going to be slightly harder, maybe impossible. My thought would be to allow them to display the build once complete with details on how to join the raffle.

Parts List (Will be updated as time progresses)
Main Components

  • Motherboard: GIGABYTE GA-X170-EXTREME ECC
  • Processor: TBD
  • RAM: 8GB G.Skill Aegis DDR4 Kit
  • HDD: TBD
  • PSU: EVGA SuperNova G2 1000W
  • CPU Cooler: Thermaltake Water 3.0 w/ TT Ring Pro 12 fans
  • Graphics: TBD
  • Blu-Ray Drive: TBD
  • Monitor: TBD
  • Keyboard: Poseidon Z RGB
  • Mouse: Ventus Z RGB Gaming Mouse
  • Headset: Cronos RGB Gaming Headset
  • Fans: Thermaltake Ring Pro 12 x6

Case Parts

  • Phobya Vandal Resistant "Momentary" Bulgin Switch - 23mm -
    Black - White Ring LED
  • Phobya SlimGuide Fan Controller
  • Phobya Thermometer with Digital Display
  • Darkside Front Panel I/O Connection Kit
  • DarkSide 5mm CONNECT Modular LED - Red
  • DarkSide 5mm CONNECT Modular LED - White
  • DarkSide 12" CONNECT Dimmable Rigid LED Strip
  • Phobya PCI Airslots - Black
  • Toggle Switches

Specialty Modding/Misc

  • Sleeving: Paracord from TheParacordStore.com
  • Cable Combs: 3D printed by DreamPC
  • Cable Rubber Grommet Round
  • Sheet Aluminum
  • Sheet Diamond Plate
  • Sheet CoPolyester
  • U Channel trim

Tools

  • Drill w/ bits
  • Jigsaw w/ Metal Blades
  • Dremel 395 Multitool w/ cutting wheels/grinding stones
  • Metal files
  • Molex tools
  • Alphacool Eisplateau Anti-Static Mat


So without further ado... lets meet the patient:

Case Acquisition
Was dropping off my trash at the local "convenience center" when i notice off in the distance tucked in between some broken CRT TVs, lays a piece of future treasure. A quick "May I..." to the guy running the center and I was off and running with my newest beige modding case.

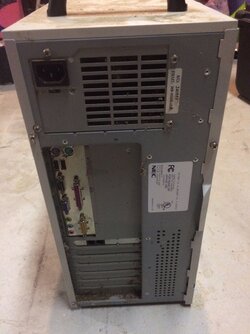
Bask in the sexy beige awesomeness...
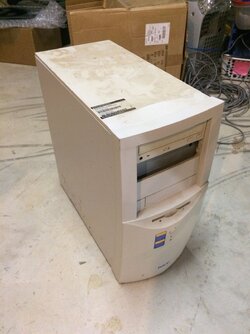
IMG_1118.JPG

Look at that nicely rounded beveled front.
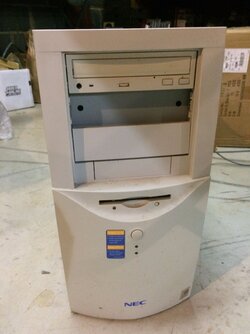
IMG_1119.JPG

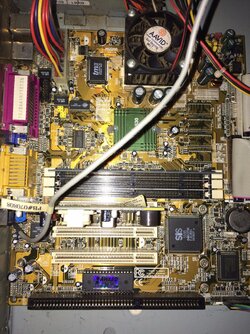
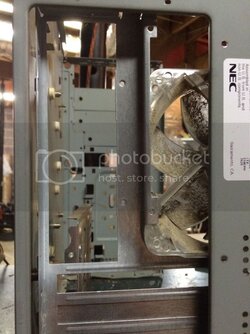
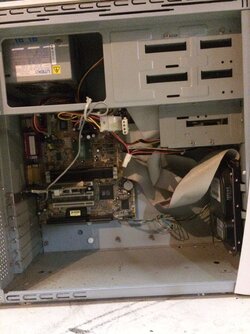
And that interior... *wolf whistles... laughs... then preps the saw*
IMG_1120.JPG

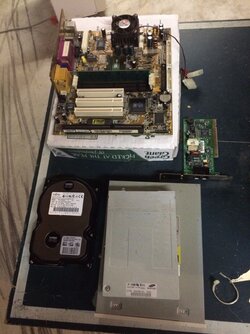
Gotta love that old hardware
IMG_1121.JPG
IMG_1122.JPG

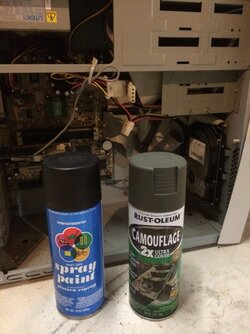
And of course a quick shot of some paint I picked up for the project
IMG_1123.JPG

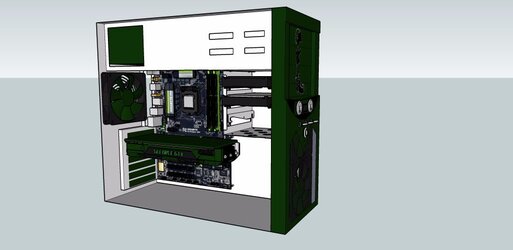
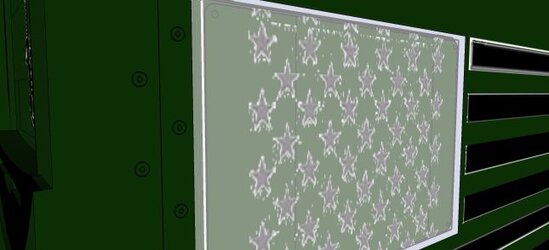
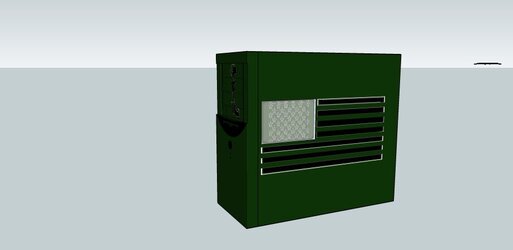
This case seemed like it would be a good platform for my military mod, so I brought up Sketchup and drafted some rough designs.

Design Concept #1 - WARNING: These concepts are guaranteed to change in one shape or another as the road progresses.

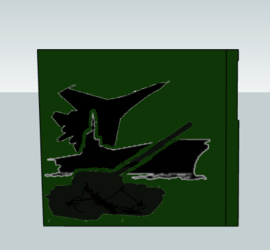
Here's my first quick concepts so let me know what you think. For the side window, I'm debating what symbol I will do the window..... I'm torn between either a grenade or a fighter jet. *UPDATE* Someone also mentioned doing a Jet/Ship/Humvee style design so I will have to play with that a bit.

The SSD will get vinyl covered to be the stars in the flag and will sit behind a plexiglass window. Cooling for this project is undecided. If I get to do watercooling or at least an Aio, I'm thinking a 240 rad in the front will work just fine.
Case Right.jpg

New Window Concept
Design Concept #2

Side Window All.png

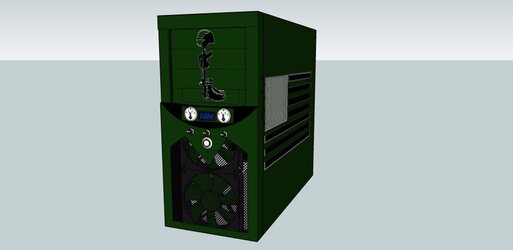
Updated front panel and inside hardware
Design Concept #3
Case Front.jpg
Case HW.jpg
Rivets.jpg


I also manged to pick up these handles for free out of a trash pile( brand new) so I decided to mock them up
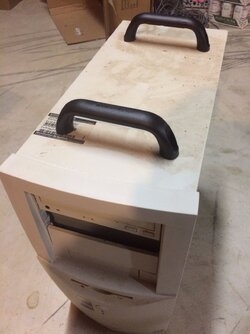
File_000.jpeg

Look at this lack of cable management space, looks like I might be making a new backplate so I can shift things over.
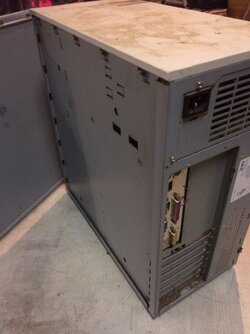
File_002.jpeg
File_001.jpeg


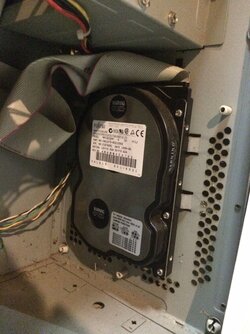
Time to remove that old dated hardware
Out with the Old
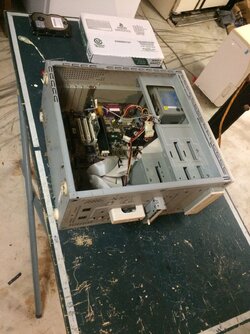
File_003.jpeg
File_004.jpeg

Look at all the modding potential...
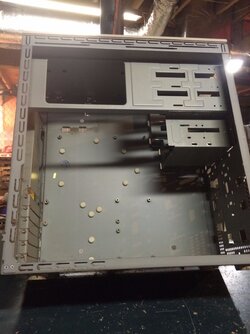
IMG_1157.JPG

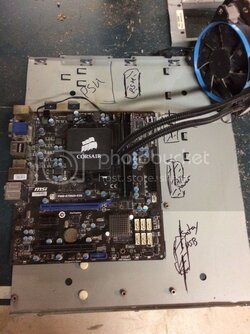
Used an old ATX motherboard to test fit, I even squeeze an optical drive to test the clearance
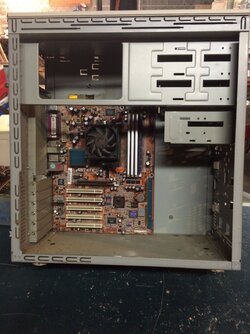
IMG_1156.JPG
 
Last edited:
I believe I have the same case and was considering a LAN party box for it. I'll sub to see where this goes so long as you promise to use that Lite-on PSU in the build. LOL

P.S. You have PM.
 
I believe I have the same case and was considering a LAN party box for it. I'll sub to see where this goes so long as you promise to use that Lite-on PSU in the build. LOL

P.S. You have PM.

I'm thinking 250W will be a little low for what I'm envisioning for the build.

EDIT: Welcome aboard :)

- - - Updated - - -

View attachment 183644

I'm super excited to announce, for those that noticed...... We are now officially sponsored!

Our first sponsor that I'm pleased to announce is ModMyMods.com

logo.gif

They have graciously agreed to handle the lighting and the needed cables to make that work. Additionally, they were nice enough to include the Vandal LED switch, zip ties and some rubber grommets for the cable pass through. Working with ModMyMods couldn't have been any more enjoyable. They were always quick to get back to me and always professional. Once the parts arrive I will get some hardware shots posted.

In the meantime, I need to get my "photo studio" *cough cough* set up.
 
Last edited:
Have you considered incorporating the 5 branch symbols into the build? Maybe shift the flag up towards the top and have a 2 by 3 pattern of the symbols underneath.

Like this
6290011b-5151-42c5-81d9-8890b7f55e5c_560_420.jpg
 
Soooo, going with a Su 27 Flanker? :) Subbed!

I googled "sexy fighter jet" and that's what came up. ;) Well, it's not far from the truth anyway I googled "fighter jet silhouette" and that's the one that matched my need the closest.

Have you considered incorporating the 5 branch symbols into the build? Maybe shift the flag up towards the top and have a 2 by 3 pattern of the symbols underneath.

Like this
View attachment 183676

Hey Lochekey, welcome to the party!

I actually did take the seals into great consideration for this build as a solid way to show that it was dedicated to all the branches of service. However, I am going to be sticking very close to my choice of green subdued. If I felt like I could make them into a subdued color scheme, then I would've done them on the side of the PSU or the inside covers with a window.

All I have to say is... great minds think alike. :)
 
View attachment 183644

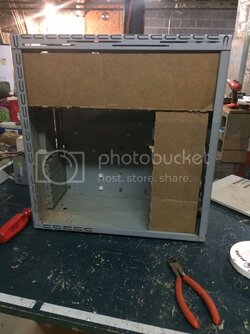
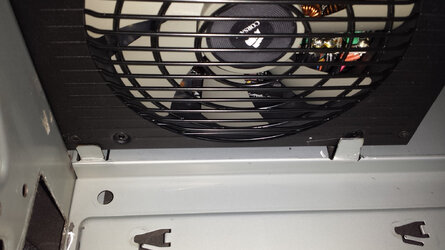
Figured I'd mock up some quick cardboard shrouds to see how clean it would make it look. I'm definitely in favor of the top shroud but I'm still a little uncertain about the front shroud. I wanted to test fit my Corsair TX650 but the placement of the prefab shroud was too narrow to allow me to squeeze the PSU up into the space. The PSU that was in the case was almost half the size of that Corsair.

File_000_zpsnjfjvm5f.jpeg


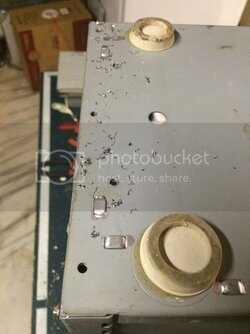
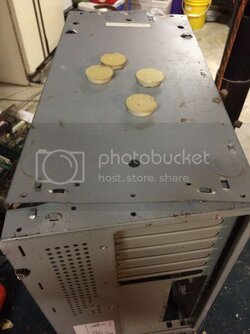
Then the teardown begins with drilling out all those rivets to remove the top panel.

File_003_zpsdy5awsjd.jpeg


I had planned on using the optical bays and turning the hdd bay 90 degrees.... but as you can see gotta love old non-modular assembly.

File_002_zpsqj4x8qdq.jpeg


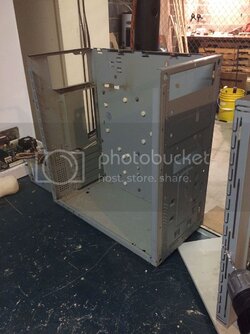
As you might've guessed previously, the front, back and motherboard tray are all ONE piece :p So taking off the bottom panel is definitely being a chore. Where the holes are used to be a tiny dot that welded the two pieces together. Since I don't plan on welding it back together, drilling out the welds allows me to rivet the case back together instead.

File_005_zpsdewxayhe.jpeg


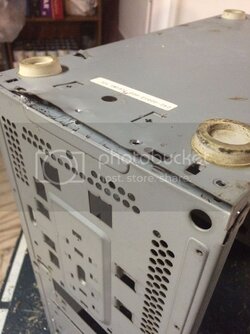
But as you can see, popping all those welds have bent up the edge a bit. Going to need to give it a good speaking to with my mallet :)

File_004_zpsqczjqqyl.jpeg
 
I love the old heavy steel they used in these old cases. Fits the "Tank" theme to a T.
 
I love the old heavy steel they used in these old cases. Fits the "Tank" theme to a T.

Suprisingly, this case isn't super heavy like most are. They used a lot of plastic to form the front and top panel. The rest of the metal is surprisingly light but it's definitely not aluminum :p
 
Update 9/30/16

TestSig_zpsrt3mhkbq.gif


So is everyone enjoying the updates?


Well it’s time to do some more tearing down and overall destruction of the case. First, let’s remove those nasty yellowed case feet.

Remove%20those%20Feet_zpstw18mrse.jpeg


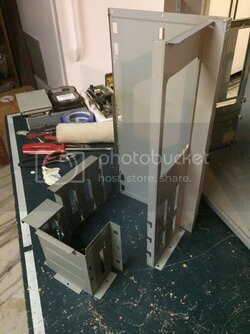
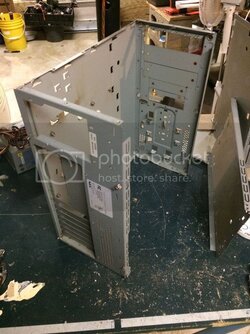
Next, we can finish taking off the bottom panel. Breaking the remaining welds along the side were only a slight annoyance. All that’s left is the front/tray/back one-piece.

Bottom%20and%20Top%20Removed_zpsscicmurc.jpeg


Everything is apart, now we can start marking cuts.

Marking%20cuts_zpstfb2xf28.jpeg


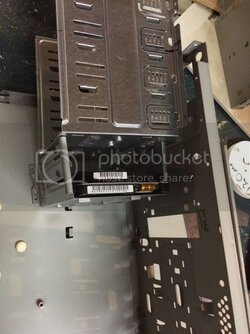
Before cutting the panels apart, lets test fit our drive bays for clearances. Looks like everything will fit nicely.

Testing%20out%20fit%20bays_zpsbgafpw0e.jpeg


In testing out the new motherboard IO panel placement, I went from 5mm clearance to 12mm. I would’ve liked to get more out of it, but that’s all I can do and still have room for a 120mm exhaust. But I think it will give me just enough to hide the cables like I need and fit the SSD in it’s place.

New%20motherboard%20placement_zpsgjodpge6.jpeg


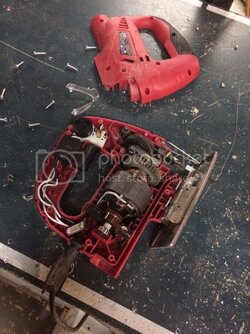
Now everything has been spaced out and adjusted…. Lets break out the jigsaw! Welp, need to fix it first. The blade arm retention spring had broke in half, so I had to use my ingenuity and use a spacer and new spring to fix. Then I adjusted the bottom runner so the blade is back in place and secure.

Fixing%20Jigsaw_zpsyyqsvomo.jpeg


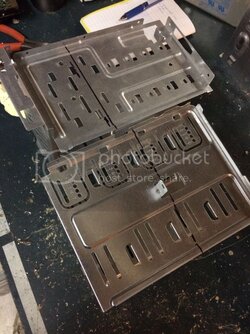
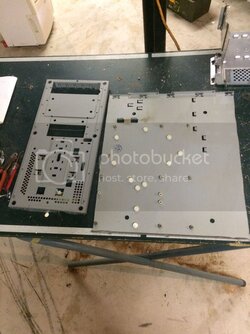
And… now we start cutting. First we cut up the one piece monstrosity. Now the motherboard tray and front panel is separate.

Motherboard%20tray%20cut%20from%20front%20and%20back_zpsizbt2jgu.jpeg


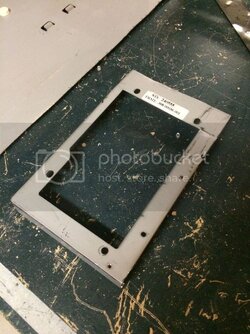
Yes I hear you saying, “But wait James, where’d the back panel go?” I give you my new PSU bracket, all that I’m keeping from the back panel(unless I steal the mesh from it later). My plan is to have the bracket that gets screwed onto the PSU, then you can slide it into the case and secure the bracket with 2 thumbscrews. I also found out I need to cut the bracket opening just a bit more to allow for the extruded power supply plug on the newer PSU models.

PSU%20Bracket_zpsp3iwbljm.jpeg


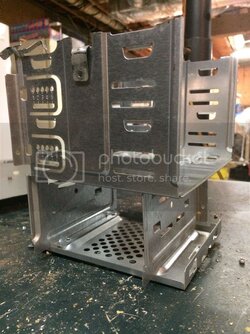
Then we can cut down the new drive bays to fit two optical drives and 2 HDDs. And lets test the look.

New%20bay%20setup_zps4kxidj9o.jpeg


Well I didn’t care for it too much, so I broke the bottom bracket off. It was just too big and clunky. Instead I will hold it with an old optical bay cover similar to what I did in my Double Dragon build.

Creating%20new%20HDD%20bays_zpshpwo80pr.jpg


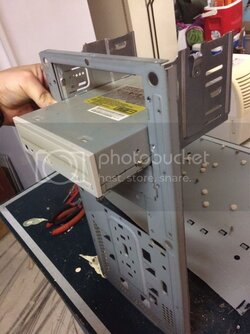
I like the new placement and design, so let’s line up the optical bays with the front panel hole…. It fits perfectly with the new motherboard tray placement. Time to drill some holes for our mounting solution.

Lining%20up%20optical%20bays_zpsr1ocpy75.jpg


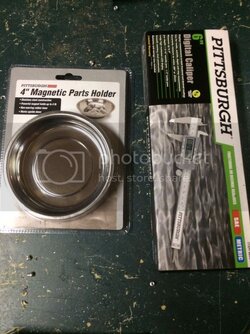
So in closing, my father in law walked up to me yesterday evening after getting back from Harbor Freight and tossed these to me and said “Happy Birthday.” I’m not sure if I should tell him my birthday was back in May…… oh well, I can’t complain. I can now stop losing screws and make more accurate measurements.

Late%20Birthday_zpsbagzp8sh.jpg


Until next time…. Let me know what you think, I always love to hear from my friends here in the modding community.
 
Looking good James. 2 ODD bays is more than enough for todays rigs. Many would say it's 2 too many but I'm still old school and like at least one myself too.

One word of advise. 2 screws may not be enough to secure the PSU mounting plate. It may want to sag being an upper mounted PSU. One thing that I have done in the past to help with this is to cut another support tab. I'll see if I can dig up a pic of it. I know there's one on here, just not sure how far back I need to dig.

At any rate looking great so far.

EDIT: Found it.
I didn't want to highjack your build.
pic1.jpg

Here's a link to the full build if you're interested.
 
Last edited:
Looking good James. 2 ODD bays is more than enough for todays rigs. Many would say it's 2 too many but I'm still old school and like at least one myself too.

One word of advise. 2 screws may not be enough to secure the PSU mounting plate. It may want to sag being an upper mounted PSU. One thing that I have done in the past to help with this is to cut another support tab. I'll see if I can dig up a pic of it. I know there's one on here, just not sure how far back I need to dig.

At any rate looking great so far.

EDIT: Found it.

I will definitely take a look at the build. In regards to the PSU there's already two tabs on the motherboard. I do plan on putting the "shelf" " or even support rail. That will wait until I start getting it together and the back panel is being fastened.

As always I love the input and ideas. Keep them coming.
 
Update 10/4/16

TestSig_zpsrt3mhkbq.gif

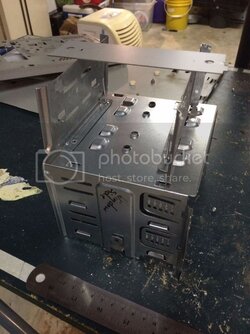
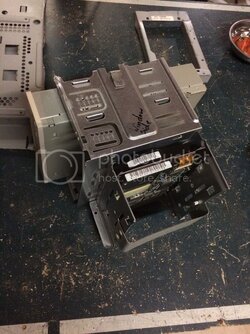
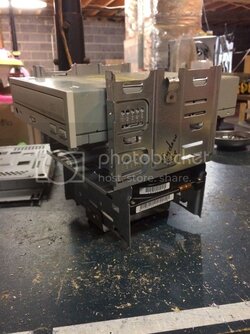
Assembled the drive bays together to test fit and make sure I drilled the holes in the right spots. This is temporary as I will take it apart for painting. I did notice I'm going to have to figure out a solution to mount it also to the top panel as well for extra support.

IMG_1201_zpssqspvfqc.jpg
IMG_1200_zpsgznbrtnh.jpg


Marked up the motherboard tray for location of grommets and other cuts that will be needed

IMG_1202_zpsjksqk1ue.jpg


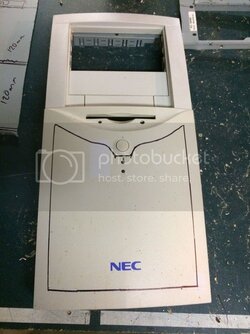
Marked the cut of the front panel that will be replaced with mesh and painted.

IMG_1203_zps53d5vk1a.jpg

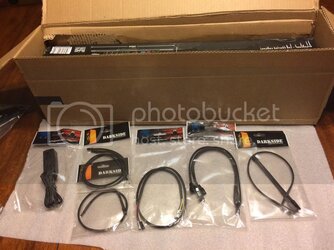
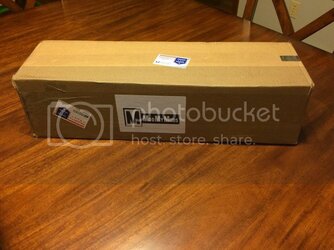
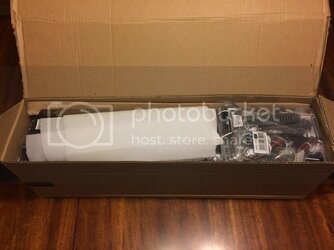
First box from the sponsors(ModMyMods.com)
Feels like Christmas morning! :D
IMG_1205_zpsowztjdny.jpg

Packed tighter than soldiers in a cattle car
IMG_1206_zpsuiqla4nl.jpg

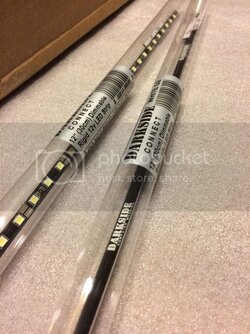
Some Darkside magic....
IMG_1209_zpsnm1rkhxl.jpg

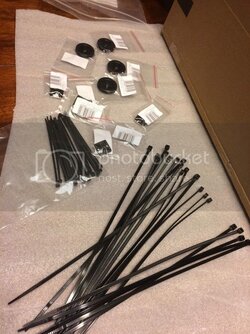
Cable management supplies.... glad I'm moving that motherboard tray to make room
IMG_1210_zpsroeh3lo2.jpg

Mmm... look at those clean black sleeved cables
IMG_1211_zpszwv451fu.jpg

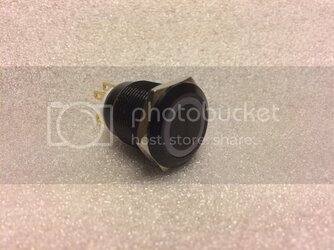
Vandal switches... I've always wanted to use one of these
IMG_1213_zpsjeh4dtv9.jpg

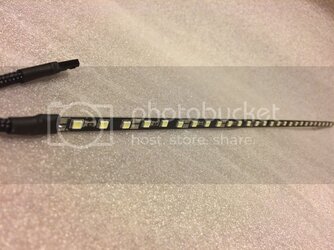
Darkside strip unsheathed... all those LEDs :D
IMG_1214_zpsxqqkvzx9.jpg

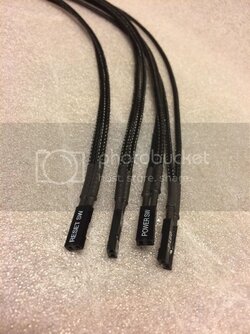
Front panel extensions
IMG_1215_zpsdbbvkbds.jpg

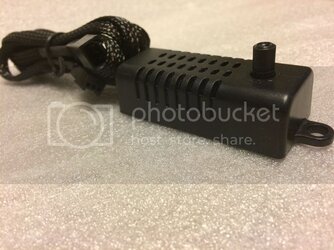
Why have dimmable LED strips without a dimmer?
IMG_1216_zpsbvtxustb.jpg

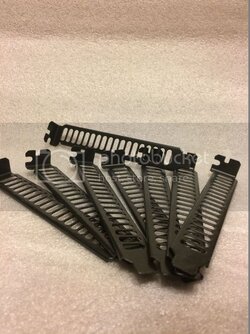
Nice clean black vented PCI covers
IMG_1217_zpsgnziru55.jpg

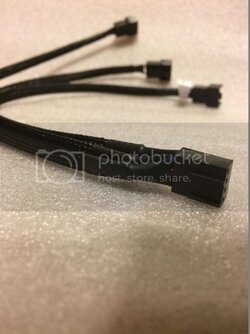
PWM splitter
IMG_1218_zpsuncm0l8a.jpg

*flex* always love product flair(*thinks he might need to incorporate this into the build... since they were the first onboard*)
IMG_1219_zpsmeyq6rgi.jpg

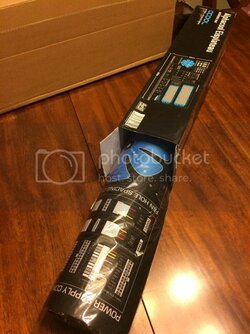
*drool* That work mat is so nice. The material feels superb! I can't wait to get this laid out on my area.
IMG_1220_zpsauzffn5k.jpg
 
Subbed for the promise of awesomeness! I'd offer to throw some donations your way but I don't have the wiggle room this month sadly. If you're still building by the time I get paid again I'll definitely toss a few bucks and some of the case fans I have lying around your way! :thup:
 
Subbed for the promise of awesomeness! I'd offer to throw some donations your way but I don't have the wiggle room this month sadly. If you're still building by the time I get paid again I'll definitely toss a few bucks and some of the case fans I have lying around your way! :thup:

Well you're in luck, or would it be I'm in luck, :p but in all seriousness my complete date is the 28th of February. I just realized I never posted the timeline for the project. I will have to do that in a few hours when I get ready for work.
 
Last edited:
Update 10/5/16

TestSig_zpsrt3mhkbq.gif


So, since Vishera posed the question I realized that I had not posted my expected timeline. So for those who care about project timeline/deadlines, here you go! :) For everyone else, I give you a peek of what the next update will be about.

Timeline of Project

2016

- September 30th 2016 - Case design finalized
- October 31st 2016 - Case cutting and layout complete
- November 30th 2016 - Any additional fabrication complete
- December 31st 2016 - Case painting complete

2017

- January 31st 2017 - Case assembly complete
- February 28th 2017 - Project: Military Tech case customization to be complete
- March 1st 2017 - Raffle begins

- Advertising push starts
- Finalize case display schedule

- May 29th 2017 - Raffle winner announced and check presented to VFW
representative at local Memorial Day Ceremony


And the tedious cutting work with xacto knife....

IMG_1229_zpszymxelpr.jpg
 
Last edited:
Update 10/5/16

TestSig_zpsrt3mhkbq.gif


So, since Vishera posed the question I realized that I had not posted my expected timeline. So for those who care about project timeline/deadlines, here you go! :) For everyone else, I give you a peek of what the next update will be about.

Timeline of Project

2016

- September 30th 2016 - Case design finalized
- October 31st 2016 - Case cutting and layout complete
- November 30th 2016 - Any additional fabrication complete
- December 31st 2016 - Case painting complete

2017

- January 31st 2017 - Case assembly complete
- February 28th 2017 - Project: Military Tech case customization to be complete
- March 1st 2017 - Raffle begins

- Advertising push starts
- Finalize case display schedule

- May 29th 2017 - Raffle winner announced and check presented to VFW
representative at local Memorial Day Ceremony


And the tedious cutting work with xacto knife....

IMG_1229_zpszymxelpr.jpg

So do you already have the core components picked out then? Lemme know what they are in your email. Even if I can't do something majorly generous like cover the CPU I'm sure I can get you a crate of Corsair fans or something. What are the measurements for the mounts you're adding? :p
 
So do you already have the core components picked out then? Lemme know what they are in your email. Even if I can't do something majorly generous like cover the CPU I'm sure I can get you a crate of Corsair fans or something. What are the measurements for the mounts you're adding? :p

Sent you an e-mail!

As for the main components they are all still TBD. I'm waiting for word back from a couple companies for sponsorship, otherwise I'll be hitting the streets fundraising to purchase the needed parts. In regards to the mounts, I'm not sure which you are referring.... the fan plate, the PSU bracket, the SSD, or something else? :)

I want to thank everyone for all the support and encouragement so far, I love to do modding like this but it's always nice to hear that I can catch the attention of some of the best minds in the industry.

Until next time, keep those eyes out for the next update either tomorrow or Friday. Depends on how much I can get done tomorrow morning before work.
 
Back