• Welcome to Overclockers Forums! Join us to reply in threads, receive reduced ads, and to customize your site experience!

PROJECT LOG ROG PARAGON

Overclockers is supported by our readers. When you click a link to make a purchase, we may earn a commission. Learn More.

ChasBurkhart

Registered
Joined
Aug 18, 2016
ROG Paragon Build Log
by Chas Burkhart

ROG Paragon1.jpg

Welcome to my project announcement of my case mod/ build log of the ROG Paragon! I would like to thank Republic of Gamers, In Win and EKWB for making this happen. The case mod/ build will represent some of the finest names in the computer industry. Above you will find my base concept of the build.

Paragon means, viewed as a model of excellence. This is why I chose Paragon as a name for this build. To me Republic of Gamers motherboards are just that, a model of excellence. Like In Win cases are for their cases and EKWB are for their cooling.

03.jpg

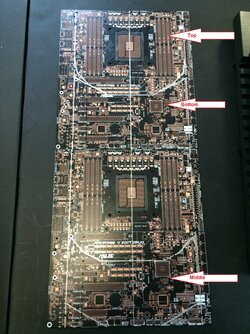
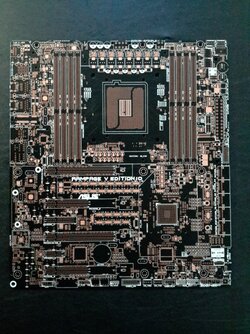
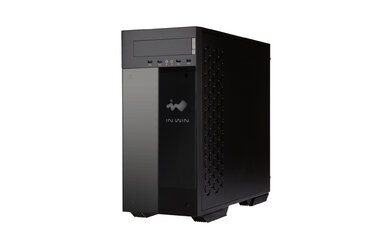
The case mod will be with the beautiful In Win 509 ROG Certified. The In Win 509 will be modded using Republic of Gamers Rampage V Edition 10 PCB blanks along with a couple other ROG parts. Next I will be cutting the pattern using a Craftsman Scroll Saw and Dremel cutting wheels.
IMG_2725.JPG

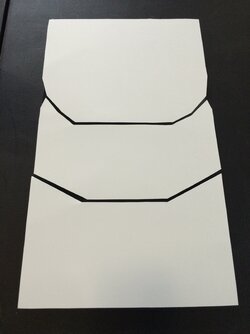
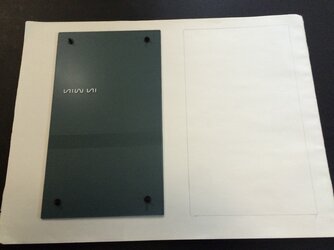
The case front will be backed with smoked cast acrylic to match the smoked glass of the 509 and maintain that menacing look. I used card stock to trace the 509 front glass and sketch the Strix GPU pattern.

IMG_2729.JPG

After the templates were cut I used a metallic silver Sharpie to trace the templates onto the PCB blanks. I made sure to utilize as much of the PCB as I could.

IMG_2735.JPG

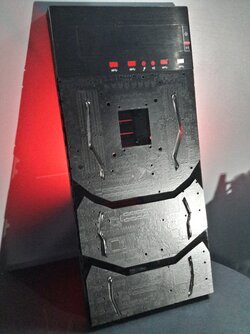
I will be using the Strix LED pattern on the front, side and top of the case by cutting the pattern into the PCB blanks. Above you can see the basic front PCB pattern that will be on top of the smoked acrylic for the front glass. I wanted to give it that Strix GPU look on the front of the case as well as retaining the R5E10 PCB. I will be placing the LED pattern once I have the basic outer pattern cut.

Picture 26.jpg


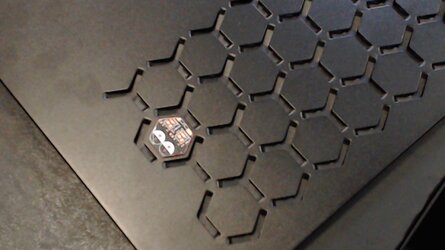
I have also started to cut the hexagons from the PCB to pattern over the side vents of the 509. I thought this was a really good design on the case and wanted to accent it. I used a Craftsman Scroll Saw to cut the above hexagon and made sure to leave a small lip of the original hexagon to show. I rounded the edges using a Dremel and standard sanding drum. See the video above for the first cut hexagon.

IMG_2639.JPG

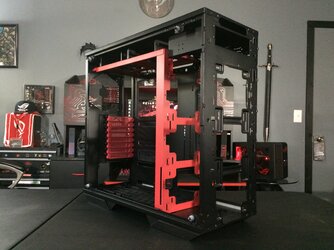
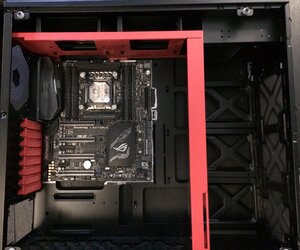
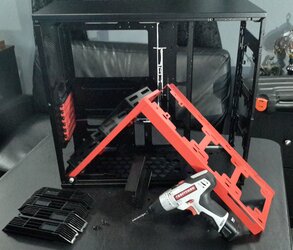
I began by disassembling the In Win 509, isn’t she sexy with nothing on? This was a very easy process and took roughly an hour while taking pics along the way. I will be attempting to also remove the red center support for some internal modding then place it back into the build. It is held in by small rivets and will require nuts and bolts to be fitted back in place.

IMG_2679.JPG

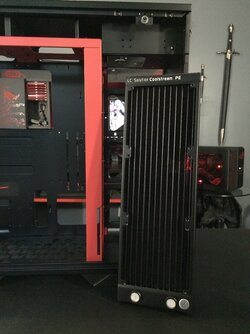
I am also using the EKWB CoolStream PE 360 along with 6 120mm static pressure RGB fans in a push-pull configuration and a EKWB EK-XRES Revo D5 PWM. I will be installing everything in the front bay and it will take some modifications to get it to fit just right. I will also be using 10/12mm EKWB PETG tubing.

Please stay tuned for weekly updates of the case mod/ build as it progresses. Thanks
 
ROG PARAGON Update 2

ROG Paragon Build Log
Update #2

Welcome to update number two for the ROG PARAGON Project. I had planned on doing a bunch of PCB cuts but decided to spend the day organizing all of the tools and my work area for the project modding work. This was needed badly and gives me the ability to easily locate all of the essential tools for my PCB and acrylic work. Plus an added bonus I can move freely in my new work area.​

1.1.jpg

2.2.jpg

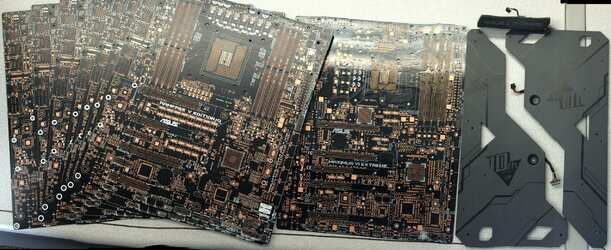
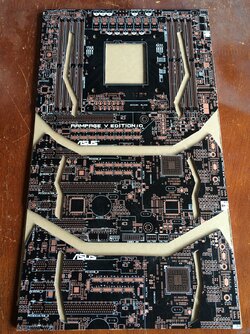
I was able to acquire the above PCB blanks and Rampage V Edition 10 backplates plus a R5E10 heatsink form a generous ROG Team member. The R5E10 PCB blank is what started this project. We wanted to be able to use these in a very cool way and since I am yet to find anyone who has used a PCB blank as a modding material I felt it was very original. I plan on utilizing all that you see above in the modding of the In Win 509.​

4.2.jpg

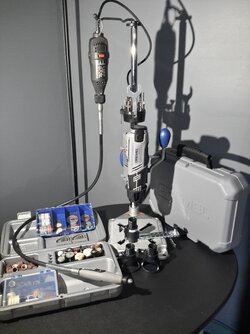
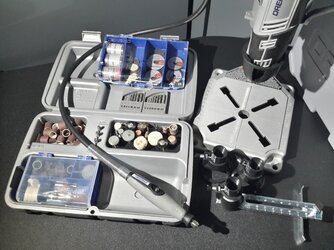
I recently got the Dremel Workstation, Dremel Hole Saw/ Straight Edge, Dremel Routing adapters, Dremel Flex Shaft Adaptor, Dremel 8220. I then mounted both of my Dremels into the Workstation. I also organized all bits, drums and disks to make it easier doing my acrylic work and PCB modifications.​

5.jpg

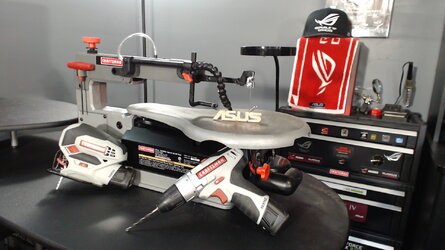
Below you will find the Craftsman Variable Speed Scroll Saw. This worked out great for making big cuts with the PCB and Acrylic! The Craftsman Scroll Saw made short work of them in no time so it will be a crucial piece of equipment for the build. I also have the Craftsman NexTec Drill and Jig Saw which will also come in handy for modding.​

6.jpg

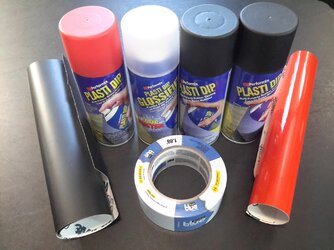
For paint for the build I wanted to do something very unique and hadn’t been done before as well. I will be laying out a full circuit trace pattern over the entire case body with either vinyl or Map tap. After that I will be painting the case with Plasti Dip. This will give the case a motherboard look and will make a great base for the PCB and acrylic work to come! I have Plasti Dip in red, black and Plasti Dip Glossifier to prevent fading and help protect the under coat. I am also using 3M vinyl for accents.​

7.jpg

Next update I should have the PCB blanks cut and will have started a test pattern for the circuit layouts on an old desktop then a test run painting the desktop panel with Plasti Dip. Please stay tuned for more updates! Thanks​
 
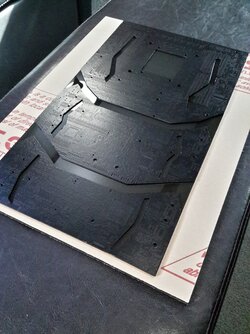
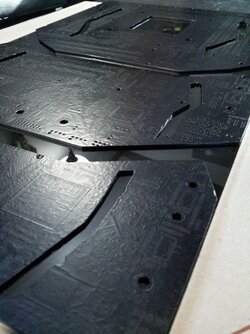
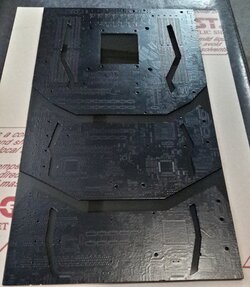
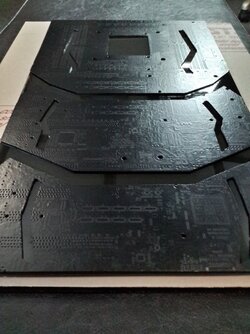
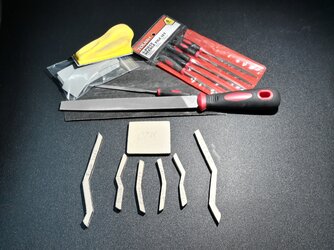
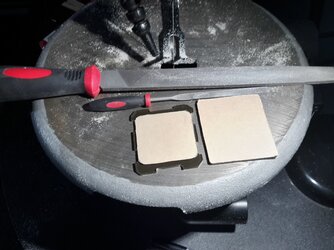
The Rampage V Edition 10 PCB blanks have been finalized, cut and finished for the In Win 509 front glass! Currently in the middle of paint now! The best tools for the job were the Dremel 225-01 Flex Shaft attachment with cutting disks, electric sander with 120 grit sand paper and file set!

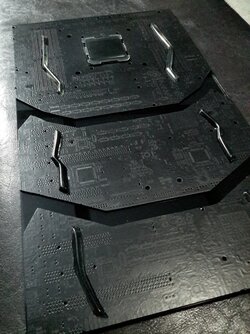
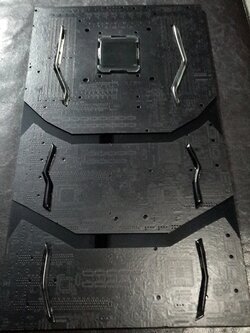
Spent roughly 10 hours between design, cutting, sanding and prepping the PCBs. After paint I will be marking the CPU and LED cutouts onto 1/4" thick smoked cast acrylic for cutting. I will then inlay them onto the smoked acrylic front glass and into the PCB blanks for finalization of the front glass. Pretty happy with the overall design and believe the mimic the ROG Strix 10 series GPU layout very well!

3.jpg
 
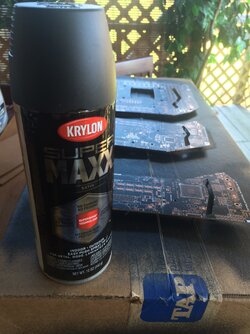
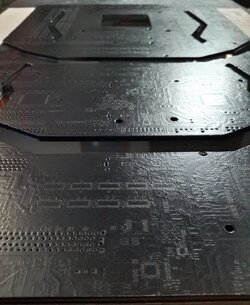
Finished the ROG PARAGON front glass PCB blanks today for the case mod. Used Krylon Super Maxx Satin Black. Applied 3 even coats and they look great on the Tap Plastics smoked cast acrylic!
Now to get the acrylic LEDs inlays, CPU front logo cut and polished! Everything is coming together now I have a solid method of cutting and finishing the PCB blanks for this mod/ build!


1.JPG
2.jpg
3.jpg
4.jpg
5.jpg
6.jpg

Up and to this point progress has been slow due to the difficulty of cutting the Rampage V Edition 10 PCB blanks. The R5E10 PCB is extremely think and durable! The scroll saw blades were literally destroyed by the toughness of these PCBs. The Dremel disks at slow speed (5,000 rpm) seemed to be the sweet spot for cutting these beasts. I have tried numerous Dremel bits, Scroll saw blacks and have found the best way to cut and shape PCB blanks is with Dremel cutting disks, files and sandpaper.

Next I will be cutting, shaping and polishing the smoked acrylic PCB LED and CPU inlays to finish off the front glass. The Tap Plastics smoked acrylic compliments the In Win 509 smoked glass very nicely! Stay tuned for more updates! Thanks
 
Thanks! Having the circuitry still visible was the plan .. wanted it to be unique but felt the bare PCB blanks added too much visually so I decided to use black to tone it down. Tested 3 paint type before I went with the Krylon satin black. Pretty happy with the look myself!
 
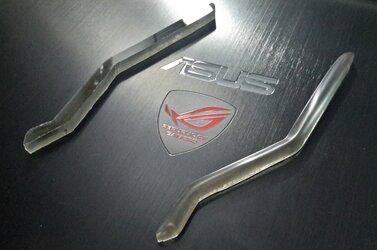
As some of you may have seen on social media I have started carving, sculpting and finishing the LED inlays for the front glass PCB blanks. Aside from time consuming this processes has worked out really good and the finished product is just what I had hoped. It takes roughly 90 minutes to finish each inlay.

In order to achieve this I cut the LED inlays from 1/4" thick smoked cast acrylic. Then I peeled off the top protective layer from the acrylic. I used a small sanding drum on my Dremel Flex Shaft attachment and low speed (5,000 rpm). Then I slowly removed all of the edges from the acrylic until they were roughly rounded. After that I used the file set and 240 grit sandpaper to finish the rounding of the acrylic inlays.

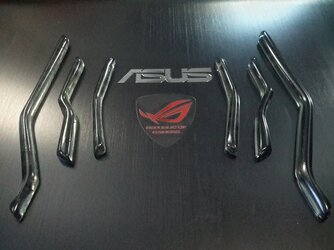
Once the inlays were rounded I then used wet sand paper, a bowl of warm water and patience to give it a rough polished look as you can see below. The objective is to give the inlays a nice glow with the LED behind the front glass not blink you. The layout of the inlays and the PCB blank pattern was inspired by the new Strix 10 Series GPU. See the pics of the original cuts and the before and after pic of the inlays below. Only 14 more of these babies to go!

30.jpg
ROG PARAGON LED Comparison.jpg
 
Thanks appreciate it .. making more progress today on the case front. Finished the PCB acrylic inlays yesterday. Polishing and finishing took some time but I think it will be worth it in the end.

2 Finished Acrylic 11-12-16.jpg
 
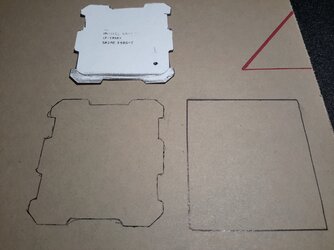
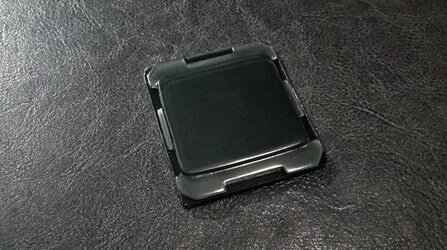
Most of the front glass for the case front has been assembled. In the process of creating a Core i7 6850k out of smoke cast acrylic from Tap Plastics. Think this should be the worlds very first acrylic Core i7 6850k :)

Case Front 2.jpg

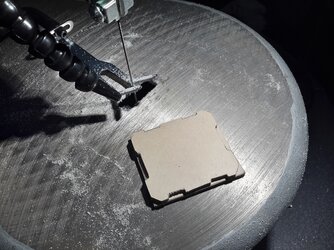
Cutting and creating the Core i7 6850k from acrylic with the Craftsman Scroll Saw below :)

1 acrylic 6850k pattern.jpg

2 Acrylic CPU 2.jpg

3 Acrylic 3850k cut 2.jpg

Stay tuned for more to come!
 
The Intel Core i7 6850k acrylic replica has been completed for the ROG PARAGON case front! Creating a CPU from 1/8" cast acrylic was no easy task but glad I decided to create it all the same. With hours of filing, sanding and polishing it has finally taken shape and come together.

I have ordered the Republic of Gamers black vinyl logo that will be sandwiched in between the CPU pieces. It will look really good with the In Win 509 RGB LED box from the front center logo behind it. Can't wait to get everything together!

Acrylic i7 6850k.jpg
 
Sorry for the delay but had some on and off weather with little time to myself. What time I did have I spent modding, painting and planning. Hope you enjoy the new post!

Below is the front glass all together. I have not fully mounted the acrylic CPU yet since I am still waiting on my vinyl’s to finish the job. The ROG logo will be sandwiched between the CPU pieces in black so will be highlighted like the batman light once complete with its own Aura LED RGB module from the In Win 509 behind it.

ROG PARAGON Front Glass 2.jpg ROG PARAGON Front Glass.jpg

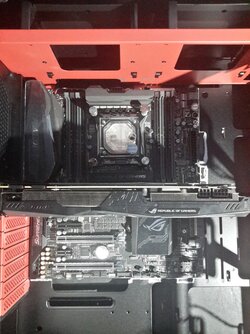
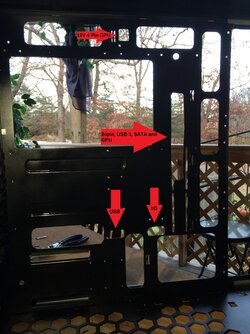
The plan for the ROG PARAGON was to have an extremely clean cabling look all in black with only some white letter on hardware, 2 red ROG PARAGON 1” high vinyl’s and full RGB. In order to get everything properly I placed the Rampage V Edition 10 into the 509 and marked exactly where the cabling would go to the motherboard.

Motherboard cabling ports marked.JPG Test Fit.jpg

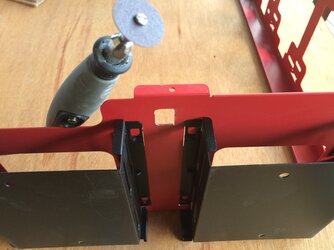
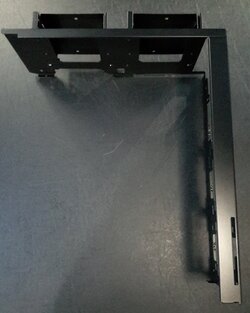
I began by removing most of the rivets from the inner chassis of the In Win 509. Using a 1/8” drill bit and a high speed drill I removed the case rivets until I could remove the inner chassis and 5 ¼” bay. I also removed the red I/O covers as well to be sprayed black.

In Win 509 ROG Rivet Removal.jpg

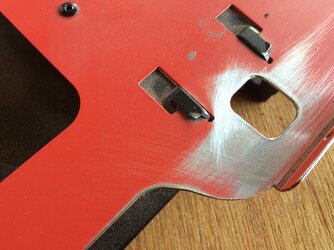
I used the Dremel cutting disks to cut the cabling ports out of the 509 frame and chassis. Once cut I then rounded the ports with flat small file, small round file and sandpaper. Sharp edges would be a bad thing when it comes to cabling. I have also ordered 1/8” U channel for the new cabling ports to prevent any damage to the Cablemod ModMesh cables.

Finished cable ports.JPG

I placed the ports exactly ½” from the motherboard itself. This will allow for a tight cable bend and clean cabling. I will also be cutting PCB blanks to cover everything except the cable ports I created for the RVE10 motherboard layout. To compliment that I will be creating a power supply cover with the PCB blanks as well.

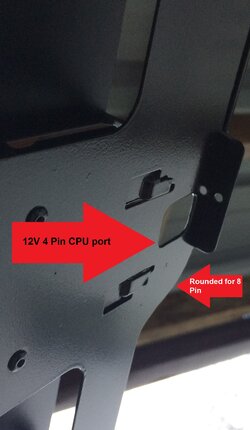
These ports in particular required two cuts ... the 12V 4 Pin and 8 pin CPU cable for the RVE10. I wanted the ports to come out exactly at the motherboard port for a clean look so the cuts will pay off in the end.

12V 4 Pin Port cut.JPG 12V 4 pin port sanded.JPG 12V 4 Pin Port.JPG

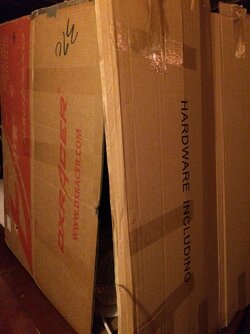
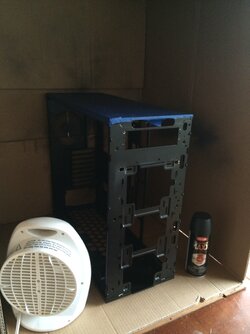
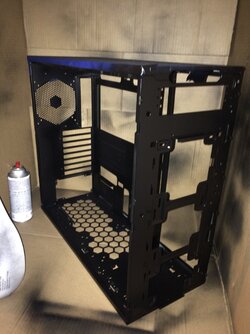
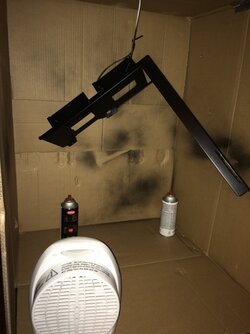
Now that the ports were cut I began spraying the chassis, I/O plates and the frame black. Here is where I ran into problems. The temperature had dropped to 0c and I had to create a spray booth using the box from DXRacer and a small portable heater. This worked out really great and was even better than spraying in warm weather. The temperature inside the box is a nice 32c! I left 3 coats of Krylon Super Maxx Satin black bake onto the chassis and frame for 4 hours. Turned out great!

20161204_145433_Richtone(HDR).jpg DXRacer Spray Booth.JPG IMG_3128.JPG

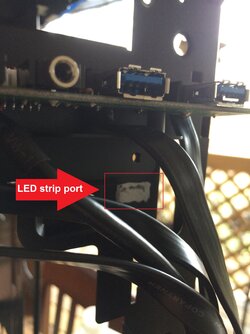
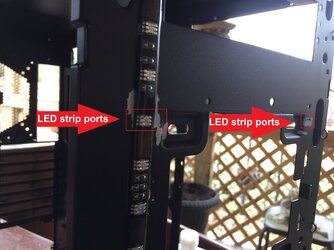
Next I had to create a couple custom ports for the Cablemod Magnetic 60cm Aura RGB LED light strips for the front. The strips will be just below the top front panel and behind the acrylic LED inlayers on the front glass. The LED strips will also be on either side of the front filter and with the LED being magnetic I will be easily able to remove them for cleaning the tower. The ports will allow them to dive into the chassis and will loop over the top of the 5 ¼” bay. This will also light up another addition you guys will see soon!

I also used the trusty DXRacer spray booth again once the LED ports were cut, trimmed and rounded. The last coat is baking as we speak!

509 chasis paint.JPG LED Ports painted chassis.JPG LED Strip port allignment.JPG LED strip port marks.JPG LED strip ports cut.JPG 20161204_181153.jpg

Stay tuned for more updates and full parts list!
 
The front of that case will be insane looking, can't wait.
Thanks ... I will have two strips of Cablemod Aura RGB LEDs on the acrylic inlays and the In Win 509 RGB LED module for the acrylic CPU. Should be nice and bright! lol
 
Back