• Welcome to Overclockers Forums! Join us to reply in threads, receive reduced ads, and to customize your site experience!

[BUILD LOG] Water Box Inferno

Overclockers is supported by our readers. When you click a link to make a purchase, we may earn a commission. Learn More.

mgrisoli

Registered
Joined
Sep 30, 2014
Location
Porto Alegre - RS - Brazil
Hello everyone!

I am not new to water cooling but I haven't really built anything in a while.
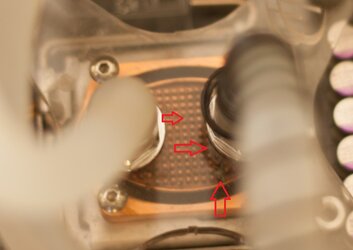
Last time I upgraded my system I turned back to air cooling because of some sh*t I found in the loop:
IMG_6857.jpg

I believe it was result of the corrosion of aluminum parts inside the radiator.
Also, I was upgrading the GPU, so I had to turn down my awesome EK full coverage water blocks.
My reservoir was also showing some crackles.

So, with my reservoir looking bad, radiator gone, GPU water blocks gone and the money invested in new parts: MOBO, PSU, CPU and GPU, it just made sense to go air cooling and save some of the liquid fun for later.
That was good because I saw some rigid tubing loops and I fell in love with that looking and the idea of learning some new tricks.

I have an old case though, a Danger Den Water Box Plus, which I plan to reuse for this build.
I know, it's acrylic, all transparent and old fashioned, but it still looks darn good and it seems easy enough to mod if necessary.
The case itself is amazing, but it leaves nothing to imagination, I have to improve my skills on cable management because I cannot hide it anywhere in this case - no pun intended.

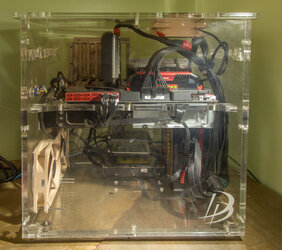
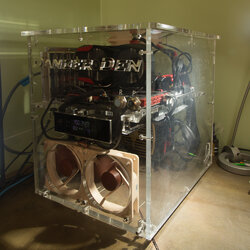
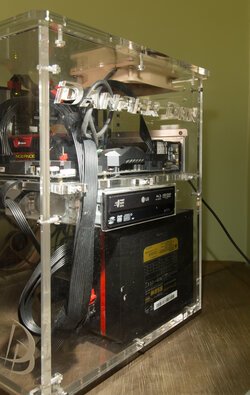
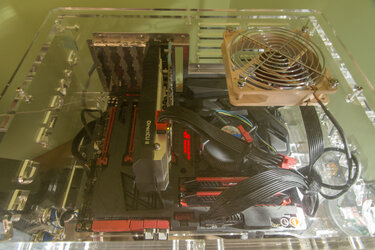
So, here is what I have today:
IMG_7553.jpg
IMG_7556.jpg
IMG_7562.jpg
IMG_7565.jpg

Don't be scared by the looks, this is just a temporary arrengement for the system to work.
I feel like I have good components here and with your help I am going to sleeve these cables, put some lighting, watercool it and make it look awesome.

Even though I am not new to water cooling, my objectives in the past were always silence and performance, almost never aesthetics.
So, I expect this time to struggle a little with sleeving and cable management, as well as dealing with rigid tubing.

Here is the hardware I have today:

  • MOBO Asus Maximus Vii Formula Intel Z97
  • Processor Intel I7 4790k 4.0ghz 1175
  • RAM Corsair Vengeance Pro 16gb (2 X 8 Gb) 2400mhz
  • Blu-ray Lg Black Wh16ns40 Cache 4mb Sata
  • NVidia GeForce GTX 760
  • Thermaltake 850w modular PS-TPG-0850MPCGUS-1
  • Ssd Samsung 840 Evo Mz-7te500bw 2.5 500gb Sata Iii
  • HDD WD Black 1Tb
  • HDD WD WD10JPLX-00MBPT0 500Gb

I know the GPU sucks, but I will upgrade it that later, I promise.
I use this rig for a little gaming and a lot of work, which includes Autocad, 3D rendering and some heavy ****.

In my next post I will go through what I am planning to do and gather some ideas.
I have some specific questions that I hope this forum can help.

Cheers!
Marcelo
 
Hi everyone!

So, what I am looking for is to do what has to be done to extract an awesome performance in terms of thermal exchange.
I need some room for overclocking (nothing extreme), need room for a powerful GPU that will be acquired later.

I also hate noisy systems and this one will have to look good as well, that means a pigeon's nest of cables and tubes is not acceptable.
I will watercool CPU, GPU, and chipset.
Not planning to watercool RAM nor HDs.

To take advantage of the looks of the MOBO I will stick with the black with red accents color schema.
I know... not an original idea, but I will be ok with it.
I don't want to make too red, so maybe some white leds will help.
When I sleeve the ATX cables I may make one or two red.

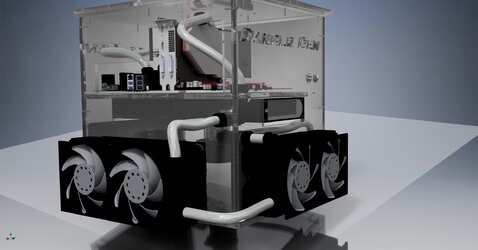
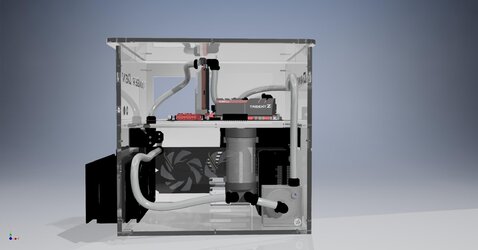
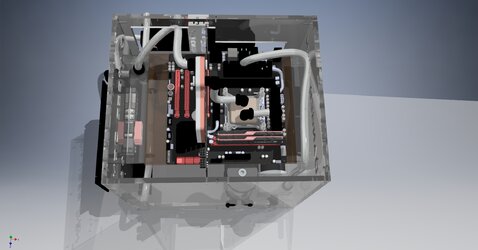
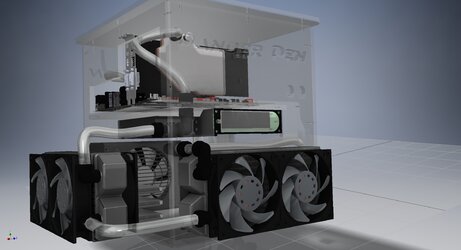
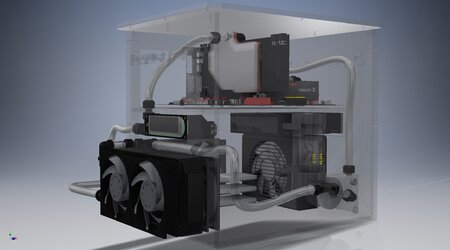
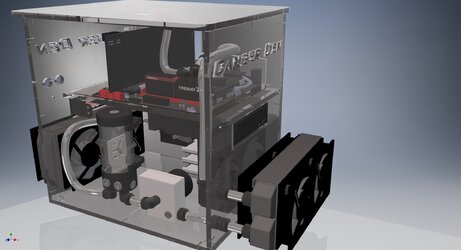
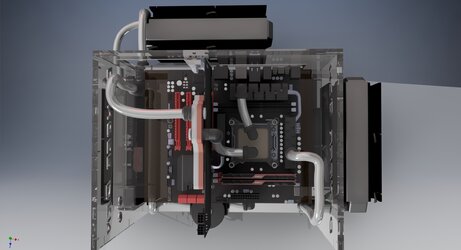
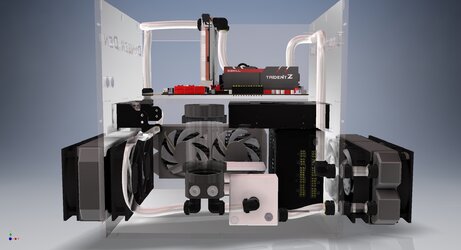
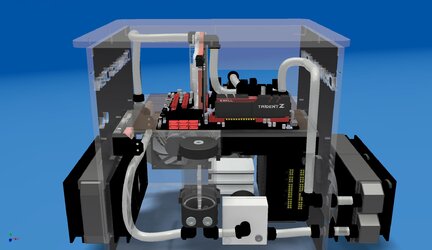
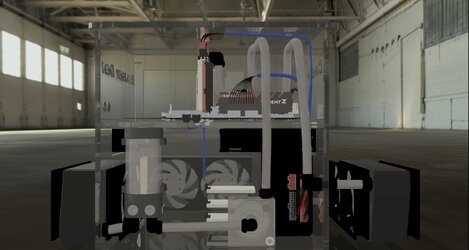
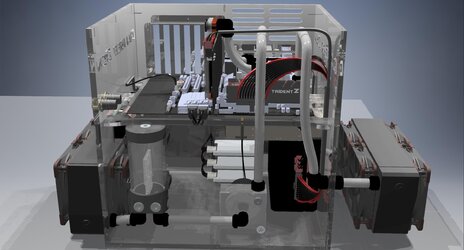
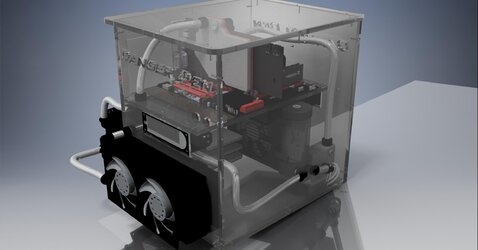
I sketched up some ideas to test placement and routing for the tubes, look at here:
Danger_Den_Case_002.jpg Danger_Den_Case_003.jpg Danger_Den_Case_004.jpg Danger_Den_Case_006.jpg Danger_Den_Case_007.jpg Danger_Den_Case_test.jpg

Don't mind the flexible hoses in the sketch. Those will be PETG pipes.
I just don't quite know how to deal with tubes and pipes in autodesk inventor yet.

Here is my first dilemma.
The placement of the radiators.
It seems this case was designed for one 240mm on the left side.
But, for my intentions I don't think this is enough.

So, I am thinking about a second 240 on the back.
It will be attached with long screws and at least 50mm apart from the back of the case.
I am thinking about 2 units of 240 EK coolstream XE (60mm).

So, I have two questions:

1. Do you think 2 x 240 60mm thick radiators would be enough to cool down GPU, CPU and chipset, with possible some humble OC?
2. Do you want me to sketch up an alternative placement for the radiators like both on the top?

Feedbacks are welcome.

Cheers,
Marcelo
 
Looking good Marcelo. My guess is it 2x240 would be a bare minimum. I doubt you'll get much of an OC if any. Is there any chance you could switch the rear radiator to a 360? If not maybe switch both rads to the monster 80mm thick rads from alphacool?
 
Blaylock,

Thanks for calling the rads out.

I'm thinking about the 360 rad (it's 400mm lenght) kinda.. sorta.. fit on the back.
The case is just 380mm wide, but if I "overlap" with the side rad 240... hmmm, perhaps...

There are some other cons, though.
One of them is the PSU.
The back of the PSU would be covered.
The PSU would be blowing hot air onto the rad.
Additionally, I wouldn't have a plece to fix the rad screws where it overlaps with the PSU.

I guess I was resisting to the idea of a third rad, but after all it doesn't look that bad.
I rerouted the pipes in the mobo too.

Here is what I designed for 3 rads:

Danger_Den_Case_v1_3_rad_lower_002.jpg
Danger_Den_Case_v1_3_rad_lower_003.jpg
Danger_Den_Case_v1_3_rad_lower_004.jpg
Danger_Den_Case_v1_3_rad_lower_005.jpg

I was even thinking on mounting all rads on the top of the case. 3x240 or maybe even 2x280.
But I don't want the whole thing to look stupid and one of the most interesting things in this case is that you can see the mobo from the top and see the pipe runs through all blocks...
I guess I don't want to loose that possibility.

Take a look and let me know what you think.
 
Last edited:
You can get away with 120.4 worth of rad for a CPU and GPU only loop. If you add the 3rd rad, you'll be able to run your fans at a lower speed and have more than enough headroom for OCs as well as a 2nd GPU for SLI if you ever choose to.

Nice sketches btw.
 
Wow, have not seen a DD Water Box in an eon, can't wait to see this come together.

I agree with both these cats, if you can get more surface area great, this will lower the noise output of the system.

If not you simply will need to ramp up the fans until you get the desired temps.

Case is a bit limiting, but lovin the Retro Water Box

Yeah, I surrendered to the 3rd rad, you guys nailed it, I don't want fans running in 100%.
 
Great decision adding a 3rd rad into the loop. You can then run the fans at a lower rpm and will get less noise with about the same or better cooling performance.

Like Witchy I haven't seen a DD waterbox in years. I also like the fact you're reusing it. Can't wait to see it when it's finished :thup:
 
Hello everyone,

I have ordered fittings, res and some other smaller parts.
Just missing fans and rads at this point.
It takes long for these things arrive here in Brazil, so I will be modelling in my sketeches until it arrives, but do not expect to see any real assembling so soon.

I have two questions for you about the fans and rads I am divided between two choices on each item:

Rad:

EK's XE
https://www.ekwb.com/shop/ek-coolstream-xe-240-double

Alphacool
http://www.frozencpu.com/products/1...ml?tl=g30c95s160&id=esw5RSAU&mv_pc=4327#blank

I was thinking to go EK, but I saw additional in/outs in Alphacool rad and I went nuts, that would help with the pipes routing.
Also I see a "lonely hole" in the opposite of the header, is that supposed to be an out or an in? or maybe just a fill port?
I wonder if any of you ever used that for something...

Fans:

- EK Vardar F2 120mm
Or
- Noctua NF-F12 Industrial PPC 2000 pwm

I was thinking EK again because of some reviews but I am a big fan of Noctua fans (sorry, I couldn't contain the pun)
I found that this specific Noctua model has a static pressure of 3.94!? against 1.43 of EK's
Noctua also beats up EK on airflow 121,8 m³/h x 88m³/h.

from a quick look at Amazon both can be bought at equivalent price.
Maybe this one is a no brainer...

Thoughts? Ideas?

Btw, I am working on my sketches and refining everything, including possible routes of pipes and cables.
Stay tuned and let me know what you think about these choices of fans and rads.

Cheers.
Marcelo
 
Alphacool rads are nice. As you noticed, they have several ports. The top single port is for filling.

As for fans, I'd venture with Gentle Typhoons AP15s or the other Darkside Typhoons, PA's 1850 RPM fans. They're the top dog when it comes to rad fans.
 
Last edited:
Alphacool rads are nice. As you noticed, they have several portals. The top single port is for filling.

As for fans, I'd venture with Gentle Typhoons AP15s or the other Darkside Typhoons, PA's 1850 RPM fans. They're the top dog when it comes to rad fans.

Got the Alphacools but I've chosen the X-Flow series.
For fans I picked the Noctua indeed.

Ok, So I ordered everything and I believe it will take at least a couple months until I get everything on site.


This is the last update I made in the model:
Danger_Den_Case_v1_3_rad_lower_012.jpg

I let you all know when parts start to arrive.
 
Updates!

I have made progress in the model. Added more details on parts placements, improved tube and cable routing, I guess I am achieving better looks comparing with the initial sketches. Please feel free to chime in about this.

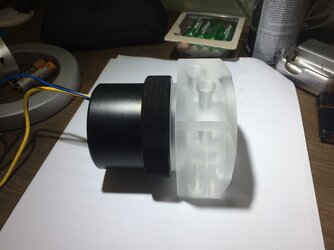
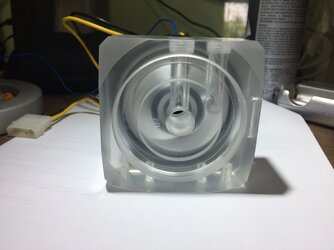
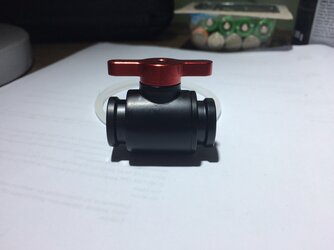
First batch of parts arrived:

I am upgrading my D5 with a retrofit kit.
Danger_Den_Case_v1_3_rad_lower_015.jpg
IMG_3775.JPG
IMG_3776.JPG
IMG_3777.JPG
 
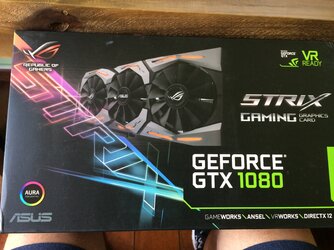
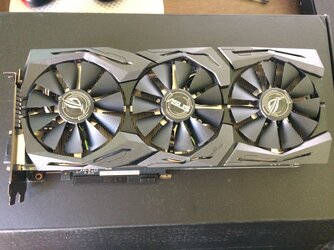
GPU arrived yesterday...
Nice unboxing experience!
IMG_3807.JPG
IMG_3811.JPG

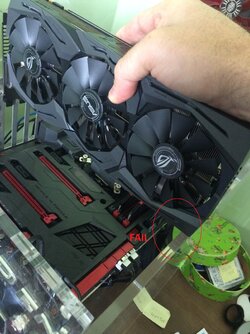
And then...
IMG_3813_2.jpg

Luckily the board itself is smaller than its cooler and would fit in the case.
The water block is on the way, hopefully not exceeding the length of the board.
M
 
I can't tell if the shrouds of the GPU is sticking out or that's the PCB as well. I don't think that's a reference GPU, therefore you probably will get a WB at the most, the exact size of the PCB.
 
Regarding your very first post and the pictures of the Danger Den water block you said you would reuse, it is a horrible cooling performer compared to the blocks out now like the EK Supremacy MX or the XSPC Raystorm.

They will beat the Danger Dens cooling by at least 5c ~ 10c because of the advanced cooling design, I have one of those Danger Den blocks that's been shelved for years just for that very reason.

Danger Den used those cast pins in the copper base and they are very inefficient at cooling, they look good, but just do not get the job done.
 
Regarding your very first post and the pictures of the Danger Den water block you said you would reuse, it is a horrible cooling performer compared to the blocks out now like the EK Supremacy MX or the XSPC Raystorm.
They will beat the Danger Dens cooling by at least 5c ~ 10c because of the advanced cooling design, I have one of those Danger Den blocks that's been shelved for years just for that very reason.
Danger Den used those cast pins in the copper base and they are very inefficient at cooling, they look good, but just do not get the job done.

Wow, thanks for the call out.
I will consider replacing it with a more up to date one.
My 4790k has very high temps even when not OC'ing, a better block would definetely help then.

On a side note, while the new setup is not ready yet I am doing AIO - Cooler Master Seidon 120V V3 Plus, and noticed that the base of the block is not perfectly machined/polished like other blocks I had.
The copper surface would be normally "mirror like" to maximize contact surface, not so sure that matters so much, I have seen articles debating if that matters at all with good quality thermal paste.

M
 
On a side note, while the new setup is not ready yet I am doing AIO - Cooler Master Seidon 120V V3 Plus, and noticed that the base of the block is not perfectly machined/polished like other blocks I had.
The copper surface would be normally "mirror like" to maximize contact surface, not so sure that matters so much, I have seen articles debating if that matters at all with good quality thermal paste.
M

If you have a block with machining marks and you don't want to lap it, just use Old Faithful!

Artic Silver 5 is one of the best TIMs we have at our disposal, Why?

Because it is a gap filler that seats over time and once fully cured it's conductive thermal properties always increase anywhere from 1c to as much as 5c, that's not website HoopLah, I've seen it myself.

It's at least 99% silver Ag, and silver is one of the best thermal conducting elements on the periodic table.

Do not take my word for it, look yourself.

https://environmentalchemistry.com/yogi/periodic/thermal.html
 
I would disagree that AS5 is one of the best TIM's available. Yes it is good but it is far from the best.
 
Back