• Welcome to Overclockers Forums! Join us to reply in threads, receive reduced ads, and to customize your site experience!

PROJECT LOG Project Storm (All in one HTPC/Gaming/Router/H20)

Overclockers is supported by our readers. When you click a link to make a purchase, we may earn a commission. Learn More.
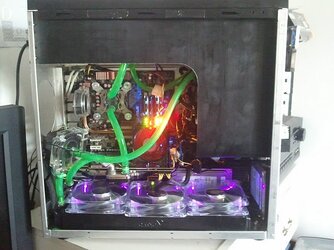
Before any comments on the whole funky fan situation going on.... its due to be sorted,
- New fans already ordered (starting to like the nickel look)
- Along with a lapping kit, not for the cpu as im too scared of damaging it and knowing how impossible it will be to find another that will do 4.15GHz but for the cpu block, it was SHOCKING! you could make a rasping noise if you pull your fingernail down it, I was stunned to see such bad machine work on a enthusiast block, so thats one job to do when it arrives. ill get pics of the state of it
- Also ordered a fan controller which (fingers crossed) with a bit of modding will still fit in the top bay, will need paining though as its silver.
- Also ordered a 775 Backplate as i dont like the pressure bending the board.
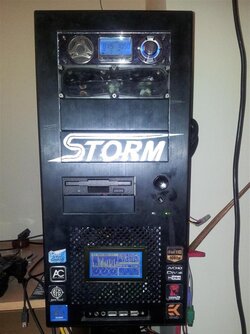
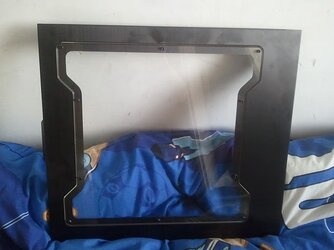
- Also ordered a Windowed side panel, I did intend to make my own but seeing the lian-li shaped one i decided i wouldnt be able to create the same effect and went with an after market one.

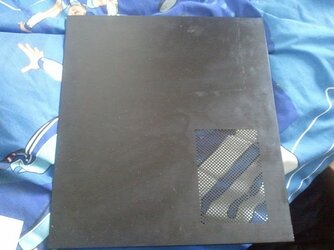
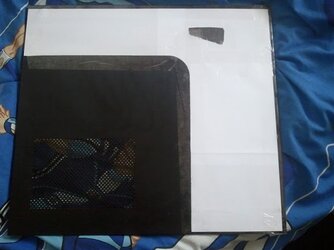
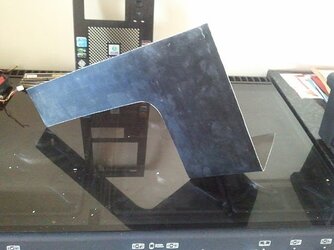
I also realised that with the spare side panel i can cut a piece to cover the top bar and down over the 5" bays and the 3.5" bays below and use it to cover all the screws and mountings

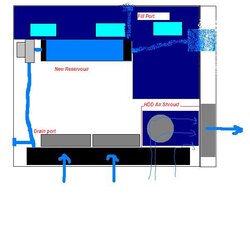
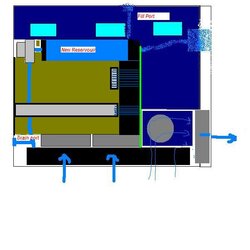
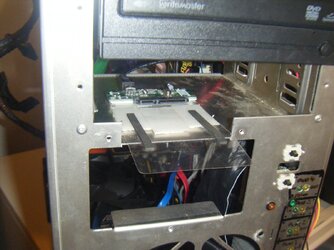
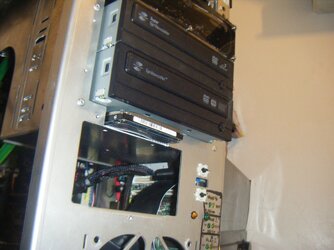
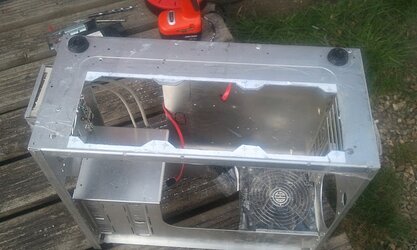
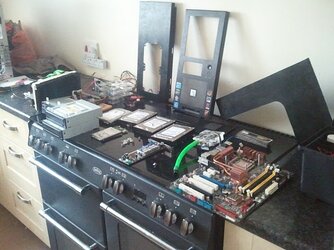
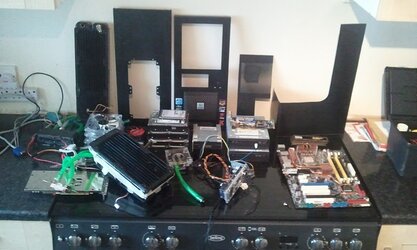
Some pics of the Removable HDD next and then thats me until I get the parts above and do a full stripdown of the machine to install it all... Yipee (im getting fed up of draining and refilling now, can you tell?)
 

Attachments

  • DSCF0017.JPG
    DSCF0017.JPG
    297.6 KB · Views: 236
  • DSCF0019.JPG
    DSCF0019.JPG
    521.5 KB · Views: 213
  • DSCF0020.JPG
    DSCF0020.JPG
    287.5 KB · Views: 238
Well, lapping kit turned up, managed to do the heatsink and also the cpu, looks like i should have done some more research as by the time id worked my way through the papers, i did not have the finnish i was expectining but it was considerably better. (round 2 needed sometime soon)
Remounted using recycled paste and got slightly lower temps, maybe 1 degree.
Remounted the cooler 90 Degrees and it certainly made a difference, not in reducing temps, but balancing them out over the cores, i was running load at 48 on two cores and 55 on the other 2, after switching 90 degrees i ended up at 49/49/53/53 so that made me feel better, so it seems the flow is better suited this direction. I have major concerns however about the TIM on this mount and am not confident its a good mount.

Today however i receievd some artic ceramique, a side panel and single pci slot for the gtx470, so some more work going on tonight to check the mounting and temps and free up the slot next to the GTX470 so i can refit the DVB-T card next to it and it not interfere with the Radiator fans now i went for 25mm fans over the 20mm Yate loons. Happy times

Really going to have to find somethings to do to the PC that dont cost much (ie Sleeving) as im going to thailand in 50 days and cant be spending much at the moment
 
****************** MAJOR UPDATE ****************

OK, parts listed on the 20th turned up now, Namely:
W-65BT Window *b grade* £20 from Kustom PC`s with free p&p (bargain)
Aerogate II
EK 775 Backplate
3x Hiper Chrome 120mm Fans
Arctic Ceramique
And now there all wired in, some new pics.
I actually feel like im close to finnishing now, just some cutting and cable management to do but thats for this weekend if the weather stays nice
 
99% Complete!!!

OK, finally got to strip the machine and get some needed work done on it, So the whole lot came out, a jigsaw a drill and some other tools. Also got to fit some new parts and fabricate some steath panels.
Firstly the steath panels, I did plan on powdercoating the case, but since i bought another side (windowed) and had a nice sheet of anodised ally i thought id put it to use
Firstly i used paper to make a template of the upper chamber
 
Bit crude but it worked a treat to make a template
 

Attachments

  • 2011-04-02 16_07_29.jpg
    2011-04-02 16_07_29.jpg
    51.1 KB · Views: 166
  • 2011-04-02 16_09_59.jpg
    2011-04-02 16_09_59.jpg
    50.2 KB · Views: 166
  • 2011-04-02 16_13_10.jpg
    2011-04-02 16_13_10.jpg
    57 KB · Views: 166
This template was then tranferred to the old side panel
 

Attachments

  • 2011-04-02 16_05_34.jpg
    2011-04-02 16_05_34.jpg
    47.3 KB · Views: 165
  • 2011-04-02 16_23_43.jpg
    2011-04-02 16_23_43.jpg
    35.3 KB · Views: 167
Then was cut out using a jigsaw and positioned back in the case. At this point i wasnt too sure how much excess would be required at the bottom, amazingly it fit in perfect and flexed in behind 2 rivets at the fromt negating any need for extra srews to fix the panel, I was really happy about that, literally couldnt have gone better!
Once this was in, i could then judge how much below would be needed and bent it to cover the underside of the HDD cage
 
Cheers.
Unfortunatley the upload photo keeps crashing so i cant upload the latest progress... so ill post some benchmarking.
Now ive got the bottom rad installed & cut out i decided to see if it will now let me push the system further. I know I had the cpu up to 4.14 Ghz before but decided to back off at 4100 mhz where it was stable but at 1.625v which is about as high as im comfortable pushing it (for now)
Managed to push the GTX470 to 855mhz (607 Stock) so up another 50mhz on top of what i was pushing before and also the memory seemed almost stable up at 2113mhz, however in 3dmark11 the memory didnt seem to make much real difference so i backed off back to 2050 which i know is a stable overclock.

Few benchmarks later and a beta driver update I managed to beat my goal of 5200 points on performance mode, actually hitting 5220. making that score a respectable 38% faster than stock on gaming and the cpus at 70% faster than stock. Accoring to the leaderboards on 3dmark im running in 12th place, which is pretty damn good, BUT i dont understand how im not in the lead (bar the lad whos pulled 5700, thats not even achievable) I say i dont understand as my clocks are equal if not more than some of the higher 3dmark scores. Ive even reinstalled windows 64bit so its a blank install but still not there.

Also the latest beta driver seemed to give me an extra 100 points in 3dmark, the other scores are on the WHQL driver so where am i going wrong? i appreciate the cpu speed shouldnt make a massive amount of difference but im at 4.1ghz whereas the higher scores are 3.6-3.8ghz.

The ONLY think i can think of is that the memory needs more playing about with, i think i got it from 1066 > 1140 still at 5-5-5 timings. Would i notice much difference if i ran it at say 1000 at 4-4-4, i know im scraping the barrel here but its annoying me i cant get a higher score and i want the absoloute MAX out of this machine.

Any advise or ideas on what else i might be doing wrong greatly appreciated
 
Latest

So ive not updated for a while and im about to have another blitz on it so i thought id best update before i do. these were done a while ago but i couldnt update

So ive cut the plate and another from the old side case, bent the bottom to cever all the bays and also to mount something later on
 

Attachments

  • 2011-04-02 16_48_46.jpg
    2011-04-02 16_48_46.jpg
    66 KB · Views: 91
  • 2011-04-02 16_57_12.jpg
    2011-04-02 16_57_12.jpg
    66.3 KB · Views: 91
  • 2011-04-02 18_13_28.jpg
    2011-04-02 18_13_28.jpg
    75.2 KB · Views: 91
new window panel arrived

rear panel fitted

quick pic of the panel i cut and shaped

both panels cut perfectly so the lever into place (no screws/glue/anything needed) :D
 

Attachments

  • 2011-04-02 18_20_50.jpg
    2011-04-02 18_20_50.jpg
    62.1 KB · Views: 88
  • 2011-04-02 16_05_43.jpg
    2011-04-02 16_05_43.jpg
    36.8 KB · Views: 113
  • 2011-04-03 14_34_45.jpg
    2011-04-03 14_34_45.jpg
    48.3 KB · Views: 88
OK, this posts is out of order but hey

Stripped my machine, didnt realise how much stff id managed to "shoehorn" into this case, pretty mych ive left no space free

so i managed to jigsaw out the bottom rad hole, cut dowm thin strips of old sound dampening foam and remounted the rad, mounted the micro board
 

Attachments

  • 2011-04-03 16_56_04.jpg
    2011-04-03 16_56_04.jpg
    90 KB · Views: 88
  • 2011-04-03 15_16_46.jpg
    2011-04-03 15_16_46.jpg
    70.1 KB · Views: 88
  • 2011-04-03 15_23_25.jpg
    2011-04-03 15_23_25.jpg
    82.5 KB · Views: 89
  • 2011-04-03 18_27_13.jpg
    2011-04-03 18_27_13.jpg
    65.7 KB · Views: 88
  • 2011-04-03 18_38_44.jpg
    2011-04-03 18_38_44.jpg
    43.8 KB · Views: 88
  • 2011-04-03 18_41_43.jpg
    2011-04-03 18_41_43.jpg
    76 KB · Views: 88
Couple of pics of the micro board and the :-/ 
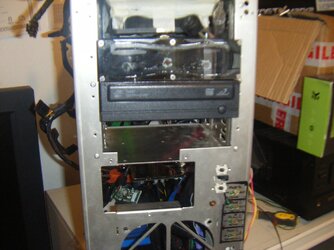
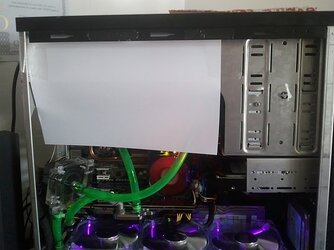
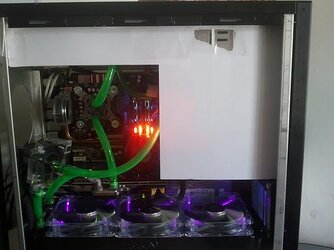
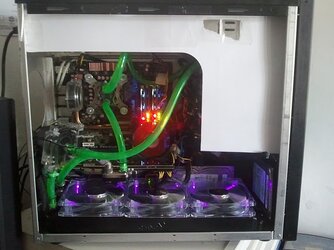
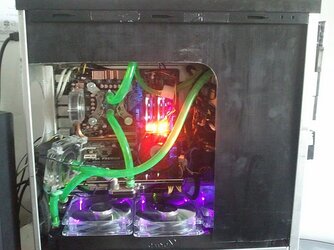
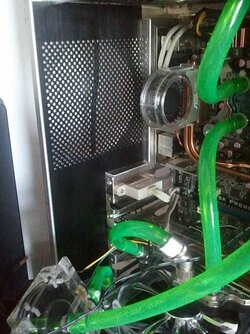
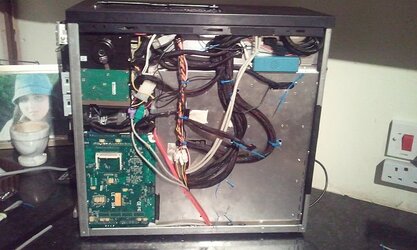
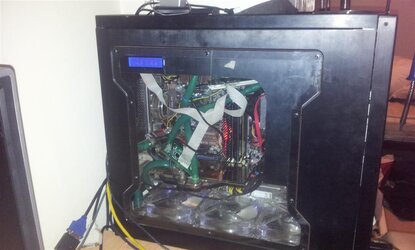
excellent wire management
 

Attachments

  • 2011-04-03 15_30_02.jpg
    2011-04-03 15_30_02.jpg
    93.1 KB · Views: 86
  • 2011-04-03 15_30_10.jpg
    2011-04-03 15_30_10.jpg
    108.6 KB · Views: 87
  • 2011-04-03 22_00_29.jpg
    2011-04-03 22_00_29.jpg
    96.3 KB · Views: 87
so all that puts me up to novermber ish time and ive moved house since then, here we are up to dateish in its new home

yes its a bit messy at the mo but ive managed to rewire 2 16x2 lcds mounted one into the plate i cut, the other is loose but due to be mounted the same way at the other side, the 2 controller boards will also be mounted sandichched between the plate and the original case and be invisible.

Ive also stealthed the 2 DVD drives and attempted to paint a logo which you can see is part-done and didnt come out as i like so thats been re-done and im in 2 minds wether thats stopping.

I removed the ram fan and bought some tall aluminium ramsinks, however in the process of removing the old heatspreader i damaged 2 of my sticks
 

Attachments

  • 2012-02-09 01.45.57.jpg
    2012-02-09 01.45.57.jpg
    762.8 KB · Views: 86
Last edited:
i have planned to have 3x same lcds, rear displaying network stats, mid showing GPU stats, load, temp, memory usage and the front showing the CPU data. quick mockup i did to get a picture
Still need to order the 3rd screen and im playing with the idea of a 4x20 or a graphical display to mount into the front airvent
 

Attachments

  • 2012-02-09 01.45.577.JPG
    2012-02-09 01.45.577.JPG
    395.7 KB · Views: 107
  • 2012-02-15 09.58.42 (Large).jpg
    2012-02-15 09.58.42 (Large).jpg
    80 KB · Views: 86
Better internal shot. You can see the ramsinks here.

as i said i wanted to get the log back up to date before I went on round 3 of this project as its ready for a teardown
 

Attachments

  • 2012-02-09 01.46.23 (Large).jpg
    2012-02-09 01.46.23 (Large).jpg
    82.9 KB · Views: 86
******STAGE 3 PLANS*********
***************************

Ok, now ive got it all up and funtioning correctly and given its in a good need of a full teardown & clean it means i can finnish off all the niggly bits and finnish this off. So heres my todo/ shopping list

The tubing was second hand and while it wasnt my choice of colour ect it was 100x better than what i had previously, this machine has been built amost 100% from ebay 2nd hand (except the HDDS), its about time i spent some cash and did it right so im going with Black / silver / Blue lighting & coolant

1: Paint the tranparent part on the fans matt black as they look out of place to me

2: Paint the motherboard tray & rear Matt Black

3: Paint the NB/MOSFET Heatsink with aliuminium paint which (should be heat proof as its airbrushing water based stuff which i have in hand ready for another project)

4: Paint the tops only of all the visible caps silver

5: Buy 3m Clear tubing

6: Buy 250mm tube reservouir
This will be mounted horizontally hanging from the top bar under the lcds, the pump will be properly mounted straight behind this (see picture)

7: fill it with Mayhems Aurora Blue, if you havnt seen this stuff its here
ITS AWESOME!!

8: possibly drop the radiator underneath the case and leave the fans inside & mount wheels to raise the case to ready it for SLI as my lower PCI-E is blocked at the moment, though this probably wont happen until i do go sli

9: use standoffs to move the perspex 10mm off the side of the case side
As all the rad fans are pulling air in then there isnt that much open space for the air to escape this should overcome the positive pressure inside the case


10: wire up the leds that are in the reservoir

11: mount a few switches to control lighting on fans / reservouir for nighttime movie watching

12: Create a bracket for the hdds to they mount over the 1st 3rd of the radiator and mount a fan exhausing out of the front, they will then need a shroud fashioning so the front fan will suck ait through the rad, over the drives and out the front (see picture)

while cecking positioning i realised that the same shroud, The vertical piece, will also be able to run straight up and be used to civer the rear of the drives above, also it can be used to tidy the 24pin & 6+8 Picie as my idea is to sheath these and take then at 90 degress to the baord out of the dive covering panel

Im also very short on space and i aim (when prices drop) to have a 6x2tb array, this configuration will allow me to mount 4-5 drives in this space, will prob have to remove the micro board now
Already cut out excess alumnium at front of air instake (a lattice of bars that arnt nesessary)

13: Buy a radiator grill for the top 240 Rad

14: Buy 2x Replacement silver fans for top

15: Replace cheap barbs with bitspower shiny

16: Buy and fit a top fillport

17: Buy and fit a Drain port mounted at rear means with the direction of the radiators it should all drain if tipped on its back

18: Paint the rear of the perspex fronted bay panels so they dont look washed out and match the black of the case
Fan controller easy,
not too sure about the res as its going to need masking off and ant imperfections will be very visible, might use a sharpie on here when i do the teardown
 

Attachments

  • untitled.JPG
    untitled.JPG
    27.1 KB · Views: 88
Last edited:
Over this weekend ive not done much,
managed to get the fan housing painted matt black,
cut out the 2nd LCD screen
stood off the window from the side panel -/+ 10mm
Removed the perspex covering the fan controller and painted the rear of this panel, so now the panel looks jet black and matches the case
 
So new plan:

Ive found there isnt enought space to mount a 25mm fan purely inside the removable frot panel, so i will have to cut into the front panel and mount the whole square of the fan half in half out. OR remove the fan and mount the motor part only without sheath so its half inside the front hole. - ive not decided yet

The stealth panel (in green should fit completely in one piece from radiator right up to the top bracing and hide all wires/drives ect and also provide the nescesary boxing to the front fan/hard drives are essentially within a closed box which suck through the rad over the drives and out the front

The 24 pin wires will go 90derees from the MB and into the panel so should look clean, the same with the Video card for a very clean look

By my maths this whole panel should be cuttable out of 1 single sheet if bent correctly, maybe once ive finnished i may take a trip to a laser cutting shop and get it all re-done perfectly - I may have to revove the rounded top corner, but that may happen anyway depending on the reservoir fitting as it will put is square to the front bays, but i wont make a desision until thats in hand

To give you an idea.......
#1 is the new panel im going to make with cuts into the side for wiring as this makes it a lot more removable as a temporary cover until i decide on thermals placement ect

#2 shows how it can be made from a single sheet which i would get laser cut from brushed aliminium / polished stainless???

#3 how it fits together

note how the final has only holes for the psu/gpu, i will have to get an atx extension and speperatly feed the pins through whhich means if i disconnect both ends the panel remains removable

can anyone spot any pitfalls that ive overlooked with this???
 

Attachments

  • untitled v2.JPG
    untitled v2.JPG
    28.1 KB · Views: 79
  • Stealth panel.JPG
    Stealth panel.JPG
    14.3 KB · Views: 80
Ive sent off for a rough quote from a local fabricator, roghest mock up ever, this should surely provide some amusement when they see that.

Does anyone have any thoughts on what you would expect to pay for this built with 3mm bushed anodised back aluminium

Just for giggles ill put on what i sent to the fabbies
(the 2 tabs under the lcds, could be used to attach the res on cleanly and is also the res tubing imput.

Hopefully the only visible wiring will be psu & gpu
 

Attachments

  • fabby 1.JPG
    fabby 1.JPG
    26.8 KB · Views: 78
Back