1. Make a 100mm or 75mm paper template (6x6 or 5x5) depending on how big your monitor is.
1.1 I used Autocad, but you can easily cut out a 6x6 or 5x5 square piece of cardboard or paper and then take the mount from the stand and mark your holes onto the template.
2. Purchase a 1/4" 12x12 ABS plastic sheet or smaller.
http://www.amazon.com/ABS-Textured-...TNSW/ref=sr_1_2?ie=UTF8&qid=1315583212&sr=8-2
2.1 Purchase a small can of ABS Cement and Acetone.
3. For 100mm mount I cut out a 6x6 square, and for 75mm 5x5 is good.
4. Purchase 4-3/4" 4mm hex head bolts along with 4 nuts and 8 washers.
5. Purchase or use hot soldering iron with a suitable tip for melting/welding plastic.
6. Carefully use a screw driver to press down and unhook the plastic tabs holding the back cover on. (I started near the bottom next to the function/menu/power buttons) and remove the back.
7. Find the center of the back. I used the circle HP logo and measured 3" out from center and marked the edges.
8. Cut out a 6x6 or 5x5 square piece of ABS plastic.
9. Prep the area lightly with a paper towel and Acetone on both the back and the plastic plate. Then apply ABS cement to the back overlapping a bit. Then press the plate down onto the glue using pressure for a few seconds.
10. Tape your template to the back of the now glued plastic blank on the back cover, and drill your 4mm holes (find a bit that closely matches a bolt).
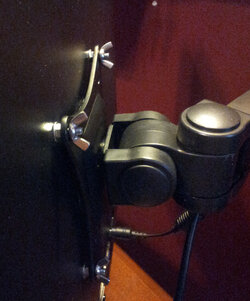
11. Place all 4 bolts through the holes with washers and nuts and tighten them.
12. Find a scrap piece of ABS plastic to use as filler/welding material and melt the plastic all around each nut. Melt a tad bit on the top of each nut as well so it won't fall out once you remove the bolts.
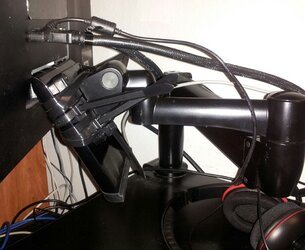
13. Remove the bolts and snap the back cover back on to the front.
14. Get help or carefully hold the monitor to your desk top stand mount and carefully thread your bolts into the holes, and TIGHTEN.