• Welcome to Overclockers Forums! Join us to reply in threads, receive reduced ads, and to customize your site experience!

Weekend Project with pics. Tubes and new block

Overclockers is supported by our readers. When you click a link to make a purchase, we may earn a commission. Learn More.

bluezero5

Winner, Rig-o'-the-Quarter, Fourth Quarter 2012
Joined
Mar 17, 2012
Location
Tokyo
Tubing project as promised to some.
Old Tubing were Primochill, installed just 3 weeks ago.
they went CLOUDED in 1 week.. and I was worried.
I added silver coil and CuS04 in the old loop.. after 3 weeks, the pH is at 5.9.. I call that not ideal at all.

So my stuff ordered from performance-pcs came.. and work begun:

first look at the old system
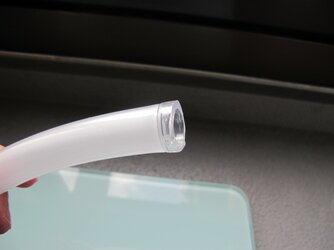
pretty much.. white tubes...

IMG_3751.JPG

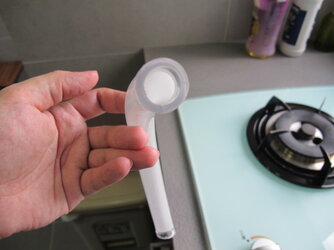
I took apart. and lets look at the tubing.. you can see area without water contact is still clear.. so that rounds it down to the liquid's contact causing this..

IMG_3752.JPG

another look here, you can see the film is actually getting thick.. I think I made the right call taking the whole thing apart..

IMG_3753.JPG

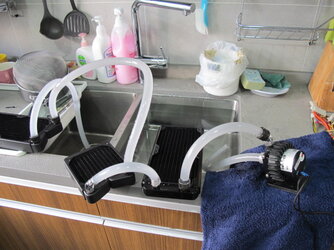
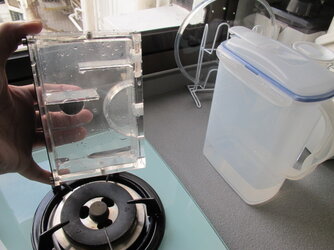
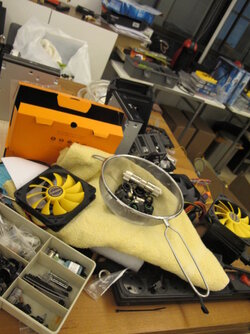
Always wash before work. You will see my rads here. 2 are from swiftech, and one is a BlackIceStealth. Can you tell which is which? haha. So you know, the tank of water there.. is deionized water.

IMG_3754.JPG

Here's the res.. looks ok.. I thought there was a white film too, turns out to be fog only.

IMG_3755.JPG

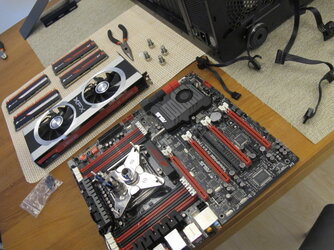
taking EVERYTHING apart..

IMG_3756.JPG

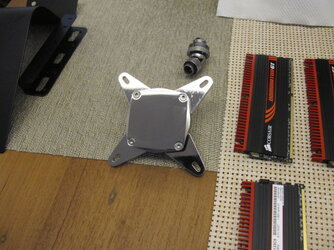
Here's the koolance cpu 37 after lapping. mirrorly and 'slightly' concave, perfect.

IMG_3757.JPG

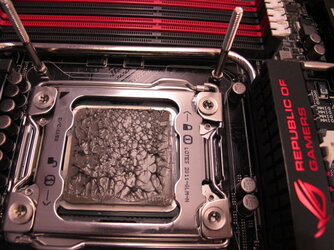
this time, I use Artic Silver5 as TIM, was using MX-4, so just going up the ladder. AS5 is not bad.. spreads easy, right viscosity for good use. Expensive though.. the instruction says this is the kind of TIM that takes 2 days to set in... and can experience a full 1'C difference.. we will see.

this is a picture of my placing down the block, removing it to check for contacts. (I always always do that.)

IMG_3758.JPG

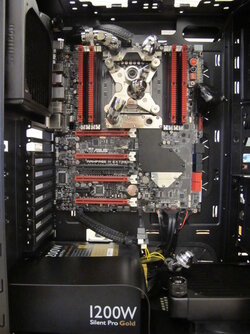
New VRM and SouthBridge waterblock now installed. Kinda an overkill... but hey, if koolance made a R4E specific waterblock.. I want it. I also self made a PSU partial cover with a piece of metal painted black. Now I can put my pump on it !

IMG_3760.JPG

worked from 4pm - 4am.. no kidding...

IMG_3761.JPG

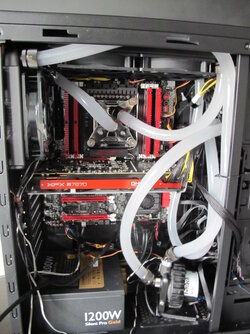
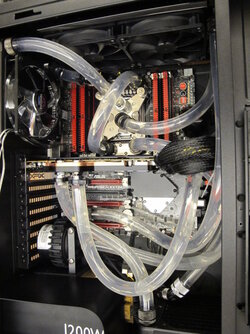
completed. Let me introduce my components.
Top Fans are SLIPSTREAM 1900 rpm, they are awesome, works fine, lowered temps than GT-AP15s, they are in a PUSH/PULL set up.

back fan is a Enermax Duo 1700 rpm arg 85CFM, also push/pull, but the pulling partner is another SS1900. I just have the Enermax here for the good looks.

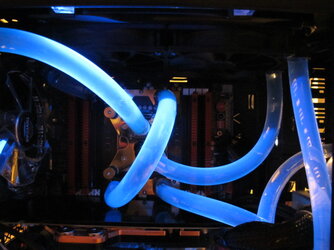
Bottom rad, I have 2 SS1900 as push, not push/pull there.. running out of room on my box.. TUBES, are now Masterkleer 1/2 ID. they do something special.

IMG_3763.JPG


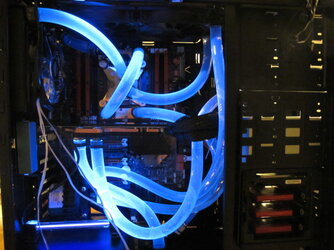
that is this:

Tube are UV reactive. I think it looks nice.

IMG_3764.JPG


another closer look.

IMG_3765.JPG


Now lets hope this time. With JUST silver coil and distill, it won't cloud anytime soon. A serious pain in the butt to redo it. :)

Thanks.
 
Seems like a pretty sweet system!

Just a quick question...isn't that an awful lot of thermal paste to be using? unless i'm mistaken, the recommended amount is about the size of a small pea...

it probably isn't a huge deal as it seems like the temps in your sig are pretty solid :)
 
yeah, when it comes to TIM, I try more than less.

as i have had episodes where pea size wasn't enough, but never had a problem when more was applied. So I just try my best to have the entire 'surface area' covered for max amount of heat transfer from the chip to the waterblock. :)
 
The mentality on thermal paste is very different. Some say, all it takes is to apply a "small pea" in the middle of the processor and thats it. Others say to evenly apply a small layer of the paste at the whole area.

Fact is: When the "easy" method is used, the paste wont be at the entire surface because at the edges there could be close to none. Usualy cheap OEM builds are done like that because they always use the methods with lowest amount of work.

Another fact is that "air bubbles" doesnt seem to be a high issue as long as pressure is sufficient because when the layer is small enough its hard for air bubbles to appear. I still want to have a proove that they actually exist. Guess i will make some tests using a glas plate, so i can see it with my eyes if there is bubbles around.
 
Fact is: When the "easy" method is used, the paste wont be at the entire surface because at the edges there could be close to none. Usualy cheap OEM builds are done like that because they always use the methods with lowest amount of work.

That's patently false. If you mount your block correctly you get even spread regardless. Look at Vapor's TIM testing if you doubt that that is a fact. He uses the blob in the center method.
 
That's patently false. If you mount your block correctly you get even spread regardless. Look at Vapor's TIM testing if you doubt that that is a fact. He uses the blob in the center method.

just read that review nice read thanks.

what I don't understand is IX is clearly the better TIM but how do people install this on a WC loop? do they pull all their parts out eg. pump, res, rad and make sure they are up the right way while doing the install or do pumps, res, and rad work fine if horizontal or vertical?
 
Everything works fine in any orientation as long as there are no bubbles in the loop and the pump is getting nothing but water from the res.
 
IX is actually a metal based TIM. It's a thin pad sorta that actually MELTS and flows between the parts. You have to turn your PC on with NO CPU cooling, ie, fans off or no water flow. You turn it on and let it overheat so the PC shuts itself off. That is hot enought to melt the IX.

It's tricky, Mobo must be horizontal, starting block pressure can make it fail etc.
 
bluezero5, thanks for this post it was most interesting to see and read. My question is about the UV tubes. Is it a black light you have that gets them to light up like that? That is so cool and I must do something similar. I will look around and see if I can find the tube and lights. But if you could post some links that would be great too. Thanks again!:thup:

I found some products for UV tube set up. Let me know what you think of these or is there something better? And yea I want blue:)

http://www.frozencpu.com/products/2...thode_Kit_-_Ultra_Bright_UV.html?tl=g6c75s133

http://www.frozencpu.com/products/8...ng_-_UV_Blue.html?tl=g30c99&id=Kr4MmTAk#blank
 
Last edited:
hey Kenny!

You want this instead of the blue light.. this is black light (UV) :)

http://www.frozencpu.com/products/3031/lit-96/Logisys_4_Dual_Cold_Cathode_Kit_-_UV.html?tl=g6c75


your tubing is Blue tubing, going bright blue under UV. :) which is great!
I chose clear tubing that goes pale blue under UV, cause I like it like that. :)

and ya, I do enjoy putting UV lights in my chassis. Some say it even kill bacteria! but to my opinion, the UV intensive is not yet enough to 'kill everything', maybe just a mild kill on some that came too close to the lights. :)

(that's why you see I have one of the bottom tube, running very close to the lights. disinfect!!! haha.)
That is great stuff! :salute:So you think dual 4" is plenty of light? I am just doing a CPU block.
 
UV light is used to kill bacteria/mold in HVAC (Heating/Ventilation/Air Conditioning) but at a much greater intensity than what the average consumer is able to purchase.
For the maintenance crews that work on these units, they have to either: 1) wear UV protective goggles or 2) turn them off.

Whether or not the UV lights in computer cases do this, I doubt it.

-H
 
That is great stuff! :salute:So you think dual 4" is plenty of light? I am just doing a CPU block.


depends how large is your chassis. for a normal full tower, yeah, I reckon such is enough. For Ultra-Towers though.. probably need a bit more. :)

and yes, don't count on it as biocide, not effective enough. I still have silver kill coil. But the thought of it 'killing some bacteria', is a comforting thought. :)
Yea my case is going to be a Cooler Master HAF X.
 
UV light is used to kill bacteria/mold in HVAC (Heating/Ventilation/Air Conditioning) but at a much greater intensity than what the average consumer is able to purchase.
For the maintenance crews that work on these units, they have to either: 1) wear UV protective goggles or 2) turn them off.

Whether or not the UV lights in computer cases do this, I doubt it.

-H

100% agree. Normal pretty case UV is nothing like a blinding UV used in uses to sterlize water. We have one at work, $200 bulb in a $75 quartz tube.

Knowledge really helps. Assuming means............
 
IX is actually a metal based TIM. It's a thin pad sorta that actually MELTS and flows between the parts. You have to turn your PC on with NO CPU cooling, ie, fans off or no water flow. You turn it on and let it overheat so the PC shuts itself off. That is hot enought to melt the IX.

It's tricky, Mobo must be horizontal, starting block pressure can make it fail etc.

Really, with no cooling at all?
I thought you ran it with the cooling until the cpu hit a certain temp then shut down the rig altogether....
 
I got a request to update on the tube's situation on a weekly basis.
I will add a weekly pic on the Masterkleer tubes I used every weekend.

So far, on day 6, clear as day 1. (which is already infinite improvements from PrimoChill before)

The two things that are different from last time were:
1, Masterkleer instead of PrimoChill tubes.
2, Just Silver Coil instead of Coil + CuSO4.

by elimination:
Either Or/AND PrimoChill / CuS04, would have been the major cause of the 1 week clouding observed before. (observational conclusion after day 1) Pic will be posted soon.
Thanks Blue. That's good info.
 
Back