• Welcome to Overclockers Forums! Join us to reply in threads, receive reduced ads, and to customize your site experience!

virgin modder here

Overclockers is supported by our readers. When you click a link to make a purchase, we may earn a commission. Learn More.

turbomursu

Registered
Joined
Jul 2, 2008
Location
Finland
hello people

i've been harrassing the other forums before this but now my project is at such stage that there's something to show.

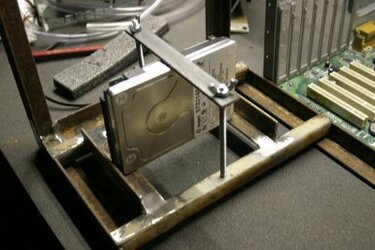
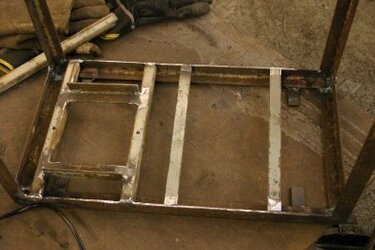
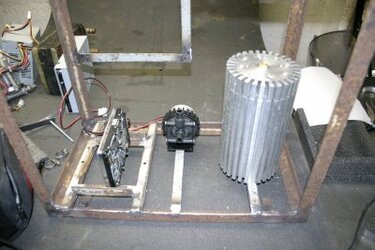
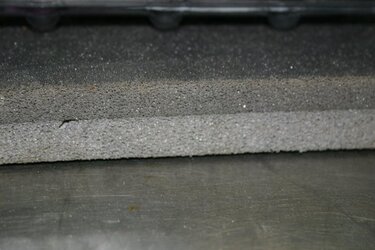
at first i started the project as very quiet, watercooled and extremely powerful gaming machine. well, along the way i had to give in for some of my demands. it's still going to be quite powerful and i hope not very loud. watercooling still stays but without the enormous abount of DIY parts I planned. looks like i'm buying all the WC parts and making just the case myself. I also planned to have rubber plates as covers, but the stuff i found at my parents' place doen't look good. so i'm going for something that looks like neoprene to me (the bottom picture).

i've learned a lot along the way about how to plan and how to proceed with the project. i bet there's still a lot more to learn and i'm willing to see where this all takes me to.

if you're interested, the project log is here. feel free to comment.
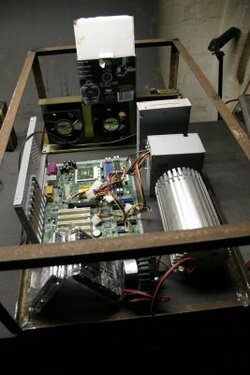
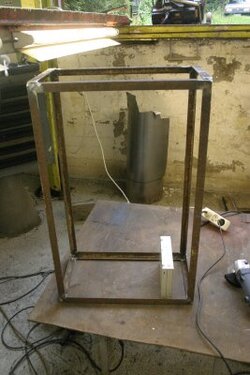
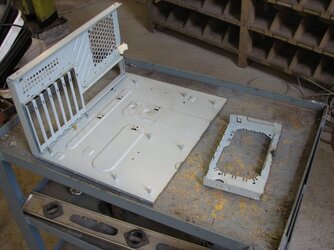
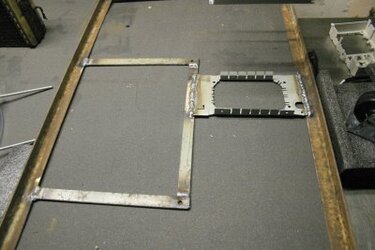
 

Attachments

  • pre_setup%20003.jpg
    pre_setup%20003.jpg
    24.4 KB · Views: 723
  • frame%20025.jpg
    frame%20025.jpg
    26.1 KB · Views: 1,787
  • case%20006.jpg
    case%20006.jpg
    17.6 KB · Views: 768
  • IMG_3639.JPG
    IMG_3639.JPG
    42 KB · Views: 769
  • IMG_8940.JPG
    IMG_8940.JPG
    39.4 KB · Views: 723
the project timeline isn't very strict, because i can work on it only on weekends maybe twice a month if i'm lucky. it's supposed to be ready in early december and i'll keep posting here when anything relevant happens. all the minor stuff and some thoughts to keep the blog running will be posted in the blog.

@ killuazaoldyeck: it's a bit heavier than alu frame, but i'm not in the little league myself either :) i'm not going to any LANparties or anything and i tend to keep stuff on top of the case. so it should be ok even a bit bulkier. the case measurements are about 80x52x26cm (31.5x20.5x10.2 inch).
 
haven't posted here for a while, but since there are not too many people reading the project log and way more reading this so i'm posting a little update here too.

i've got most of the stuff i need but i'm still waiting for the water blocks and all the computer parts. i also need to buy the plexi for the window and something to filter the air intake. still a lot todo, like making the covers, attaching the wheels, intake/exhaust grills, handles, all the WC stuff. the mobo installation plate needs also fastening, but now i have a frame to fasten it to. there was a small error in measurement, but luckily the mobo plate will cover it.

i've also ordered all the parts. here's the complete list. some of them i already have.

LG DVD+- RW DL LightScribe 20x
A-data 4GT DDR3 1333MHz+
ASUS EAH4870X2/HTDI/2 HD4870X2, 2GB
Intel CORE 2 DUO E8500
ASUS Maximus Extreme
2x Samsung 1TB Spinpoint F1
PC Power&Cooling Silencer 750 Quad (Red, Crossfire edition) PSU
HardwareLabs BlackIce 360 (i think it's that one)
EK-waterblocks EK-FC4870 X2 CF acetal for GFX card
APOGEE GTZ CPU block
Nexus Prolong
3x Sharkoon 140mm fans
2x Lazer white LED
Aerocool GateWatch2
Thermaltake FlowTX+
Swiftech MCP655
Windows Vista home premium 64-bit, UK, OEM

the attached pics show my HDD rack and the frames to install the mobo and PSU. the last pic shows how the optical drive and the PSU line up. that wheel in the pic is for the case too.

i'll get back when i get something new done. comments are most welcome.
 

Attachments

  • hdd_bracket.jpg
    hdd_bracket.jpg
    26.5 KB · Views: 631
  • mobopsuframe.jpg
    mobopsuframe.jpg
    21.8 KB · Views: 639
  • assembly.jpg
    assembly.jpg
    29.9 KB · Views: 693
Last edited:
almost all of the basic rails and mounts are in place. the top row pics are aout the wheel mounts and the bottom row is mounts for the pump and the "decorative piece".

next i'm going to drill some holes and make the mesh panels for this. i'm also getting the frame sandblasted and painted when it's ready enough.

any ideas how to mount the cover plates? the plates will be that thick neoprene covered with rubber. i was thinking of glueing them together and inserting washers in appropriate places, fastening with M6 bolts. is there a better way? there will also be plexi windows around the corner where that alu chunk is.
 

Attachments

  • corner.jpg
    corner.jpg
    17.1 KB · Views: 594
  • bottom.jpg
    bottom.jpg
    25.9 KB · Views: 597
  • rails.jpg
    rails.jpg
    24 KB · Views: 541
  • fitting.jpg
    fitting.jpg
    26.9 KB · Views: 590
i've been tinkering a bit again and finally i have somethign to show. the plan was to finish the project at the end of the year, but deadlines are meant to be broken :)
it'll be finished when it's ready. i'll keep you posted.

soundproofing
tammikuu09%20026.JPG tammikuu09%20027.JPG

rubbers almost ready to go
Kuva004.jpg

frame painted
Kuva021.jpg

still a bit of work to do, but i can do only 1-2 hours at time and setting things up and cleaning the workspace takes time too, so just a little bit can be acheived at any session. i work at a pub basement now so there are "distractions" :D
 
well... mostly i've been updating the project log and since there hasn't been too much visible progress since last update i didn't update this thread earlier.

now i would really like some feedback about the stuff i've done.
 
this might be a good time for an update ;)

WC set up and some airflow too.
6a011016613d7e860c011018040a2c860e-500pi


A bit more cable management, window plates and the front cover before we're good to go.
6a011016613d7e860c0110186459bc860f-500pi


the thing even boots up.
6a011016613d7e860c011018649623860f-500pi


well... later i found out that the GFX outlet was leaking a bit (noticed that early and shut off the machine. no harm done i guess.) and one of my disks in the RAID0 might be failing. need to look into them next week (or whenever i have the time next time).
 
here's some pics of the project i now declare finished. i managed to heat the water to 80C (forgot to plug the rad fans in...) and that caused a leak destroying the mobo and GFX card.

i hoped that the card was still alive and ordered another with a waterblock to have quadfire. well... it didn't work. anyhow, here's the picture galore.

i'm going to make a stuicker out of this and have it on the window. white will be transparent ofc.
trans-jefe.jpg

11112009399.jpg

11112009397.jpg

08102009333.jpg

plasma cut sheet metal. i printed the pic on paper, cut it and then draw the outline to the metal. i got lucky with this.
08102009337.jpg

lights on
11112009404.jpg

11112009405.jpg

11112009408.jpg

11112009406.jpg
 
here'e pics from the WC assembly


here i'm still hoping for the best
07102009314.jpg

07102009315.jpg

07102009323.jpg

08102009324.jpg

08102009325.jpg

08102009326.jpg

noisy fans
08102009328.jpg

nucular powa rulz ok :D
08102009332.jpg

T-line for easy drain. emptied the system 4 times before did this...
10102009340.jpg

project done. had i known all i know now, i'd done many things differently.
 
You fixed the leak right? Looks good right now adding some wire sleeves would help a bit also.
 
fixed the leak allright. i hope i don't have to fiddle with the joints too often anymore.

for the wire sleeves i used zip ties. the last pic is a horrible mess, but look at the pics with the red lights on where i got the ties in place. not really showcase stuff, but after over a year with the project i've started to like it how it is right now :D
 
Wow... that's all I can say.

You should be a professional... Almost all cases look crap these days but this is just beautiful. Could be because it's home-made but it does look superior.
10/10 for everything.
 
Back