• Welcome to Overclockers Forums! Join us to reply in threads, receive reduced ads, and to customize your site experience!

FEATURED Case based Evaporation cooling (aka bing's bong cooling)

Overclockers is supported by our readers. When you click a link to make a purchase, we may earn a commission. Learn More.

Shelnutt2

Overclockers Team Content Editor
Joined
Jun 17, 2005
Location
/home/
I've been looking to get into water cooling again, as I need something to help with the temps. My old XP90-C just can't handle anything. When idle my E6300 is at ~60C. I was looking more stuff up today about the latest and greatest when the bong thread was bumped. So I started researching that. I can across Bing's friend's design.

The easy stuff:
I already have a Via Aqua 2300, it does 600 GPH and a 7' head. I think that should be good enough. Piping I'll get locally and tubing I'll get from mc-mastercarr. Back in the day I used masterkleer 7/16" . Is that still the preferred tubing?

For a water block I'm looking for something that is 775, 1155,AM3 compatible. Or only 775 if the price is right. I've seen that the EK-Supreme HF is suppose to be the best CPU block but it's $70-80 depending on the exact model. Is there any better options? There is a Danger Den block for $20 in the classifieds. There is also a Dtek Fusion V2 for $45. Any opinions on those?


Now on to the fun stuff:
Lets start with the design itself.
View attachment 59948

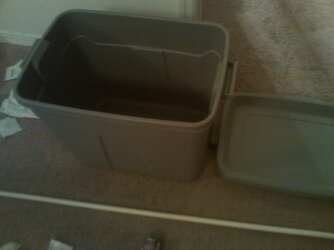
I think I am going to put this into a 18 gallon storage bin. I can get them for $5 a piece. The dimension of 16.58"x16.20"x24.22" are right in line with what I was thinking. Now it's perfectly rectangular but works pretty well. I originally was going to use another pc case, as I have about 5 generic ones. However they are all very very holely.


I'm not sure what I am going to do about the fans yet. I know the design calls for squirrel cage fans but we'll see what solution is settle on. For the hot air exhaust I am going to make a change, and output the hot air to a p-trap. This should help collect and last condensation that is caught exiting and also help to keep the hot exhaust from blowing any of the condensation from the "roof" from being blown out. I'll put a drain at the bottom of the p-trap and feed it back to a reservoir. This will also help a small amount on the water loss.

I'm going to have misters at the top where the hot water is coming in, and I plan to use a metal plates, possibly copper from mcmastercarr for the tunnel.

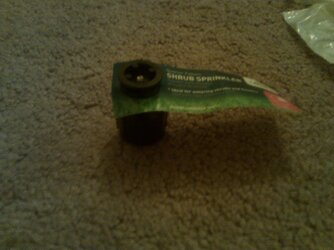
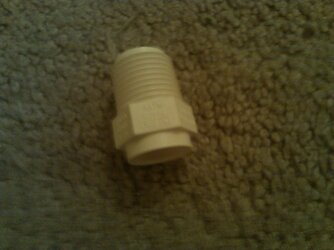
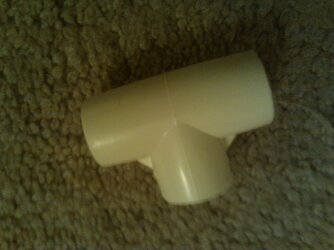
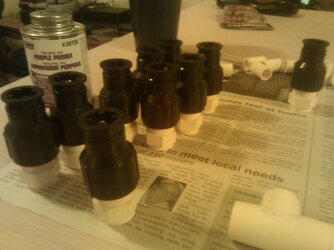
For the misters I have orbit 90 degree shrub sprinklers. They are $0.77 at lowes. I combined that with $0.44 nipples, $0.56 threaded t, and a 10 foot piece of pvc for $1.55. I bought 5 sets of the mister setups. That should fit across the 16" pretty well. It's all 1/2". My pump is 3/4" barbs. We'll see what my water block is barbed at and that changes if I'll go 3/4" tubing or the 1/2" tubing through everything. If it's 3/4" I'll just use a reducer/brushing to go to 3/4 -> 1/2" for the misters.
 
Last edited:
Let me start off with a personal note. You will see that most of these items are from Lowe's. I don't like Lowe's. My experience with them is they are understaffed and never can help me. They don't have what I need, or don't know where it is. Home Depot is my store, always has been, always will be :). That said though, the closets home depot is 3.8 miles away, up the road with lots of lights and intersections. Lowe's is just 1.0 miles, with 2 lights. Being that gas prices were around $4 and only started going down recently I don't go to home depot that often. It's one of the very few downsides to drive an El Camino (~8mpg in this hilly Florida town).

Parts:
1x 18 gallon bin aka "Centrex Plastics, LLC 18-Gallon Plastic Rugged Tote" Item #: 345844 | Model #:345844 available from Lowe's for 8.48

IMG_20110705_202648.jpg

10x Orbit 90 degree shurb sprinklers (these are 1/2"). Item #: 60732 | Model #:54010D Available from Lowe's for $.077.

IMG_20110705_202433.jpg

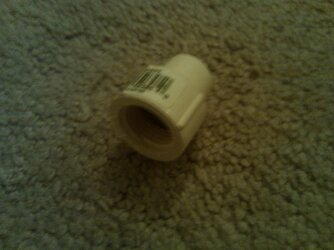
10x 1/2" CPVC Male Adapter Item #: 23765 | Model #:50405N Available from Lowe's for $0.19

IMG_20110705_202455.jpg

10x 1/2" Socket-Socket CPVC Tee. Item #: 23759 | Model #:51405K Available from Lowe's for $0.17

IMG_20110705_202507.jpg

1x 1/2" CPVC Cap Item #: 23764 | Model #:50305Y Available from Lowe's for $0.19

IMG_20110705_202540.jpg

2x 1/2" Special Female Adapter Item #: 23764 | Model #:50305Y Available from Lowe's for $0.57

IMG_20110705_202526.jpg

1x 10' 1/2" CPVC pipe.

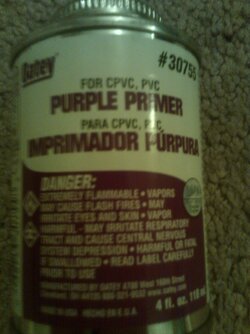
1x Oatey 8 Oz. PVC and CPVC Purple Primer Item #: 23781 | Model :307560 available from Lowe's for $4.98

IMG_20110705_202604.jpg

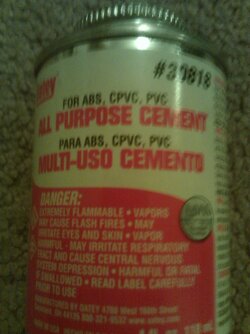
1xOatey 4 Oz. All-purpose Cement Item #: 23540 | Model #:30818D available from Lowe's for $4.98

IMG_20110705_202553.jpg

2 x 1/2" Barbs Available in a 10 pack from McMaster-Carr for $5.27

1x Float Valve

Various amount of 1/2" tubing. Personally I used 7/16" Masterkleer for a better fit. Available from McMaster-Carr for $0.57 a foot


A note on CPVC vs PVC. The PVC fittings that Lowe's sells are rated only to 110F (~43.3C). The water is going to be hotter than that going into the piping. Now the PVC probably would hold fine, evident by the number of evaporative cooling designs already build over the years. However to get the better heat rated CPVC, which is good up to 180F (82.2C), is only a about $0.50 total extra. I think it's worth it, but it's up to you. Also you don't need 10 feet of it, only about 27" total, however the price difference for me was $0.20. I figured for 20 cents it's worth it to have plenty extra.

Waterblock I'm testing with is a Enzotech SCW-REV.A available at Newegg for $34.99

Water pump is a Via Aqua 2300 (Currently OSS and not displayed)

Hot Glue gun and a plethora of glue sticks.

Great Stuff
Teflon tape
Drill and 5/8" drill bit


Onto the building!

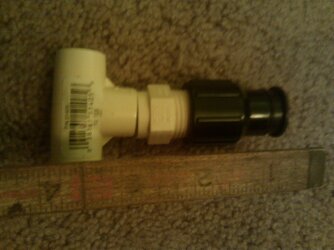
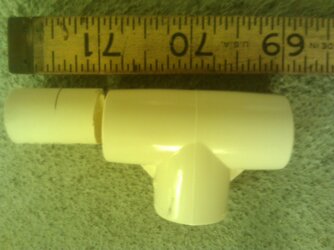
The first thing to see was how tall is the sprinkler setup going to be? I screwed the sprinkler to the male adapter and set it next to the Tee. Turns out I need about 3.5" clearance.
IMG_20110705_203617.jpg

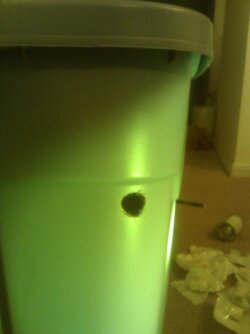
With that I measured 4" from the top and tried to go as close to the side as I could. Since the corners are rounded I wanted to use that to my advantage. I needed to two holes to run the line for the sprinklers.
IMG_20110706_181404.jpg

Now the bin is rated at 16"x16"x24", but those are its maximum dimensions, which include the handle. In practice the bin is only ~20" wide at the top. Each tee is a little under 2" long. Thus 10 tees will fit across.
 
Last edited:
To measure how big I needed to cut the cpvc pieces for the tees I inserted the pvc tube into a tee and marked where it stopped. I then measured and doubled this as I will be joining two tees. It comes out to be a little under 1". I wanted minimum spacing between tees in order to fit all ten sprinklers into the bin.
IMG_20110706_182624.jpg

Now I couldn't get a picture of this but when gluing the cpvc the important thing is to put the primer (purple stuff) onto the cpvc first, then put the glue. After you put the glue on the pipe push it into both tees. YOU HAVE SECONDS TO DO THIS! The glue will dry very quick. Also it is important to make sure that all the tee's are lined up. To do this I simple would push both together then push them/all of the tees against the table so that everything was at the same angle.
IMG_20110706_202625.jpg

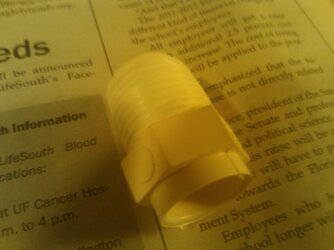
Next thing to do is to attach all of the sprinklers to the male adapters. That way we can make sure when we glue it that we have all of them lining up properly. When screwing the shrub sprinklers to the male adapters it is important to use teflon tape to make sure you get a good seal.
IMG_20110706_204304.jpg IMG_20110706_210806.jpg

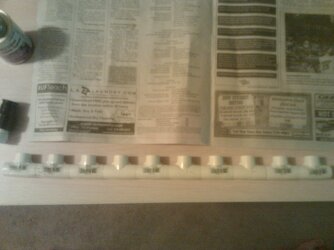
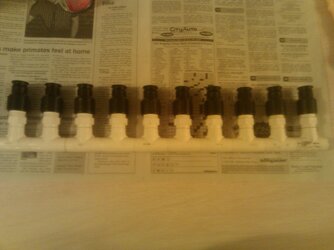
Again because we want to make sure we take the least space possible it is important to check every cpvc cut. For these male adapters to the tee they need about 7/8". After you cut out ten check them all. The problem with sprinklers that are too high is they might hit the lid which is slightly recessed. When you glue these it is very important that you press it in and line it up so the head is facing the same outward direction as the rest of the heads. After you glue all ten of them it should look like this:
IMG_20110706_213014.jpg

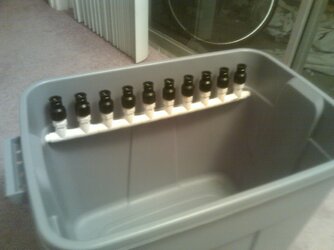
Make sure it fits in the bin. Afterwards cut two 2" cpvc pieces in order to act as the ends for the sprinklers and to fit it in the bin. You'll have to glue these pieces inside the bin. I suggesting putting paper in the bottom of the bin in order to avoid spilling or dripping any glue. As always it is important to wipe away the access glue after you put the pipes together. It should look as follows:
IMG_20110706_213238.jpg

Glue the cap to one side and the female adapter to the other. Then screw in the barb but make sure once again to use teflon tape.
IMG_20110706_220251.jpg

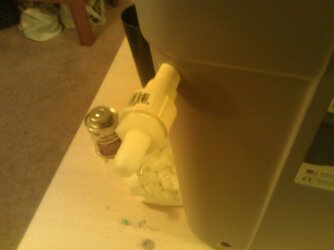
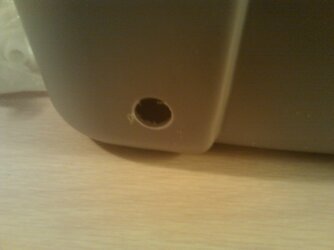
Near the bottom of the bin it is important to cut a third hole, this is the drain/ouput of the cooler. I used a 1.5" piece of cpvc with the female adapter and a barb attached to act as the return. After you glue the female adapter onto the pipe put glue all over the rest of the pipe and slip it into the hole in the bin. Hold it for a few minutes and it'll create a water tight seal.

IMG_20110706_220302.jpg

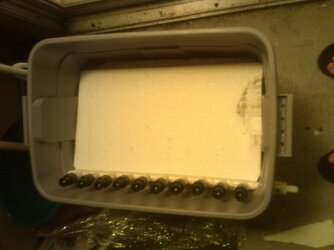
The styrofoam is just temporarily cut in place and held there by force. Gluing or a a more permanent test solution will be determined.
IMG_20110706_222918.jpg

For now though its just an experiment to see if the design is plausible. A quick test shows everything working and no leaks.

[side note] At this point I attempted to install an autofill with a $8 brass float valve. IT FAILED MISERABLY AND CAUSED LOTS OF PROBLEMS. It cause leaks and pains. The problem was the brass was too heavy and I could never get it mounted and my cpvc sealed properly. It always ended up leaking at the pipe. It was also too tall so I had to mount it to high so the water had to be too high. It just didn't work. I have lots of pictures of it but I'm leaving it out unless someone request to see it.

Now what I tried to do next was use great stuff (gap filler) and glue the styrofoam in that way. However that only marginally worked and in hindsight it is better to install the fans first, so that is what I will continue with here.

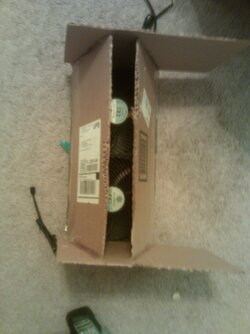
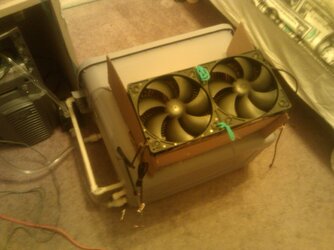
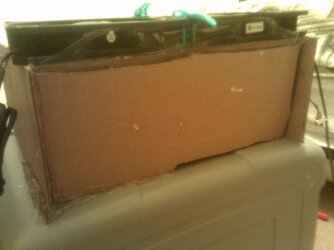
First thing with the fans is to tie them together with string, or yarn. Then I taped two 14" piece of cardboard to the top and bottom at angles. I then plugged the fan in to test which rate of deflection gave the best results. Then I held the slated piece of cardboard in the location while I super glued two sides on the cardboard which hold it all together. Nothing is glued to the fans only taped. Only the cardboard is glued to itself. This gives me a nice 14" x 2.5" window with a good air flow.

IMG_20110716_153120.jpg

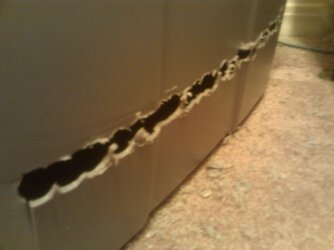
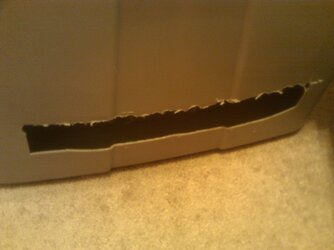
My box cutter is crappy and I need to buy a new utility knife but I haven't yet. So I had to drill out the holes for where the fans will mount. I needed a rectangle that was 14" x 2.5" and was 3" from the base of the bin. I decided to try and drill 14" across. Dumb mistake. I should have drilled a single hole and then used my knife. So the top looks pretty bad but the sides and bottom I cut cleanly.

IMG_20110718_182551.jpg

IMG_20110718_183213.jpg


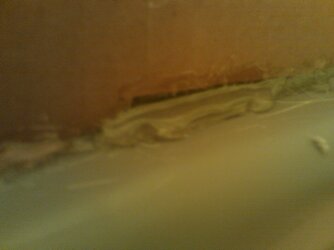
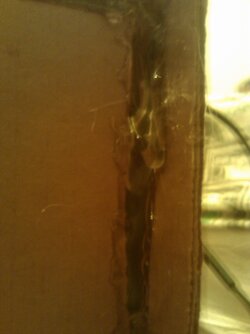
The next step was to place fan mount to the bin and hot glue the cardboard to the bin on all sides. I had to do a little trimming of the cardboard and ended up needing to add some planks to the top and bottom pieces so they would reach the bin and I could glue it. I wanted to make it all air tight.

I got some good shots of what it takes to make it air tight and overall how its attached.

IMG_20110718_202010.jpg

IMG_20110718_202808.jpg

IMG_20110718_202019.jpg

IMG_20110718_202801.jpg

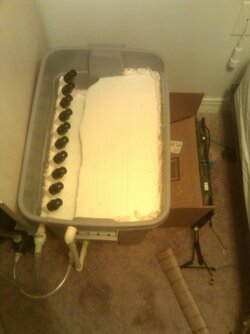
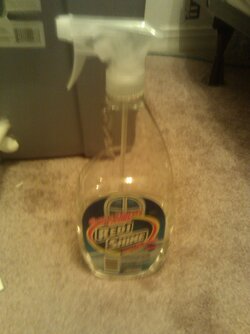
After the fans were mounted it was time to finish the styrofoam. Now per suggested I bought acetone and a 99 cent bottle of fake windex. I dumped the fake windex into a bucket and filled it with the 16oz bottle of acetone. I then experimented and determined that three sprays across the styrofoam was the limit. This helped to create more surface area. I then placed each layer in the bin at a 30 degree angle. Now my suggestion here is to use great stuff to seal and fill the gapes in the strofoam. However I'd do it one layer at a time and then hot glue the remaining gaps and the great stuff for support. The great stuff by itself will not hold the styrofoam with water I found out. Now I did things is a slightly reverse order but this is what I suggest you do it'll take a longer time but trust me its worth it.

IMG_20110716_165055.jpg

IMG_20110718_204521.jpg

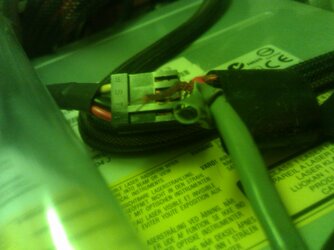
Now the second to last thing to do is hook the fans up to power. As the fans only had a 3pin power adapter I had to improvise. WARNING IF YOU ARE AN ELECTRICIAN LOOK AWAY NOW :bday:

First I needed motherboard power so I tapped an unused floppy connector (I have two and only need one). I twisted 3-4 strands of 18 gauge wire and put it in the ground (black) and 12v (yellow) slots of the connector.
IMG_20110718_211623.jpg

Next I needed to hook it up to the fans, so I cut two small piece of wire and again used 3-4 strands of the stranded wire, twisted it and showed the black in the black (ground) and red into the red (hot).


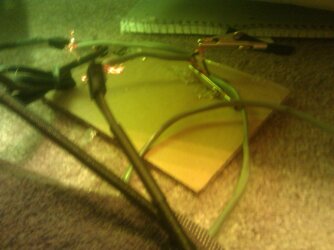
Now because this is all temporary I have all the wires just twisted and alligator clipped. I've ordered proper connectors and I'm going to solder some good safe wires soon. I suggest than anyone repeating this thing about the fans ahead of time and have a power supply situation already prepared.

IMG_20110718_211656.jpg

Lastly hook up all the tubing and fill it with ~2 gallons of water. Then start priming the pump :). You may or may not need a little more water but only add about 2 cups at a time. Too much is a very very bad thing. I ruined the whole bottom of my fan mount by spilling water out by adding too much. Now also I have half the bin and the fan mount sitting on a towel that is folded. It puts my cooler at an angle but it seems to keep everything dry and keep the pump with more water.

Results are in this post.

One thing to note though is that this is loosing/evaporating water very quick! About every 6-12 hours I'm having to add a 2-3 cups to keep air out of the pump. I don't think I have any leaks as I've checked and my towel is dry.
 
Last edited:
I'm looking forward to watching this thread :D
Given the nature of the pump you might want to think about an enzotech sapphire block, it has much lower restriction and may work better with the low pressure high volume pump. I've used one with a magdrive pond pump (360gph, 9' head) and it worked quite well.
 
My suggestion would be for the D-Tek Fuzion V2. If it has the push pin mounts, it is very easy to convert to a bolt thru. It just takes a back plate, some bolts, and some springs and nuts that fit the bolts. You can also pick up the Pro Mount kits for it from a few online vendors for about $10 or so, which I think will get you set up for 1155, 1156, and 1366 for Intel, and as far as I know, AMD hasn't changed the bolt thru pattern since either the 754 or 939 days, so the AM2 kit should work well.

The Danger Den block is likely older technology, which may not hold up too well with the heat load of current CPU's. For the tubing, I personally prefer Primochill LRT, but the Masterkleer is likely worlds cheaper. :thup:

Edit: The EK Supreme HF would be superior to both of the blocks in the classies you mentioned. If you want to save some money and buy from the classies, the D-Tek would be my choice.:D
 
Doing some quick research it seem the enzotech sapphire block is actually the better choice! It's cheaper and performs quite well.

I think I'll go ahead and order that and then I'll get 3/4" to 1/2" barbs and replace the barbs on my pump. Everything will be 1/2" then, my only concern here is that the pressure might be too high, and my sprinkler heads will shoot too far, neglecting the dropplet effect. We will have to see.

I still need to figure out my fan and my metal situation. The metal is what I'm not sure about the most. I can get 12" x 24" or 24" x 24" sheets of aluminum from mcmastercarr for $8-12, unfinished. However the thickness is what worries me. If I get 1/8" thick it cost me over $100. If i got with .032 for 12"x24" it's $9. For .064 its $15. I'd need two sheet.

I could also go with annealed sheets, which are pliable, and cheaper. However I've never used annealed and I'm not sure if pliable means they ill old the 30 degrees I need, or not? How "soft" is this soft metal?

For the reservoir auto fill I'm going to use a simple cheap float valve. That will keep it simple.

For the output of the hot air, I haven't decided if I want to open the top on a slant, or cut a rectangle out at the top of the side. My concerns with opening the top are that I'm letting air escape in a number of directions and unless I put plexiglass on the sides, I can't really use my p-trap method. It also will make it more difficult to make it air tight.
 
Subscribing from interest. Maybe I can have a chance to give input. Within my experience anyways.

Very cool to keep track of neat projects like this.
 
The pliable sheets are probably the way to go really, the thicker stuff may be an issue to bend, aluminum doesn't really appreciate bending much (though at <0.1" it doesn't matter much as long as you only bend once).

I don't think you need very thick stuff, .032 would be about right I think as it doesn't really have to hold any weight to speak of.
Even if it did look like it was going to flex you could put a lip at the bottom edge, that would stiffen things up a lot and wouldn't compromise the design.


On the hot air exit I'd be inclined to use a side exit, I had a reason too, but I managed to forget it between looking at the design picture and clicking in the text box to post.

Guess over at physics forums gave me some ideas. I'll be calling to some recycle centers tomorrow and see if I can buy sheets from them. Will be a lot cheaper.

Also about the side exit. I'm actually thinking about turning the whole design on its side. It's 24" long and 16" wide. So I have two questions to ponder here. 1) Does a shorter "tunnel" but wider or a longer tunnel but narrower work better? 2) Does a shorter steeper angle or a longer flatter angle work better?

Basically the tunnel base is going to be either 24"x12" OR 16"x18". the first one at a slighty steeper angle. So would a 8" less wide surface but 6" longer at a shallower angle give it a greater effect? I'm torn. Part of me things the long time in the tunnel would be better, i.e. more heat transfer to the metal and long time the fan/wind is blowing on it. The other part things that with a steeper tunnel there will be more air pressure and then a greater heat transfer.

The benefit on turning the design sideways though is that I can also have a smaller exhaust hole and easier to direct to a p-trap.
 
Id imagine its all about surface area... Doesnt matter the shape really so long as the surface area is the same better, it should be just as effective.
 
In theory a very wiiiiide and not very tall setup beats a narrower taller setup of the same surface area.
Maybe not by much (certainly not by much, really), but by some.

I'm thinking that a bunch of ledges and steps to get the water to splash around might be a good idea.
 
I just saw this idea for the first time and I think I instantly fell in love with it! And hopefully I can save you a bit of time and headache with this idea I just thought of.

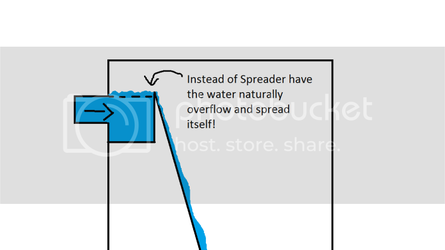
Instead of incorporating a spread at the top, why don't you make a sort of small reservoir at the water inlet and have the wall holding it in just a small amount higher than the slope? With this idea, you don't have to worry about the water flowing through any misters or such and instead allow nature to naturally spread the water as the "reservoir" overflows. here's a picture to help explain what I'm talking about.

spreaderidea.png
 
I will buy you a blower, under the requirement that you just finish the project and take pictures as you build. :)

How do you want to power the fan? 12 volt DC or AC? Unfortunately the blower I had been saving to donate to a bong project died in a flood, but it had what you would want, was DC (could run off your power supply), and was simple to control with a potentiometer.

If you have a unit in mind, let me know and I will PayPal the money so I don't have to ship you the unit. Otherwise if you don't have a unit in mind, I can look at making some suggestions.

@Jezus53: i think a spray is essential to getting the necessary surface area of the water for good evaporation to take place. The only time I have seen this work well without a considerable spray was by building a tower filled with ping pong balls to increase the surface area. A slope of water on a panel would not be enough, unless maybe you have a ton of panels going back and forth inside the container.

Is it necessary to use metal? Couldn't you do a trial design using tinfoil or plastic wrap? The metal isn't going to be a big help, except for its durability. The evaporation is where the heat transfer takes place.
 
Last edited:
Remember the one way of filling the tubes with ping pong balls? Lots more surface area or just another way of doing it.

I can see long tubes being less effective. As the water drips down it imparts heat to the air by way of condensation. As the water goes farther down the tube the air is higher humidity, thus less heat transferred to the air. I'm sure there is a balance depending on 500 vairiables.

I always liked this idea of evap cooling. Heck I cool my house in the summer in Vegas using evap cooling. When the air is under 10% humidity, my house can be at 75F with 110F outside, my electric bill is very very low for Vegas. But when the humidity is 40% in the monsoon season (Aug), my house is 83F when it's 110 outside and I'm at 70% humidity indoors. It's just the afternoon when it's terrible though. Better $150 vs $450 bill. Been running them almost 10 years now.

Keep up the good fight, I think it's a great low energy way to cool a PC.
 
Hey IMOG, do you think a bong cooler would be effective in NEO? I am assuming since the humidity can get raunchy here the swamp cooler effect would not work well at all. Hence why no one uses swamp coolers here.

The link is for the benefit of anyone who wants to peruse what the evaporation cooling principle is. Neat concept actually, and one I grew up with when Summer got going. Just had to clean out the frogs before you used them. Else it sprayed tiny frogs everywhere.
 
@jezus53: i think a spray is essential to getting the necessary surface area of the water for good evaporation to take place. The only time I have seen this work well without a considerable spray was by building a tower filled with ping pong balls to increase the surface area. A slope of water on a panel would not be enough, unless maybe you have a ton of panels going back and forth inside the container.
.


Yeah, I guess I jumped into the idea before I completely knew what I was talking about, oops! Now I see the need for the misters since that is where the heat transfer really takes place, I thought it was where the water was flowing down the slope, of course, I could still be mistaken, but this is what I'm taking away from what I've read so far.
 
Jezus53, read that link I inserted in my post above yours.. You can skim it kinda and still catch on. Very simple principle actually.
 
Jezus53, read that link I inserted in my post above yours.. You can skim it kinda and still catch on. Very simple principle actually.

I followed that and then realized right away where my mistake was. I like this idea but the only problem I see is with it being open, you have to be more careful about crap growing in your loop, more so than your typical wc loop since you can just use distilled water and a small amount of biocide whereas this design makes using it pointless.
 
Jesus, actually I think the concept in the first post focuses more on the slope than the misters also. So you weren't really off track. I could be wrong about what is more important. I really don't have a lot of confidence in a single slope working well tho as in the design. If its water running across a plane like that, I would think you may want panels at a very slight downward slope of a couple degrees, going back and forth down the containment vessel. Water runs down the maze, air flows up it.

Misters, sprinklers and shower heads have been used in designs I remember seeing most often because tons of tiny water droplets have a lot more surface area than a flat panel of water.

Regardless tho, I think it will work. And its cool and gets me interested. :D
 
Back