• Welcome to Overclockers Forums! Join us to reply in threads, receive reduced ads, and to customize your site experience!

WC/Partial Rig Revamp.

Overclockers is supported by our readers. When you click a link to make a purchase, we may earn a commission. Learn More.
K, here is the rest of the sleeving. what a pain in my a**. I thought for sure i would have switched some pins around on the main 24pin plug. But i called TT to ask the about the pin set up and they confirmed i was good. PHEWWWW! Hopefully i get some time this weekend to do the new setup. All i have to say is thank god that the re-sleeving end of the project is done. F that i will never do that again.

The PSU sleeved. I got the wrong size heat shrink for the main plug so i electric taped it instead.


Got the 6pin plug on the sata cable and too the other stat cable and made it a uni sata drive cable instead of having the extra 2 plugs on it.
 
ctrl_alt_del_ said:
looking good - keep the pics comming!

As you wish. After about 6hours at the shop re-wiring a 73 240z, PITA!. I decided to go home and start the revamp. Got home around 6pm and got to work. By the time i was tierd and called it a night it was 12am today.:eek: But as i was doing to build i took a grip of pictures. Im off to the shop today after i wake up to finish the fill port and make the new aluminum rad mounts and see if i can't fab up a hdd bay for my fourth drive. Enjoy.

The ThermalTake Armor case striped down to nothing for a fresh start.


The old mobo on the left and the new mobo on the right. went from asus a6n sli dlx to A8N32sli dlx


The EVGA 7950GX2 stock cooling fans


Taken apart for the new DangerDen Block.


The DD blocks mounted.(very straight forward and simple install)


Re-assembled


The 4800X2 in the new mobo and rethermal pasted with Arctic Silver.


Then on goes the storm CPU block.
 
Mobo in the case


Graphics card on the mobo


In goes the PSU


Did some thinking for this one. It took me awhile to figure out where i should mount the Swifthech Microres. Then it hit me.


Then i had to find a place for the pump. That was easy.


Just drilled out the two existing holes for the new pump


Then i slowly started to add the cables into play, started off with the sata cables, I had to modify one of the cables to fitin with the video card, the DD block kind of touches it, im going to see if there is any other solution(s) for this later.
 
Last edited:
One by one i started to measrue each line, cut, then smart coil them. Damn waht a pain. butlet me tell you , with the 1.8" thin wall tygon tubing, it saves your arse. Look at the line coming out of the GPU block, how close it is to the floor of the case.
Line#1

Line#2

Line#, O, forget it here you go.


Then installed the HDD Cage and the Poer Cables for the HDD's nd the DVD burners. I let all my wire ties at the shop so i couldn't clean up the wiring yet, will do that tomorrow at the shop.


Comparing the ThermalTake rad(right) ThermochillPA120.2(left)


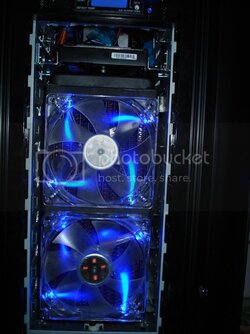
The font of the case befoe the Rad setup goes in
 
Mounted the 120mm Fans on the front side of the rad blowing air from the front of the case onto the rad.


Got the UV Light bars n with double sided tape from 3M.

Another shot


Tomorrow i will drill out the hole for the fill port and also make a hole on the back side of the pump so i can get to the speed switch by only removing the one side panel and not having to remove the entire pump out then bolt it back in. And the clean up the wires a bit and fill the loop. Then its show time.
 
Beautiful job, man! :thup:

I do have one small request - you left off with the single pics of the tubing just as it was getting interesting! I very much wanted to see a clear shot of the turn on the under-side of the GPU block. Do you still have that pic ...?
 
QuietIce said:
Beautiful job, man! :thup:

I do have one small request - you left off with the single pics of the tubing just as it was getting interesting! I very much wanted to see a clear shot of the turn on the under-side of the GPU block. Do you still have that pic ...?


I don't have one of that tubes angle but i can take one and post it with the final run of pics.
 
The really tight bend I had in one loop was on edge to the side of the case so I couldn't get a good shot of it. If you can get a shot of yours it would be great to show what that combination (thin-walled Tygon & SmartCoils) can do ... :)
 
I will post the rest of the pics as soon as i figure out all the problems that are in front of me right now.

problems:
1- Turn the pc on for a split second power then no power. (fixed-found out that when i resleeved the 4pin peripheral cable i swap pins in the PSU side. Swap out for a untouched 4pi cable everything turns on fine.

2- Rad had a drip by drip leak on the bottom. (fixed-Damn drain screw was loose, Made me damn near have a heart attack cause i thought that i might of puctured on of the rails when i pop rivited the mounting brackets on, Thank God it wasn't that)

3- Damn Air bubbles in the loop(not quite fixed almost, Got almost all of them out except for on the outlet side of the CPU block right where the line drops down thereis a small pocket of air right there, How do i get rid of all the bubbles????)

4- no video signal at all????? Did i mess up my GPU Card????? System does not beep or anything when i power it on? It would beep if the video card was messed up no??

Step 1 find the problem.

So i took my old mobo and hooked everything back up to it like another fellow ocforums members suggested. It worked but it was my old board, so i pulled out the new board and heard a little piece of something fall?????????????????? no clue, i blew the board of with compressed air and hooked everything back up to the new board outside the case and low and behold it works. I think what ever fell was causing the problem. What i mess i made in the process hahahahahaha i cant even find my screwdrivers or any tools. hahahahahahahahahahaha. now it is time to put everything back together the way it was before i turned the power on for the first time. What a nightmare this turned out to be. Pheww than god everything is still okay.

will post the pics of the mess and the final product later on.

im such a noob
 
Last edited:
Okay, Nevermind the fix the problem is still there. It worked for maybe 4 trys then back to the old ways.???????????????????
 
Okay so where were we. Ahh yes pictures but first. I finally figured out what was wrong. There were two cable that i ran behind the mobo for the usb port on the top side of the tower. They were being probed into by the board and causing al sorts of problems. Problem fixed windows installed and im off. here we go.
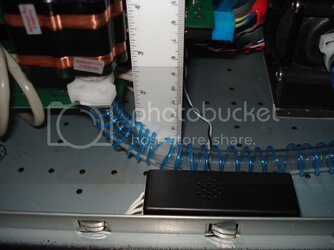
Picture requested by QuietIce on the tight bend on the outlet of the DD GX2 and the bottom of the case.
DSC01110.jpg

DSC01109.jpg

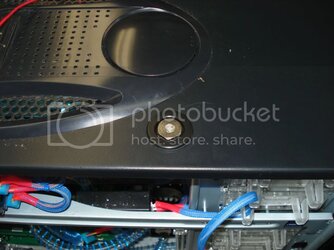
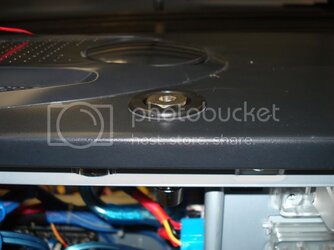
Next we got the right side of the case the actuall back of the mobo side. This is a hole for the speed setting on the pump. so handy.
DSC01111.jpg


Ok now the fillport(thank god i was at the shop for all this modding to the case)
DSC01114.jpg
DSC01115.jpg

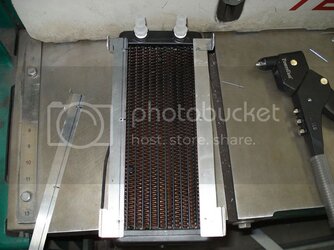
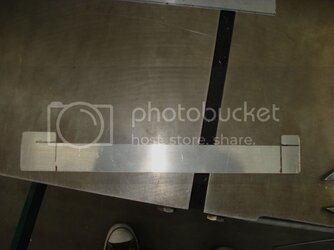
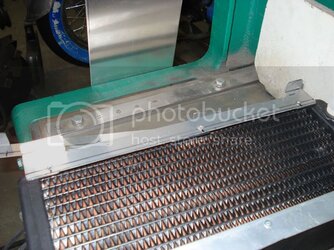
Now for the fun part, rad mounts. so easy,
DSC01117.jpg
DSC01119.jpg
DSC01118.jpg

Mounted in the case
DSC01122.jpg

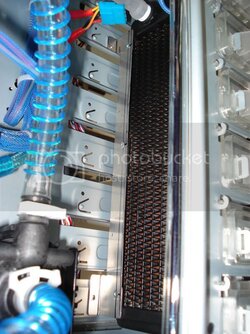
From the front
DSC01126.jpg
 
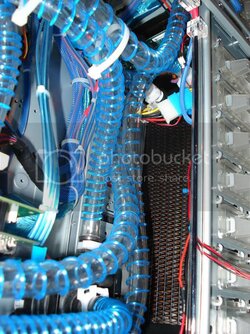
The shot of the tygon smartcolied tube in the rad area
DSC01125.jpg

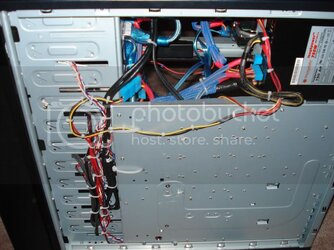
Wiring on the back side
DSC01123.jpg

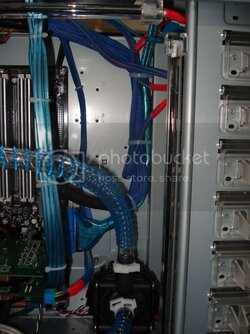
Wiring on the inside of the case
DSC01113.jpg

The mess i made last night at 1am trying ti find out the problem of me getting no video siganl to the mintor and almost having a heart attack thinking that i messed up my video card while doing to DD GX2 water block or something happened to the cpu during transfer from boards.
DSC01129.jpg


And last bu not least i will have the final final pics of the case completly done with side pieces on and everything tomorrow.
 
I love my new set up much better then the old one, wow what a diff. Here is the list of temps:
GPU Before: 65idel/75-78load
GPU Now: 31-36idel/41-45load
CPU: 36 idel w/ 25.5 atmosphere temp
Mobo: 41-45 idel
inside case temp: 29.3 w/ 25.5atmosphere temp

The biggest drop was on the GPU holly crap 30degrees.:drool:

Yea you can say i'm happy:beer:
 
Yes - very cool indeed. Good Job getting all that stuff in there!!

Quick question - on the original setup, looks like you had a flow meter on the loop. If so where did you get it and can you give me some details on it?

Thanks!
 
Ok, lost my post on this the first time. Excellent setup, and it looks great. However, you've applied the AS incorrectly to the CPU. There's a process involved in applying the thermal paste (AS5 or Ceramique), and you'll want to check out the AS page on this for instructions (choose the appropriate CPU):

http://www.arcticsilver.com/ins_route_step2amdas5.html

With a proper application, you'll see a drop in temps over time, particularly if you've cleaned the IHS and block well before applying.
 
Back