• Welcome to Overclockers Forums! Join us to reply in threads, receive reduced ads, and to customize your site experience!

Watercooling a Dragon

Overclockers is supported by our readers. When you click a link to make a purchase, we may earn a commission. Learn More.
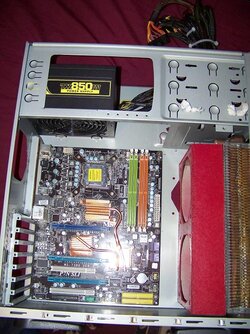
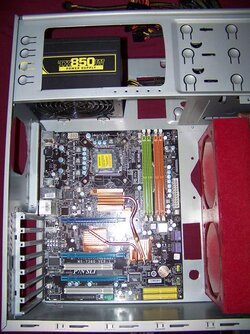
I did some more cutting today. I made some holes for the power and data lines to run behind the motherboard tray. There isn't a whole lot of space back there though, so I'm not sure how well it will work. I added a hole near the PSU to run the the wires through, and there is another hole close to the bottom of the tray to bring them back to the front. I cut the rectangular holes with a hand nibbler. It takes longer, but I didn't have enough space to use the jigsaw. It makes the edges easy to clean up with a file too. The small round hole will be for the front panel connectors. Anyway, here are before and after shots.

Before
000_0054.jpg

After
000_0055.jpg

I think I'm about done cutting on this case. A little cleanup work and some sanding and I should be ready for paint. Now I have to buy stuff. :( Primer, paint, sandpaper, masking paper, new blades for the exacto knife, and I need a new sheet of plexi for the side window. Anybody wanna lend me a buck? :bang head I'm really gonna miss my sandblaster on this part of the project. I hate hand sanding.

Also, my question from the last post still stands. Anybody got a way to make those countersunk rivets work? I'm not gonna drill them out if I can't put it back together right.

Thanks for looking. :thup:
 
Looking good!

I've never worked with rivets, I always just use nuts and bolts. Even if I have to drill out rivets, I use nuts and bolts to put whatever it is back together.

You gonna put some u-channel molding on your wire management holes?
 
I normally would just pop rivet it back together, but the rivets go behind the rear edge of the side panels. If the rivets aren't flush, the panel can't go all the way forward and it'll leave a weird gap at the front edge. I could use countersunk screws, but I can't find anything with a head shallow enough to sit flush in the hole. I'm still thinking about it, but I may just have to paint it all as one piece. I would really like to have it apart though. It would be a lot easier to paint inside that drive cage if one side was off.

I'm not sure about edging the holes yet. I'm gonna sand on them some more before paint. If I like the way they come out, I'll just leave them as is. They aren't sharp now. I took the b@stard file to the rectangular ones and gave them a nice rounded profile on the edges. They could use a little more cleanup though. I have a grommet I'll probably put in the round hole.
 
Last edited:
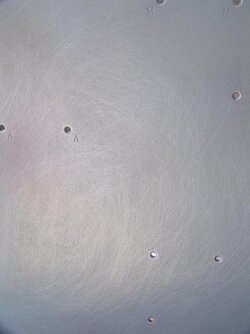
I sanded and primed the frame/drive bays/mobo tray today. Well, not sanded. The frame was in pretty good shape, so I used steel wool to prep the surface. The light scratches give good mechanical adhesion for the primer. I got this finish on every part of the frame.

000_0057.jpg

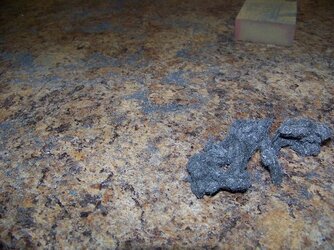
Always wear gloves when using this stuff to rough up a part. These little splinters will dig into your skin with the slightest provocation. Also, try to avoid laying any bare skin on the piece while you sand. You can pick up the steel splinters that way as well. I wear the blue disposable mechanic's gloves when working with this stuff. Most of the slivers are too short to go through them.

000_0056.jpg

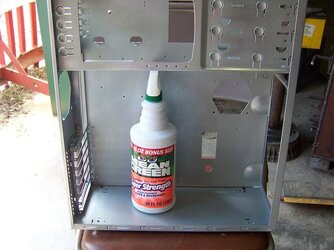
After the steel wool treatment, I washed the whole thing down with mean green and a lint free cloth. This gets rid of any grease, oil, and leftover metal dust.

000_0058.jpg

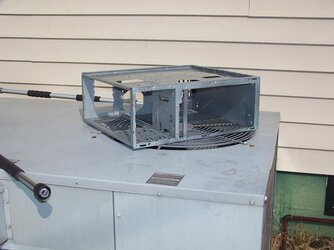
After washing, you need the part to be really dry before priming. I laid it on the exhaust for the central unit. The vibration helps work the water out of the cracks and crevices. The warm air dries the metal pretty fast. I let this set for about 2 hours, just to make sure it was dried well. A single water drop running out of a crack can ruin your day.

101_0983.jpg

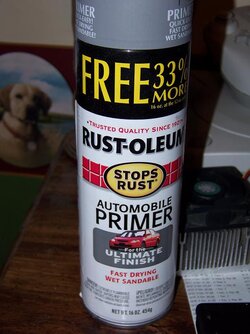
I primed it with rustoleum auto primer. I like this stuff because it goes on pretty smooth. The surface looks really dusty when your finished spraying, but a few swipes with a tack rag leaves a nice primer finish.

000_0060.jpg

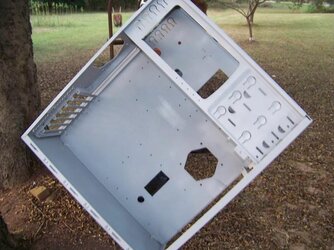
And here it is in my high tech outdoor spray booth. I still have to let it dry a bit and clean it up, but I'm happy with it.

000_0059.jpg
 
Last edited:
A trick we use on sheet metal edges to keep them from cutting someone (you have to go gentle so you don't turn the edge into a knife edge) is to use a knife sharpener. The ones with the V shape in them and lightly drag it along the edge's of the sheet metal this will take off the sharp corners but will not take it down to a knife edge if you do it gently.
 
A trick we use on sheet metal edges to keep them from cutting someone (you have to go gentle so you don't turn the edge into a knife edge) is to use a knife sharpener. The ones with the V shape in them and lightly drag it along the edge's of the sheet metal this will take off the sharp corners but will not take it down to a knife edge if you do it gently.
Thanks for the tip. I'm thinking of just covering the edges though.

I still have that exact same case which I did the same thing. One of these days I might just go back it and use it again.

I like these old cases. They are sturdy, and nowadays I get people offering them to me for free all the time.

Sorry I haven't posted more in this thread. Real life has gotten a bit complicated over the last week or so. I plan on painting the frame tomorrow. It's still up in the air how that will turn out
 
Looks great so far, excellent work & log!

Thanks Hokie :thup:

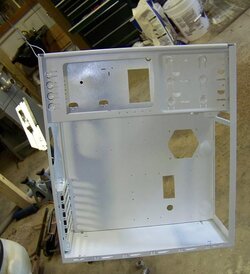
I finally got to paint today. Got the first coat on and I'm not sure I like it. I usually use regular rust-oleum enamel, but I tried the rust-oleum lacquer for this. It's supposed to have a brighter/glossier finish than the regular enamels. It looks ok now, but it went on really thin and didn't cover very well at all. I ended up only getting about halfway through with one can. :( I went in the garage and dug out a third of a can of white enamel and finished the rest of the job. The only difference I can tell between them is the smell and coverage. The enamel covered much better than the lacquer, but it has a much stronger smell. I'll give it a day or two to harden up, then I'll sand it flat and put another coat of enamel over it. In the mean time, I'm waiting on my frisket to get here so I can mask off the outside panels and do some design work.

Here is a pic of how it sits at the moment.

000_0062.jpg
 
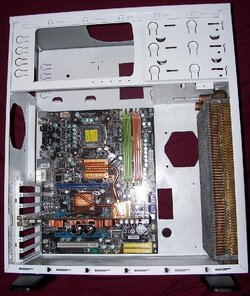
Surprise! I'm not dead. I've just been a bit overwhelmed recently. I finished painting up the frame and got one side of the top of the case painted. I put the motherboard and one card in to get a rough idea of how much space I'll have for tubing runs. I've got some masking stuff (frisket) here now, so I'll start working on a design for the outside of the case shortly.

Here is how it sits at the moment. I hate photographing white objects. The flash and jpeg compression make the texture of the paint look worse than it really is. The inside of the top is still gray, I'll paint that tomorrow or Thursday. I also need to clean the staining off of the rad it looks really bad in these pictures.

Picture.jpg
 
Last edited:
Back