• Welcome to Overclockers Forums! Join us to reply in threads, receive reduced ads, and to customize your site experience!

Projects Cyborgmind, Fei & Regis Mark V- aka, making my house WIRED!

Overclockers is supported by our readers. When you click a link to make a purchase, we may earn a commission. Learn More.

Chaos_Being

Member
Joined
Jun 10, 2003
Location
Eldersburg (Sykesville,) Maryland
Well its that time finally- tax returns are here, so I can finally build the pc's that I've been wanting to for a while. Some I will be modding (Cyborgmind in particular,) some not so much, but the overall effect will be to make my house that much more "wired." I already have a reputation among my friends for being a tech nut, I"m looking to push the envelope :D

The parts are ordered and some are on there way, so naturally no pics yet. Here's a list of what is coming though:


Cyborgmind- Desktop replacement for "Megatron":

-Opteron 165 (actually I already have this)
-MSI K8N Diamond Plus
-2gb of GSkill PC4000
-Silverstone Zeus 560w (was originally going to be a powerstream 520 but the place I was purchasing from was sold out.)
-XFX 7900GTX
-Thermaltake Armor case, black
-Scythe Mine heatsink
-74gb Raptor
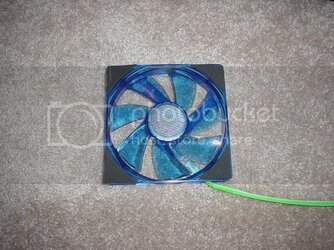
-UV fans, sleeving, cables & lights!

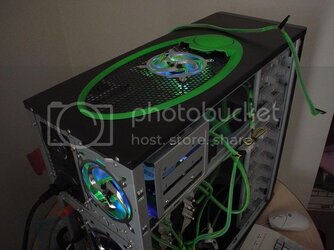
This PC will be the target of most of my modding- I'm not 100% sure what I'm going to do and not do (I'm waiting to get the case in-hand to make any final decisions,) but it'll probably involve painting and I'm definitely going to mod the top into a proper blowhole.


Fei- another HTPC

I'm mostly going to be recycling the guts of "Megatron" to make this. It will replace "Id" (get the references?) as the bigscreen-designated HTPC. "Id" will go upstairs to its previous home with my old tv. New parts of note will be the case (Antec Overture II,) and I'll be getting another SRX wireless card.


Regis Mark V- File Server

Again, its not going to be completely new parts, I already have the majority of the hard drives, the PSU (from Megatron) and I'm going to be modding my current chieftech case to hold all of the hard drives (I had previously removed one of the hard drive cages & retaining shelf.) I have a 2.6 northwood that I'm taking out of an old Dell 4600c- I was thinking about trying to get the mobo to work too, but eventually decided the heck with trying to jury-rig it to work, and ordered another mobo. I might try giving this a name-themed paintjob (you get a cookie if you know where I got the name,) I suppose it depends on how much effort I feel like putting into it. On its way is-

-another 320gb hd, which will bring up its storage capability to 1.48 TB
-Asus P4S8X-MX mobo
-512mb Mushkin Green pc3200
-4x SATA PCI HD controller card


I anticipate that I'll be getting some of my parts by this weekend, but I probably won't have everything I need to really get started until next week. Pictures and a worklog will follow :)
 
Last edited:
Well I've got a "bit" of a problem here...

I just checked the status of my 3 largest packages which were being shipped by FedEx. They were originally due to be delivered today- but, the website says they were already delivered, two days ago...

That means that about $1,100 of my stuff is "somewhere."

I am not happy.

Of course I find out about this just before I go to work, so I'm going to have to wait and try to call as soon as I get the chance.

What a F*cking nightmare :bang head


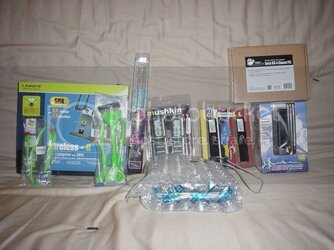
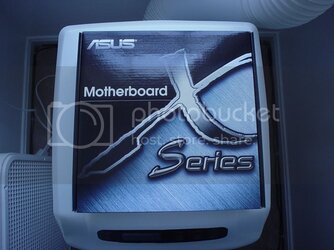
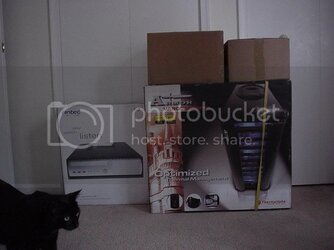
EDIT: Ok, everything's fixed now! What apparently happened was that my shipment was scanned in for delivery, and then afterwards the deliveryperson realized that they were in the wrong area (or something along those lines, it was the best explanation fedex could give me over the phone.) So, my packages were never actually delivered to someone other than me, even though they showed up as delivered on the tracking website. I was told that they were supposed to be delivered tomorrow- instead, they were waiting for me when I got home, along with my last shipment from UPS. Here's everything (and one of my "helpers"):

lastdelivery.jpg

So I ended up having a good day after all. I'm going to be checking everything over tonight and getting an in-person look at the Armor. However, my ideas so far are a green & black scheme. I'm going to be painting the doors and the plastic bezel on top neon green (I'm also going to be cutting the top bezel some and re-shaping it with bondo I think before painting, I still need to actually look at it.) I'm also going to be doing some custom stenciling. I may try to take the case apart to paint it and then rivet it back together- I want to, I just need to muster the confidence to tear apart and rebuild such an expensive case =P And then of course there will be lots of UV stuff inside. Real updates very soon.
 
Last edited:
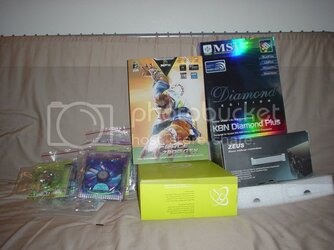
Here's the rest of the parts unpacked:

lastbatch.jpg


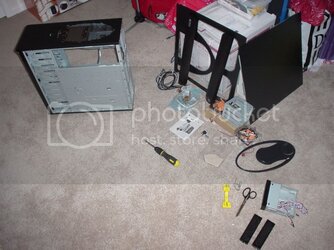
I started taking apart the Armor last night, and getting a feel for what I want to do to the case. I was a little surprised at how thin the plastic for the top bezel is, it looked like a thick, solid piece from the pictures. That means that I probably won't be using any bondo on it- although I am still going to cut the center fan guard part out to create an unobstructed path for the top blowhole. I'm going to cut out a hole in the metal mesh for that fan, as well as cut out the mesh for all of the other fans, and affix them with bolts and rubber washers vs. the plastic clips that came with the case.

As far as the front door/wing things, I may end up painting them black (covering up the exisiting logos) and do my stenciling in green, vs. painting them green and doing the stenciling in black. I'm not 100% sure yet.

I have a big roll of thin black craft foam which I'm going to try cutting up and use to cover parts of the inside. That should darken the inside like I want it, as well as provide some sound dampening. If if looks bad, then I'll re-visit the idea of just painting the inside. I'll be honest, I'm a little leery of un-riveting the entire case and then trying to put it back together :p

Anyways, here's a far as I got with it last night (I was mostly just exploring possibilities.) I should have a lot more time today, I plan on doing some of the cutting after I get home. I'll need to borrow a dremel from my brother in law again though- although I may as well just buy my own.

disassembly.jpg
 
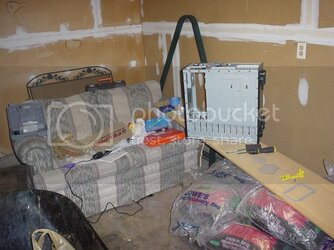
Ok, I made a trip to Home Depot today (I swear, between this project and all of the gardening I've been doing, I've spent more time there than any other store lately.) I finally got myself a Dremel (no more borrowing,) some paint, zip ties, and safety goggles. Here's a shot of my garage, where I just spent a good part of my evening (don't you love my ghetto "board resting on a couch and a pile of mulch" workbench? :p )

garage.jpg


I must say though, its SO much nicer to be able to do this sort of stuff in a garage- the last time I did any case modding, I was still living in an apartment. Let me tell you, trying to use power tools in an apartment sucks...

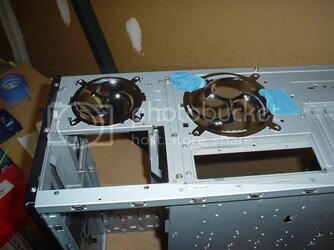
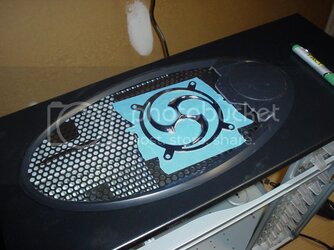
Anyways, the main thing I tackled tonight was the rear fan grills. They're gone. I've also sanded and smoothed the top hole to fit the contours of my 92mm fan grill, and I started planning out what I need to trim to do the same for my 120mm one.

blowholes.jpg


Once I'm done with that tomorrow, I'm going to cut the plastic bezel on the top, find the best placement for the top fan, and then cut a blowhole out of the metal mesh on the top. For starters anyways.
 
More updates. Cutting steel takes a long time!

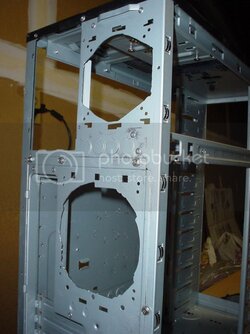
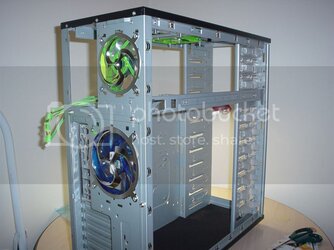
Here's the rear of the case with the grills cut out. I know the holes look strange and uneven, but I cut them to better fit the contours of my fan grills. Trust me, it looks good with the grills on:

rearcutouts.jpg


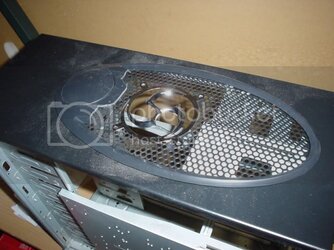
I cut the top plastic bezel and sanded the cuts down- I think it turned out pretty well. Here's a shot of it sitting where it belongs (but not clipped back down,) along with the top of the case masked off and marked for another cut:

topmask.jpg


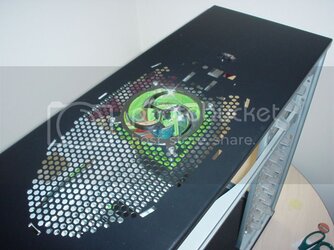
The actual blowhole went without issues, but I had some problems drilling the holes for where the screws will go through. I actually ended up cutting a long notch instead of drilling a hole on one corner, but the fan grill covers it up. Here's everything sitting in place, looks pretty good!

topcutout.jpg


The plan for tomorrow is to paint the top bezel (and perhaps the front door/flap things,) finish cleaning off all of the metal dust, cut and fit the black foam inside the case, and if I have time, start assembling the hardware inside. I also have an idea for mounting the two 120mm fans in the front- I know a lot of people have sucessfully used zipties to suspend the fans, but I think I want something a little more sturdy. I'm thinking of building a rectangular frame which I can screw the fans to. This frame will have tabs on the side which I'll connect to the case somehow (I'm thinking superglue or JB weld would be the easy way out- or I could connect it with bolts & nuts.) I still haven't decided what material I'm going to make this frame out of. Most likely I'll cut it out of some extra case panels that I have in my basement, although cutting heavy gauge steel is getting a tad old :) I'll have to check if any of them are aluminum, but I don't think they are.
 
Last edited:
Sweet!! I was waiting to see more than well presented boxes :D

I wonder if a place like cyberden in columbia would let people display thier cases at some point... Some things i wana see in periscopic vision haha.
 
Well, it was a night of experimentation and some progress. I didn't take any more pictures though.

As far as the front fan bracket idea I had went, I was in Home Depot today (again...) with the mission to find something suitable for said bracket. I found some sheet aluminum, but it cost a little more than I wanted to spend for even a small 1 foot square piece. Then I found vinyl tiles- the same size, and 68 cents each. It had a nice rubbery texture yet seemed solid enough, so I figured it might make a good bracket with some cutting. Unfortunately, I found out that its also very brittle when cut thinly, as my almost complete bracket fell apart in my hands. :cry: So I am back to square one as far as mounting the front fans. I'm starting to think that I might be able to just directly attach them to the front bezel, perhaps with a tiny bit of superglue in the corners to hold them on (that way I should be able to remove them later if need be.) My only concern is that they may cause the bezel to rattle, but I think I may try it anyways.

I measured and cut a piece of black craft foam, fit it to the bottom of the case, and glued it down with a bit of hot glue. It turned out really well, and was probably my major success for the night. Then I tried a test fit of one of my fans, and found that the screws that came with the fans were the wrong size for the holes in the case (I was kind of expecting them to be too short, but not this.) So I think I'll be taking another trip to the Depot tomorrow to get some long 1/8" bolts and attach the fans the same way I did with Megatron- bolts and nuts.

The top plastic piece is sitting in my garage with a coat of primer on it for tonight. I'm probably going to hit it with some green paint before I leave for work tomorrow. Then hopefully I'll be able to get home early, as I'm anxious to get this together and running by this weekend. Then, while I'm running stress tests on the newly born Cyborgmind, I can start working on the other two! :clap:
 
Last night was a busy time. I decided that I was tired of doing just case mods, and wanted to start assembling the hardware inside. I got some 1/8" bolts, washers and nuts, and mounted the rear and top fans (there are also neoprene washers between the fans and the case):

rearfans.jpg

topfan.jpg


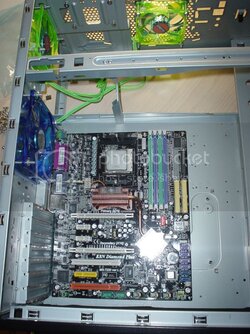
From there I mounted the motherboard. There's a pretty good sized space to its right that I'm going to cover with another piece of the black craft foam.

inside.jpg


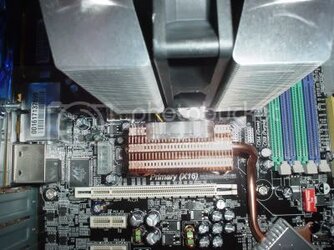
From there I went to mount my Scythe Mine heatsink, and that's where I ran into problems! I clipping mechanism that holds the heatsink to the stock bracket was hitting the fan imbedded in the northbridge heatsink, so I couldn't get any clamping pressure on the bottom portion of the heatsink. So, after a moment of thinking, I took the cpu heatsink back off, unscrewed the fan from the northbridge, and re-mounted the Mine. It just BARELY fit. I had to try clipping it a few times to get what seemed like an even clamp, I'm still not 100% sure that it is well seated but I shall find out soon. Afterwards, I slid the northbridge fan back into its place. Its impossible to reseat the screws, but its actually pretty secure. Once I get everything up and running and find out the northbridge temp, I may try reversing the fan (since I can now) so it blows up into the cpu heatsink instead of down onto my video card. Here's a pic of just how crammed together the cpu and northbridge heatsinks are (I probably wouldn't recommend this particular combo to anyone after this experience.) The bright gleam in the center is the clip reflecting the flash:

heatsinksqueeze.jpg


By then I was pretty tired, so all that I did was insert my video card and put the hard drive cage back in. I was a little concerned that my UV SATA cable wasn't going to reach up there, but it looks like I'll have plenty of room. Here's how I left it, with my Raptor ready to go:

harddrivenext.jpg


Hopefully I'll be finishing the hardware assembly today and get windows installed. I still have some case mods to do, in particular more foam lining, the top plastic bezel (its out in my garage with a final coat of paint drying,) painting the front door/flap things, and figuring out a way to mount the front fans.
 
Big news- Cyborgmind is ALIVE (well so far anways) :D

I got it together enough to boot up, and am currently formatting and loading windows. I started the day by getting the powersupply in (I had to take off the top fan that I had already mounted first, the Zeus is big & heavy and has a LOT of cables.) I also brought the top bezel inside from the garage and re-clipped it on:

topon.jpg


From there I tackled the front fan mounting issue. I decided to go ahead and just mount them directly to the front filter panels, but I still wanted to make sure that there was some vibration dampening. I also needed a little bit of clearance to make sure the fan didn't scrape. So, I cut up some more of my foam and came up with this (to which I glued directly to the front):

fanfoam.jpg


From there I mounted the DVD drive, plugged in all of my power and data cables, and turned it on- fired right up the first try. The cabling is a mess I know, its purely temporary- I just wanted to see if everything worked. An interesting side note though- I tried to check to make sure that my CPU temps were ok in the bios, and the "PC Health" part would freeze every time. I'm guessing a bios update should fix that though (hopefully!) In the meantime, I guess I'll install Speedfan or whatever temp utility MSI includes with the mobo...

formatting.jpg


Last but not least, glowy pic! This should get even better with my UV metor lights which will make my other fans and the cables glow:

glowy.jpg


EDIT: Well Speedfan doesn't seem to work with this mobo... (it only shows my hard drive temp.) So I installed MSI's temp monitor, which shows my cpu as idling at 31C and the System temp at 45C (I'm assuming this is the power circuitry or the NB temp.) Not bad, I guess I don't have to worry about the mounting of the Mine :)
 
Last edited:
Hmm, it bluescreened during SP2 installation- winsys32.exe (I think it was) errored out. Now windows seems a bit screwed up even though it restored back to pre-SP2 (it boots slowly and asks for me to uninstall SP2.) Sigh. Perhaps it didn't like some of the software I installed beforehand, or maybe the hardware is unstable...I'm going to troubleshoot it tomorrow probably.

EDIT: I stayed up a little late instead and did my troubleshooting last night. It passed 2 hours of memtest, so I went ahead and did a reformat/reinstall, and then installed SP2 immediately which succeeded. I then let it run dual prime overnight for about 8.5hr, which passed without errors. Seems fine so far, I'm still a bit confused at the source of the earlier bluescreen.
 
Last edited:
I'm posting from Cyborgmind :clap:

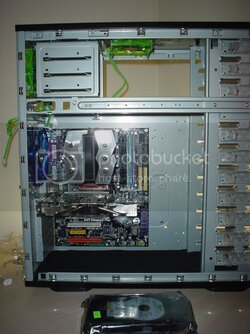
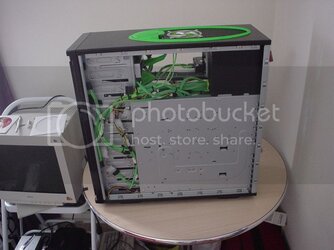
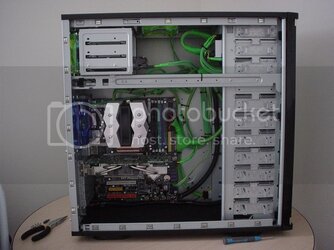
Today's big task was to fix up the godawful wiring. I unhooked everything and went cable by cable, ziptieing (is that a word?) everything I could. It took me a few hours- the Zeus has LONG cables, and a lot of them. The only mishap I ran into was that the connection for one of the top fans kept coming loose every time I put the back panel on, it took me a couple of tries and some electrical tape before it would power on properly with the case all put together. Considering the amount of cable and the fact that I didn't try cutting into the motherboard tray to give the cables a place to hide, it came out pretty good. (I wanted to be able to see the cables a bit anyways since they're all nice and UV sleeved, I just didn't want them in the way of airflow at all.) Here's the back of the case after I was finished:

backwiring.jpg


And the front:

frontwiring.jpg


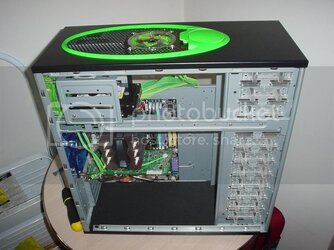
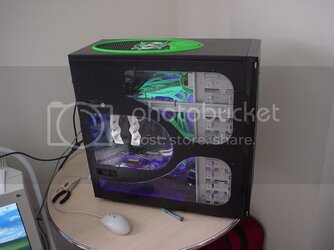
A shot of it all together:

alltogether.jpg


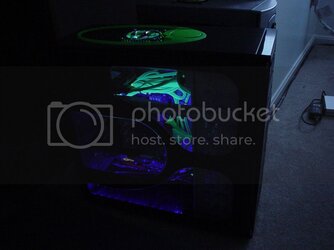
And finally, the money shot- a picture in dim lighting:

darkglowy.jpg


I'm in the process of getting all of my necessary software updates and transferring my data over now. Two big things remain for Cyborgmind- one, I still need to paint the front flaps. Two, I need to start overclocking! So far though, I am sold on dual cores and Raptors (although the seek grinding on the Raptor is a little loud.)

As far as the other two PC's on my list, the next one to be built is the HTPC "Fei."
 
Back