• Welcome to Overclockers Forums! Join us to reply in threads, receive reduced ads, and to customize your site experience!

2/3 Boxes In: The Build Has Begun (pics)

Overclockers is supported by our readers. When you click a link to make a purchase, we may earn a commission. Learn More.

phil178821

Member
Joined
Mar 27, 2008
ok.. so right now I only have one picture and the best i could do was a 2mp camera. so I haven't seated my blocks yet, since tubing will not arrive until thursday and I do not want to sit without my computer until then

first, let me say, i dont know what those people over at NCIX (US) were thinking when they packaged my $330 USD order! There was no package cushioning, everything was just "Tetris-ed" into a logitech box, and the best part, I didnt order anything made by Logitech!. Everything is undamaged, however, the fools threw my 6 mounting screws for the 120.3pa shroud in the box, resulting in three of them disappearing. Thanks! they will be getting an email soon.

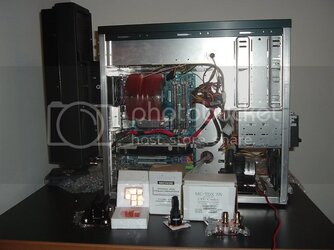
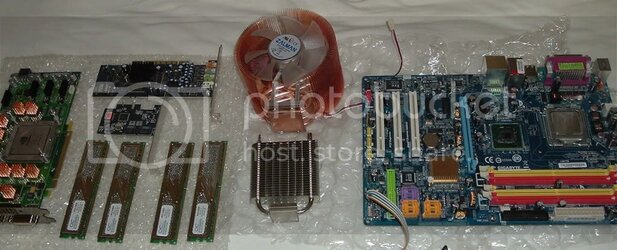
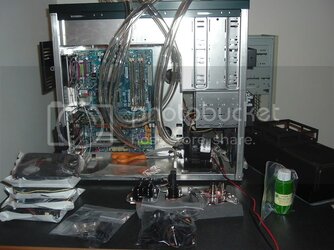
So here is my one pic with just the pump and rad in position, as well as my blocks laid out.

DSCF0722.jpg

So.. I am at a loss with how to mount a fan between my rad box and radiator (i have 4 yate loon's coming in with the tubing and I am going to place one between the radbox and the rad, and three on the other side) The 120.3 came with 12 odd thread size mounting screws, of which, i dont have anything of similar size thread to use on the fourth fan (the one between the rad box and rad). Thanks guys, more will be up tomorrow and Thursday. now sure how to work this one
 
Last edited:
petra's is great. I did make orders from them, and i am actually waiting on the a rrival of their package, wish i didnt pick the cheapest shipping!. but really, so far, they have been excellent. as for NCIX, i went with them because the price was right on quite a few items.
 
after some cleaning up by the moderator, I am back to post some more about my ongoing build. here it is:


i found a set of screws that will screw into the rad. At the current moment I am just going to mount the rad box right onto the rad, like displayed in my first post. When my fans come in tomorrow (along with the tubing :smt080 ) i will see about adding the extra fan between the rad and rad box.

on a positive note, NCIX appologized and is shipping me three more screws for my shroud.

Moving on:

In preparation for the tubing tomorrow, I began mounting my blocks and cleaning up the system

first: I ran hot tap water through the radiator for approximately one hour. I then rinsed the radiator three times(including shaking it back and fourth) with room temp distilled water.

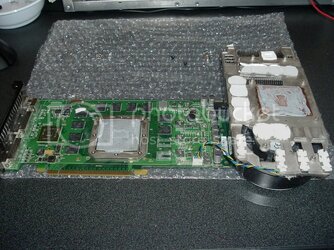
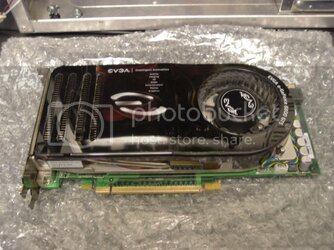
Next I went on to removing the stock HSF from my 8800GTS. One thing I have to say is: they sure cake that puppy with thermal paste. Take a look:
DSCF0730.jpg

DSCF0731.jpg

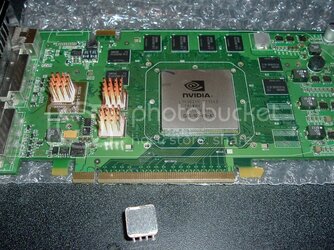
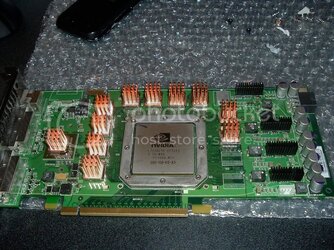
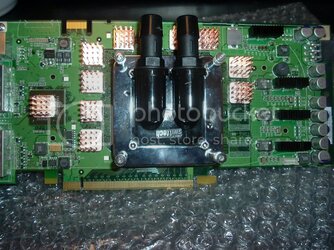
Next i used ArctiClean to clean the gpu and ram-mosfet-i/o chips. Then, using no heat (since i do not have a blowdryer handy) i firmly pressed all of the sinks to the card. They all appear to be holding well, with me being able to lift the card off the table through holding them. here are some more photos:

DSCF0733.jpg

DSCF0734.jpg

DSCF0736.jpg


With my 8800 now finished, I moved on to removing my motherboard and adding the mounting brackets for my DD MC-TDX and Swiftech MCW30.

Here is a photo before hand:

DSCF0737.jpg

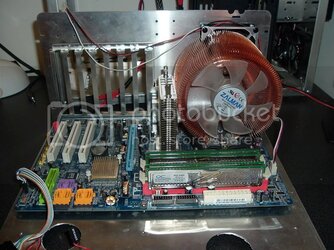
Here it as after I removed my components and cleaned up the chips with Arcticlean:

DSCF0738.jpg


Adding the brackets for the two other blocks was pretty easy. Now I have a couple of options for mounting the MCW30 to my chipset.
-A hard mount where the block is just bolted down
-A spring mount, which as you would expect, includes springs

I decided to go with the springs, figuring it will lead to less damage. I may change my mind, though, after seeing how the tubing moves the block.

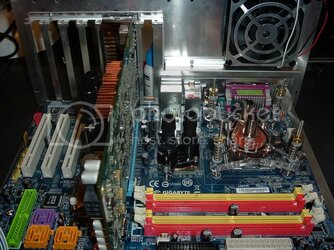
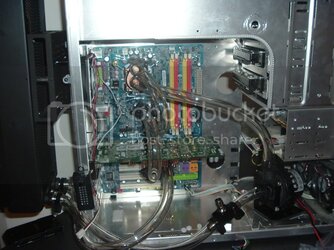
So here is a final picture of my Mobo with all the blocks installed.

DSCF0741.jpg


now I am just triyng to decide if I want to soak my copper blocks in vinegar, or just rinse them with DI.

hope you enjoy, more to come tomorrow. Any questions or suggestions are welcomed!


Phil
 
Looking good Phil! Best luck!

Only thing I can add is that for your rad screws (fans, shround, etc) you should hit Home Depot for a 6-32 tap and tap the holes instead of using the self-tapping screws. It's cleaner and less chance of poking a hole where you don't want one. Tap + handle will run you about 10 bucks and its a very simple tapping job into soft metal.
 
can you guys also check my psu post, here in the water cooling thread. I am having troubles that might stop me from being able to leak test..

link here
 
lol, when I saw the pics of the video card I thought you had lost some ram chips.

It looks like a pretty good deal. I'm really not a fan of Danger Den's CPU blocks but that one should do fine. I feel the Apogee or Fusion would have been a better choice.
 
yeah it ighta been.. but something just drew my to the DD block..

on the other note, i thought i was missing some ram chips as well.. got a little confused. :)
 
Nice setup, bro.

Quick important MSG though! Check this phil,

http://swiftech.com/store/product_details.asp?ProdID=435
MCW30-hardmount-hardware.png

^^^
This is their hardmount kit for the MCW30. It helps so that when you connect a CPU and GPU block it's more stable and won't move around. Seeing as how you're using 1/2" tubing, it'll be a "fat bend." So I strongly recommend you get this little kit to help place the MCW30 in a stable, firm, and tight position.

Edit: If you're in a hurry to get this sweet system up, your local hardware store has standoffs
 
Last edited:
thanks for the pointer. the kit actually includes a hardmount and I was trying to decide between it and the spring. I just went with the spring because i didnt want to put too much pressure on the chip, but i bet your are right. I was gunna wait to see if i need the hardmount, but thanks for the suggestion. easy swapy of the springs for spacers :)
 
yeah after several sites have letme down it's probably bad to push a good website huh? Don't want to help anyone out now, do we?


and your age level is....?

Matt, you really need to drop the attitude or your stay here will be pretty shortlived.

G rated forum, the guys in green are the ones who you DONT want to get into a toughman match with.
 
Good job so far Phil!

1 suggestion.

Bubble wrap can conduct electrical activity, so do not place your components on bubble wrap.

A plain ole wood table is best :D
 
Good job so far Phil!

1 suggestion.

Bubble wrap can conduct electrical activity, so do not place your components on bubble wrap.

A plain ole wood table is best :D

+1 .very good point,I did wonder when i saw the pic.

I use a wodden desk or anti static bags if i can.
 
so fill has hit a snafu.

when i order my yate loon fans, i didnt realize they were closed corner. becaues of that, all of the screws I have are not long enough.. result, Phil had to make a nother order, for longer screws. (at school, dont have a car, so cant drive to hardware store)

on a side note: double thumbs to the folks at Petra's Tech Shop. Made my order of screws and one bottle of pt-nuke, chose three day shipping at a cost of 15 (thats just the shipping). About 4 minutes later i received a call from someone at Petra's (after emailing them earlier in the day to see if there was a cheap quick method to get the screws) and he offered to mail them out today via USPS, which is great cause they deliver on saturday. either way, thumbs up for the service.

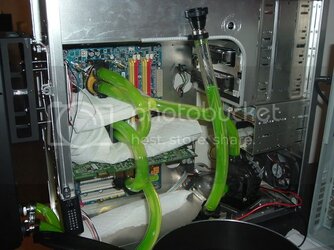
now here are a few pics. another note: I know the tubing to the rad goes out the case door. I am going to have to settle with this until i get home and can drill some holes in my rear panel.

DSCF0746.jpg

DSCF0747.jpg

DSCF0749.jpg


any questions, tips, pointers? One thing I do wish: i made the tubing from the t-line to the pump a (not the top of the tline) a little longer so i could more easily hold it higher for bleeding.
 
Back