• Welcome to Overclockers Forums! Join us to reply in threads, receive reduced ads, and to customize your site experience!

DIY hard drive rack ver2

Overclockers is supported by our readers. When you click a link to make a purchase, we may earn a commission. Learn More.

Navig

Senior Case Master
Joined
Dec 7, 2003
As part of my ongoing DIY Low Cost Benching Station project, (sale thread here), I decided to develop my own low cost hard drive mounting system.


Here was my last self made hard drive rack.


This is meant to be a totally different focus. Here are the goals of this mini project:

1) Simple to build
2) Low cost
3) Easily reproduced
4) Scalable
5) Easy and convenient to use
6) Not much emphasis on aesthetics


Well here is my first attempt:


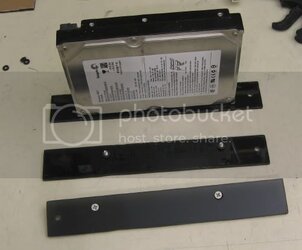
First I built a set of caddies. I'm building a 3 drive prototype:

HDcaddycaddies.jpg

They are simple strips of 1/4" thick bronze acrylic, 1 1/4" x about 7". They are made from scraps of plastic I have sitting around the shop.


There are 2 countersunk holes to mount the caddy to the drive. The drives are cushioned with rubber washers, which incidentally also conveniently hold the screws in place. There is one more mounting hole, more on that later.
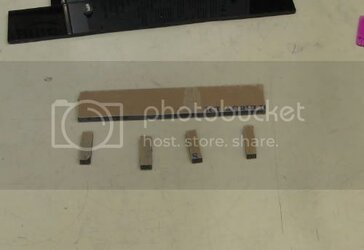
 
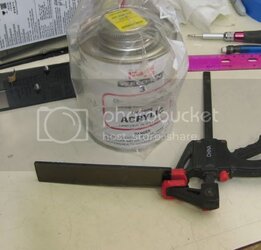
Next I constructed a rack from plastic, composed of this small strip of plastic with some teeth, like a comb:

HDcaddyrack1.jpg


They get bonded with some good ol' IPS#3:


HDcaddyips3.jpg


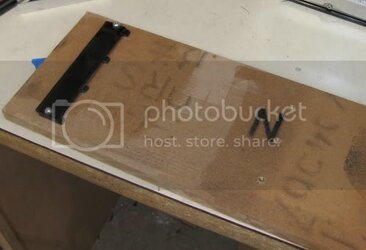
Next I mounted the rack to my mounting surface with some screws. You can also see I added some appropriately placed threaded-inserts into the board surface also:


HDcaddyrack2.jpg


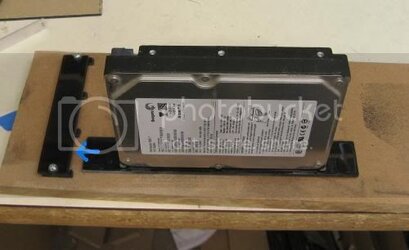
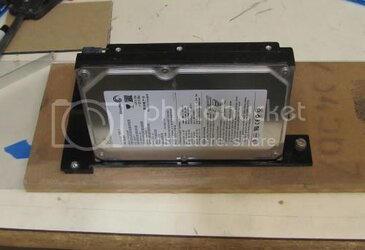
Hard drive caddy slides into the rack:

HDcaddymount3.jpg


And gets locked down with a thumbscrew into the threaded insert:


HDcaddymount2.jpg
 
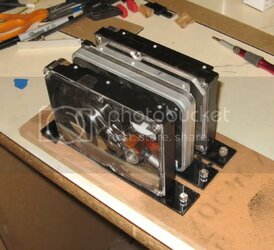
3 drives mounted:

HDcaddytriplets.jpg


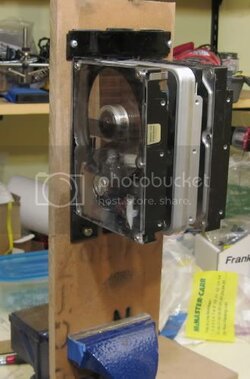
On the side:

HDcaddyvertical.jpg


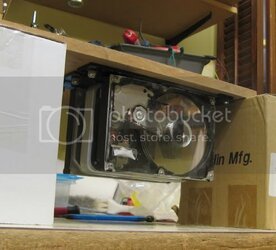
Upside down:

HDcaddyupsidedown.jpg


There you have it!

Navig
 
On the aesthetics:

Its definitely a little rough. I lack the appropriate tools--frankly you need laser cutting and cnc machining. I may outsource some day.

But its pretty easy to make a functional product with simple power tools. With the addition of some jigs, they could be cranked out in large quantities.
 
That looks really cool. The aesthetics are fine, in my opinion... it's so simple there's not a lot there to look bad. :)

I wish I wasn't dirt poor, I need one of those benching stations.
 
this is the route i will likely be going for my case mod, plexi seems the easiest to work with a dremel vs aluminum or something.
 
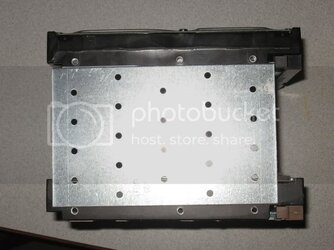
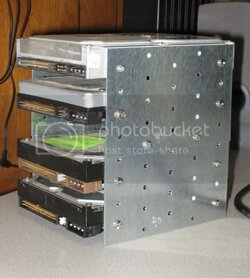
Just stumbled upon this thread, was at Lowe's today, found some plates that match up exactly with the outer holes on a hard drive, just what I was looking for, you can just bolt one plate to another vertically, 2 plates fits 4 drives easily, with plenty of room in between, .79 cents each

plate.jpg
 
You could also get blank plates and drill holes yourself , not trying to be Mrs obvious here , just keep it in mind .
 
I have tried drilling my own holes, and honestly, unless you have a drill press it takes FOREVER and is not very accurate!
 
so you take the metal off the HD and put plastic over it?

where did you get the plastic from? any plastic will do?
looks like some rubber sealant too.
 
I personally use pipe strap. Cheap simple and flexible :)

I really like Navig's setup, I have done one sided mounting with optical drives but never with hdds.

Very cool looking though.
 
Nice find kkfromnj. It's always cool to find that works right off the shelf.

I do have a pretty much complete shop, so fabricating from raw aluminum, steel, or plastic sheets is easy for me.

ricflair, yes that's an old school mod, replacing your hard drive cover with plastic. I wouldn't necessarily recommend it as it has a high probability of ruining your hard drive, but there are plenty of tutorials out there on how to minimize your risk. I took it one step further, I used window tint to add a translucent "N" to the inside of the plastic. This was a very old 30gb hard drive--it no longer works (probably from my modding) so I use it as mock-up components.
 
Nice find on those plates. I'll have to print out the pic and go visit Lowe's.

I know that this is off-topic, but I just about couldn't stop laughing when I read the following in pinkles sig.

When I die, I want to go peacefully like my Grandfather did, in his sleep -- not screaming, like the passengers in his car.
 
Nice find kkfromnj. It's always cool to find that works right off the shelf.

I do have a pretty much complete shop, so fabricating from raw aluminum, steel, or plastic sheets is easy for me.

ricflair, yes that's an old school mod, replacing your hard drive cover with plastic. I wouldn't necessarily recommend it as it has a high probability of ruining your hard drive, but there are plenty of tutorials out there on how to minimize your risk. I took it one step further, I used window tint to add a translucent "N" to the inside of the plastic. This was a very old 30gb hard drive--it no longer works (probably from my modding) so I use it as mock-up components.
that is sweet!!

yeah now that you mention it, i am scared of doing it haha. no more shielding
 
Sorry to bring this thing back, but how did you get it to hang upside down?

Also, does it strain any part of the hard drive to hang sideways? Could I have it hanging/propped from one screw horizontally instead of vertically?
 
I'm not sure I understand the question.

The hard drives mount to a plastic mounting plate by 2 of the mounting holes found on the side of standard hard drives.

The plastic mounting plate is then held to the panel by a hold down bracket on one side and a thumbscrew on the other end. As long as the hold down bracket and thumbscrew receptacle stay mounted to the panel, the panel can be sideways or upside down.


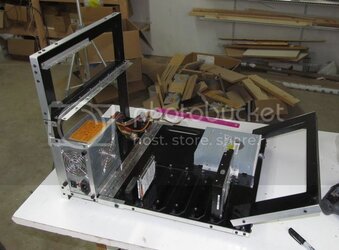
Here is more recent edition of this hard drive rack style:


VLC10bottomplaterigged.jpg


I've easy'd up the hold down bracket by using some 1/8" thick rubber washers instead of plastic "teeth in the comb" as above.

You can see it a little better in this pre-planning setup:

http://img.photobucket.com/albums/v363/navig/DIY VLC Station/VLC10driverack.jpg


Navig
 
Back