• Welcome to Overclockers Forums! Join us to reply in threads, receive reduced ads, and to customize your site experience!

[PROJECT LOG] Dr. Franken-Mine (a quagmire of old and new parts)

Overclockers is supported by our readers. When you click a link to make a purchase, we may earn a commission. Learn More.

Blaylock

"That Backfired" Senior Member
Joined
Jun 5, 2013
Location
Go Blue!
I've decided to jump on board and build my first mining rig. I'll be using primarily retired components I have laying around and purchasing new GPU's a CPU and a PSU.

Here is a list of the components that I had to start this project.

Mobo - MSI 890FXA-GD65 socket AM3+
RAM - DDR3 240pin speed and quantity TBD (will update when my source delivers it) This fell through so I stole 4GB from my gaming rig until I can mine enough to buy some ram wit BTC. (The wife can't complain then! LOL)
Storage - WD old school or might go USB BAMT (undecided) Maxtor 60GB Old IDE with an IDE-Sata converter
Fans - assorted will configure later once I find the hot spots.
GPU - 1x Sapphire HD7950 Vapor-x & possibly 1x MSI HD6870 Twin Frozr2 (If I can convince my buddy to sell it to me)


Purchased items (Please give me input if you like or dislike something)

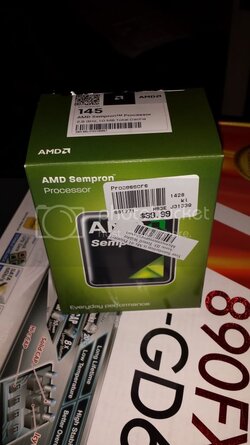
CPU - AMD Sempron 2.8Ghz 45W w/ HS -Purchased from Microcenter $30
GPU's - 2x PC HD7850 - Purchased from the Egg for $120 after MIR
PSU - Corsair RM850 80+Gold - Purchased from the Egg for $120 after MIR
Fans - 2x High Speed Yate Loons and fan grills - Purchased from the Jab-Tek for $1.50 each(50% off sale):clap:

This is an ongoing build log so please stay tuned. I'll update this pic as the build progresses.

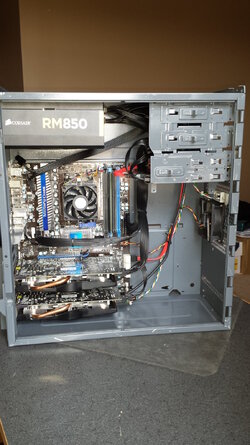
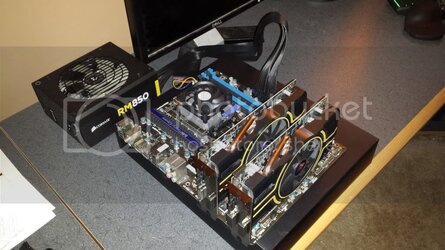
Current Rig running:
13804190715_5cf1872d4e_k.jpg Untitled by Blaylock123, on Flickr 13804229013_6241929acf_k.jpg Untitled by Blaylock123, on Flickr
 
Last edited:
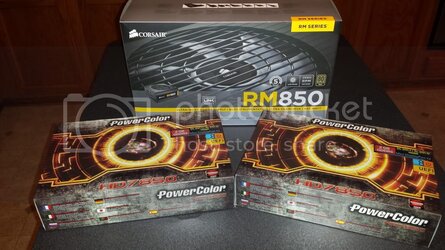
Received my PSU an a pair of GPU's in the mail today.
20140205_180258_zpsa72ac620.jpg

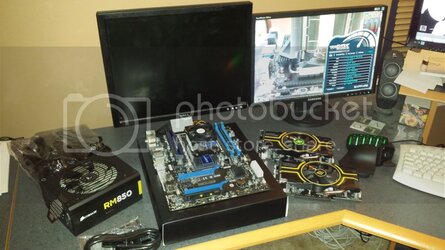
Here's what it looks like before assembly.
20140205_182343_zps4de15762.jpg

...and before power.
20140205_183729_zps69d4751d.jpg

now to figure out how to use BAMT. Software had always been my weakness.
 
Last edited:
BAMT and I had a few words last week and it ended unfavorably. Bamt is not a very friendly program and since I don't speak it's native language (Linux) there was some major ireconsilable differences.

So we came to a mutual agreement to part ways before it got to ugly. So it's on to windows. More pics coming soon.
 
Ok Windows 7 installed running CGMINER 3.7.2 and bouncing between middlecoin and hashco.ws depending on current performance. Right now I'm getting about 650kH/s from the 2 7850's. I think I might be able to squeeze just a bit more, but I'm pretty close to max as far as I can get it. I'm sure some of the pro's out there could get closer to 700 with these, but I lack the experience.
 
Last edited:
Just installed CGWatcher 1.3.5. It got me to 700Kh/s upon install. I haven't even tweaked anything with it. Awesome Program!
 
Nice mining rig you got there. You should try out maxcoin it's the most profitable now I made a week's worth of hashcow BTC in 24hrs.
 
I'm getting around 390khs with these settings on my Powercolor 7850's. I use Kalroth's version of CGminer 3.7.2:

-I 17 -g 1 -w 256 --thread-concurrency 8192 --gpu-engine 1120 --gpu-memclock 1400

Lookin good so far!
 
TBH, you should have gone with a 80+ Bronze. I forget who, but someone here did the math, and found that a 80+ Gold (or platinum) psu takes 18 moths to start saving money.

It's cheaper to buy 80+ Bronze, and the amount of electricity the 80+ gold saves take 18 months to become cheaper than the bronze ones.

Anyway, nice rig! :D

I'm still using my main rig to mine one :p
 
It was really the RM that I was after because I'll be using this for my "future" gaming rig and the fact that the fan has yet to kick on means ZERO noise. The fact that it's a gold is a bonus.
 
It was really the RM that I was after because I'll be using this for my "future" gaming rig and the fact that the fan has yet to kick on means ZERO noise. The fact that it's a gold is a bonus.

As long as your happy with it right? :)

I really want to build my own rig now :D
 
TBH, you should have gone with a 80+ Bronze. I forget who, but someone here did the math, and found that a 80+ Gold (or platinum) psu takes 18 moths to start saving money.

It's cheaper to buy 80+ Bronze, and the amount of electricity the 80+ gold saves take 18 months to become cheaper than the bronze ones.

Anyway, nice rig! :D

I'm still using my main rig to mine one :p

at the price difference between bronze and gold, i figure it is definitely worth getting the gold.
the platinum psu are much more expensive, and not worth it in my opinion.
 
I'm getting around 390khs with these settings on my Powercolor 7850's. I use Kalroth's version of CGminer 3.7.2:

-I 17 -g 1 -w 256 --thread-concurrency 8192 --gpu-engine 1120 --gpu-memclock 1400

Lookin good so far!

I got more speed running my 7850 at 1000 mem speed rather than raising it with normal scrypt. I also have a 4gb card so it might very well be something memory controller related or whatever.


Then again, I take a huge hash rate hit over -I 13.
 
I found a sweet spot for scrypt mining.

Engine core=1200
Memory=1350
Thread concurrency=8192
W=256
Intensity=20
G=2
Thread count=1

Hash rate=400kh/s each.
 
Trial and error of course, but alot of reading an learning too. I never expected the memory to overclock as well as it did. I actually had it up to 1450 at one point but it just was't stable enough and the hash/WU rate just wasn't worth the instability. I want this thing running 24/7/365 so stability is key.

Still not sure if I want to flash the bios to unlock the voltage. I'll decide that this weekend after I plug it into the kill-a-watt for a few hours. I need to pull it down for some maintenance anyhow. Gonna try putting CryptoSlax on it. Wish me luck, I sure didn't have any with BAMT. LOL
 
Update.

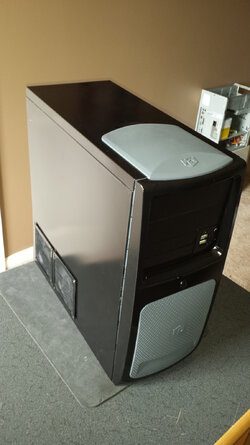
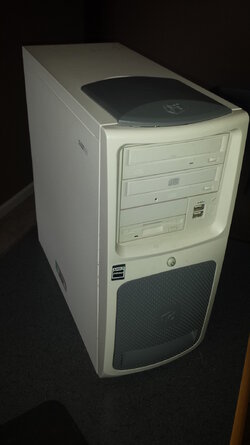
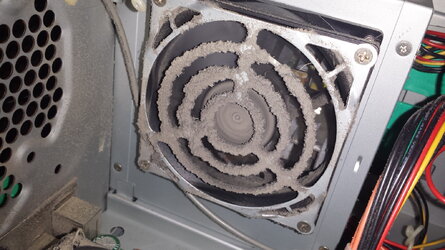
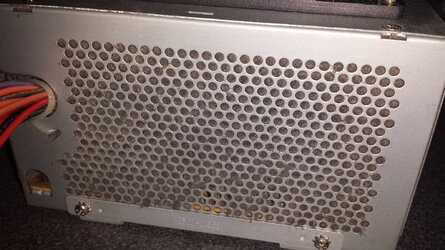
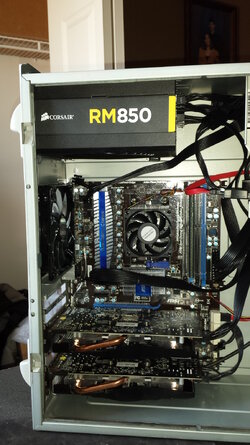
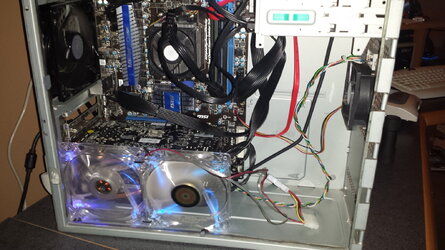
I finally found a usable case for this monster. It's an old Gateway computer that was manufactured in late 2000. I"ll be re-purposing the case and maybe in the future burning up the 1Ghz Athlon CPU for HWBot points. But that's for the "Just Putzen Around" thread. Lets crack this case open and see what we have to work with.

13631489274_4ac023f674_k.jpg
13631481933_dc7abc8722_k.jpg
13631450455_b2323a0e4e_k.jpg
13631795244_465531435f_o.jpg
13633377843_446006f695_k.jpg

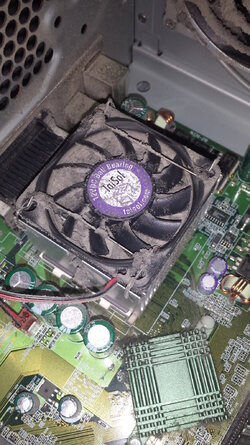
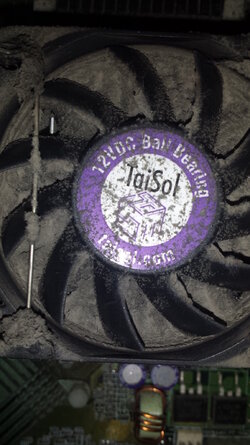
Holy Hell, this thing is disgusting. It's a good thing I have a strong stomach. I can promise you it will never get this bad again. I'm actually surprised it's still running.


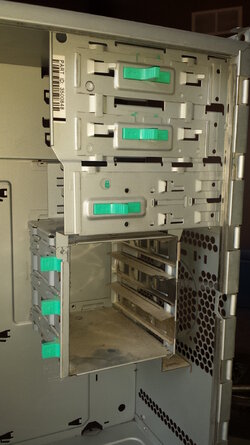
Out with the old and in with the new. Now that I have it gutted I have to say. I don't know much about Gateway computers, but this case is pretty awesome. I never expected a mass produced case to be almost completely tool-less with a removeable side mount HDD cage.

13671981844_3c73b0e89c_k.jpg

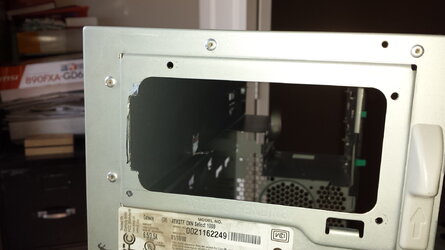
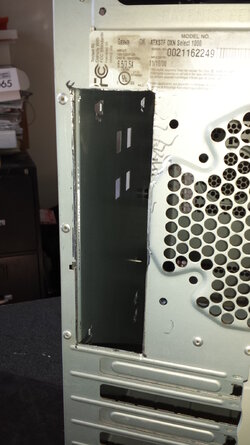
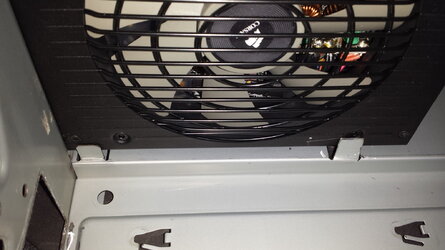
After doing some pre-fit measurements I had to make a few "minor" adjustments. The power supply needed to have mounting holes added and a small notch cut out for mounting clearance. Also, if you look through the PSU opening you might see I also notched out another tab for the much heavier and longer PSU.(Mental note: Do not try to push the tab down right after cutting it with a dremel. You'll get a nice 2nd degree burn right on your finger tip. Fortunately there aren't many nerve endings on the very tip of the finger. Ouch.)

13671976134_92d97fa1a8_k.jpg

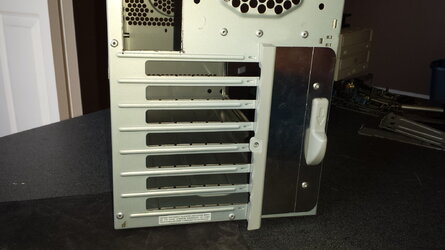
Next was to cut-out for the MoBo access. Oh, did I mention even the PCIe slots are tool-less. Just pull that plastic handle away from the case and the flex plate releases the PCI cards. So far the only drawback to this case is it only hase 7 PCI slots so there won't be alot of room for the GPU's to breath. I may have to modify that somehow.

13671972794_9034248982_k.jpg
13671629665_83336c164e_k.jpg

PSU-fits nice.
13671625645_83940791dd_k.jpg

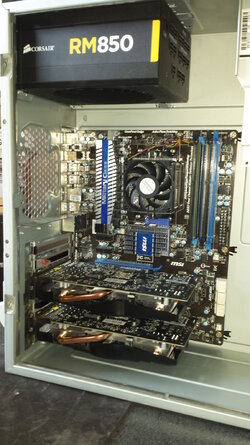
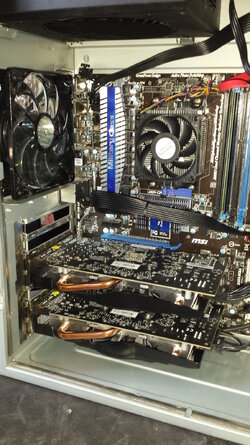
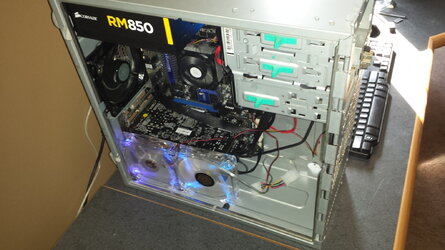
Mobo+GPU's not bad. As you can see, if the MoBo was up another 12-16mm there would be room for an 8th PCI slot and room for more airflow for the GPU's. Oh well for free I'm very happy. I was also very surprised to find out this case allows for a 120mm rear exhaust fan. If you go back a few pics you'll see the intake is only an 80mm. Not sure why that is, but it's not an issue for me as I intend on running 2x120 case fans on the side panel to inject air directly into the tightly packed GPU's. So my in/out ratio will be 340in/120out which will give massive positive case pressure. Maybe to much. If so, I'll just kill the 80mm front intake and call it good.
13671621665_5a53c44d12_k.jpg

Here she is all wired up and back up mining. Total downtime was about 4 hours due to some re-fitting of the MObo and PSU mounting.
13671615955_569ef38f35_k.jpg
13671611335_36133c40fb_k.jpg
13671605185_9c990a66b6_k.jpg

Next chapter. Modding the shell of the case....
 
WOW! No dust!! :rofl:

Looks good Blaylock!


Now... What are you going to do to that case?
lol, stay tuned I guess? :D
 
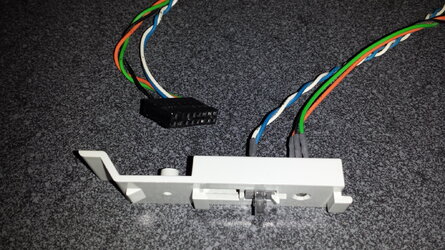
Quick update today. I finally got sick of jumping my MoBo to power on/off so today adgenda was to rewire the case power switch.

13727189565_4174e4d9b7_k.jpg

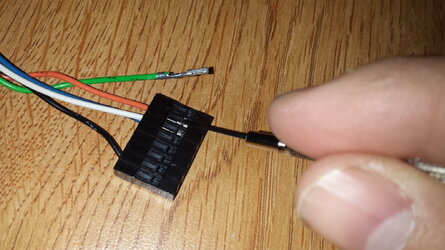
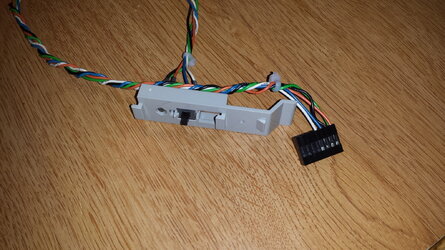
Naturally the case JTP1 connector is different than my boards so I was originally going to cut and re-solder some 2 pin connectors. But then after reading "The Beastly Junkinator"'s thread I had the idea of re-pinning the existing connector. It's a little longer than my motherboards, but no harm in letting it hang over a bit (Lord knows I've been Hungover plenty).

13727230543_383f997ac7_k.jpg

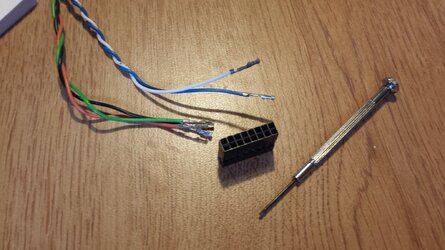
With my smallest jewlers screwdriver I found that you can push the wire in slightly lift the tab on the connector and pull the pin out.

13727227293_d8cf0eb3d4_k.jpg

Once all the wires were out I decided I didn't like the 2 sets of wire braids. They're going to the same place. What's the point of that. So I re-braided them in a single braid. I was also planning on attempting my first cable sleeve as a practice run for my next build(probably 2015 unless I hit the Lottery *fingers crossed*), but could't find my wire shrink wrap. Oh well, maybe next time. Ok, back to pinning the connector. Refered to the old manual (always RTFM) and pinned it up nicely.

13727588994_21f923ea0b_k.jpg

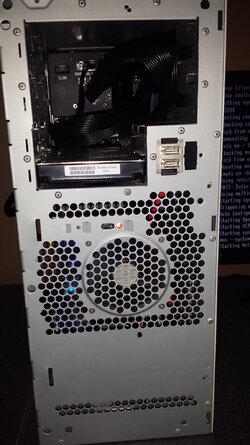
And Voila I have an operating Power switch and HDD/PWR LED. Never mind the cable management. It's still an open case until my goodies come in...and a fresh coat of paint.

13727221883_1a1d1ba435_k.jpg
13727582724_a0565972db_k.jpg
 
Looks good! :thup:

Pffft.. that cable management is tidy compared to that ugly thing I made that I called a case! :p
 
Back