• Welcome to Overclockers Forums! Join us to reply in threads, receive reduced ads, and to customize your site experience!

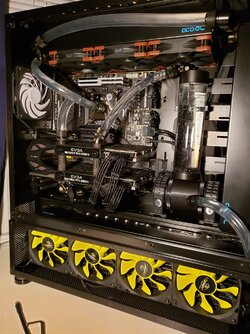
EVGA Z390 Dark & Lian Li PC-V3000 Build Log

Overclockers is supported by our readers. When you click a link to make a purchase, we may earn a commission. Learn More.

MattMan657

Member
Joined
Mar 14, 2013
Location
Massachusetts
EVGA Z390 Dark & Lian Li PC-V3000 Build Log

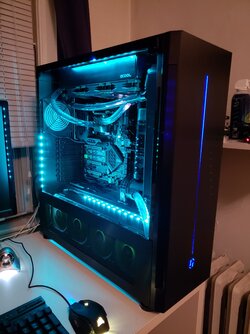
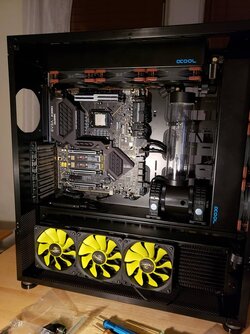
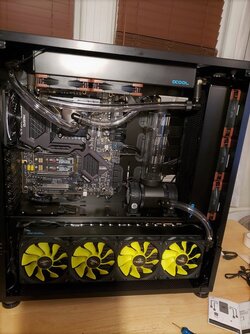
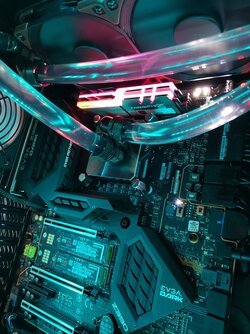
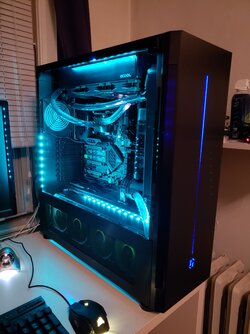
The build I've been planning since September is complete! Design thread here! I have a bunch of comments specifically about the Lian case that I hope folks may find useful. Will post em after the pics.

Much appreciated to everyone who contributed and commented in my design thread.

CORE COMPONENTS
  • Case: Lian LI PC-V3000WX
  • Mobo: EVGA Z390 Dark
  • CPU: Intel i9900k Delidded from Silicon Lottery. Binned at 5.0 GHz.
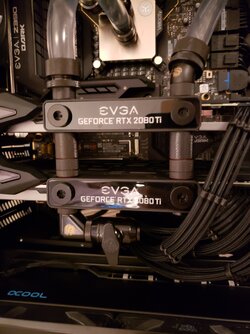
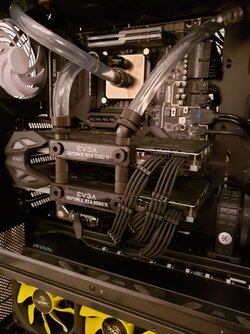
  • GPU 2 x EVGA 2080Ti FTW3 Ultra Hydrocopper NVLink SLI
  • RAM: G.Skill Trident Z RGB @ 4,133 MHz 17-17-17-37
  • SSD 1: Samsung 970 Pro 512 GB for Boot, Drivers, Critical Programs and Monitoring Programs
  • SSD 2: Samsung 970 Evo 500 GB for general programs and games
  • SSD 3: Samsung 850 Evo 1 TB for general storage
  • PSU: EVGA Supernova 1600w T2


WATER COOLING COMPONENTS
CPU Block: EK Velocity Full Nickel RGB
2 x EVGA Hydrocopper GPU Waterblocks
Pump: EK Dual D5 Pump
Reservoir: EK 250 Lite
Radiators: Alphacool 2 x 360mm UT60 & 1 x 480mm UT60
Tubing: PrimoChill Advanced LRT w/ 3 x Silver Kill Coils in the tubing
Fittings: Bitspower, Enzotech, Koolance QD
Fans: Noctua 120mm iPPC 2000RPM on top and front radiators. Akasa 120mm Vipers on bottom radiator.


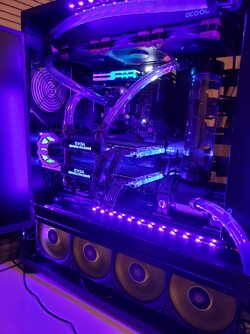
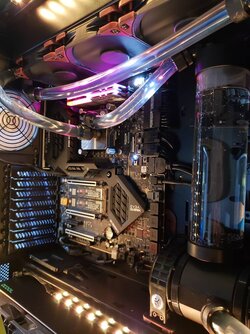
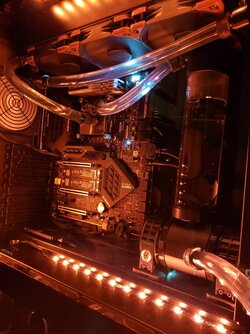
FINAL RESULT!!!
2 x 2080Ti FTW3 Ultra Hydrocoppers added to loop. Additional changes made while adding GPUs...
Bitspower On/Off Valve added to bottom of GPUs. This gives a drainage solution at the two lowest points in the build
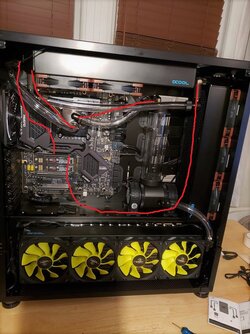
Rerouted top tubing route to run to the side of the top radiator as opposed to below it. Gives better access to radiator fans, RAM, and the reservoir fill port
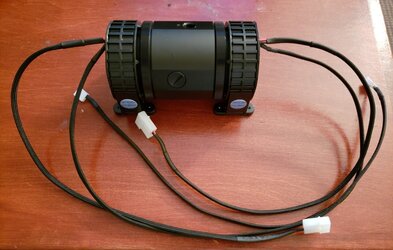
Swapped out pump's white PWM connectors with black ones to blend in better with the motherboard and overall build
Better organization of GPU power cables, added cable combs


20190407_003304.jpg
20190407_003332.jpg
20190407_003401.jpg
20190407_005607.jpg


Final Result pre GPUs added to loop
Teal.jpg
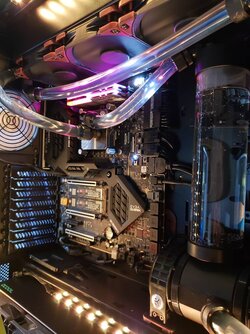
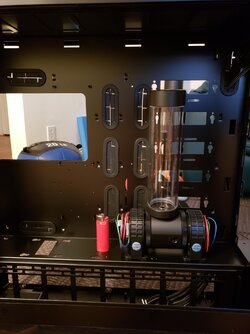
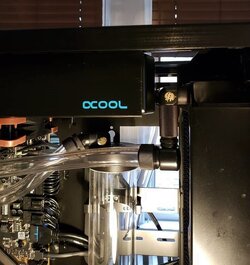
Pump and Res Up Close.jpg


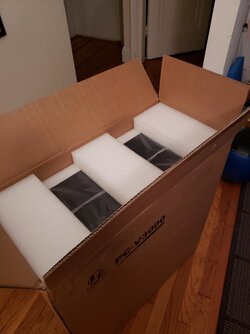
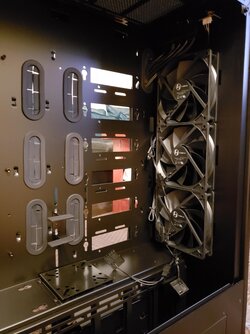
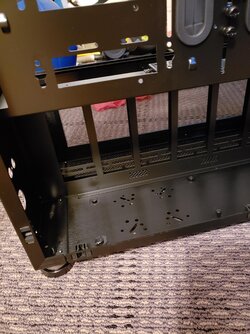
Opening the Case. I originally posted these pictures in the design thread.
Box Open.jpg
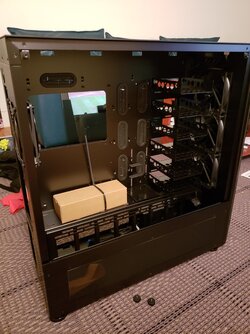
Out Of The Box.jpg
HDD Caddys Removed.jpg
Bottom HDD Cage Removed.jpg
ResPump In Place.jpg


The first thing I needed to do was cut out some metal and a drill a hole for the tubing run and radiator placement.

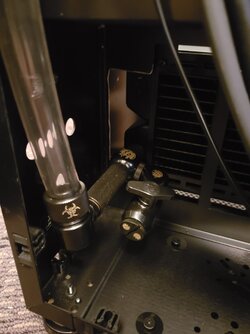
I'm very surprised that Lian left this covered by default. Makes perfect sense to keep it open for tubing. Used the average dremmel to cut it out. I actually abandoned the below fitting and drainage design and instead just went with a pair of Koolance QD3 Quick Disconnects. Way simpler overall to just take a spare piece of tubing with a spare female QD I bought.

bottom rear 2.jpg


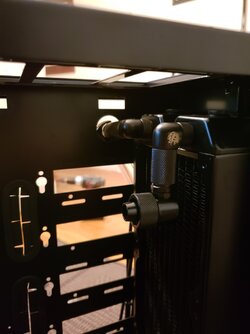
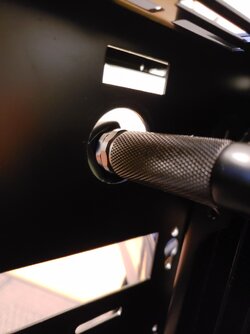
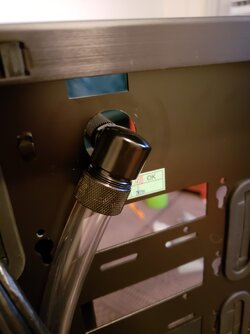
For allowing the rear fitting of the front radiator to connect to the fitting exposed by the above cut out. Used a step drill bit, was actually really easy.

top rear front.jpg
top rear 2.jpg
top rear.jpg


Also sleeved the cables on the EK Dual Pump. Very surprised that this isn't standard from EK. It's their most expensive pump setup and they sleeve other pumps. Odd omission.
finished.jpg
 
Last edited:
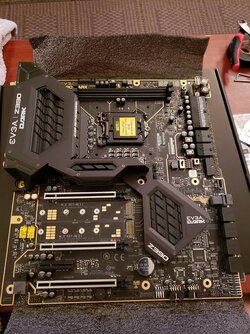
My original plan was to get the Z370 Classified K Mobo and Intel i8700k, but it was so close to the 9900k's release date and the Z390 Dark's originally estimated release, so I decided to wait... and wait I did. At the end of the day I'm super happy I went for this mobo and cpu. The Dark is easily the nicest motherboard I've ever worked with.

The board went up for sale last week, ordered it on the spot, and it arrived on Monday. So commenced the build!

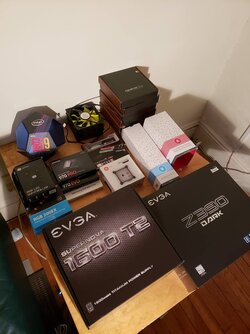
Table of Parts.jpg

Samsung 870 SSD is held in place with a little bit of velco. Worked great.
Dark Mobo Out of the Box.jpg
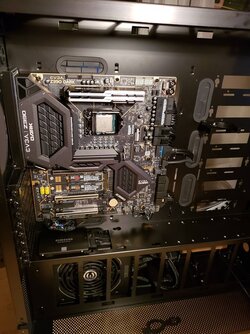
Mobo Mounted In Case.jpg
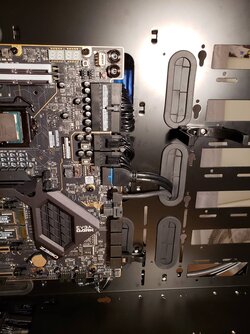
Mobo Wire Management.jpg
Water Cooling Parts Mounted.jpg
Water Cooling Tubing Setup.jpg


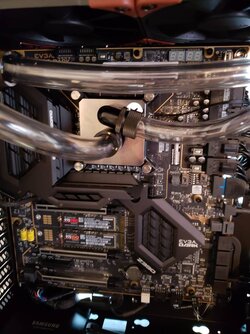
New EK Velocity block was super easy to setup. Love the look of the full nickel. The logo and Velocity text do light up via RGB.
CPU Block Up Close.jpg


This last pic shows how tight the clearance was with having two 360mm 60mm thick radiators. I originally bought a 420mm 60mm but it was just too long, wouldn't have been enough room for the fittings on the left of the top radiator so I exchanged it for another 360.
Top Right Fittings.jpg
 
Last edited:
With everything in place, it was time to fill! In some of the pics, and slightly in the video, you'll see that the right fan on the top rad isn't mounted. The clearance is so tight there that I have to take it out to unscrew the reservoir's top cap for my fill bottle. Not a HUGE deal, but a little annoying. Lesson learned for next time.

I removed some of the paper towels for a minute just to take the video.

 
Last edited:
And that's the build! Things left to do...

GPUs. Yep there are no GPUs in it right now. I'm planning on getting one this year and putting it on water in the loop. For now I'm going to use my old 780Ti Classified SLI setup just to hold me over. They need a dusting so I haven't set them up yet.

When I put a new GPU on water, I'm also going to move the long horizontal tubing to run to the side of the top radiator, like above the Alphacool label. I may try my hand with hard PETG tubing. When I do this, I'll probably have the long run go to the top radiator's rear port, and also run PETG from the top rad's front port to the CPU block, reversing the ports. This will make it easier to get to my RAM and fans and should just look cleaner.

Swap out the PWM extension cable at the bottom of the case for one with a black connector. Gotta keep the color scheme living up to the mobo's name.


OBSERVATIONS ON THE LIAN PC-V3000WX
  • The bottom radiator component can only fit a 60mm thick radiator MAX. And if you do go that thick with a 480mm long, you will need to remove the piece of metal, as I did, to expose the fittings in the rear. There just isn't enough room to have both fittings be on the front. Not enough clearance for the tubing from the bottom fitting to pass over the top. Either that or you need to have the radiator face the rear side of the case, which does have a bit more room. I think this is a pretty big oversight on Lian.
  • A 420mm top radiator WILL NOT fit with a 360mm 60mm front radiator. Although you CAN physically mount it, there was next to no room for the fittings, regardless of if you have them facing the front or rear of the case. Also, it's so long that a bit too much of rad will be covered by the rear of the case.
  • I really wish the front and top rads had the same type of rail mount system that the bottom has. Really like this feature.
  • Overall it's an awesome case, but the above are definitely areas where it could be improved. Bullet points 1 and 2 are definitely important for someone considering a build with it.


Additional notes
  • There's a Swiftech 8-Way PWM Fan Splitter for each radiator. Let's me see what each set of fans are running at.
  • Swiftech Helix for the rear exhaust fan. I had this and my Akasa Vipers from my old build. Figured I'd reuse em.
  • The EnzoTech 90 Degree fittings are really nice. Would use again. I got em cause FrozenCPU didn't have enough Bitspower 90 Degrees.


RGB notes
  • Using the Cooler Master RGB Controller for the EK Block and LED Strips which are from DeepCool
  • Cooler Master software can't control the G.Skill RGB Ram. Perhaps it's a limitation on my motherboard?
  • Not a huge fan of either Cooler Master's and G.Skill's RGB software. They WORK but I don't love them.
 
Last edited:
OVERCLOCKING

The first thing I did was run Prime95 for awhile with just stock settings to test temps. Didn't break 60 until some air that was still making its way to the res passed through the block and it spiked quickly. I think it was a combination of that and the blend test running one of the more intensive runs.

First actual change was to get the RAM running at the specified speed of 4,133MHz with timings of 17-17-17-37. Enabled XMP, set those specs with a voltage of 1.4v. MemTest64 passed a 5 loop test and RAM stayed in the 28-30c range.

The 9900k was purchased from Silicon Lottery, delidded and binned at 5.0ghz with 1.300VCore. Ran Prime95 with this for awhile, temps hit high 60s on the more intensive blend tests. I wanted to see how low I could get the voltage with 5.0GHz, so I got it down to 1.285 before I decided to try and see if I could get to 5.1.

For 5.1GHz I increased VCore back to 1.300v, ran prime for awhile and it was stable! Temps were solid, never breaking 70. Cinebench score of 2183.

I then upped it to 5.2GHz, kept it at 1.300v and it crashed in the first 10 minutes. Upped it a few different times until I reached 1.340v. With the Vdroop setting to -25%, it was fluctuating between 1.337 and 1.340. I think that's as close as you're going to get to vdroop not causing a major change to your override vcore. Temps were reaching high 70s to 81-82 ONLY on the super intensive tests in blend mode, never going above that. Vast majority of the time it was staying in the mid 50s to high 60s.

So now I'm sitting comfortably at 5.2GHz. Next I wanted to see if I could lower my ram timings. I tried 16-17-17-37 with raising the voltage a little, passed a 5 loop MemTest. Went down to 16-16-16-37 and started to get errors so I raised the voltage up to 1.450v. Passed the 5 loop test. Next I tried moving CAS to 15, and it wouldn't post so I used the Dark's BIOS Safe Boot button which boots you direct to the BIOS if you have a bad overclock. Super useful feature. Decided to stay at 16-16-16-37 which is where I'll call it a day.


FINAL OC
CPU Frequency: 5.2 GHz
CPU VCore: 1.340v
RAM Frequency: 4,133 MHz
RAM Timing: 16-16-16-37
RAM Voltage: 1.450v

Gives me a Cinebench score of 2260-2270.
 
Nice job man, Great clocks and temps

That is a lot of rad but certainly can't hurt, temps will change a little once you get those Classy's in the loop

that board reminds me of an old MSI board I had back i n the day with the memory at a right angle to what we would call standard

Looks like the concerns some early reviewers of this board had of the memory being in the way of a rad was unfounded

Defiantly looks a bit empty with out the vid cards in the mix , be sure to post up some pics once there in
 
Thanks guys, couldn't have done it without the help from folks here.

I'm not going to put the OG Classys in the loop as they're just a stop gap until I get something new in the near future. Too much work for something that will just be a temporary solution. But to your point, I'll just enjoy the radiator overkill for now :D

There were no issues with getting the ram in, but what will be a little tricky is if I need to pull the fans out. Would need to remove the ram to get to the screws. No way an 80mm rad would fit though, 60mm is definitely the max this Case's top slot can handle. You could theoretically put an 80mm in the front spot, but you'd have to go with a 240mm top and you'd lose some room where I put my pump and res.

You know... the case is definitely big, but it's not unwieldy. To be honest I expected it to be a little bigger. Overall I think it's the perfect size for a full loop. My original goal was to maximize and utilize the full amount of space the case offers and I think I've accomplished that. Three big radiators, pump mounted directly in the front, etc.

I took a few gambles to try and reach that goal. I got super lucky that there was JUST enough clearance for the fitting on the res to not interfere with the right fan on the top rad. Wasn't sure if there was going to be enough clearance for the tubing from the top radiator's rear fitting to pass over the I/O Port and exhaust fan. Overall the gambles were worth it. I definitely think the case has been maximized.


My current thoughts for a GPU will probably be an EVGA 2080Ti FTW Hydrocopper. I'll most likely have the CPU block run to the GPU, and GPU to the res. Basically just inserting the GPU in between the CPU and res. I MIGHT try hard PETG for this as I really want to give it a whirl for replacing the current long horizontal run with it. The big reasons why I'm waiting is that right now Nvidia GPU prices are frigging insane, hoping they go down. That and I want to see what the deal is with how Nvidia is now "supporting" FreeSync which will have an impact on getting a new monitor.
 
I have been looking at a new build with that card myself, crazy, $ 1,600.00 for a vid card , though 1K was bad a few years ago when I bought two of the original Titans for a build

sure the two Classy's will hold you over , could take a while to save that much coin, I have also been looking at the MSI and Gigabyte water blocked cards as well.

the MSI is currently 2 bills cheaper than the FTW3 Hydro, the Gigabyte is no where to be found :(

once you get the card you could go from vid into top rad into cpu and over to eliminate the real long tube if that makes any sense ?

Time to enjoy the fruits of your labor :thup:
 
Yea it's crazy how inflated they are right now. I'm considering just biting the bullet as I have someone that might buy my old build for a few hundred bucks plus bonus season from 2018 is around the corner. I started cleaning my Classys tonight and I thought man I wish I had a GPU to match the rest of the rig lol.

Are you suggesting Front Rad > GPU > Top Rad > CPU? That isn't a bad idea, but if I'm able to move the current long route higher up directly next to the top rad, it'll basically put it completely out of the way of the rest of the components. While if I went from front rad to GPU, it would be a little more in the way of the motherboard. It should be a pretty simple PETG run, two 90 degree bends to connect the front rad's front fitting to the top rad's rear. Then have the top rad's front connect to the cpu.
 
I am hoping they go down soon, the 2070's you see some deals on but have not seen that trend on the Ti's ........ :(

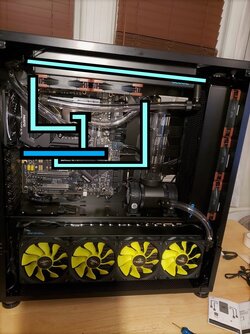
It really does not matter what order the loop is in, I was just thinking of a way as not have to cross over ?


however it still would cross, just down near the pump not at the top of the res ?

Water Cooling Tubing Setup.jpg
 
I'm honestly considering trying getting two used 1080ti hydrocoppers. If used, probably less than a single 2080ti.

The run you posted above would up being longer than the current and would be more in the way of the other components. It would certainly work, but my envisioned idea would put it completely out of the way of everything else.
 
Well, I caved in and ordered an EVGA 2080 Ti FTW3 Ultra. Wasn't super comfortable buying a used GPU and new EVGA 1080 Ti cards online were going for $1k give or take. I'd rather spend the few extra hundred bucks and get the latest and greatest for a new build, direct from EVGA, ensuring a solid warranty and support scenario.

Going to run it on air for a bit and OC it on air, mainly because I just want to stop building for a moment and game on! Rest be sure it'll be on water in the very near future. When I do I'm going to try my hand at PETG tubing and make the changes I mention above. Loop plan as of now...

GPU Loop Plan.jpg
 
Good chance I might get a 2nd 2080ti and Nvlink em.
A 1KW PSU is still plenty (including overclocking the cards and CPU and plenty of headroom) and would have saved your wallet quite a bit of cash. I would run 2080Ti SLI and 9900K both overclocked on a 850W unit and never think about it. :)
 
FYI: If Ray tracing is a big deal for you check it out as I remember reading early on that it does not work with SLI?

That may have changed or is being addressed on the driver level , but would confirm before you drop another $ 1,500.00 on another one

But wow, two of them is awesome sauce
 
Back