- Joined
- Jul 5, 2018
- Location
- Waterbury, VT
[PROJECT LOG] Gears of War
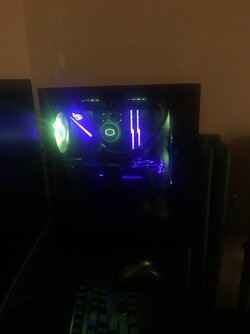
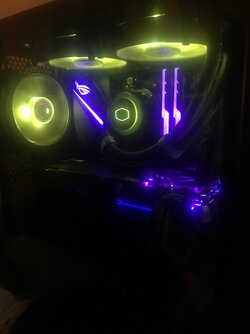
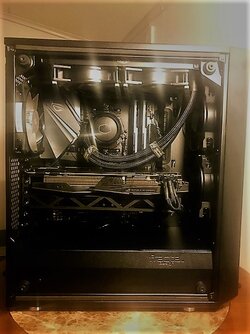
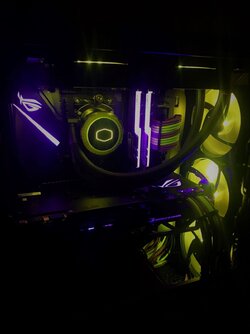
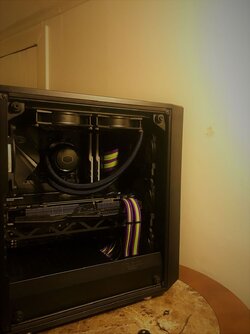
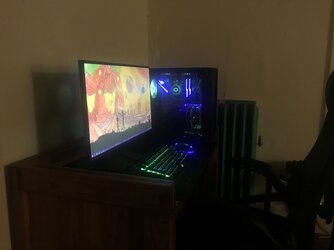
UPDATED 11/21/18: So the entire plan has changed from what it was this summer.
So originally I was going to mod my Meshify C with my current hardware listed in my signature. But as time went on, I kept finding myself looking at custom loops and day dreaming. Needless to say, the decision to create a loop has changed the entire concept from what it was this summer.
PCPartPicker part list / Price breakdown by merchant
CPU: AMD - Ryzen 5 2600X 3.6 GHz 6-Core Processor (Purchased For $229.99)
Thermal Compound: Thermal Grizzly - Hydronaut 3.9 g Thermal Paste ($14.29 @ Amazon)
Motherboard: Asus - ROG STRIX X470-F Gaming ATX AM4 Motherboard (Purchased For $214.99)
Memory: G.Skill - Trident Z RGB 16 GB (2 x 8 GB) DDR4-3200 Memory (Purchased For $216.99)
Storage: Patriot - Burst 240 GB 2.5" Solid State Drive (Purchased For $35.99)
Storage: Samsung - 970 Evo 250 GB M.2-2280 Solid State Drive (Purchased For $106.99)
Video Card: Asus - GeForce GTX 1080 8 GB ROG STRIX Video Card (Purchased For $669.99)
Case: Fractal Design - Define S2 Blackout – TG ATX Mid Tower Case ($165.46 @ Newegg)
Power Supply: EVGA - SuperNOVA G3 650 W 80+ Gold Certified Fully-Modular ATX Power Supply (Purchased For $109.99)
Operating System: Microsoft - Windows 10 Home Full - USB 32/64-bit (Purchased For $119.99)
Monitor: Asus - ROG SWIFT PG278QR 27.0" 2560x1440 165 Hz Monitor (Purchased For $613.66)
Keyboard: Asus - ROG Claymore Core Wired Gaming Keyboard (Purchased For $159.99)
Mouse: Asus - ROG Gladius II Wired Optical Mouse (Purchased For $94.69)
Other: Bitspower G1/4" Mini Valve with Black Handle, Matte Black, Body ($32.99 @ Amazon)
Other: EKWB EK-CoolStream XE 360 (Triple) Liquid Cooling Radiator (Purchased For $120.99)
Other: EKWB EK-CoolStream XE 360 (Triple) Liquid Cooling Radiator (Purchased For $120.99)
Other: Bitspower G1/4" to Enhance Multi-Link Fitting for 12mm OD Tubing, Matte Black, 4-pack ($33.99 @ Amazon)
Other: Bitspower G1/4" to Enhance Multi-Link Fitting for 12mm OD Tubing, Matte Black, 4-pack ($33.99 @ Amazon)
Other: Bitspower G1/4" to Enhance Multi-Link Fitting for 12mm OD Tubing, Matte Black, 4-pack ($33.99 @ Amazon)
Other: Bitspower None Chamfer PETG Link Tube, 12mm OD, 1000mm, Clear, 4-pack ($34.99 @ Amazon)
Other: Bitspower None Chamfer PETG Link Tube, 12mm OD, 1000mm, Clear, 4-pack ($34.99 @ Amazon)
Other: EK Water Blocks EK-FC1080/ 1070/ 1060 GTX Strix Backplate - Black (Purchased For $24.94)
Other: Bitspower T-Block Fitting with Triple G1/4" Female, Matte Black ($14.99 @ Amazon)
Other: Bitspower G1/4" Temperature Sensor Stop Fitting, Matte Black ($15.99 @ Amazon)
Other: Bitspower G1/4" Temperature Sensor Stop Fitting, Matte Black ($15.99 @ Amazon)
Other: Bitspower G1/4" to Enhance Multi-Link Adapter Fitting, 90° Rotary, Matte Black, 4-pack ($72.99 @ Amazon)
Other: Bitspower Flow Sensor, Matte Black ($46.99)
Other: Bitspower G1/4" 5mm Male to Male Fitting, Matte Black, 4-pack ($25.99 @ Amazon)
Other: PrimoChill Liquid Filling Bottle - 1000mL ($9.99 @ Amazon)
Other: Klipsch R-15PM Powered Monitor - Cherry (Pair) (Purchased For $279.00)
Other: Thermaltake CL-W153-AL00BU-A ID 10mm x OD 12mm hard tube Pacific Hard Tube Bending Kit ($69.99 @ Amazon)
Other: EKWB EK-CSQ G1/4" Plug with EK Logo, Black, 4-pack ($24.99 @ Amazon)
Other: EKWB EK-Vardar EVO 120ER PWM 120mm Fan, 2200 RPM, Black, 2-pack ($54.99 @ Amazon)
Other: EKWB EK-Vardar EVO 120ER PWM 120mm Fan, 2200 RPM, Black, 2-pack ($54.99 @ Amazon)
Other: EKWB EK-Vardar EVO 120ER PWM 120mm Fan, 2200 RPM, Black, 2-pack ($54.99 @ Amazon)
Other: EKWB EK-AF G1/4" FillPort, Black ($14.99 @ Amazon)
Other: EKWB EK-Velocity CPU Waterblock, AMD CPU, Nickel/Plexi (Purchased For $93.95)
Other: EKWB EK-CryoFuel Solid Premix Coolant, 1000mL, Electric Purple ($36.39 @ Amazon)
Other: EKWB EK-CryoFuel Solid Premix Coolant, 1000mL, Electric Purple ($36.39 @ Amazon)
Other: EKWB EK-CryoFuel Solid Premix Coolant, 1000mL, Electric Purple ($36.39 @ Amazon)
Other: EKWB EK-CryoFuel Solid Premix Coolant, 1000mL, Electric Purple ($36.39 @ Amazon)
Other: Swiftech Maelstrom D5 Reservoir Pump Combo - 200mm ($159.95)
Other: EK-FC1080 GTX Strix - Nickel (Purchased For $167.47)
Total: $4548.67
Prices include shipping, taxes, and discounts when available
Generated by PCPartPicker 2018-11-21 22:39 EST-0500
New Case: Fractal Design Define S2 White
So I am going with this case for two reasons, one obviously being that it is far more suited to a custom loop than my Meshify C and two because there will be painting to do this time and starting white will make that far easier. And with that comes a completely different theme (I know, LMFAO!). No more lack luster brand whoring, real theme this time... I have chose to go with a Gears of War theme and for paint, Nvidia green with purple (as close to the coolant color as possible) accents.
Here is the plan for MODS:
1) Custom Loop Liquid Cooling Electric Purple (UV Reactive) Coolant/Nvidia Green Accent Fittings
2) Custom Cables Nvidia Green/Purple
3) Paint Case Nvidia Green
4) Paint Fractal Design Logo on PSU Shroud Purple
5) Purple Thumb Screws
6) Paint Purple Gear Logo on Front Panel (Large top center)
7) Paint Purple xXSCU84ST3V3420Xx on side of PSU Shroud
8) Etch TG Panel: Gears Logo Large Center
9) Cut removed portion of PSU Shroud to accomidate Radiator/Fans
10) Paint Purple EK, Ryzen, Nvidia and ROG Logos small on bottom edge of Front Panel
11) Paint SSDs Purple
12) Custom Plexi rear panel cover (Nvidia Green)
13) Paint Radiator Fins Purple and Perimeter Nvidia Green
14) Gears of War Ticker Figures
15) UV Lighting
Here are images that I will be converting into Vinyl Graphics for Paint and Etching Stencils: (Image 1: Paint Stencil for PSU Shroud) (Image 2: Paint and Etch Stencil for Front Panel and Glass Panel, though it will be larger than displayed)


Similar Stencils will be made up for the small font panel logos.
UPDATED 11/21/18: So the entire plan has changed from what it was this summer.
So originally I was going to mod my Meshify C with my current hardware listed in my signature. But as time went on, I kept finding myself looking at custom loops and day dreaming. Needless to say, the decision to create a loop has changed the entire concept from what it was this summer.
PCPartPicker part list / Price breakdown by merchant
CPU: AMD - Ryzen 5 2600X 3.6 GHz 6-Core Processor (Purchased For $229.99)
Thermal Compound: Thermal Grizzly - Hydronaut 3.9 g Thermal Paste ($14.29 @ Amazon)
Motherboard: Asus - ROG STRIX X470-F Gaming ATX AM4 Motherboard (Purchased For $214.99)
Memory: G.Skill - Trident Z RGB 16 GB (2 x 8 GB) DDR4-3200 Memory (Purchased For $216.99)
Storage: Patriot - Burst 240 GB 2.5" Solid State Drive (Purchased For $35.99)
Storage: Samsung - 970 Evo 250 GB M.2-2280 Solid State Drive (Purchased For $106.99)
Video Card: Asus - GeForce GTX 1080 8 GB ROG STRIX Video Card (Purchased For $669.99)
Case: Fractal Design - Define S2 Blackout – TG ATX Mid Tower Case ($165.46 @ Newegg)
Power Supply: EVGA - SuperNOVA G3 650 W 80+ Gold Certified Fully-Modular ATX Power Supply (Purchased For $109.99)
Operating System: Microsoft - Windows 10 Home Full - USB 32/64-bit (Purchased For $119.99)
Monitor: Asus - ROG SWIFT PG278QR 27.0" 2560x1440 165 Hz Monitor (Purchased For $613.66)
Keyboard: Asus - ROG Claymore Core Wired Gaming Keyboard (Purchased For $159.99)
Mouse: Asus - ROG Gladius II Wired Optical Mouse (Purchased For $94.69)
Other: Bitspower G1/4" Mini Valve with Black Handle, Matte Black, Body ($32.99 @ Amazon)
Other: EKWB EK-CoolStream XE 360 (Triple) Liquid Cooling Radiator (Purchased For $120.99)
Other: EKWB EK-CoolStream XE 360 (Triple) Liquid Cooling Radiator (Purchased For $120.99)
Other: Bitspower G1/4" to Enhance Multi-Link Fitting for 12mm OD Tubing, Matte Black, 4-pack ($33.99 @ Amazon)
Other: Bitspower G1/4" to Enhance Multi-Link Fitting for 12mm OD Tubing, Matte Black, 4-pack ($33.99 @ Amazon)
Other: Bitspower G1/4" to Enhance Multi-Link Fitting for 12mm OD Tubing, Matte Black, 4-pack ($33.99 @ Amazon)
Other: Bitspower None Chamfer PETG Link Tube, 12mm OD, 1000mm, Clear, 4-pack ($34.99 @ Amazon)
Other: Bitspower None Chamfer PETG Link Tube, 12mm OD, 1000mm, Clear, 4-pack ($34.99 @ Amazon)
Other: EK Water Blocks EK-FC1080/ 1070/ 1060 GTX Strix Backplate - Black (Purchased For $24.94)
Other: Bitspower T-Block Fitting with Triple G1/4" Female, Matte Black ($14.99 @ Amazon)
Other: Bitspower G1/4" Temperature Sensor Stop Fitting, Matte Black ($15.99 @ Amazon)
Other: Bitspower G1/4" Temperature Sensor Stop Fitting, Matte Black ($15.99 @ Amazon)
Other: Bitspower G1/4" to Enhance Multi-Link Adapter Fitting, 90° Rotary, Matte Black, 4-pack ($72.99 @ Amazon)
Other: Bitspower Flow Sensor, Matte Black ($46.99)
Other: Bitspower G1/4" 5mm Male to Male Fitting, Matte Black, 4-pack ($25.99 @ Amazon)
Other: PrimoChill Liquid Filling Bottle - 1000mL ($9.99 @ Amazon)
Other: Klipsch R-15PM Powered Monitor - Cherry (Pair) (Purchased For $279.00)
Other: Thermaltake CL-W153-AL00BU-A ID 10mm x OD 12mm hard tube Pacific Hard Tube Bending Kit ($69.99 @ Amazon)
Other: EKWB EK-CSQ G1/4" Plug with EK Logo, Black, 4-pack ($24.99 @ Amazon)
Other: EKWB EK-Vardar EVO 120ER PWM 120mm Fan, 2200 RPM, Black, 2-pack ($54.99 @ Amazon)
Other: EKWB EK-Vardar EVO 120ER PWM 120mm Fan, 2200 RPM, Black, 2-pack ($54.99 @ Amazon)
Other: EKWB EK-Vardar EVO 120ER PWM 120mm Fan, 2200 RPM, Black, 2-pack ($54.99 @ Amazon)
Other: EKWB EK-AF G1/4" FillPort, Black ($14.99 @ Amazon)
Other: EKWB EK-Velocity CPU Waterblock, AMD CPU, Nickel/Plexi (Purchased For $93.95)
Other: EKWB EK-CryoFuel Solid Premix Coolant, 1000mL, Electric Purple ($36.39 @ Amazon)
Other: EKWB EK-CryoFuel Solid Premix Coolant, 1000mL, Electric Purple ($36.39 @ Amazon)
Other: EKWB EK-CryoFuel Solid Premix Coolant, 1000mL, Electric Purple ($36.39 @ Amazon)
Other: EKWB EK-CryoFuel Solid Premix Coolant, 1000mL, Electric Purple ($36.39 @ Amazon)
Other: Swiftech Maelstrom D5 Reservoir Pump Combo - 200mm ($159.95)
Other: EK-FC1080 GTX Strix - Nickel (Purchased For $167.47)
Total: $4548.67
Prices include shipping, taxes, and discounts when available
Generated by PCPartPicker 2018-11-21 22:39 EST-0500
New Case: Fractal Design Define S2 White
So I am going with this case for two reasons, one obviously being that it is far more suited to a custom loop than my Meshify C and two because there will be painting to do this time and starting white will make that far easier. And with that comes a completely different theme (I know, LMFAO!). No more lack luster brand whoring, real theme this time...
 I have chose to go with a Gears of War theme and for paint, Nvidia green with purple (as close to the coolant color as possible) accents.
Here is the plan for MODS:
1) Custom Loop Liquid Cooling Electric Purple (UV Reactive) Coolant/Nvidia Green Accent Fittings
2) Custom Cables Nvidia Green/Purple
3) Paint Case Nvidia Green
4) Paint Fractal Design Logo on PSU Shroud Purple
5) Purple Thumb Screws
6) Paint Purple Gear Logo on Front Panel (Large top center)
7) Paint Purple xXSCU84ST3V3420Xx on side of PSU Shroud
8) Etch TG Panel: Gears Logo Large Center
9) Cut removed portion of PSU Shroud to accomidate Radiator/Fans
10) Paint Purple EK, Ryzen, Nvidia and ROG Logos small on bottom edge of Front Panel
11) Paint SSDs Purple
12) Custom Plexi rear panel cover (Nvidia Green)
13) Paint Radiator Fins Purple and Perimeter Nvidia Green
14) Gears of War Ticker Figures
15) UV Lighting
Here are images that I will be converting into Vinyl Graphics for Paint and Etching Stencils: (Image 1: Paint Stencil for PSU Shroud) (Image 2: Paint and Etch Stencil for Front Panel and Glass Panel, though it will be larger than displayed)


Similar Stencils will be made up for the small font panel logos.
Last edited:

