-
Welcome to Overclockers Forums! Join us to reply in threads, receive reduced ads, and to customize your site experience!
You are using an out of date browser. It may not display this or other websites correctly.
You should upgrade or use an alternative browser.
You should upgrade or use an alternative browser.
PROJECT LOG Project Unity
- Thread starter WarWolf
- Start date
Basically the method is using a locator pin.
Put a long nail or something straight and pointy into the drill bit, and have a sacrificial piece of wood on the base. Something sturdy of course. Bring the drill bit down and mark the wood where the piece will go. From there, install something to make a pin to perfectly align the piece. Make sure your pin is roughly the same size as your drill bit you're using, I personally use another drill bit of the same exact size.
Then USE A PUNCH and mark your center point and drill a small pilot hole (same size as your pin), making sure you got dead center. Then mount the board you drilled onto the pin. Install your forstner bit and when you press it down, it will be directly centered on the pin, and your hole will be aligned to the forstner bit perfectly. Setting your depth stop on your drill bit will get you perfect depth, perfect alignment, and (pending you do everything correctly) perfectly straight holes. After you do the forstner, you can swap to your potentiometer post drill bit, and drill it through 90% of the way. From there the hole will guide itself and you can clear through without any movement.
- Thread Starter
- #24
Basically the method is using a locator pin.
Put a long nail or something straight and pointy into the drill bit, and have a sacrificial piece of wood on the base. Something sturdy of course. Bring the drill bit down and mark the wood where the piece will go. From there, install something to make a pin to perfectly align the piece. Make sure your pin is roughly the same size as your drill bit you're using, I personally use another drill bit of the same exact size.
Then USE A PUNCH and mark your center point and drill a small pilot hole (same size as your pin), making sure you got dead center. Then mount the board you drilled onto the pin. Install your forstner bit and when you press it down, it will be directly centered on the pin, and your hole will be aligned to the forstner bit perfectly. Setting your depth stop on your drill bit will get you perfect depth, perfect alignment, and (pending you do everything correctly) perfectly straight holes. After you do the forstner, you can swap to your potentiometer post drill bit, and drill it through 90% of the way. From there the hole will guide itself and you can clear through without any movement.
Thanks, I shall take a look.
I got it mounted to the desktop and any misalignment is not obvious when you look at it, but I'll take a close look at it and possibly see about redoing it straighter.
- Thread Starter
- #26
Ah, I'm just super anal with stuff like that. You're putting all the effort into this, may as well get it perfect
I need to start being more focused on getting it perfect. Finally clicking that oh yeah, this may be the final version rather than redoing it and fixing all the little things by building a new one.

Side note, anybody else been having intermittent issues getting here? Seems like since I switched to Chrome from Firefox more often than not I get "Chrome could not connect to www.overclockers.com"

Prime example of a little thing that needs fixing.
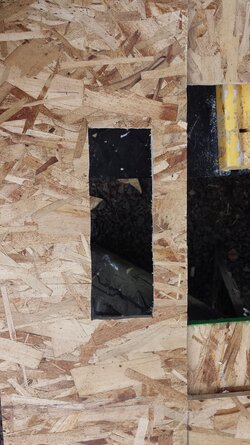
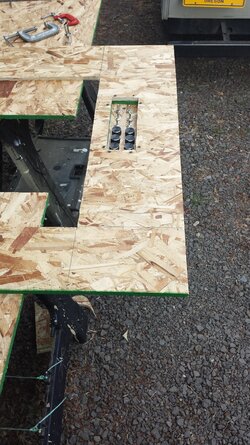
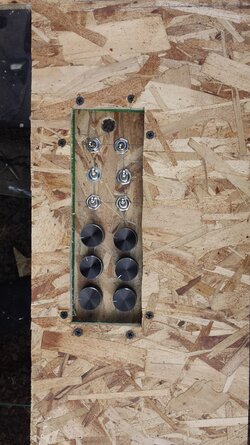
Got the hole for the control panel cut and mounted it. While the imperfect cuts are a considerably less noticeable than the pictures make it look, in the interest of aesthetics I took the router to it and made it much cleaner.
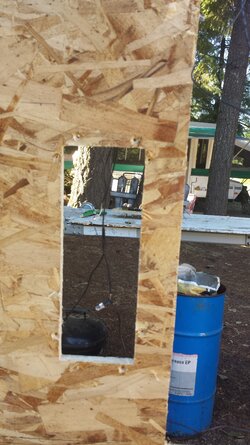
Haven't had the chance to remount it yet, too hot outside to make it enjoyable to do much. Plus Witcher 2 has me recently.
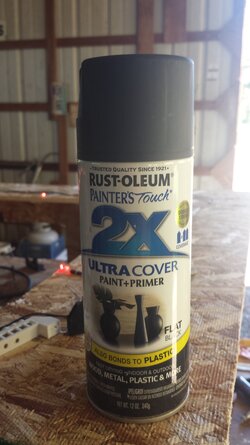
Picked up some paint for, you know. Painting stuff.
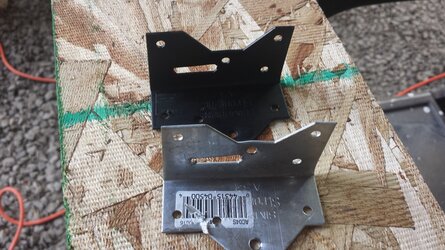
Tried it out on one of the metal brackets for the corner posts.
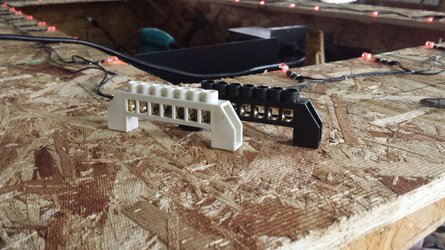
And also on a power distribution bus that'll be going with an Arduino mounted in the desk near the control panel.
Been working a bit with an Arduino, the LEDs, and a MSGEQ7 chip.
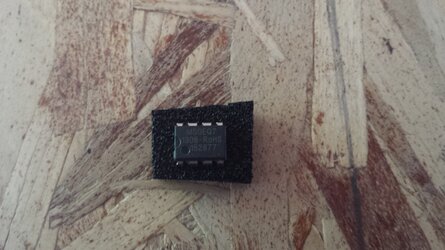
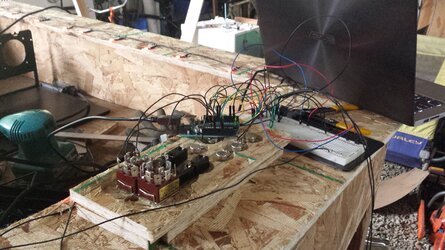
The MSGEQ7 takes input from an audio jack and splits the signal into 7 frequencies (63Hz, 160Hz, 400Hz, 1kHz, 2.5kHz, 6.25kHz, and 16kHz) and then passes the amplitude of each to the Arduino. The Arduino reads and interprets into a digital value from 0-1023, which is then compressed/mapped to 0-255. This value is output via one of the PWM pins to the LEDs to set their brightness. (As far as my understanding of it is.)
Since the LEDs are split into four strands, I decided to make two strands set by lower frequencies and the other two by the higher frequencies. The strands are intermixed (ie, every other one is on the same strand, 1-2-1-2 etc) so as to evenly spread the brightness.
Found a nice tutorial by J Skoba providing a schematic and code. (Link) Modified the code to work with the control switch and dimmer. And whadda you know. It works.

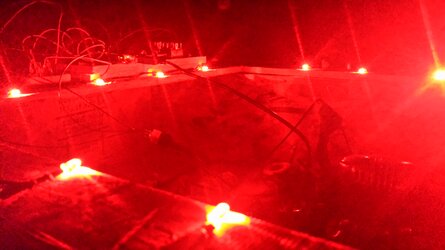
Edit for more clarity: The brightness of the LEDs is set by the amplitude (loudness) of the sound being passed to the chip. Song with loud bass? Half the lights are going to be bright, flashing to the bass rhythm.
And isn't the easiest to record and do justice to. I have one video, decently shows the effect but not thrilled with it yet. Still trying to find a balance still between dark enough to see the LEDs well but light enough for the camera to still be good quality. In the mean time, let me know if I should post the video and/or code.
Last edited:
- Joined
- Jan 11, 2012
- Location
- North Carolina
Side note, anybody else been having intermittent issues getting here? Seems like since I switched to Chrome from Firefox more often than not I get "Chrome could not connect to www.overclockers.com"
I've been getting that too, and apparently a few other members. I started a thread in the forum feedback section about it. I use Chrome all the time but it doesn't work with Firefox or IE either.
Back on topic: It's coming along nicely. Usually things I start as a rough draft stay as a finished product, so it's not a bad idea to start smoothing things out as you go along.
Just like the metal front panel I was going to make for my Antec 300 a year and a half ago... I still have my original wooden one.
- Thread Starter
- #28
Quickly, in between connection loss. 
Originally (and still might) planning on scrapping this current desk and rebuild it out of hardwood once I finished it. Though either way, there's something to be said about doing it spot on the first time regardless of if I keep it or not. Best not to be doing cuts for the first time when using the expensive wood.
Originally (and still might) planning on scrapping this current desk and rebuild it out of hardwood once I finished it. Though either way, there's something to be said about doing it spot on the first time regardless of if I keep it or not. Best not to be doing cuts for the first time when using the expensive wood.
Contact me before you start this with hardwoods. I'll assist you in getting the best bang for your buck in the wood department.
Give me some dimensions you plan on using, I'll rough estimate some costs for you.
edit: brace yourself though, working with hardwoods is a different animal than working with OSB. In both cost, tools required, and skill. For me, If I made a desk like that out of maple, I would be expecting the price to be around the 300$ range.
Legs would be 20 bucks each, easy; top im guessing is like 2' x 4'? out of 3/4" x 6"; we're talking 40$ for the top; with the side pieces we're looking at 1/2" x 8" (guessing), so around another 40$; bottom would be around 60$. Trim peices would be another 20 bucks.
Proper mounting hardware is expensive, using stainless would be ideal. Add in high quality screws and fastners and the acrylic top... and we're around the 300$ mark.
Last edited:
- Joined
- Jun 28, 2012
Contact me I'll assist you in getting the best bang for your buck in the wood department.


I'm sorry, couldn't resist that one. Carry on!
- Thread Starter
- #31
That would be great, will do. 
Was expecting it to be pretty spendy. One reasons I'm going to see how the OSB turns out, hard to beat nice hardwood though. Another alternative is going light on the hardwood. Maybe solid top and then veneer for the sides.
Off the top of my head:
Top is 60" x 35"
Sides are 30" x 7"
Front is 54" x 7"
Bottom is 54" x 30"
Edit: Remembered I was considering doing a second bottom to do cable management and supports, so two pieces sized for that.
Miiight be able to salvage the piece that is cut from the top for the sides, if I remember correctly the hole is 43" x Something.
Add more to that estimate, considering doing tempered glass rather than acrylic/polycarbonate for the look and durability. Found a glass shop locally that will do it, just need to go talk and see about cost.
One concern is the tools. The tools I have, while the work, they're not top quality or brand new. They were bought for rural living house work, not building a hardwood desk. Would a check to ensure good condition on the blades and bits be sufficient to do the job do you think?

Last edited:
- Joined
- Jan 11, 2012
- Location
- North Carolina
I'm sorry, couldn't resist that one. Carry on!
- Joined
- Feb 18, 2010
Contact me before you start this with hardwoods. I'll assist you in getting the best bang for your buck in the wood department.
For me, If I made a desk like that out of maple, I would be expecting the price to be around the 300$ range.
Legs would be 20 bucks each, easy; top im guessing is like 2' x 4'? out of 3/4" x 6"; we're talking 40$ for the top; with the side pieces we're looking at 1/2" x 8" (guessing), so around another 40$; bottom would be around 60$. Trim peices would be another 20 bucks.
I think you are quite off on your prices. Hardwood of any substantial length costs serious money. If you add width to length, it increases exponentially. If you add quality, width, and length, prepare to bend over and grab some ankles. Quality veneer is the only way that you are not going to be eating some knee caps in a project like this. Check woodcraft.com for some of the best prices on wood and veneers. If you go the hardwood route, be prepared to drop $600-700 to do your project. The veneer route is maybe half of that. For a project like this, there is no reason to go with solid hardwood, as it offers nothing besides visual appeal. Veneer will do the same for half the cost.
I think you are quite off on your prices. Hardwood of any substantial length costs serious money. If you add width to length, it increases exponentially. If you add quality, width, and length, prepare to bend over and grab some ankles. Quality veneer is the only way that you are not going to be eating some knee caps in a project like this. Check woodcraft.com for some of the best prices on wood and veneers. If you go the hardwood route, be prepared to drop $600-700 to do your project. The veneer route is maybe half of that. For a project like this, there is no reason to go with solid hardwood, as it offers nothing besides visual appeal. Veneer will do the same for half the cost.
For starters, if you're buying wood online, you're going to grossly over pay. Woodcraft.com is grotesquely overpriced.
At an actual lumber yard, you pay by board foot, which includes length and width. Up here, maple is 6-8$ a board foot, and they dont care how wide or narrow you're getting it.
For example, this is the shop I go to. They carry widths from 1/2" to well north of 12"
http://www.handleystreeservice.com/quote.htm
while I appreciate your concern, you're pretty incorrect here, sorry.
Heres a board foot calculator.
http://extension.missouri.edu/scripts/explore/G05506.asp
I'm sorry, couldn't resist that one. Carry on!
god lol
That would be great, will do.
Was expecting it to be pretty spendy. One reasons I'm going to see how the OSB turns out, hard to beat nice hardwood though. Another alternative is going light on the hardwood. Maybe solid top and then veneer for the sides.
Off the top of my head:
Top is 60" x 35"
Sides are 30" x 7"
Front is 54" x 7"
Bottom is 54" x 30"
Edit: Remembered I was considering doing a second bottom to do cable management and supports, so two pieces sized for that.
Miiight be able to salvage the piece that is cut from the top for the sides, if I remember correctly the hole is 43" x Something.
Add more to that estimate, considering doing tempered glass rather than acrylic/polycarbonate for the look and durability. Found a glass shop locally that will do it, just need to go talk and see about cost.
One concern is the tools. The tools I have, while the work, they're not top quality or brand new. They were bought for rural living house work, not building a hardwood desk. Would a check to ensure good condition on the blades and bits be sufficient to do the job do you think?
For starters, forget about any solid top or bottom. That would be ridiculous with a desk with an acrylic top.
Here's basically how I would do it.
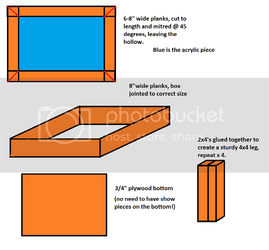
For this job, I would have the following tools personally
- Miter Saw, a good carbide blade makes clean and accurate cuts possible.
- plunge router with a follower bit and a roundover bit. You can make semi templates and get perfect results with the follower bit. The roundover bit would give a clean, polished look to the end product.
- a good drill
- forstner bit set
- brad point set
- high quality screws, stainless for this level of project
- mallet
- a high quality t square
- double stick tape for the templates
- some HDF to make templates
- a quality planer to plane to wood (you can ask the shop to do that for you, its usually pretty cheap to have them do it, cheaper than getting a good planer would cost)
- an orbital sander
- TONS of sandpaper lol
- safety gear
RULES WITH HARDWOODS ->
1) ALWAYS WEAR GOGGLES, no matter what you're doing
2) ALWAYS WEAR BREATHING PROTECTION. Even a simple dust mask will save you pain later.
3) ALWAYS PREDRILL HOLES, no matter how "small" the hole will be. Yes, this also applies to nails.
4) hardwoods can warp, don't be storing it outside
5) always put a finish on it. I would recommend a wipe on poly for this, being your first time working with it
6) take your time.
- Joined
- Jan 11, 2012
- Location
- North Carolina
Glued 2x4's won't create a perfectly square leg, unless you shave some off the width. Why not just go ahead and use 4x4s?
Or, unless hardwoods are measured differently. I wouldn't know, I've never dealt with them.
Or, unless hardwoods are measured differently. I wouldn't know, I've never dealt with them.
Glued 2x4's won't create a perfectly square leg, unless you shave some off the width. Why not just go ahead and use 4x4s?
Or, unless hardwoods are measured differently. I wouldn't know, I've never dealt with them.
Hardwoods are measured differently
A proper glue joint is both stronger than the original pieces of wood (good for desk legs... and a large reason why I want him to do it, bowed legs would be a problem) and would be more cost effective.
He could also do a contrast strip for aesthetic purposes, could be cool ?
edit: for example, heres a neck blank I made of flamed maple and jatoba wood. Lovely contrast adds interest to the piece. Also makes the piece much much much stronger and resistant to warping

- Thread Starter
- #39
Thanks for all the tips. Glad I started the log. 
Two main questions:
1) Your diagram for how you would do the top, do you have the legs coming up past the bottom to support the inside edge of the joints for the top / have some kind of support there?
2) Is the glue joint just as simple as the pieces with glue in between, clamped for a while? I like the look and idea of the contrast strip.
- Joined
- Jul 10, 2014
following this with interest, neat idea
Similar threads
- Replies
- 5
- Views
- 247
