- Joined
- Jun 10, 2013
- Location
- Las Vegas
Ok, so my nickname is Fish, but I tend to use 'willardcw4' as my forum handle... you'll get used to it.
_____________________________________________________________________________________
07/22/2013
HERE is the link to my previous forum post discussing the components for the build. I'm using a Monsoon res instead of the XSPC res for THIS build - I'll be liquid cooling my current PC (just the CPU) in a couple months and will use the XSPC res. Pump is a D5 Vario.
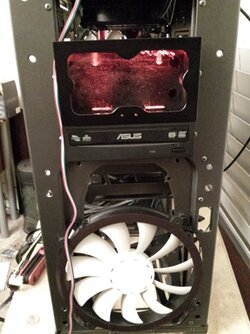
I also have demciflex fan filters on the 200mm intake on the front of the case, and the rear 140mm fan I'm using as an intake. I'll have more input when I actually get the rig running, but so far I'm REALLY impressed with these fan filters.
I'm going to be doing this build log in several pieces. I've been so busy with work and 'life' that it has taken me a lot longer to get everything together! All the parts are in, just slowly working through the build.
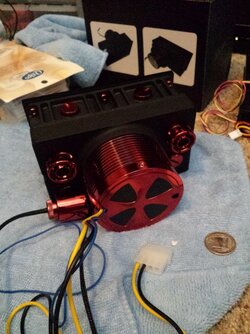
A few pics of the monsoon res all setup (D5 Vario inside) - I have a temperature sensor in the spare inlet port on the back connected to a 90 degree monsoon compression fitting:


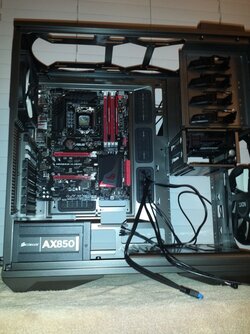
Here is a pic of the stripped case with mobo / ram / psu / SSD:

_________________________________________________________________
07/26/2013
So I've spent some more quality time with the build... having some issues with the tubing which I bring up below. Not sure whether I should re-orient the CPU block to make things cleaner / not touch.
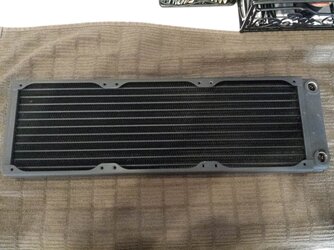
Anyway, here are some of the pics of my build in progress. First is the radiator sitting with some warm (distilled) water prior to my several 'radiator dances':

Next is the result of my first dance:

Lot's of particles in there!!! I did the dance a total of about 6 times. The next pic is of my 2nd to last dance (it looked good, but I did one more for good measure!):

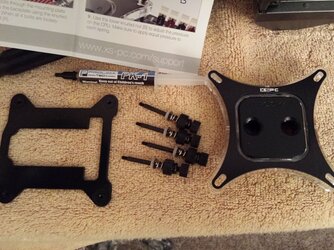
Here is a pic of my CPU block about to be installed:

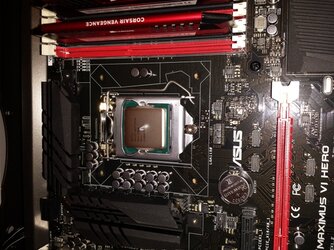
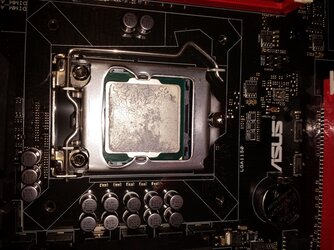
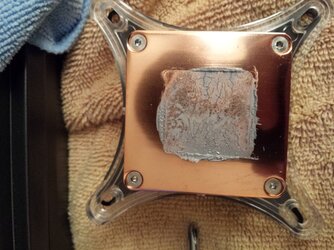
My TIM application (I had some issues getting the block on because I had idiotically installed the mobo in the case prior to installed the CPU block. There was a decent amount of sliding and potentially a corner of the block that lifted off of the CPU die, so if temps are bad then I know why. I may re-do the application due to the tubing concerns I posted later on in the thread anyway.):

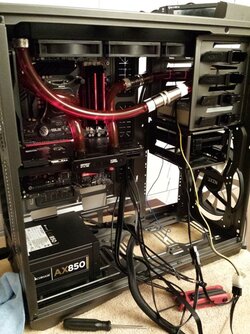
Here's a pic of the build while leak testing:

There was a small leak that I go into more detail about later in the thread. For now I'll leave that info there until I make a decision about what to do with the loop, whether or not to re-do the CPU portion to make it cleaner.
I still have it chugging away - the D5 Vario on setting 3 is insanely quiet. Since I have two quick disconnects there is a chance I may bump it up to setting 4 if I'm not getting desirable temps (since there is some pressure loss over the QDs) but hopefully will be fine.
_________________________________________________________________
7/29/2013
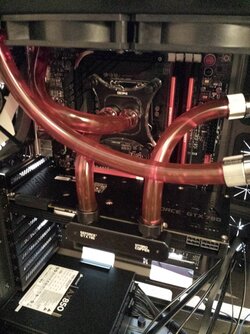
Well, I got the PC completely built and up and running. I left the way the tubing is (see post below) for now. It's not perfectly ideal but my temps are what I would consider to be 'awesome' and everything else just fit into place.
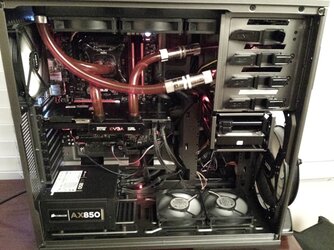
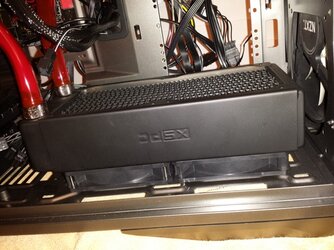
Here's a pic with the extra 2 x GT AP-15's I put in the bottom of the case. I bought 6 total, expecting to do push-pull... but my temps looked good under initial stress testing with just push I decided to put them down there. If I get another 780GTX Hydro Copper down the line I'll probably add in another 240mm radiator at the bottom of the case:

Here is a view of the reservoir with the 'fixed' temperature probe. I had issues with it leaking THROUGH the fitting (they didn't do a good job siliconing the wire in the rear of the probe). The fitting is on the 'inlet' side (right) on the bottom port attached to a 90 degree Monsoon G 1/4 fitting. I got some clear GE Silicone II and it did the trick! Fluid temp @ 28C, room temp ~29C at the time of this picture:

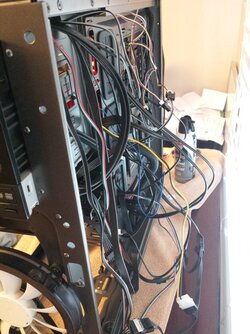
Pic of all the cables during 'Project Cable Management'... luckily I was able to tame that beast prior to putting the sides back on!! Note this was before I added the additional 2 AP-15s on the bottom - I am controlling the 5 x AP-15s with my BitFenix controller and the 3 x case fans (front, rear, side) with the built in 3-speed controller):

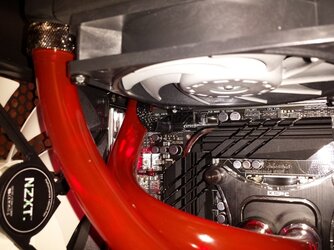
Pain in the a** but got the CPU Power, somehow, plugged in with the radiator already installed... also (after this pic was taken) installed the D5 pump PWM header to the CPU Fan header on the Mobo (also a pain in the a**!):

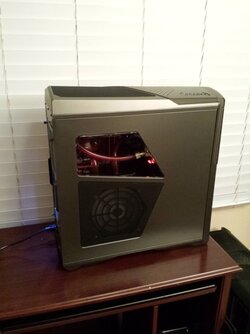
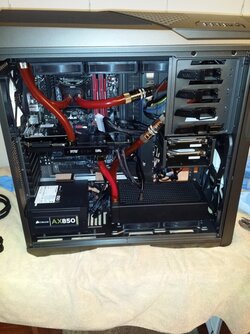
Here's a side view with the case put back together:

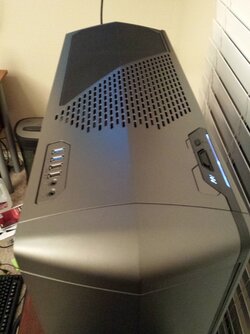
Top view:

I had to take the Demciflex filter off of the 200mm fan in the front of the case. All of the sudden, after removing the filter and putting it back on, it would constantly be 'sucked' onto the center bearing of the fan, creating a very annoying scraping sound. I adjusted fan RPM, tried putting a spacer in, toyed with it in other ways, but couldn't get it resolved. What bugs me is that it was fine for 2 days and then started acting up. I replaced the Demciflex with the stock NZXT fan filter. I still have the 140mm square on the rear of the case for that intake.
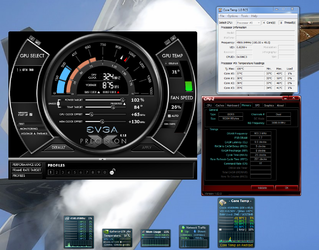
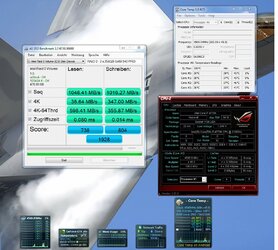
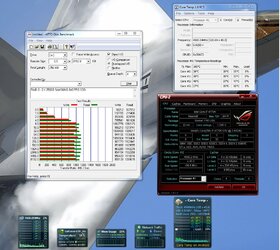
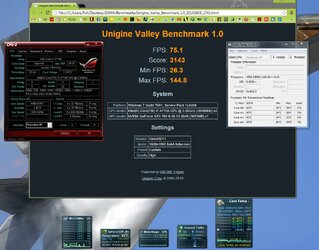
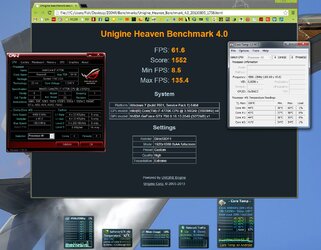
I'll get some benchmarks screenshots soon, but I ran stability testing with AIDA 64 for wrangling in my CPU (also added GPU loading after I tuned my CPU) and HyperPi to get my memory timings down. I used the Unigine Valley Benchmark for GPU stability. Here are my current frequencies and voltages where applicable:
CPU:
Haswell i7 4770K (3.5GHz stock)
4.5 GHz @ 1.25V, peak temp 85C with ambient 26C on AIDA 64 after 25 minutes
Memory:
16GB (2x8GB) Corsair Vengeance Pro 1866 MHz (9-10-9-27 2T stock)
1866 MHz, 9-9-8-25 1T
GPU:
EVGA 780GTX Hydro Copper (Core 980MHz / Boost 1033MHz, Memory 3004MHz stock)
Using EVGA Precision X software
+102% Power Target (NOT linked to temp target)
+65 MHz GPU Clock offset
+130 MHz Mem Clock offset
Variable Voltage
Ultimate frequencies under load (Unigine Benchmark):
Core 1385MHz, Mem 3134 MHz --- 36C with ambient 26C
-------
Benchmarks / screenshots to come!
_____________________________________________________________________________________
07/22/2013
HERE is the link to my previous forum post discussing the components for the build. I'm using a Monsoon res instead of the XSPC res for THIS build - I'll be liquid cooling my current PC (just the CPU) in a couple months and will use the XSPC res. Pump is a D5 Vario.
I also have demciflex fan filters on the 200mm intake on the front of the case, and the rear 140mm fan I'm using as an intake. I'll have more input when I actually get the rig running, but so far I'm REALLY impressed with these fan filters.
I'm going to be doing this build log in several pieces. I've been so busy with work and 'life' that it has taken me a lot longer to get everything together! All the parts are in, just slowly working through the build.
A few pics of the monsoon res all setup (D5 Vario inside) - I have a temperature sensor in the spare inlet port on the back connected to a 90 degree monsoon compression fitting:
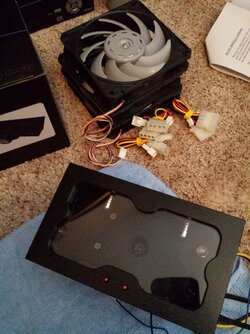
Here is a pic of the stripped case with mobo / ram / psu / SSD:
_________________________________________________________________
07/26/2013
So I've spent some more quality time with the build... having some issues with the tubing which I bring up below. Not sure whether I should re-orient the CPU block to make things cleaner / not touch.
Anyway, here are some of the pics of my build in progress. First is the radiator sitting with some warm (distilled) water prior to my several 'radiator dances':
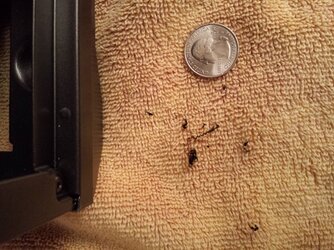
Next is the result of my first dance:
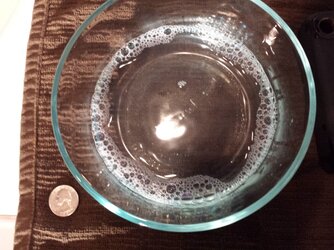
Lot's of particles in there!!! I did the dance a total of about 6 times. The next pic is of my 2nd to last dance (it looked good, but I did one more for good measure!):
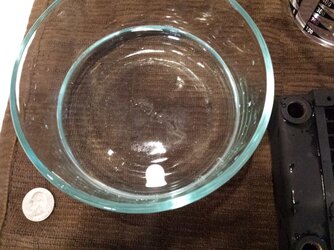
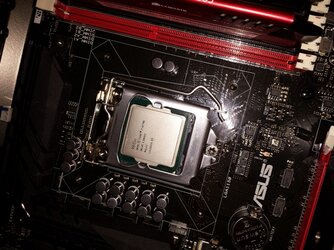
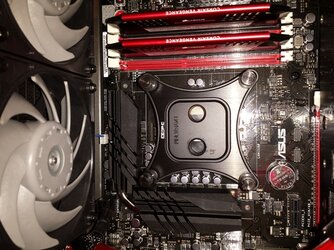
Here is a pic of my CPU block about to be installed:
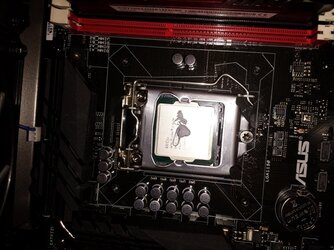
My TIM application (I had some issues getting the block on because I had idiotically installed the mobo in the case prior to installed the CPU block. There was a decent amount of sliding and potentially a corner of the block that lifted off of the CPU die, so if temps are bad then I know why. I may re-do the application due to the tubing concerns I posted later on in the thread anyway.):
Here's a pic of the build while leak testing:
There was a small leak that I go into more detail about later in the thread. For now I'll leave that info there until I make a decision about what to do with the loop, whether or not to re-do the CPU portion to make it cleaner.
I still have it chugging away - the D5 Vario on setting 3 is insanely quiet. Since I have two quick disconnects there is a chance I may bump it up to setting 4 if I'm not getting desirable temps (since there is some pressure loss over the QDs) but hopefully will be fine.
_________________________________________________________________
7/29/2013
Well, I got the PC completely built and up and running. I left the way the tubing is (see post below) for now. It's not perfectly ideal but my temps are what I would consider to be 'awesome' and everything else just fit into place.
Here's a pic with the extra 2 x GT AP-15's I put in the bottom of the case. I bought 6 total, expecting to do push-pull... but my temps looked good under initial stress testing with just push I decided to put them down there. If I get another 780GTX Hydro Copper down the line I'll probably add in another 240mm radiator at the bottom of the case:
Here is a view of the reservoir with the 'fixed' temperature probe. I had issues with it leaking THROUGH the fitting (they didn't do a good job siliconing the wire in the rear of the probe). The fitting is on the 'inlet' side (right) on the bottom port attached to a 90 degree Monsoon G 1/4 fitting. I got some clear GE Silicone II and it did the trick! Fluid temp @ 28C, room temp ~29C at the time of this picture:
Pic of all the cables during 'Project Cable Management'... luckily I was able to tame that beast prior to putting the sides back on!! Note this was before I added the additional 2 AP-15s on the bottom - I am controlling the 5 x AP-15s with my BitFenix controller and the 3 x case fans (front, rear, side) with the built in 3-speed controller):
Pain in the a** but got the CPU Power, somehow, plugged in with the radiator already installed... also (after this pic was taken) installed the D5 pump PWM header to the CPU Fan header on the Mobo (also a pain in the a**!):
Here's a side view with the case put back together:
Top view:
I had to take the Demciflex filter off of the 200mm fan in the front of the case. All of the sudden, after removing the filter and putting it back on, it would constantly be 'sucked' onto the center bearing of the fan, creating a very annoying scraping sound. I adjusted fan RPM, tried putting a spacer in, toyed with it in other ways, but couldn't get it resolved. What bugs me is that it was fine for 2 days and then started acting up. I replaced the Demciflex with the stock NZXT fan filter. I still have the 140mm square on the rear of the case for that intake.
I'll get some benchmarks screenshots soon, but I ran stability testing with AIDA 64 for wrangling in my CPU (also added GPU loading after I tuned my CPU) and HyperPi to get my memory timings down. I used the Unigine Valley Benchmark for GPU stability. Here are my current frequencies and voltages where applicable:
CPU:
Haswell i7 4770K (3.5GHz stock)
4.5 GHz @ 1.25V, peak temp 85C with ambient 26C on AIDA 64 after 25 minutes
Memory:
16GB (2x8GB) Corsair Vengeance Pro 1866 MHz (9-10-9-27 2T stock)
1866 MHz, 9-9-8-25 1T
GPU:
EVGA 780GTX Hydro Copper (Core 980MHz / Boost 1033MHz, Memory 3004MHz stock)
Using EVGA Precision X software
+102% Power Target (NOT linked to temp target)
+65 MHz GPU Clock offset
+130 MHz Mem Clock offset
Variable Voltage
Ultimate frequencies under load (Unigine Benchmark):
Core 1385MHz, Mem 3134 MHz --- 36C with ambient 26C
-------
Benchmarks / screenshots to come!
Last edited:


 Can't wait to see what else is in store. Man that reservoir looks really great. I want one!