• Welcome to Overclockers Forums! Join us to reply in threads, receive reduced ads, and to customize your site experience!
Pierre3400's Enthoo Primo Build

Overclockers is supported by our readers. When you click a link to make a purchase, we may earn a commission. Learn More.
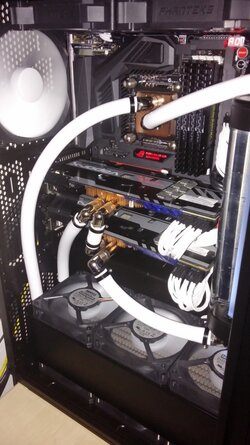
I finished up yesterday, im not happy with the wiring, but that will get better with time, i need to get sleeving kits and so on.

Sorry for crappy pictures

2014-01-13 23.13.06 (Custom).jpg
2014-01-13 23.13.55 (Custom).jpg
 
Last night, after hours of wiring, while it was airing out, I finally got the rig to a working state.

Those are basically the crappy pics above.

I had some serious issues with the Aquaero 5 last night, the fans on the 480 worked, the rest didnt and if the rest worked, the 8 on the 480 rad didnt.

I spent about 30mins on it last night and went to bed.

Today when I got home, I had an idea to what was wrong, so I tried it out with no results.

All of sudden everything just started working, no idea how or why, but it works now, so i cant whine.

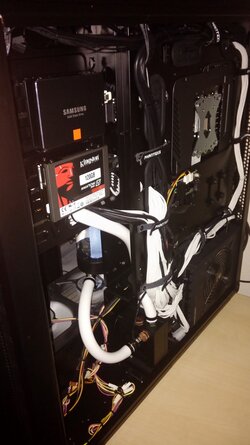
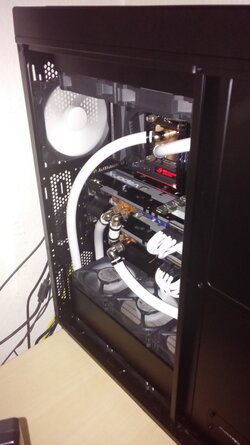
I took a few pictures, not that they are much better, but every little helps.
I cant find my camera :confused:

2014-01-14 20.14.09 (Custom).jpg
2014-01-14 20.17.47 (Custom).jpg
2014-01-14 20.17.58 (Custom).jpg
 
Great Job!!!

Looks really nice Pierre3400. I'm planning a similar build as soon as Phanteks releases the white case. Only major difference is I'm planning on bending copper pipe instead of flexible tubing and having them plated in black chrome.

Any advice? Thoughts on working with this case? In hind sight, anything that you would have done differently? Any input will be greatly appreciated.
 
An update.

This rig has been running for a good 3 months now, and im happy with the performance, but the build quality.. Well its killing me inside.

Im unhappy with my work, and im very unhappy with the looks of the GPU connections. The tubing of the water, and the wiring in general.

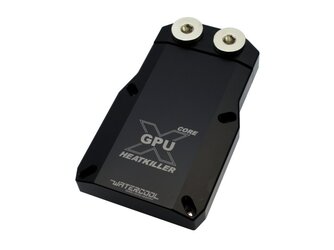
So, today, i ordered two Heatkiller Core LC blocks.
GPU_X_Core_1.jpg

also bought a link block, to that this will look more complete from the outside, and look less like its thrown together.

This means i get to empty the loop.
I am going to redo the full loop, but i dont think its going to happen right away.

Once i get the new blocks, the water will be emptied out, the GPU's taken out, then a good dust clean, and then back with GPU's and new blocks.

The reason for this, is that I plan something a bit different as far as solid tubing goes, and i want to see how it all sits and works first. But more on that once I know how its going to go down.

I am considering getting the EK motherboard blocks, only to use the top one for the mosfets on the motherboard. Simple reason, then i can take the water from the CPU, and move it to a better exit point. But my biggest issue really is the tube that runs over the ram to the CPU. I have no idea how on earth I am going to get around the issue, of not blocking the ram, and yet a clean tight look.
 
flip the top rad around?
Should allow for a "straight" run from rad to rad while needing some creative routing to/from CPU block
 
flip the top rad around?
Should allow for a "straight" run from rad to rad while needing some creative routing to/from CPU block

Flipping the rad has crossed my mind, but then i still need a long and painfull routing for the pump to rad.

Something will happen, I just need a few months to figure it out.
 
combined res/pump like
http://www.xs-pc.com/water-pumps/d5-photon-170-reservoirpump-combo
(probably only need a new "PumpTop with res-mount"

mounted to the left/rear,
flow/order: Res/Pump -> CPU > TopRad > BottomRad > GPU1 > GPU0 > Res/Pump

No, I already have that res in non combined version, and i dont want it combined.

Everything will fall into place. First the new GPU blocks need to get here, then i'll move on to fittings and tubes, and see where it all takes me.
 
Blocks are on the way, max 2 days hopefully.

I am also considering Ram cooling, just to make it all look better, but i dont know yet.

Finished up my prodigy today, so i'll have something to use when the Primo is torn down, well the waterloop :)
 
I wasnt really all that happy with the finish they make on the contact face of these blocks.

2014-05-01 19.50.47 (Medium).jpg

I have only done one so far, but both will be done before I install them.

2014-05-01 20.12.09 (Medium).jpg
 
Last edited:
Very nice pierre. Really like the looks of those heatkiller blocks and bridge. In general I really like the way all their blocks look.
 
Very nice pierre. Really like the looks of those heatkiller blocks and bridge. In general I really like the way all their blocks look.

Agreed, apart from the CPU blocks.

I was sad about the face on the blocks thou. But they are better and cheaper than EK's, and much nicere, so i can deal with 30mins of work per block.
 
What did you do to make them look spectacular? Sand paper?

Same process as when lapping a cpu. I have a 12mm thick piece of glass, then wet sandpaper, grit 400,800,1500,2000 and 2500. In this case i skipped 400 and went right to 800. Takes about 30 to 45mins to make them shine. Its all about the flat surface for better thermal contact, oh and in my case peace of mind. That ugly surface gave my ocd a run for its money.
 
Ah ok. I've seen CPU lap kits on frozencpu. I thought about doing this to my blocks and lapping my CPUs but afraid I might cause grooves and ruin them.
 
Ah ok. I've seen CPU lap kits on frozencpu. I thought about doing this to my blocks and lapping my CPUs but afraid I might cause grooves and ruin them.

Can't really ruin them as long as you're doing it by hand. I've never used sandpaper below 320grit. Just take your time and use a finer grade sand paper after each step until you're satisfied with the results.

Don't be scared, it's tons of fun.
 
Back