• Welcome to Overclockers Forums! Join us to reply in threads, receive reduced ads, and to customize your site experience!

PROJECT LOG Squadfer's Network/Servers/Rack project

Overclockers is supported by our readers. When you click a link to make a purchase, we may earn a commission. Learn More.

Squadfer

Member
Joined
Apr 1, 2010
Preface
In preparation of obtaining my first house within the next year I have started to plan, consolidate, and build my core "data center" (as my family likes to call it) for my house. This build log will encompass my server rack build, the various servers residing within the rack, along with the project of networking the house and other projects that relate to this whole endeavor.

Planning
The planning part is well underway, so much that I would like to say that it is nearly 70% completed at this time. However, plans always change thus the plan will never be complete.

Current Plan 12/27/2014
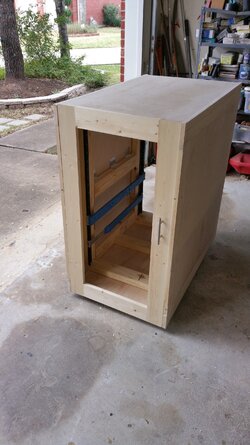
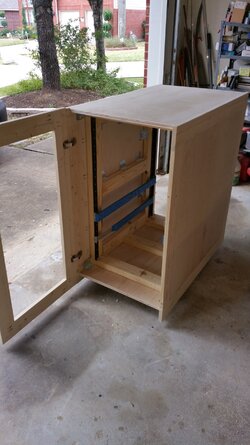
20u custom built rack enclosure.
1 media server.
2 ESXi hosts.
2 switches within the rack.
1 KVM switch within the rack.
3 UPS's within the rack.
Various wired IP camera's
Each room of the house networked with at least 2 drops.
A switch per floor of the house.
1 Roku3.
1 HTPC.
1 barebones pc for the garage.


Consolidation
Over the years I have upgraded my main system so many times that I have lost count. Each upgrade would yield a new computer for me to re-purpose, or provide spare parts until I had enough to build a new computer. This worked well for a number of years however, now I have way to many computers each performing a single task. Last year I was introduced to EXSi and since then I have been moving to a virtualized environment to help ease with all the heat and the power bill.

Media Server
My media server is running off of Freenas with ~7tb worth of available storage. At this time it is configured to run Plex media server. I do have plans for it to handle other tasks down the road that is available from the freenas plugins.

EXSi host 1
Right now this is my lab environment. My plan with this host is to turn it into my main production environment.
I will be virtualizing the following on this host:
PFsense router, 1 wan, 1 lan, and 1 dmz.
Radius server for VPN authentication (setup for 2 factor).
Domain controller.

EXSi host 2
This is currently not built.
This host will become my new lab environment and will be placed within my DMZ.

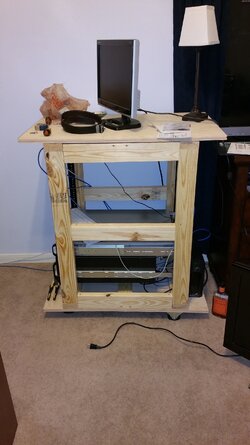
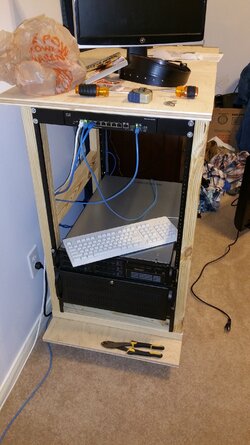
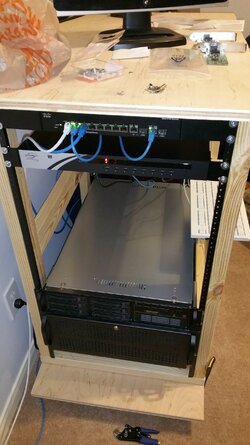
Rack enclosure
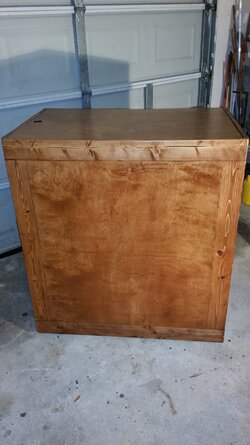
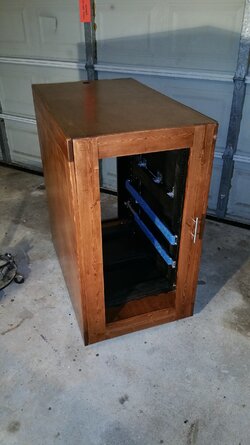
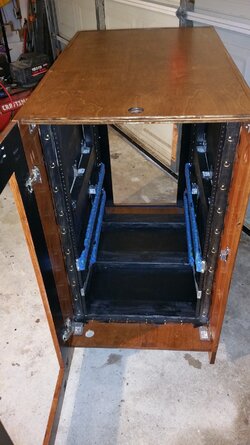
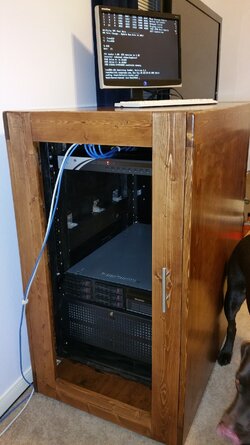
Over the past couple of months I have slowly been building my rack enclosure. It is now to a point that I feel comfortable showing to the world.
I don't have too many pictures of the build up of this rack as I did not intend to create a build log. However, now that I am typing out a build log, I will be taking more thorough pictures of everything.

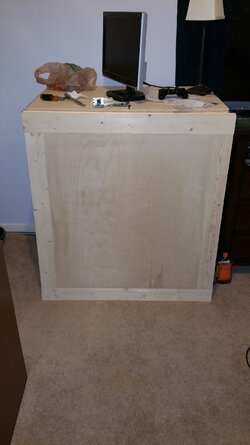
About 2 months ago I started my rack enclosure build and only made it open framed so that I could put it to use while I waited for enough time to work on it again.
20141110_062317.jpg
20141110_062343.jpg
20141119_062258.jpg

A month goes by and I finally had enough time to create the two sides for the enclosure.
20141129_183138.jpg
20141201_074808.jpg

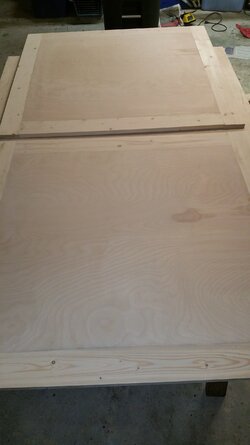
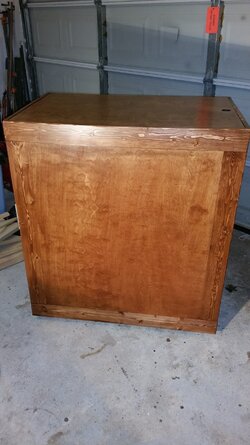
Last week I removed everything from the rack and brought it down to the garage so that I could attach the sides, create the two doors, stain it, and apply the poly.
20141223_150015.jpg
20141223_145956.jpg
20141227_151751.jpg
20141227_151730.jpg
20141227_151716.jpg
20141227_151818.jpg
20141227_175352.jpg
20141227_182655.jpg

I still have some more work to go on the enclosure but for the time being it is sitting as is.

Work to be done on enclosure:
2nd coat of black on the inside.
Drill 2nd pass through hole on the bottom rear.
Install the door screens.
Install the filter for the front door.


Table of contents
Will update with links to various posts within this thread as stuff gets accomplished.

Thanks for reading my thread!
 
Last edited:
Small update.

Received a package from amazon. Inside were a bunch of blank panels, some fans for a small little project that I will document at a later time (need to order a few more fans), along with the foam filter for the front door, and a 1u power distrubtion strip to tidy up all the loose items that need power (switches, monitor, kvm, modem, fan panel). I am still waiting on the screen material to show up before I can complete the doors for my rack.

Until then, here is a progress picture.
20150101_224547.jpg
Blank panels sure do clean up a rack pretty nicely.
 
Been awhile since last post. Since then a lot of stuff has been falling into place.

First update - house.
I have signed the contract to have a house built. Start of construction begins in August. Pretty stoked about this as the layout of the house is ideally exactly what I wanted. Two stories, 3 bedrooms all upstairs, a loft upstairs, and a big open great room for downstairs. Not overly big in sq-ft but not small either. The cool thing about having a new house built is that I get to have the builder install all the network cabling, dedicated power circuits, and sound system wires prior to drywall going up. This was a huge concern for me when looking at used houses as I knew it would be a chore to have to open the walls up and re-patch later.

Now for the fun details.
I am having all ethernet and coax drops terminate into a storage closet for consolidation. Within this storage closet will be a patch panel, a switch, a UPS unit, and an added electrical outlet. Each bedroom is having 2 ethernet drops and 1 coax. The great room is going to have a coax and 4 ethernet drops. The loft is going to have a coax and 1 ethernet drops located behind my desk. The loft is also going to have 3 ethernet drops and a dedicated 20amp circuit located next to the rack. Last but not least, the garage is going to have 1 ethernet drop. This covers networking of the house.

Second update - Rack/Server
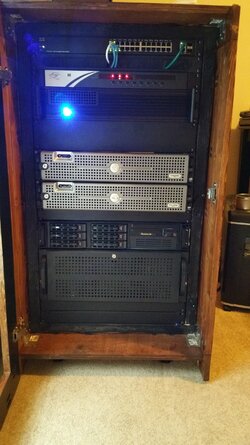
Since the last update I have acquired a few more additional servers. First acquisition was a low power high spec server to house my edge PFSense box and a new 26port switch for my Lan. Internet will be coming into this box and then routing to my lan and lab networks with their own dedicated nic ports. Each internal network will have their own virtual pfsense router, reason for this is I want to ensure that what I do within my lab does not migrate over to my lan and a double firewall setup between segments greatly reduces this concern. I do have additional nics on my edge PFSense box for when the need to have additional networks arises. I just recently aquired two Dell 2950's gen III's for a really good deal that I could not pass up. These units were stored in a warm stacked DR site and spec'd with the high end cpu's. They did include the rails and face plates, purchase price for these two additions by themselves cost less then what I paid for the whole bundle. With saying that, both of these 2950's are now going to encompass my lab environment and be turned on when needed. I did do a mod to one of them earlier to test and see if I liked the outcome and have decided I'm going to perform the same mod to the 2nd 2950. I will document the process and the purpose at a later time. If you are familiar with dell 2950's i'm sure you can identify what mod I performed.

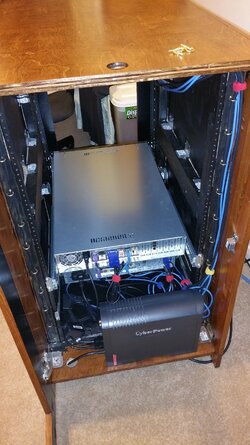
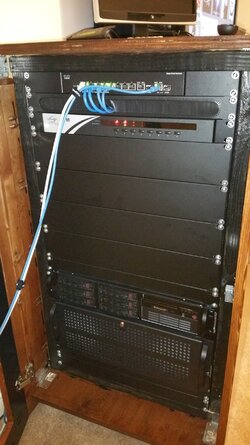
More details to follow as time permits. Until then, here is a updated picture of my rack.
20150616_173450A.jpg
 
I have had a few houses built, I can only give you one piece of advice, hire the best builder and then LEAVE TOWN TILL IT"S DONE!!! or you will have grey hair, a heart attack and no money because of all the changes you will make.
OH! nice server rig.
What does dmz mean in your first post? de moma zone????
 
Ha, I just finished with all the upgrade selections. This is my first house and I am young but all changes are final at this stage. If I do make any changes then their are fees associated for the changes. This isn't a custom built home but more of a cookie cutter builder's home. KBhome is the builder. Only thing left for me to do is sit back and watch the home get built, which I will be making weekly if not daily stops to check progress.

A DMZ is an abbreviation for Demilitarized Zone. In network terms it is a network that is located on the perimeter of your network. The purpose is to create a network that is accessible from your internal network (lan) for management of the services within, along with providing a means for this network to be accessible from the outside. A good use case would be web servers. You want outside people to be able to access the content but at the same time you don't want them to access your internal lan.
 
Dell 2950 fan mods

In my last update post I mentioned that I performed a mod on one of my 2950's to see if I would like it. Well after turning on the system, I immediately knew that I had to do it to my other 2950. If you do a search on google for "2950 22ohm mod" one of the first videos that should pop up is labeled "Dell PowerEdge 2950 fan mod - 22 ohm vs 47 ohm resistors". This video will showcase the noise level after the mod has been performed. I choose to do 22 ohms and believe me that the video does NOT do its justice on how quiet the servers are now.

I am going to outline the process involved to do this mod here.

Parts needed
Soldering station
Wire cutters
Wire strippers
22 ohm 1/2 watt resistors
heat shrink - I used 3/32"-3/64" heat shrink and it was just big enough to slide over the resistors.
Extra wire that is comparable to the existing fan wire size.

Precautions
I can not say that you HAVE to do this mod, it is up to your decision and for you to take on the risk associated with performing a hardware mod to your own server. I choose to take the risk. With that said there are 6 fans total in the 2950's. 2 PSU and 4 chassis. I choose to perform the mod on 5 of the fans, leaving one of the PSU's untouched in each server. Reason being is that I only have 1 PSU fully seated and being utilized per server. The 2nd psu is slid into it's spot but not fully seated, I am using it as a backup.

All images used here are not guarantied to be exactly like your equipment. Both of my 2950's yielded 2 different sets of chassis fans and 2 different PSUs.

Steps
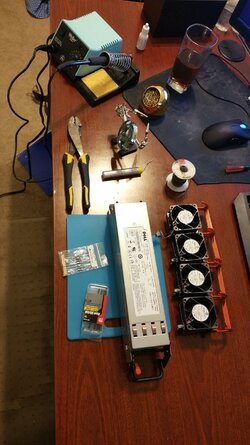
First off, gather all your equipment and parts.
20150624_193317.jpg

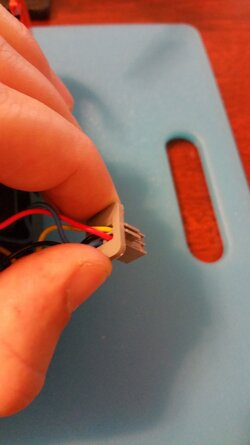
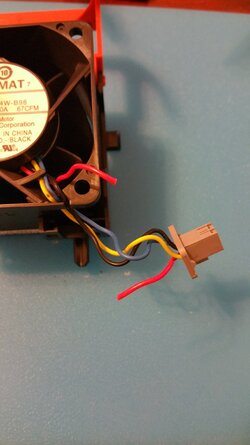
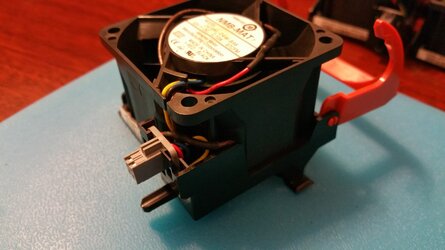
Now remove the connector from the fan casing and take a look at the wire layout. For all of my fans, the red wire was the correct wire the mod. Now with saying that, there could be a chance that this is not always the case. So pay attention to where the red wire is positioned on the connector in the following image.
20150624_193555.jpg

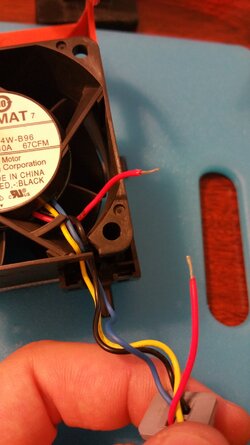
With the correct wire determined, cut it in a spot that leaves you plenty of room to work with.
20150624_193711.jpg

Trim the ends so that the bare wires are showing and able to be worked with.
20150624_194501.jpg

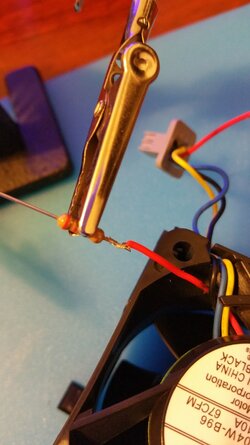
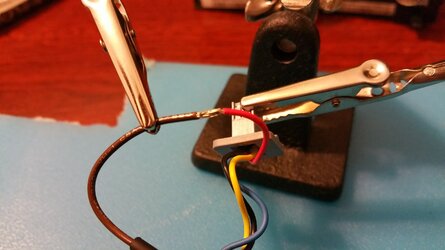
Grab a resistor and trim the end leaving enough working material. Wrap the freshly stripped wire ends around it.
20150624_194728.jpg

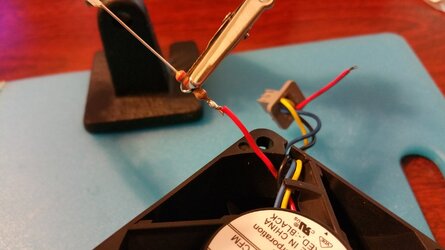
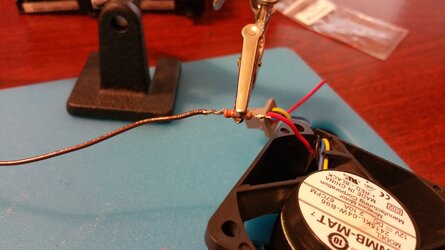
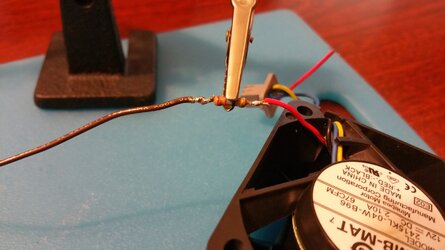
Now solder this connection.
20150624_195052.jpg

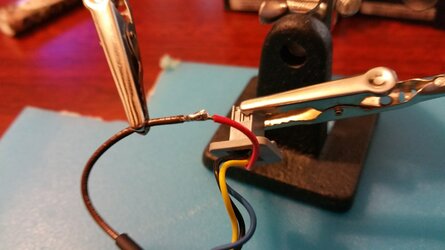
The next step is to add the other connection to the end of the resistor. This is where the extra wire will be utilized to lengthen the whole wire for a purpose that you will see later.
20150624_195422.jpg

Now solder this connection.
20150624_195635.jpg

I apologize as I have missed taking a picture of the next step. You will need to cut enough of a length to wrap around the motor of the fan and still have enough to work with outside of the case. You will see what I mean here 2 pictures from now.

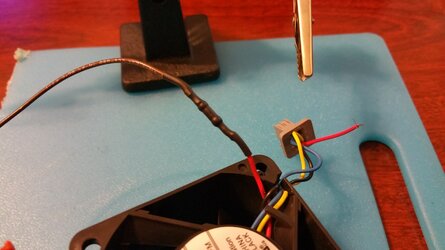
It is now time to cover these new connections with heat shrink to avoid any short circuiting.
20150624_200237.jpg

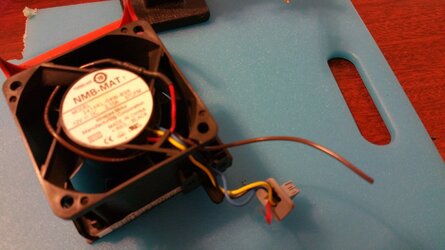
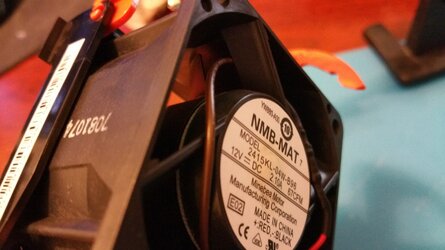
As mentioned earlier, wrap the wire around the fan motor and extend it out of the case. I choose to wrap it going under a couple of the support arms.
20150624_200351.jpg

Here you can see that there is plenty of room for the fan and the extra wire to coexist in the same general area. This is with most of the slack pulled out leaving a snug fit around the fan motor.
20150624_200517.jpg

With the wire now outside of the fan case, insert a piece of heat shrink onto the wire. Strip the wire end and proceed to join the existing red fan wire with this new one.
20150624_200954.jpg

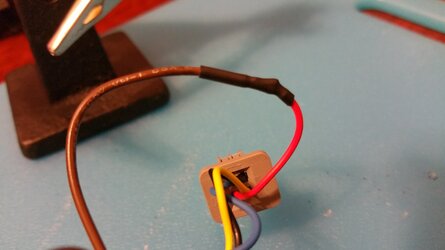
Solder this new connection. I would like to point out that this connection was not my best work. Neither on the solder connection nor the heat shrink positioning.
20150624_201423.jpg

As mentioned before, this was not my best heat shrink job. It works but I almost decided to re-do this whole connection. Since it works I decided not to re-do it as it wont be seen much.
20150624_201602.jpg

With the fan modded, it is time to put the connector back in it's place.
20150624_201739.jpg

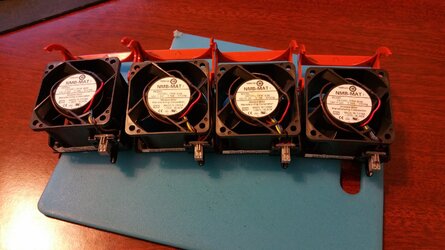
Now that is one fan completed. Repeat these steps to complete all 4 chassis fans.
20150625_205814.jpg

The next steps will involve the PSU fan. As mentioned before, My PSU and your PSU could be different. Both of the ones I modded were completely different from each other.

A word of caution. You are about to go into the internals of a PSU. There are capacitors within these that could do some harm to you if you are not absolutely careful. Proceed at your own risk. I do not take responsibility for any incurred injuries

Now lets proceed.

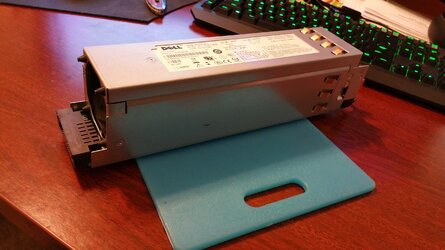
First gather your PSU.
20150626_200525.jpg

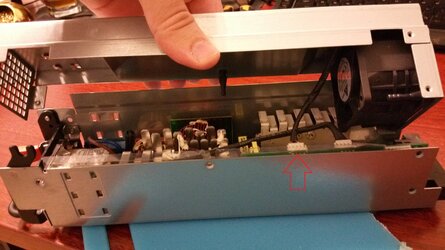
You will have to find all and remove the screws to open your PSU. Mine being documented consisted of around 7 individual screws to remove. Once they are removed, pull the top off gently. The fan is attached to the top piece and will need to be disconnected prior to fully removing the top.
20150626_122218.jpg

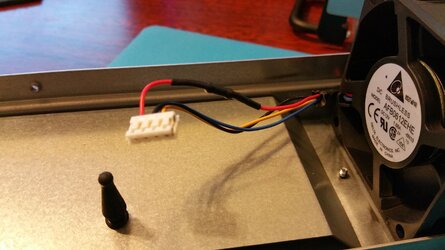
I skipped a few steps as far as pictures go but here is a fully modded fan. Again, take note of where the wire attaches to on the connector. Please do not go off of the color of the wire alone.
20150626_200147.jpg

Now put the PSU back together.

With all fans and one PSU fully modded all that is left is to plug them back into the server and to turn them on. You will notice how much quieter these servers are. For my rack, they were just a tad bit louder then all the existing servers in their already. Still quieter than my desktop machine while gaming.

Hope you enjoyed the mod.
 
Back