Hello, friends. I have returned with another retro case mod.
After my Amiga retro build I promised a Commodore 64 retro build. And after that, I promised an IBM PCjr retro. And here it is.
For those unfamiliar with the IBM PCjr:

The PCjr was released in March, 1984 to huge public outcry. It was derided for its 'chiclet' keyboard, limited compatibility with the IBM PC, poor software and hardware availability and support and high price. By the time IBM addressed these issues by buying back and replacing the keyboards, lowering the price and upping the specs, the damage had been done. The bad press was profound and prolific. And although the machine showed great promise on paper as a home market contender and had far more powerful graphics and sound than the true PC and XT, it failed miserably and is widely considered one of the largest flops of all time.
So, of course, around January 1985, when prices plummeted to get them off the shelves, in my 14 year old wisdom, I had to own one. My cousin Jeff drove me over to Computer City and as it turned out, he knew one of the salesmen who gave me a further break on the price.
Owning a PCjr turned out to be like owning the DeLorean from Back to the Future without any plutonium to power it; Unlike my Commodore 64, there was no network of fellow users to share knowledge or experience with and dwindling software suppliers made acquiring anything usable increasingly impossible in a matter of months. Many years later I learned about the mail order business of 3rd party hardware and software vendors. But it was far too late by then. Aside from the handsome IBM binder books that came with it, King's Quest, DOS 2.10, and Cartridge BASIC, the machine became a bitterly expensive paperweight in my house.
30 years later I have returned...to redeem both myself and the infamous PCjr with this project!
Original Specs, (thanks to "Mike's PCjr Page"):
CPU: Early units had a socketed Intel 8088 @4.77MHz; later models shipped with a soldered Intel or an AMD D8088, also @4.77 MHz
Memory: 64 KB on the motherboard expandable to 128 KB via expansion slot. Further expansion via IBM sidecar adapters. Later third-party add-ons and modifications raised the limit to 736 KB. My unit was 128KB
Operating system: IBM PC DOS 2.10, (Boots to Cassette BASIC without cartridge or DOS)
Input/Output: cassette port, light-pen port, two joystick ports, RGB monitor port, composite video port, television adapter output port, audio port, wired keyboard port, infrared keyboard sensor, serial port, two cartridge slots. I had cartridge BASIC.
Expandability: three internal slots, dedicated to PCjr specific memory, modem (300 bits per second non-Hayes-compatible modem available from IBM, although 2400 bit/s Hayes-compatible modems were available from third parties), and floppy controller cards. External sidecar connector capable of daisy-chaining multiple sidecars. I had one printer sidecar on mine.
Video: Motorola 6845, "CGA Plus" This chip was officially called the VGA (Video Gate Array)
Text modes: 40×25, 80×25, 16 colors
Graphics modes: 320×200×4, 640×200×2, 160×100×16, 160×200×16, 320×200×16, 640×200×4
Video memory is shared with the first 128 KB of system memory, and can be as small as 2 KB and as large as 96 KB.
Sound: Texas Instruments SN76496; three voices, 16 independent volume levels per channel, white noise
Storage: Optional 5.25-inch diskette drive or cassette. Other storage options like HDDs were eventually provided by third parties. Mine had one 5.25" floppy.
Project goals:
* Retain as much original structure as possible
* Stay true to the spirit of the original
* When cuts are necessary, keep them clean
* Pleasing aesthetics
* Hardware should allow for a solid, modern, general computing experience
* Must be able to play Team Fortress 2, Bioshock 1, 2, and Infinite with no lag at medium or high quality
I do not still own my original PCjr from 1985; I honestly do not remember what became of it. So, for this build, I started simply with an empty shell- case top, bottom and bezel, which I got off eBay for cheap:

So, I did not waste any hardware internals.
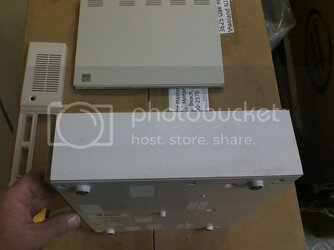
The ABS plastic was decent, but slightly yellowing. The item description was simply, "Very Good condition", but much to my dismay, the side cover of the case was missing. The right side of the PCjr was used for expansion cards called "sidecars", which added many different hardware abilities, such as a parallel port, memory expansion and auxiliary power, among many other things, and so it is no surprise that the original blank plate was missing on this unit:

After contacting the seller about the description mentioning nothing about this, he bluntly told me to return it....but, I figured
...nothing a little Komatex can't fix. I measured up a piece and cut it out on the bandsaw:

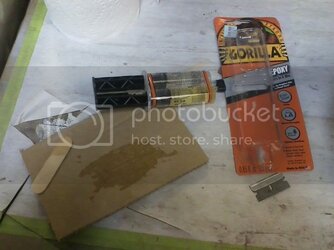
After sanding the edges smooth with 400 grit paper, I mixed up some Gorilla epoxy:

And pressed it on:

Prepped surfaces with some DuPont 3812s:

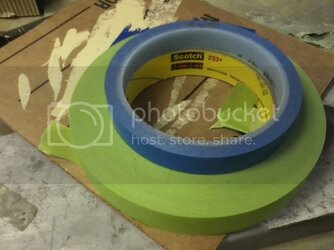
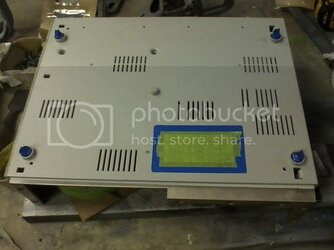
Carefully masked the IBM case badge, rubber feet and manufacturing label with 3m auto body masking tape:


Shot it with Krylon Fusion satin white:


After re-assembly:

After 30 minutes of careful filing, dry-fitting a 3 port USB hub in front left portal:


Web shot of PCjr original case rear. (Before):

I decided rather than hack the old case rear to mount the motherboard I/O panel flush with it, I would simply extend the ports from within via cords and hubs, to preserve the original look.
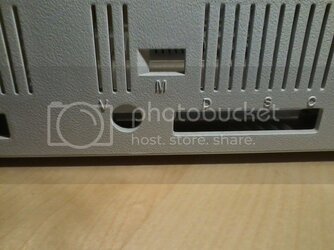
Here's the original modem RJ11 jack portal:

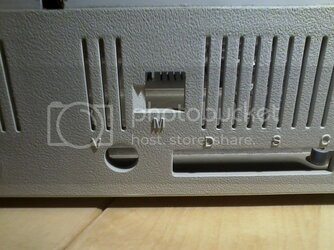
..after filing:

Dry fitting new RJ45 for ethernet:

Fits right in there..
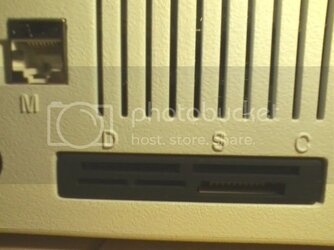
Card reader fitted into rear ports:

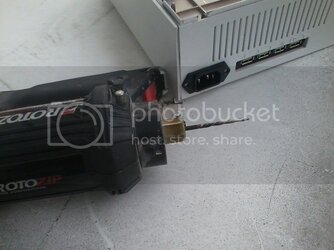
Real men skip the Dremel and go straight to a RotoZip for the C14 port:

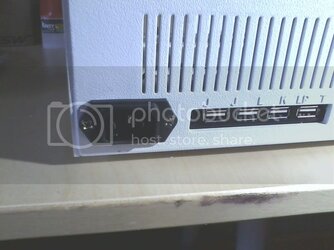
After fastening with case screws. Also note 4 port USB hub:

Here's a stacked before and after for the case rear.
Typical original jr rear:

2 Joysticks, Spare, keyboard, light pen, TV, RCA video, RJ11, CGA video, serial, cassette, power input, power rocker switch, audio out
Functional case rear, now modified for modern computing. (After):

C14 power jack, USB ports, microphone jack, ethernet, card reader, HDMI and speaker jack. Above is a momentary contact rocker switch for ATX power.
More Komatex cut on the band saw for filling in the old 5.25" floppy slot:

After sanding, it fits right in:

Scribing a line for the low profile DVD drive door:


I hand cut this with just a plain razor, which was not easy! After about 30 minutes of careful and painstaking slicing and re-slicing I then sanded the rough edges with 400 grit paper and wiped down with 3812s:

After painting with Krylon and assembling the drive:

I also covered the right port with Komatex and placed a waterclear red HDD LED, which is reminiscent of the original floppy LED.
I got a really cheap, Chinese mechanical keyboard on Amazon that is just the right size:

Removed branding with Mr. Clean Magic Eraser:

Shiny, metal IBM decal:

And....

Wink, wink.
Also note addition of AMD A10 decal added beside case badge. (Like this build, some original PCjrs did, in fact, include AMD CPUs!)
Because of the poor case ventilation, I needed a cool running, low wattage chip:

The 7800 has 4 compute cores, running up to 3.9GHz and 8 R7 graphics cores. A BIOS setting allows toggling between 65 and 45 watts. I have her running at 45w TDP, and temps never go above 55c. Performance is snappy. And 3d graphics are actually better than expected.
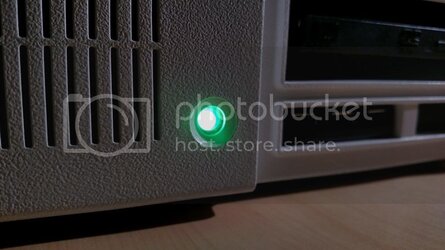
In the middle of the front bezel was originally, a simple, empty hole, where the wireless keyboard receiver sat. I wanted to use it for an Iron Man breastplate-esque glowing green power LED. Something akin to a pilot light peekhole on an old gas furnace or boiler. I tried adapting a 5mm and then a 10mm LED to fit in the hole, but they looked awful and protruded horrifically. I finally achieved the effect I was looking for by taking the plastic magnifying lens of a broken LED flashlight and fastening it in the hole with hot glue, and then gluing the 5mm LED in back of the lens:

It is difficult to effectively photograph, but to the human eye, this looks really neat. There is a nice, eerie glow, and a depth captured in the magnifying lens that grabs attention.

Internals:

New Specs:
AMD A10 7800 3.9 GHz @45w TDP
8 GB Crucial Ballistix RAM
Asrock FM2A88X-ITX+ Mini ITX Motherboard
Solid Gear 320W Mini ITX PSU
WD Black 750GB 2.5" HDD
1 Startech 70mm intake fan, volt-modded to 5vdc, for quiet operation
Windows 8.1 with Classic Shell™
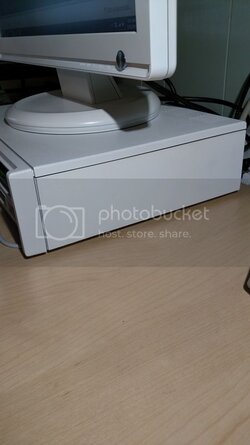
Here's a shot of the replacement side panel that I fabricated from Komatex, which I am quite happy with:

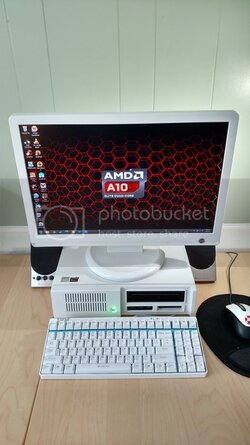
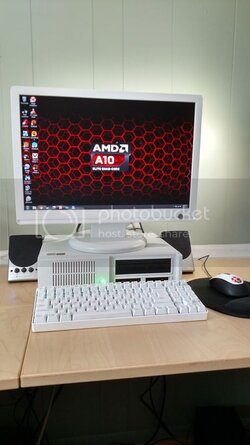
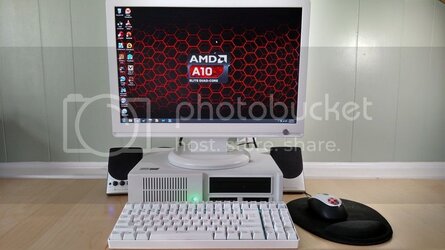
And that about does it. Using a Samsung 20" LCD monitor I repaired with a capacitor kit and painted white:


Thanks for viewing.
After my Amiga retro build I promised a Commodore 64 retro build. And after that, I promised an IBM PCjr retro. And here it is.
For those unfamiliar with the IBM PCjr:
Wikipedia said:The IBM PCjr (read "PC junior") was IBM's first attempt to enter the home computer market. The PCjr, IBM model number 4860, retains the IBM PC's 8088 CPU and BIOS interface for compatibility, but various design and implementation decisions led the PCjr to be a commercial failure.
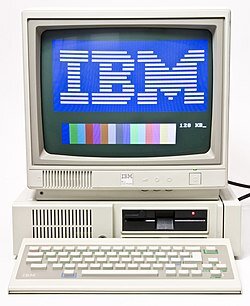
The PCjr was released in March, 1984 to huge public outcry. It was derided for its 'chiclet' keyboard, limited compatibility with the IBM PC, poor software and hardware availability and support and high price. By the time IBM addressed these issues by buying back and replacing the keyboards, lowering the price and upping the specs, the damage had been done. The bad press was profound and prolific. And although the machine showed great promise on paper as a home market contender and had far more powerful graphics and sound than the true PC and XT, it failed miserably and is widely considered one of the largest flops of all time.
So, of course, around January 1985, when prices plummeted to get them off the shelves, in my 14 year old wisdom, I had to own one. My cousin Jeff drove me over to Computer City and as it turned out, he knew one of the salesmen who gave me a further break on the price.
Owning a PCjr turned out to be like owning the DeLorean from Back to the Future without any plutonium to power it; Unlike my Commodore 64, there was no network of fellow users to share knowledge or experience with and dwindling software suppliers made acquiring anything usable increasingly impossible in a matter of months. Many years later I learned about the mail order business of 3rd party hardware and software vendors. But it was far too late by then. Aside from the handsome IBM binder books that came with it, King's Quest, DOS 2.10, and Cartridge BASIC, the machine became a bitterly expensive paperweight in my house.
30 years later I have returned...to redeem both myself and the infamous PCjr with this project!
Original Specs, (thanks to "Mike's PCjr Page"):
CPU: Early units had a socketed Intel 8088 @4.77MHz; later models shipped with a soldered Intel or an AMD D8088, also @4.77 MHz
Memory: 64 KB on the motherboard expandable to 128 KB via expansion slot. Further expansion via IBM sidecar adapters. Later third-party add-ons and modifications raised the limit to 736 KB. My unit was 128KB
Operating system: IBM PC DOS 2.10, (Boots to Cassette BASIC without cartridge or DOS)
Input/Output: cassette port, light-pen port, two joystick ports, RGB monitor port, composite video port, television adapter output port, audio port, wired keyboard port, infrared keyboard sensor, serial port, two cartridge slots. I had cartridge BASIC.
Expandability: three internal slots, dedicated to PCjr specific memory, modem (300 bits per second non-Hayes-compatible modem available from IBM, although 2400 bit/s Hayes-compatible modems were available from third parties), and floppy controller cards. External sidecar connector capable of daisy-chaining multiple sidecars. I had one printer sidecar on mine.
Video: Motorola 6845, "CGA Plus" This chip was officially called the VGA (Video Gate Array)
Text modes: 40×25, 80×25, 16 colors
Graphics modes: 320×200×4, 640×200×2, 160×100×16, 160×200×16, 320×200×16, 640×200×4
Video memory is shared with the first 128 KB of system memory, and can be as small as 2 KB and as large as 96 KB.
Sound: Texas Instruments SN76496; three voices, 16 independent volume levels per channel, white noise
Storage: Optional 5.25-inch diskette drive or cassette. Other storage options like HDDs were eventually provided by third parties. Mine had one 5.25" floppy.
Project goals:
* Retain as much original structure as possible
* Stay true to the spirit of the original
* When cuts are necessary, keep them clean
* Pleasing aesthetics
* Hardware should allow for a solid, modern, general computing experience
* Must be able to play Team Fortress 2, Bioshock 1, 2, and Infinite with no lag at medium or high quality
I do not still own my original PCjr from 1985; I honestly do not remember what became of it. So, for this build, I started simply with an empty shell- case top, bottom and bezel, which I got off eBay for cheap:
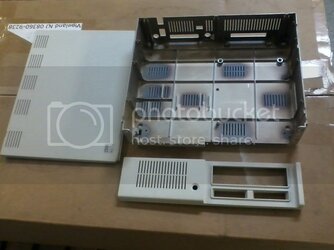
So, I did not waste any hardware internals.
The ABS plastic was decent, but slightly yellowing. The item description was simply, "Very Good condition", but much to my dismay, the side cover of the case was missing. The right side of the PCjr was used for expansion cards called "sidecars", which added many different hardware abilities, such as a parallel port, memory expansion and auxiliary power, among many other things, and so it is no surprise that the original blank plate was missing on this unit:
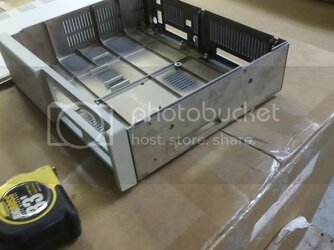
After contacting the seller about the description mentioning nothing about this, he bluntly told me to return it....but, I figured
...nothing a little Komatex can't fix. I measured up a piece and cut it out on the bandsaw:
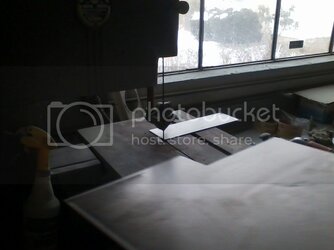
After sanding the edges smooth with 400 grit paper, I mixed up some Gorilla epoxy:
And pressed it on:
Prepped surfaces with some DuPont 3812s:

Carefully masked the IBM case badge, rubber feet and manufacturing label with 3m auto body masking tape:

Shot it with Krylon Fusion satin white:

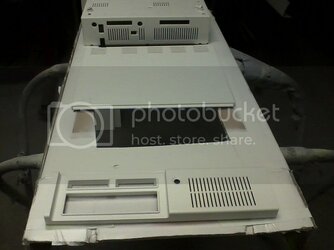
After re-assembly:
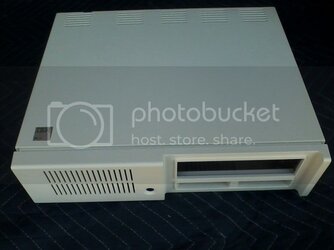
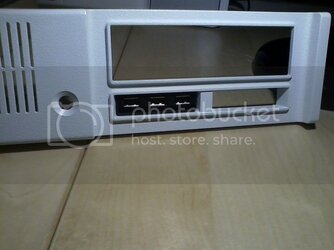
After 30 minutes of careful filing, dry-fitting a 3 port USB hub in front left portal:
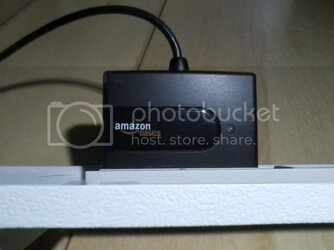
Web shot of PCjr original case rear. (Before):
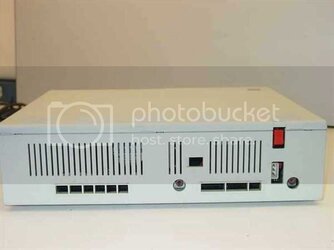
I decided rather than hack the old case rear to mount the motherboard I/O panel flush with it, I would simply extend the ports from within via cords and hubs, to preserve the original look.
Here's the original modem RJ11 jack portal:
..after filing:
Dry fitting new RJ45 for ethernet:
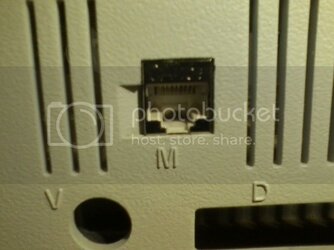
Fits right in there..
Card reader fitted into rear ports:
Real men skip the Dremel and go straight to a RotoZip for the C14 port:
After fastening with case screws. Also note 4 port USB hub:
Here's a stacked before and after for the case rear.
Typical original jr rear:
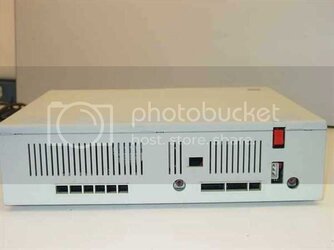
2 Joysticks, Spare, keyboard, light pen, TV, RCA video, RJ11, CGA video, serial, cassette, power input, power rocker switch, audio out
Functional case rear, now modified for modern computing. (After):
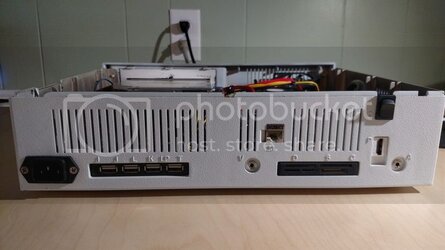
C14 power jack, USB ports, microphone jack, ethernet, card reader, HDMI and speaker jack. Above is a momentary contact rocker switch for ATX power.
More Komatex cut on the band saw for filling in the old 5.25" floppy slot:
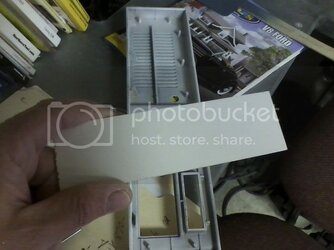
After sanding, it fits right in:
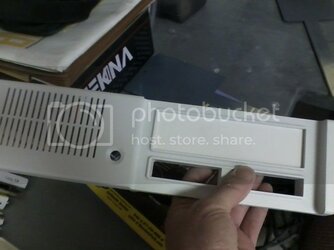
Scribing a line for the low profile DVD drive door:
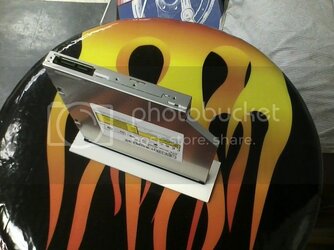
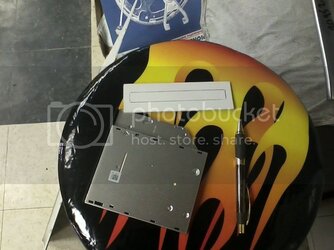
I hand cut this with just a plain razor, which was not easy! After about 30 minutes of careful and painstaking slicing and re-slicing I then sanded the rough edges with 400 grit paper and wiped down with 3812s:
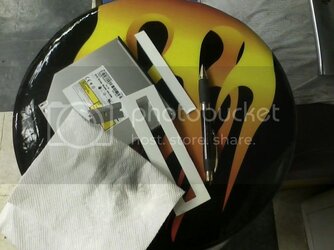
After painting with Krylon and assembling the drive:
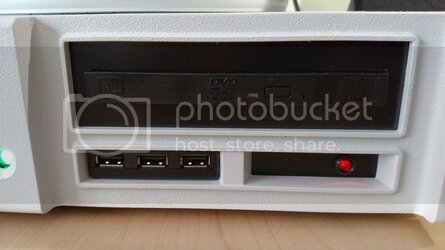
I also covered the right port with Komatex and placed a waterclear red HDD LED, which is reminiscent of the original floppy LED.
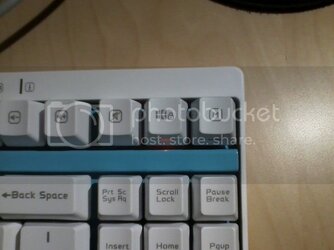
I got a really cheap, Chinese mechanical keyboard on Amazon that is just the right size:
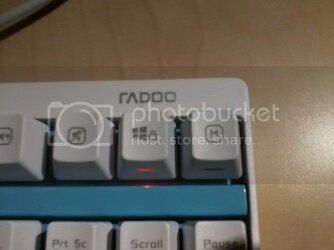
Removed branding with Mr. Clean Magic Eraser:
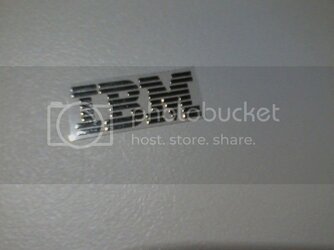
Shiny, metal IBM decal:
And....
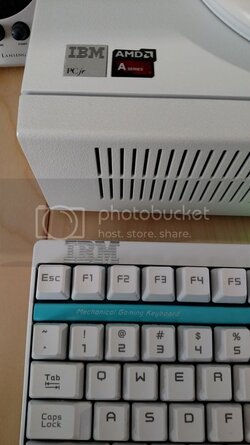
Wink, wink.
Also note addition of AMD A10 decal added beside case badge. (Like this build, some original PCjrs did, in fact, include AMD CPUs!)
Because of the poor case ventilation, I needed a cool running, low wattage chip:
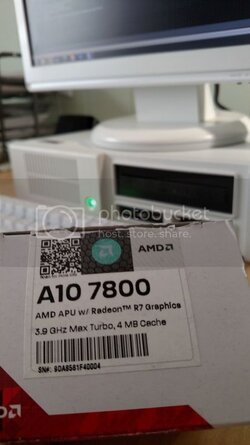
The 7800 has 4 compute cores, running up to 3.9GHz and 8 R7 graphics cores. A BIOS setting allows toggling between 65 and 45 watts. I have her running at 45w TDP, and temps never go above 55c. Performance is snappy. And 3d graphics are actually better than expected.
In the middle of the front bezel was originally, a simple, empty hole, where the wireless keyboard receiver sat. I wanted to use it for an Iron Man breastplate-esque glowing green power LED. Something akin to a pilot light peekhole on an old gas furnace or boiler. I tried adapting a 5mm and then a 10mm LED to fit in the hole, but they looked awful and protruded horrifically. I finally achieved the effect I was looking for by taking the plastic magnifying lens of a broken LED flashlight and fastening it in the hole with hot glue, and then gluing the 5mm LED in back of the lens:

It is difficult to effectively photograph, but to the human eye, this looks really neat. There is a nice, eerie glow, and a depth captured in the magnifying lens that grabs attention.
Internals:
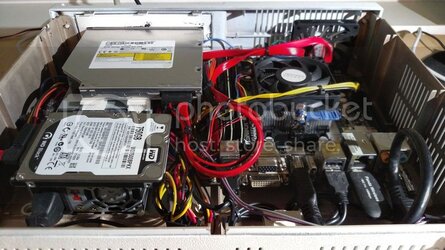
New Specs:
AMD A10 7800 3.9 GHz @45w TDP
8 GB Crucial Ballistix RAM
Asrock FM2A88X-ITX+ Mini ITX Motherboard
Solid Gear 320W Mini ITX PSU
WD Black 750GB 2.5" HDD
1 Startech 70mm intake fan, volt-modded to 5vdc, for quiet operation
Windows 8.1 with Classic Shell™
Here's a shot of the replacement side panel that I fabricated from Komatex, which I am quite happy with:
And that about does it. Using a Samsung 20" LCD monitor I repaired with a capacitor kit and painted white:
Thanks for viewing.
Last edited:
