• Welcome to Overclockers Forums! Join us to reply in threads, receive reduced ads, and to customize your site experience!

a new BEAST .. The Water Lion ! raaawwr

Overclockers is supported by our readers. When you click a link to make a purchase, we may earn a commission. Learn More.
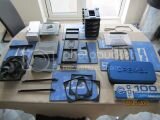
ME parts are starting to arrive, time to do show and tell

Shame my Camera sucks.


Have decided not to RMA the graphics cards, they are actually very well built and EKWB are sending me 2 replacement GPU blocks in a few weeks.. (Obviously I am sending them some Money first lol) wish it was free
 
Last edited:
leak testing day

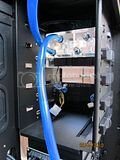
So time to run some water

First off made a BIG mistake and plugged the pump into the cse fan molex

think that's only 5v ?? it ran nice n smooth ..pretty silent too

when I figured it out and plugged it into the right connect "SODDINELL" !!

that pump went into overdrive ! .. truly awesome ! this thing shifts some water..

AND - No leaks ! after I tightened up a few things.


Had a small leak here .. was REALLY GLAD I did this testing before throwing it all in the case !


No .. the blender is not watercooled !!
 
OKAY .. Some EVIL Bastage has posted a review of HD 5870 scaling in Xfire and TRI-Fire ..

guess now I need to hold myself back from buying a third GPU.... someone hold my credit card for me .. I'm not of sound mind at the minute ...

I don't even have my mainboard yet and I want 3 graphics cards lol ... I have the will-power of SpongeBob squarepants in a burger bar.
 
addicted to dremel...

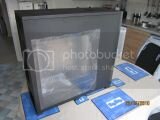
so, today I had some freetime together with my Obsidian,

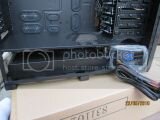
th_800dstart.jpg

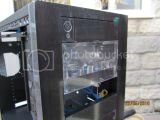
So I got to playing around a bit, and tried to fit some of the major parts fitted to get a feel for things, see what goes where, PSU Raddage and Res etc.

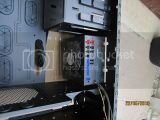
th_bayres.jpg

the Res fits like a dream after I made a modification to remove some 5.25 drive bay risers that were blocking it.
th_bayresfitted.jpg

And then it happened,

the RAD going into the top fits fine,
but I/m aiming for Two internal rads, another under the bottom tray

with the PSU, just NO BLOOMIN ROOM !! damn ...

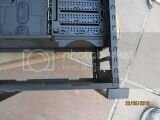
So, more Dremel action some rivet removal later :

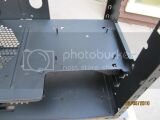
th_800d1stout.jpg

Have now removed the bottom Drive bays which were pointless

was hoping to mount the Rad and the PSU Sideways or something but it just won't fit still

th_plana.jpg

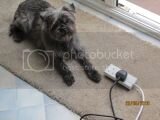
and then the dog had a cunning plan

th_guard.jpg

He said "I'll guard this and when you scream in pain I'll pull the plug!"

More dremel action later :
Removed ALL of the Drive bays, not sure where my data drive or SSD is going now but .. hell it's addicting is this Dremel !!

th_doireally.jpg

See .. more drive bays gone .. now the REAL million dollar question.. Do I keep cutting ? .. I'm thinking either remove the WHOLE bottom tray OR cut the front quarter away and forward mount the PSU on its end .. Rad at the back

th_planb.jpg

using a spare smaller PSU to show what I mean

and £300 later I have a LOT of extra bits, whoops
th_whoops.jpg

so please feel free to add comments and ideas .. I'm totally at a loss now :shrug:
 
Last edited:
You can velcro the SSD anywhere convenient and suspend the hard drive in elastic. I never thought I'd say this but the photos are too small. You could also consider an external esata drive so you wouldn't lose any speed or a USB 3 one for a slight loss of speed.
 
Yea, 640x480 size is good.

Velcro for SSDs is nice. Data drive many options. L aluminum shapes at home depot etc, some nuts n bolts, it can be done. OCD, your doing great, just keep at it. Your doing big things, expect big problems and make big ideas to overcome.
 
Yea, 640x480 size is good.

Velcro for SSDs is nice. Data drive many options. L aluminum shapes at home depot etc, some nuts n bolts, it can be done. OCD, your doing great, just keep at it. Your doing big things, expect big problems and make big ideas to overcome.

cheers dude,

So Velcro ? off to buy some sticky velcro today for that purpose.. awesome thanks..

I've Dremel'ed one of the original 'Hot Swap' drive bays away from it's chassis and will bolt that back into place later on in the process, that'll look awesome

I'm still wondering if it's worth keeping that bottom tray .. it doesn't really do anything unless the case side is on to hide some wiring.

and there won't be any there to hide now tho. :bang head

or I can take off the first 6 inches of it where the PSU will go and the secure it to the PSU chassis to add stability.

motherboard arrives today at last.

just need a few more minor items .. Compression fittings being the main one .. I might just actually tube this all together using barbs till I'm happy with it working then get compressions After I see it's okay ..

Conundrum, one Q for you ... is the NB generally hotter or cooler than a loaded CPU ?

I'm wondering about this as the MB I ordered includes a pre-fitted Waterblock on the NB .. and maybe I include it in the loop ?

ta


OCD
 
The waterblock on the mobo might be aluminum inside. Have to check that. NB does get hot but usually the Mobo air cooling is more than enough. Go with air cooling it for now. My mobo had the NB waterblock, I used the air heatsink instead.
 
Back