• Welcome to Overclockers Forums! Join us to reply in threads, receive reduced ads, and to customize your site experience!

FEATURED Repost: Jewel Box Project Completed

Overclockers is supported by our readers. When you click a link to make a purchase, we may earn a commission. Learn More.

Navig

Senior Case Master
Joined
Dec 7, 2003
Jewel Box Project


Frontslrthiunlit.jpg


So this is not my newest project, but a reposting of an old project. The old thread resided on the abit forums, now long departed.

I happened to find most of this previous post as a word document, so I will be cut n pasting it back. But I will add a few new comments here and there. The comments will be highlited with { --- }.

This project ran from February '08 to June '08. I remember starting this project in the frigid unfinished basement of a 100 year old Victorian in JP. Anyway, in the chronology of my projects, this was just after my Console project and just before my Exoframe.

A version of the build log remains on the forums here.

--> Link Here <--


This is my "Completed" thread, with prettied up pictures, but I will include a summary of the construction.


.
 
Conception


The idea of this case was pretty straight forward. I wanted a cube style case with a horizontal laying motherboard. However, instead of a plain cube, I wanted to make the front have a slope to add a little architectural interest.

The final piece to the design of this project is the concept that gives it its name. I wanted to have my lid (at least 3 sides), hinge up to reveal the internals, like a jewel box.

GoldNecklaceHandEngravedDiamondBox.jpg

{ Is this concept too effeminate. Hmm possibly. }


As usual I began with some very simple sketches to convey the basic design.


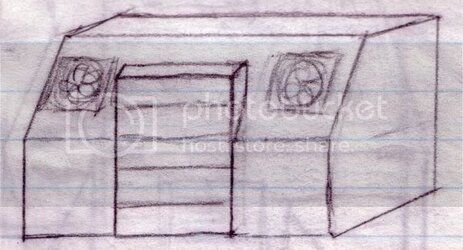
Here was the overall outside shape:

Aircase3.jpg


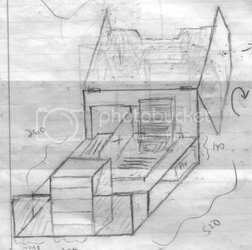
And the swinging hinge concept to make it into a “jewel box”:

Aircase4.jpg


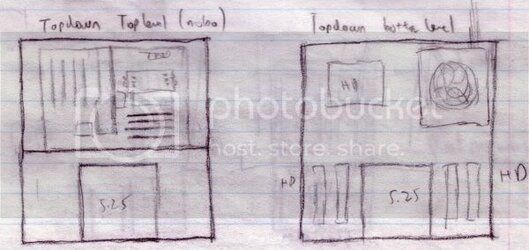
The internal structure called for a 2 tiered case, isolating the motherboard on top with a lot of dedicated airflow:

Aircase1.jpg


I wanted a free standing box stack for the 5.25 bay (built around a pre-fab 5.25 bay rack from Mountatin Mods). Instead of a cube shaped shell, I wanted to cut an angle down from the top panel. But not only that, it would cut thru the 5.25 box at angle, exposing a top portion of the 5.25 stack.


Finally, I settled on this general layout, to organize all the necessary elements: motherboard, power supply, hard drives, 5.25 drives.

Aircase2.jpg


.
 
The Build


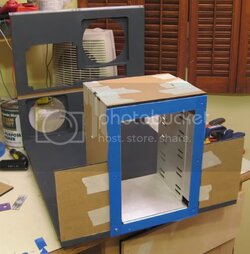
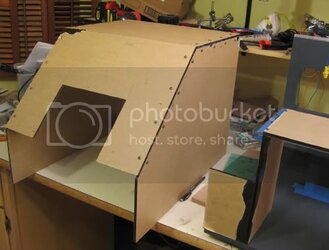
Structurally, the case is comprised of 3 basic units:

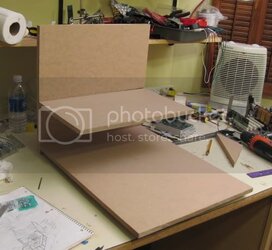
1) The large 2 tier base unit. Constructed from ½” and ¾” MDF:

Boardsassembled.jpg


2) The front plastic panel box that holds the 5.25 bay rack:

Frontplasticunit2.jpg


3) The big giant angled lid:

Plasticlidbracketed.jpg


{ This lid is hella heavy, being made from 1/4" acrylic. At the time I thought this part would be sort of more structural, but actually with the fully metal bracketed seams, its probably overkill. Altho I can comfortably stack books, use the case as a footrest, etc. More on this in later comments... }


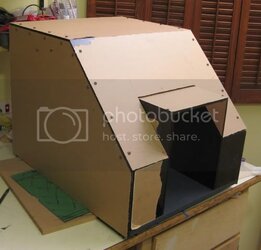
Put these 3 units together and you have, well a funky looking cardboard box!

Plasticlidbracketed2.jpg


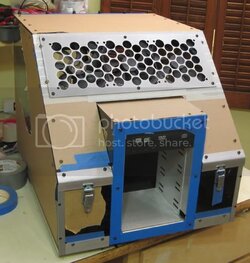
Add some trim:

Kikboxmeshmounted.jpg


Then do a whole lot of aesthetic trim work, paint, remove the safety paper, and you have a complete case:


Finishedleftfront.jpg


The last step in the build process in to select computer components, install, and then wrangle the cables!


.
 
The Tour


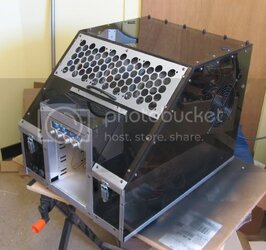
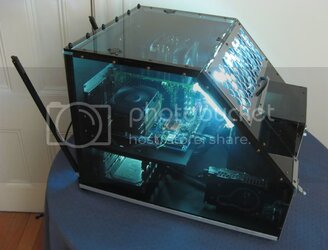
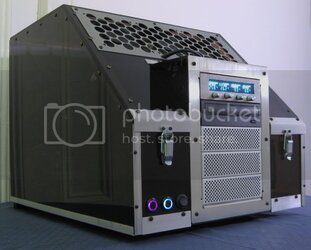
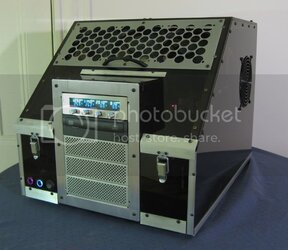
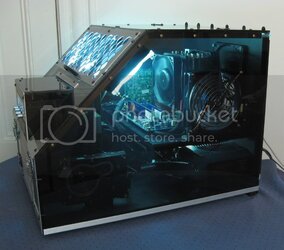
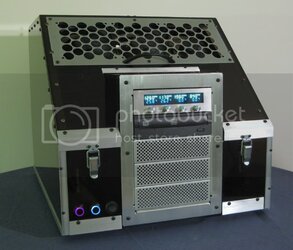
This pic here I think shows the overall exterior shape to the case:

FrontRtMidUnlit.jpg


Again, it is essentially a cube case, but with a slanted front panel that slashes thru the box containing the 5.25 drives.

The outer shell is built of ¼” bronze tinted plastic from Delvie’s, and is held together by aluminum angle brackets at the seams.

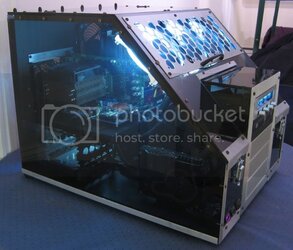
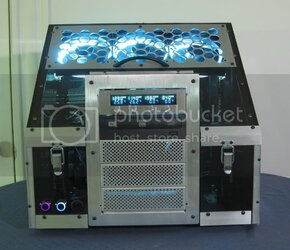
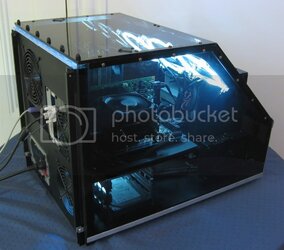
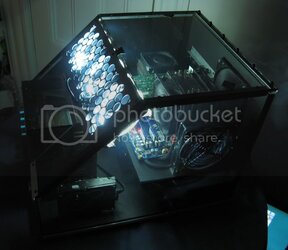
One of the cools aspects of making such a large plastic lid is that internal lighting can make a good show of your internal components. On the front in the switch cluster is a toggle that fires up 4 internal white cold cathodes, which generate enough light to display the internal components thru the tinted plastic:


FrontRtMidLit.jpg


This sort of now-you-see-it-now-you-don’t is a feature I use on a lot of my builds. The internals are lit by 4 circular white ccfls, 3 mounted behind the three 120mm intake fans on the slant panel, and 1 underneath motherboard tray shelf.

{ Yeah, I use this lighting gimmick a lot--see my latest project Resilience. My wife's getting bored of it, and since the next project is hers...was that a foreshadowing? Can "foreshadow" be made into a noun? }


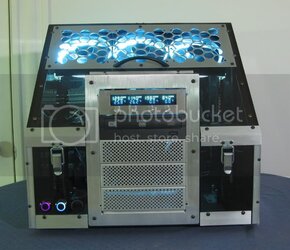
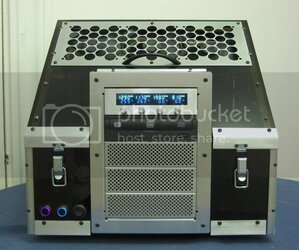
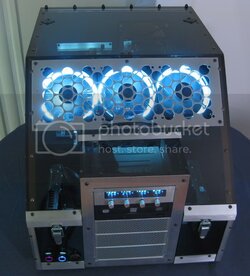
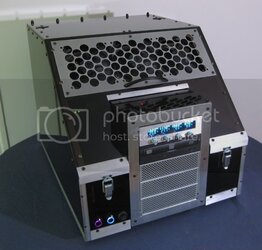
Moving round to the front of the case, here is a pic square face on:


Front2MidLit.jpg


I’m going to point out a few features here.

First of all, the overall color scheme I was going for in this case was bronze plastic and brushed aluminum.

The large slant panel is dominated by the fan intake bar. This is a 3x120mm fan bar which serves as the air intake for the case. The awesome grill is made by Kikboxes. There is also an important but low-key handle bar mounted to the steel grill.

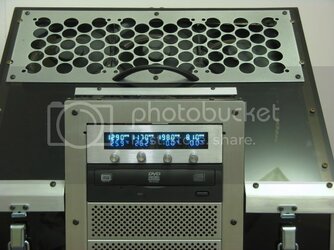
Next is a modified Scythe Kaze Master fan controller. Unfortunately, the Kaze Master doesn’t come in brushed aluminum, only highly reflective silver or black. Fortunately, it is actually constructed of brushed aluminum, so I removed the front fascia, and cleaned up the aluminum, then reconstructed a tinted black window.

Here’s a closeup:

FrontKazemaster.jpg


The Kaze Master controls 4 fan channels and monitors 2 temps for me:
Channel#1 Fan intake bar.
Channel#2 Exhaust fans.
Channel#3 Video card fans.
Channel#4 Hard drive exhaust fan.
Temp#1 Intake air temp.
Temp#2 Exhaust air temp.

{ Huh, how fortuitous I found this old document. This case is actually in current active use, but I'd forgotten what the channels actually do! }


Continuing on with my little tour of the front, here’s a lit pic:

Front2MidLit.jpg


You can really see the intake fans.

Underneath the Scythe Kaze Master is my DVD burner (Lite-on I believe) and 3 blanks (Lian Li).

The large slant panel ends in some angled aluminum trim, secured down by what appear to be 2 ratcheting latches. Now why would you need industrial latches here? More on that later.

Finally, in the bottom left (of the pictures) is my switching panel. These are 26mm lit bulgin vandal resistant buttons (from performance-pcs). The purple ring is lit for power-on, and the button is the power-on. The white ring is lit for hard drive activity (I have the system virus-scanning to keep it lit for the pics), and the button is the reset switch. The third button is the toggle for the internal lighting.


.
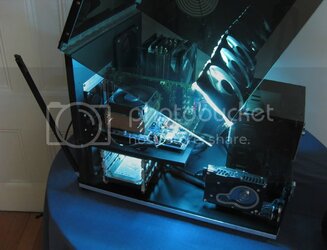
 
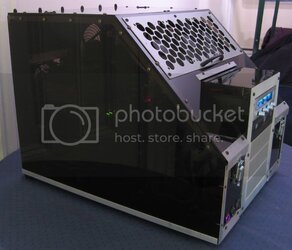
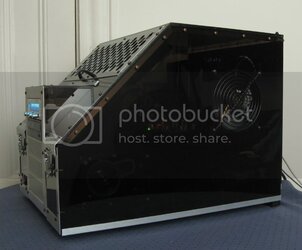
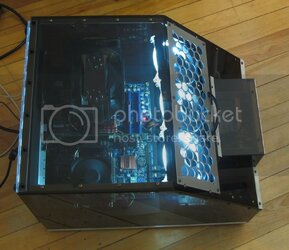
Moving on to the case’s left side, this picture shows a nice profile of the case:


LeftFrontMidUnlit.jpg


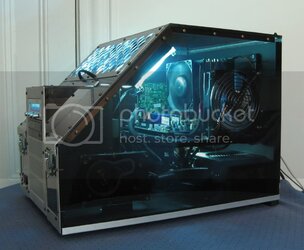
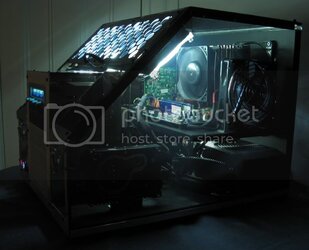
Again, hitting the lights gives a nice glimpse of the inside hardware:

LeftFrontMidLit.jpg


Also on this panel is one of the outlets for the 2 main exhaust fans (Yate Loon 140cm fans). You can glimpse some of my hardware including one of the easily identifiable WD Raptor X 150gb hard drives, my power supply (Corsair HX 620), my Ram (2x2gb G.Skill) and my cpu heatsink (Thermalright Ultra 120 eXtreme).


.
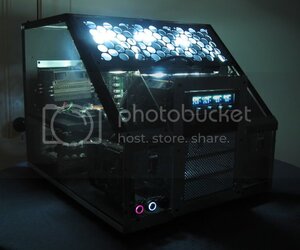
 
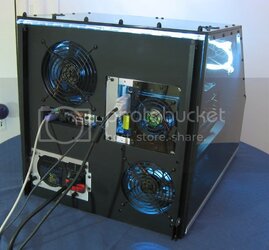
Finally we make it round to the back side:

BackRightLit.jpg


This panel is ¾” mdf. It is essentially the back bone of the whole case, so it need to be super sturdy. You can see the myriad of exhaust fans, including the other main 140mm exhaust fan, an add-on 80mm fan exhaust in the unused pci ports (for the video card), the 120mm bottom tier fan exhaust (for the hard drives), and the psu exhaust.
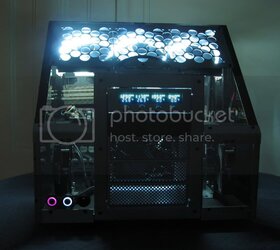


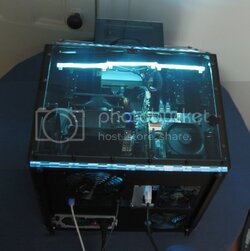
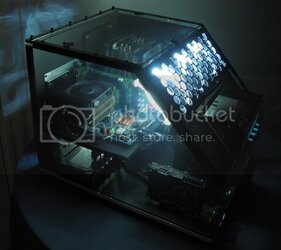
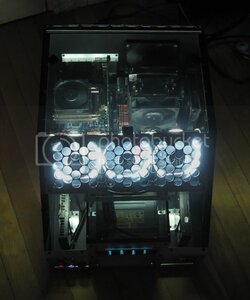
My last 2 pics of this set show the case from top down. The entire top panel is plastic, so it gives you a good view of my entire motherboard:


TopBackLit.jpg


TopdownSideLit.jpg
 
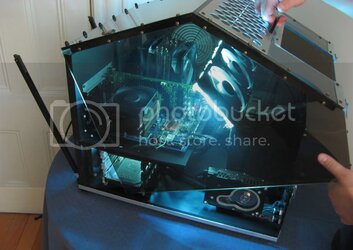
Next, I’m going to hilight one of the cases feature features. The opening lid.

As a hardware enthusiast, all of my custom built cases must feature easy accessibility to the internal components. Generally I upgrade or modify a component every several months. So part of the original design of this case was to have it open up like a jewelry box, hence the title of the project.


To open up the case, the first step is to undo the flip-latches on the front:

FrontSquare1.jpg


These 2 latches are the only thing holding the lid down, altho it is locked into place by the side trim.


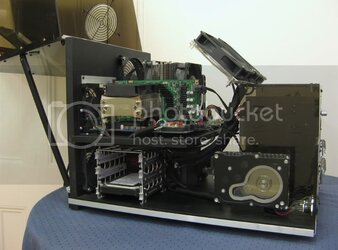
Next, you flip out the support bars on the back of the case that are going to hold the weight of the lid when open:
OpenDemo2.jpg


Next, you grab the handle on the angled front panel and lift:

OpenDemo3.jpg


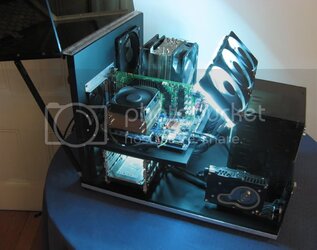
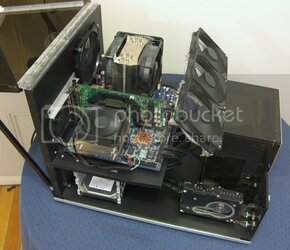
You keep rotating the lid until it comes to rest on the open support bars:


OpenDemo5.jpg


And now you’ve got tool free quick access to almost all sides of all components.

It’s really that easy.


Here is a video of it in real time:


th_Liddemo.jpg


{ I think this was a pretty neat idea. But time has proven it somewhat impractical. As I mentioned previously the lid is very heavy. Also to open the top requires a lot of room behind the case, which just isn't always there.

Most of the time, when I need to access the components, I actually undo the acorn screws, and just lift the whole lid right off.

If I were to revisit this design, I'd probably push more towards the practical and

1) Construct the lid from 1/8" thick acrylic

2) Devise a quick release method for the lid, instead of the hinged action }


.
 
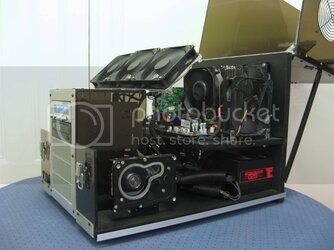
Well, now that we’ve got the lid open, let’s take a good look at the goodies inside.

MotherboardView.jpg


Here are the hardware components:

Xeon 3110 (clocked at 9*445=4ghz)
Cooled with a lapped Thermalright Ultra 120 eXtreme
http://img.photobucket.com/albums/v363/navig/Lapping/Thermalright Utra 120 eXtreme/2000.jpg
{ Hah, who doesn't love pics of a hand lapped heatsink? }
Powered by a Panaflo L1 and a Yate Loon D12SM-12 in Push-Pull
{Currently with 2 YL low speeds. Trying to keep it quieter }
Abit IP35-pro (northbridge cooled with a 40mm fan)
2x2gb G.skill PC2-8000
{ I've got 2x4gb ram in there now for windows 7 }
MSI 8800GTS 512mb custom aircooled with a Thermalright Ultra 90 (no that’s not a typo, if you look closely that is a cpu heatsink on my video card. I lose all my pci slots, but I do get –30c to the stock cooler at virtual silence. For the story on this mod, see my thread)
http://www.ocforums.com/showthread.php?t=559434
{ Wow its been a while since its I've mounted a cpu heatsink to a gpu. Might have to do it to a more card just for the fun of it. }
2x Western Digital Raptor X 150s
{Actually now running with a cherry red Corsair 120gb SSD }
1x Seagate 160gb
Lite On SATA DVD drive
Corsair HX 620


The top layer holds the motherboard.


Here is a view of the bottom layer:

OpenSideLo.jpg


Here you can see the bottom tier better. The 2 WD Raptors sit on either side of the 5.25 bay box. They have a sort of floating effect created by a simple black plastic back plate mount and some clean custom cabling.

http://img.photobucket.com/albums/v363/navig/Jewel Box Project/Harddriverack1.jpg


More drives can be added tool free via the 3 drive rack borrowed from Lian Li.

Much of the system’s cabling is hidden in the bottom tier also, including the ccfl invertor boxes, and many of the fan connections.


On the other side of the lower tier, you can see the psu:


OpenLeft.jpg


Nothing special about the PSU. It’s modular with very functional cabling, which keeps the clutter minimal. Just a few corrugated loom tubes to hide the extra cabling.


Cable organization is critical to builds of this nature. Consider that I have 4 independent fan channels controlled from the front bay, 2 temp probes, 12 fans, 3 hard drives, video card power, and motherboard power connectors.

Important cable wrangling areas include: just behind the Scythe Kaze Master, in front of the psu, velcro’d to the underside of the motherboard shelf, and underneath the motherboard itself.
 
Next stop on our tour: airflow.


It should be pretty clear that I’m a bit of an air cooling nut, so airflow was an important consideration from the initial design.

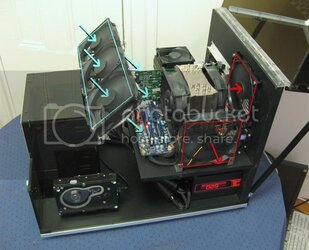
The big sloped front panel allowed me to put 3 nice 120mm fans (up to 3x70.5=211.5 cfms) blowing right onto the motherboard, from a few centimeters away.


This pic here shows this direct cool air intake:


Airflow1labeled2.jpg


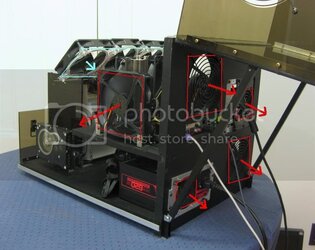
The blue box and arrows indicate the fresh air intakes, the red boxes and arrows highlight the exhaust fans.


Coming round to the back, you can see the full extent of exhaust out the back side of the case:


Airflow2labeled.jpg


.
 
Well, that pretty much concludes the tour. I’m going to fire off my last volley of pics, and let the pics do the talking.


FrontRtVLoUnlit.jpg


BackRtHiLit.jpg


Frontvhilit.jpg


Front2LeftMidUnlit.jpg


LeftMidLit.jpg


OpenDemo4.jpg


DarkFrontRtMid.jpg


DarkFrontSquare.jpg


DarkLeftHi.jpg


DarkLeftMid.jpg


DarkRtFrontHi.jpg


DarkTopdown.jpg


Frontslrtmidunlit2.jpg


Some very rough estimates on pricing on this build.

MDF ½” ¾” board $10
Plastic ¼” bronze $70
Aluminum Trim $40
Screws n Nuts $20
Other brackets and miscellaneous hardware $40
Lian Li Hard drive rack $15
Mountain Mods 5.25 bay $30
Kikboxes Grill $30
Lian Li blanks $15
Lian Li psu bracket $10
Fan grills $10
Paint $30
Switching panel $40


Altho I did not have any sponsors for this project, I like to take a few words to mention all my hardware sources, in no particular order.
Delvies plastics - www.delviesplastics.com
Mcmaster-Carr - www.mcmaster.com
Onlinemetals – www.onlinemetals.com
True Value Ace Hardware and Paint
Home Depot
Lowes
Performance-Pcs – www.performance-pcs.com
Mountain Mods – www.mountainmods.com
Jab-tech – www.jab-tech.com


Thanks as always to my wife, friends n supporters esp at the abit forums { RIP }, oc forums, and xtremesys forums.

Thanks for tuning in!

Navig


But wait there's an epilogue.

Where is it now?


The system is still in active use. Currently its my wife's main system, altho now for much longer (yup, my newest project is already underway, stay tuned for its thread).

It has been update a little as noted above:

Quieter fans on the heatsink.
More RAM.
Newer video card.
SSD.


I do love the layout. Horizontal motherboards make access so easy. I would revisit this design, I think it is solid. But as I mentioned, I'd modify it for quick lid removal instead of piano hinged.
 
I remember watching this one come together and liked it as I've like all your cases. Not one is the same, and none of them are really even similar to the standard rectangle cases you normally see. Two thumbs up! :thup: :thup:
 
Back