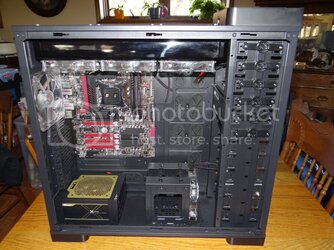
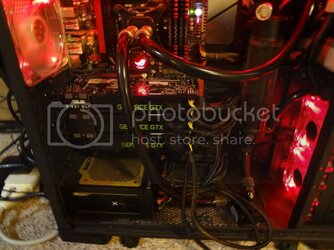
New Build: Project Black Devil EDIT: Graphics cards added!!
I've finally pulled the trigger on what I'm dubbing as "Project Black Devil." Some of you have probably seen my posts lately asking for advice and a big thanks goes out to all who have helped along the way.
Here it is:
Case: Xigmatek Elysium - Black
Radiator 1: HWLabs Black Ice GTX420
Radiator 2: HWLabs Black Ice GTX240
Radiator 1 Fans: Yate Loon 140mm D14SH-124R from Performance PC's
Radiator 2 Fans: Yate Loon 120mm D12SH-124R from Performance PC's
Pump: MCP35x
Reservoir: EK MultiOption Res X2 250 Advanced Reservoir
Tubing: Tygon R-3400 1/2" ID 3/4" OD Black Tubing - 8 ft.
CPU Block: XSPC Raystorm
CPU Block LED: 3mm LED Harness w/ Red LED from Frozen CPU
Fittings: Bitspower Matte Black Ultimate G1/4 Rotary Compression Fittings (7), Koolance VL3N QDC Male G1/4 Thread (3), Koolance VL3N QDC Female Compression (3), Koolance VL3N QDC Male Compression (1)
Biocide: IandH Silver KillCoils
Fan Controller: Lamptron FC9 4-channel 50W per channel
Fan Cables: Phobya Y Cable Splitter- 3-pin to 6x3-pin, Phobya Y Cable Splitter- 3-pin to 4x3-pin (2)
Cable Sleeving: Mod/Smart Kobra Black Sleeve Kit
Thermal Compound: IC Diamond 7
System:
CPU: Intel i7-2600K
Motherboard: Asus Maximus IV Extreme Z
Memory: Corsair Vengeance 8GB Dual Channel 1866Mhz CL9 - Red, Corsair Vengeance 8GB Dual Channel 1866Mhz CL9 - Black, 16 GB total
Power Supply: Seasonic X-1250
Boot Drive: Corsair Force GT 180GB (2) in Raid 0
Media Drives: Asus DVD Burner (2), Asus Blu Ray Reader
Sound Card: Creative Sound Blaser X-Fi Fatality Champion Series
Already Own:
Graphics Cards: EVGA GTX 570 Superclocked (2) in SLI
Keyboard: Logitech G19
Mouse: Logitech G9x
Headphones: Logiteceh G930
Speakers: Logitech Z-2300
Monitors: Samsung 2333T (3) at 5760x1080
Build Plan:
This will be a single loop and to begin with CPU only. It will not be complete until Nvidia releases the GTX 600 series. When that happens, I'm going to buy 2 EVGA HydroCopper GTX 680's to plug into the loop.
For now, my plan looks something like this:

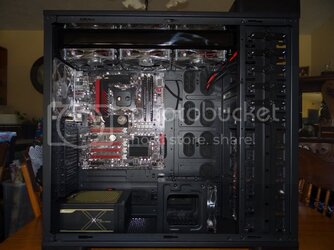
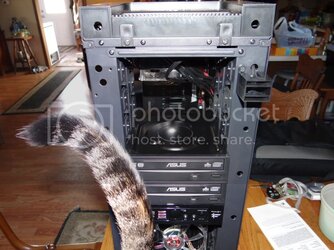
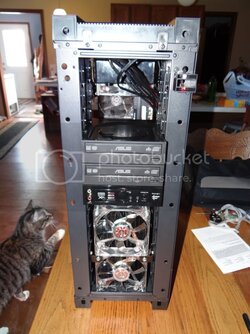
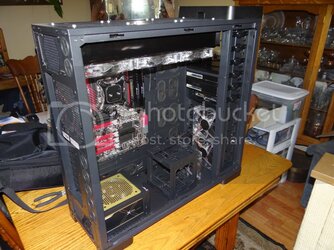
There will be a 240 mm radiator in the front where the drive bays go and a 420 mm radiator along the top. I plan to mount one of the Elysium hard drive bays behind the power supply.
Different from what the picture shows, the pump and res will be mounted separately. I plan to mount the pump on top of the drive bay and mount the res above that between the motherboard and the 5.25" bays in the front.
Both radiators will be in a push/pull fan setup with the high speed Yate Loon's. I plan to have the 6 fans on the 420 rad on one channel, the 4 fans on the 240 rad on another channel, and the case fans on a third channel. That leaves me one spare channel in case I ever add a third radiator somewhere.
The theme for this build will be all red/black. The case is all black, all fans will be red LED fans along with the red LED cpu block, and all cables will be braided black, and I do mean every cable in the case. I've already pulled the front panel off of the Elysium and as soon as my sleeve kit gets here I'm ready to get to work.
I ordered all of the cooling system and the rest of the system that I don't own already today, so I should have the majoirty of my parts by the end of the week.
I hope this build turns out amazing when I'm finished. It's my first watercooled build so I don't really know what to expect. Stay tuned and I'll post plenty of pictures as the build comes along, and probably ask some questions too lol.
I've finally pulled the trigger on what I'm dubbing as "Project Black Devil." Some of you have probably seen my posts lately asking for advice and a big thanks goes out to all who have helped along the way.
Here it is:
Case: Xigmatek Elysium - Black
Radiator 1: HWLabs Black Ice GTX420
Radiator 2: HWLabs Black Ice GTX240
Radiator 1 Fans: Yate Loon 140mm D14SH-124R from Performance PC's
Radiator 2 Fans: Yate Loon 120mm D12SH-124R from Performance PC's
Pump: MCP35x
Reservoir: EK MultiOption Res X2 250 Advanced Reservoir
Tubing: Tygon R-3400 1/2" ID 3/4" OD Black Tubing - 8 ft.
CPU Block: XSPC Raystorm
CPU Block LED: 3mm LED Harness w/ Red LED from Frozen CPU
Fittings: Bitspower Matte Black Ultimate G1/4 Rotary Compression Fittings (7), Koolance VL3N QDC Male G1/4 Thread (3), Koolance VL3N QDC Female Compression (3), Koolance VL3N QDC Male Compression (1)
Biocide: IandH Silver KillCoils
Fan Controller: Lamptron FC9 4-channel 50W per channel
Fan Cables: Phobya Y Cable Splitter- 3-pin to 6x3-pin, Phobya Y Cable Splitter- 3-pin to 4x3-pin (2)
Cable Sleeving: Mod/Smart Kobra Black Sleeve Kit
Thermal Compound: IC Diamond 7
System:
CPU: Intel i7-2600K
Motherboard: Asus Maximus IV Extreme Z
Memory: Corsair Vengeance 8GB Dual Channel 1866Mhz CL9 - Red, Corsair Vengeance 8GB Dual Channel 1866Mhz CL9 - Black, 16 GB total
Power Supply: Seasonic X-1250
Boot Drive: Corsair Force GT 180GB (2) in Raid 0
Media Drives: Asus DVD Burner (2), Asus Blu Ray Reader
Sound Card: Creative Sound Blaser X-Fi Fatality Champion Series
Already Own:
Graphics Cards: EVGA GTX 570 Superclocked (2) in SLI
Keyboard: Logitech G19
Mouse: Logitech G9x
Headphones: Logiteceh G930
Speakers: Logitech Z-2300
Monitors: Samsung 2333T (3) at 5760x1080
Build Plan:
This will be a single loop and to begin with CPU only. It will not be complete until Nvidia releases the GTX 600 series. When that happens, I'm going to buy 2 EVGA HydroCopper GTX 680's to plug into the loop.
For now, my plan looks something like this:
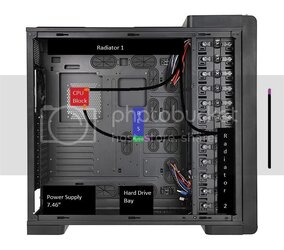
There will be a 240 mm radiator in the front where the drive bays go and a 420 mm radiator along the top. I plan to mount one of the Elysium hard drive bays behind the power supply.
Different from what the picture shows, the pump and res will be mounted separately. I plan to mount the pump on top of the drive bay and mount the res above that between the motherboard and the 5.25" bays in the front.
Both radiators will be in a push/pull fan setup with the high speed Yate Loon's. I plan to have the 6 fans on the 420 rad on one channel, the 4 fans on the 240 rad on another channel, and the case fans on a third channel. That leaves me one spare channel in case I ever add a third radiator somewhere.
The theme for this build will be all red/black. The case is all black, all fans will be red LED fans along with the red LED cpu block, and all cables will be braided black, and I do mean every cable in the case. I've already pulled the front panel off of the Elysium and as soon as my sleeve kit gets here I'm ready to get to work.
I ordered all of the cooling system and the rest of the system that I don't own already today, so I should have the majoirty of my parts by the end of the week.
I hope this build turns out amazing when I'm finished. It's my first watercooled build so I don't really know what to expect. Stay tuned and I'll post plenty of pictures as the build comes along, and probably ask some questions too lol.
Last edited:
