Hello everyone This is $ingh from India .Posting my first Thread Here ,Hope You guys like it 
After a long period and with lot of efforts i am able to arrange Liquid Nitrogen and Successfully completed my first ln2 overclocking session with AMD Phenom ii x4 955be With the rock solid Motherboard Asus Crosshair IV formula and ofcourse with the help of my best friend who helped me a lot to make this Session successful ..
Special thanks my parents,my friends for the understanding and supporting me ..
Setup:-
Amd Phenom ii x4 955be ( Awesome chip with just 1.62v i am able to cross 6.4ghz)
Asus Crosshair iv formula (Great motherboard from Asus even with too much moisture on its components it still keep on working ..Rock solid Motherboard)
G-SKILL 2*2GB 1600 CL7 (max overclocks to 2230 mhz on it ...nice ram kit)
Radeon HD 5870
EX-1000 watt
Aoc E2251 FW
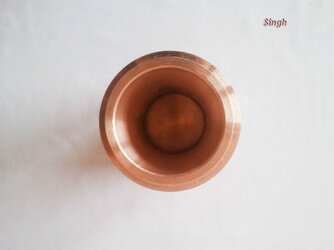
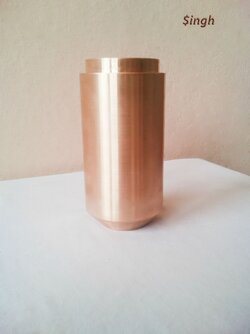
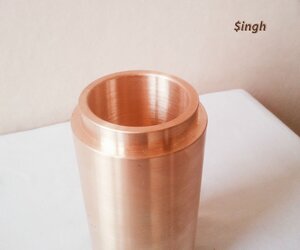
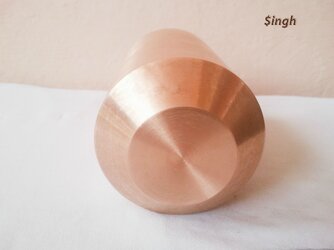
Self Made Ln2 pot ( Pot is working like charm ...i am too happy with its results )
Self Made bench table (just for benching)
25 litres of LN2
So here are some Chilled results :-
Amd Phenom ii 955be Overclocks to 6539mhz and Globally Ranked at 49th
http://hwbot.org/submission/2310789_ingh_cpu_frequency_phenom_ii_x4_955_be_6539_mhz

Super pi 1M 11sec.391ms Globally Ranked at 57th
http://hwbot.org/submission/2310794_ingh_superpi_phenom_ii_x4_955_be_11sec_391ms

Wprime 32m 6sec 562ms Globally ranked at 47th
http://hwbot.org/submission/2310797_ingh_wprime_32m_phenom_ii_x4_955_be_6sec_562ms

Wprime 1024m 216sec 516ms globally ranked at 30th
http://hwbot.org/submission/2310799_ingh_wprime_1024m_phenom_ii_x4_955_be_216sec_515ms

Some other pics :-


Too much moisture in India these days made me to stop benching ... As approx half of my motherboard is covered Water Vapours
Its a great experience working with LN2 ..
Hope You guys will enjoy it ...
After a long period and with lot of efforts i am able to arrange Liquid Nitrogen and Successfully completed my first ln2 overclocking session with AMD Phenom ii x4 955be With the rock solid Motherboard Asus Crosshair IV formula and ofcourse with the help of my best friend who helped me a lot to make this Session successful ..
Special thanks my parents,my friends for the understanding and supporting me ..
Setup:-
Amd Phenom ii x4 955be ( Awesome chip with just 1.62v i am able to cross 6.4ghz)
Asus Crosshair iv formula (Great motherboard from Asus even with too much moisture on its components it still keep on working ..Rock solid Motherboard)
G-SKILL 2*2GB 1600 CL7 (max overclocks to 2230 mhz on it ...nice ram kit)
Radeon HD 5870
EX-1000 watt
Aoc E2251 FW
Self Made Ln2 pot ( Pot is working like charm ...i am too happy with its results )
Self Made bench table (just for benching)
25 litres of LN2
So here are some Chilled results :-
Amd Phenom ii 955be Overclocks to 6539mhz and Globally Ranked at 49th
http://hwbot.org/submission/2310789_ingh_cpu_frequency_phenom_ii_x4_955_be_6539_mhz

Super pi 1M 11sec.391ms Globally Ranked at 57th
http://hwbot.org/submission/2310794_ingh_superpi_phenom_ii_x4_955_be_11sec_391ms

Wprime 32m 6sec 562ms Globally ranked at 47th
http://hwbot.org/submission/2310797_ingh_wprime_32m_phenom_ii_x4_955_be_6sec_562ms

Wprime 1024m 216sec 516ms globally ranked at 30th
http://hwbot.org/submission/2310799_ingh_wprime_1024m_phenom_ii_x4_955_be_216sec_515ms

Some other pics :-


Too much moisture in India these days made me to stop benching ... As approx half of my motherboard is covered Water Vapours
Its a great experience working with LN2 ..
Hope You guys will enjoy it ...


