• Welcome to Overclockers Forums! Join us to reply in threads, receive reduced ads, and to customize your site experience!

Need help placing drain port

Overclockers is supported by our readers. When you click a link to make a purchase, we may earn a commission. Learn More.

Andyrc

Registered
Joined
Jul 24, 2017
Location
Up North, Norway
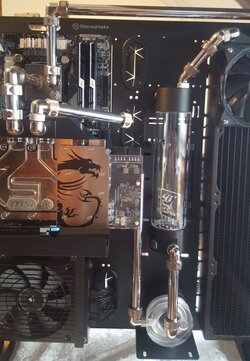
Hi all. Have been working on my first custom cooled system for a while now. Beginning to see the end of it (I think). But I need som help placing the drain port for the loop. Down right at the bottom of the radiator there is a plug where I could have placed the port. Only problem is that the case foot is in the way. So my options beeing somewhere around the pump. Someone have any good ideas? Both on solutions and splitters I can use. Been working on this nonstop so the creativity isnt the best atm :bang head

And before anyone points it out - yes there will be more fans.

thumbnail_20170724_161539.jpg
 
You can add a drain port right to the left of the pump's output near the psu or at the intake of the pump. You'll have easy access to it plus it'll be in a neat spot and still be at the lowest point. Either will work.

Nice build btw! :thup:
 
Thanks for answer :) Do you have any suggestions on what fitting to use? I would preferably stick to as few fittings and pieces as possible. This because of the aesthetics and I also dont want the pump to be too heavy in the front. Maybe this will not be a problem when I get all the tubing in place but by now the front of the pump have been kneeling a bit. Anyways, I guess a T-fitting should do the trick? Tubing goes up, drain port down.
 
With a T-line spliiter in that material you're using for hard tubing you're going to have to make one from 4 different parts which will cost more money. Your best bet is to go with with a Y-splitter, use less parts and attach an end-cap which will take the place of the drain valve. Just unscrew the end-cap and viola instant drain.

Take a look around here just to give you an idea what you'll need.
 
I would personally flip the radiator and create a drain in that section of the loop, so when you drain, you'll get the whole system draining as the radiator will still be filled in this configuration. Just reroute your tubing and use a bitspower T-line valve if possible.
 
I would personally flip the radiator and create a drain in that section of the loop, so when you drain, you'll get the whole system draining as the radiator will still be filled in this configuration. Just reroute your tubing and use a bitspower T-line valve if possible.

That would be perfect :thup:
 
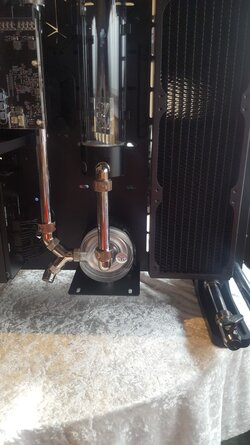
So I kept the radiator as shown in the first picture. This because with some modding done I can now use the bottom plug as a port. In addition I installed a Y-splitter for for the pump output. Already feel the nervs before the leak test.......

thumbnail_20170726_175502.jpg
 
Pack some absorbent rags around the motherboard/CPU/RAM components to start with.
 
So I kept the radiator as shown in the first picture. This because with some modding done I can now use the bottom plug as a port. In addition I installed a Y-splitter for for the pump output. Already feel the nervs before the leak test.......

View attachment 192340


Looks good, but I would've turn the rad around upside down to the ports would have been at the bottom as Jack suggested. This way you'll empty the rad too when it comes to flushing maintenance.


Pack some absorbent rags around the motherboard/CPU/RAM components to start with.

I agree. Get a heap of paper towels and place them all around the connections for leak testing. Good luck!
 
Thanks for the advice guys! But wouldnt the drain port down to the right empty most of the fluid in the radiator? Or is it something I dont get here?
 
Thanks for the advice guys! But wouldnt the drain port down to the right empty most of the fluid in the radiator? Or is it something I dont get here?

Where exactly is that particular drain port connected? Can you posta pic of where that is? Hard to see.
 
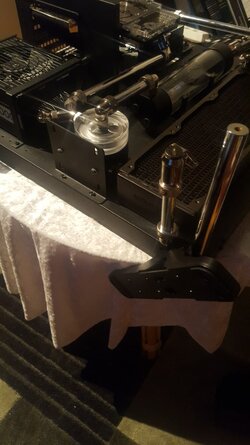
To move the rad upside down shouldn't be a big problem, but I've had to buy more tubing to re run it. I will try to avoid it if the solution I've come up with now works. Here is another pic:

thumbnail_20170726_232126d.jpg
 
So that drain port is connected to the bottom of the rad? If so then you're covered as you have 2 drain ports. Excellent job! :thup:
 
Well done on the compromise. That will work as well.

Nonetheless, keep us up to speed.
 
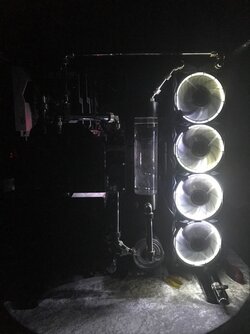
The bulid is pretty much finished, but I am not happy with the lights. Now there is light only on the right side of the build. This looks odd. Some suggestions on how to make the build more "flashy" in the dark? UV coolant or/and LED RAM?

thumbnail_IMG_11111.jpg
 
What about a couple LED lights? Maybe positioned them so the bulbs were hidden, but the light creates a little backlighting in the area you want to illuminate. A pair of LED bulbs wired together and sleeved with a 4-pin molex connector is what I got to backlight my reservoir.
 
Back