-
Welcome to Overclockers Forums! Join us to reply in threads, receive reduced ads, and to customize your site experience!
You are using an out of date browser. It may not display this or other websites correctly.
You should upgrade or use an alternative browser.
You should upgrade or use an alternative browser.
PROJECT LOG Project Vitis
- Thread starter Navig
- Start date
- Joined
- Dec 7, 2003
- Thread Starter
- #22
Time to get started on the signature pieces of this mod--the main panels.
Remember the old layout plan--a nice leaf and vine motif:

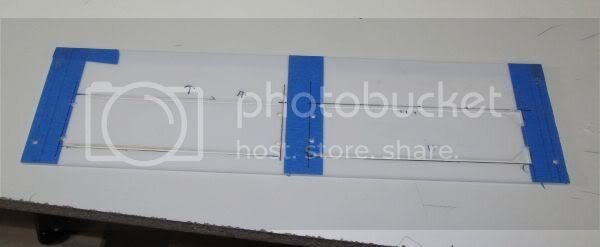
Right now I've got the 2 large panels made of 1/8" white opaque plastic:

I'm going to cut out the vine and leaf motif in relief, then have a purple backer panel.
At first I thought this would be way too intricate to cut out by hand, so I pursued laser cutting services. But after a bit of practice, I found I could do it. Also thanks to my new awesome Dewalt scrollsaw.
Here was the basic technique I used to cut out the leaves:
First I bisected the leaf, then brought the blade back and started cutting a side diversion:

Next I brought this diversion back towards the stem:

Then I continued the cut along the other edge to the leaf point:

Then I finished the last cut on the other edge:

Here I was halfway thru one panel:

And finished with all my cuts with purple backer:

This panel is actually the back panel.
I went ahead and cut the front panel with a very similar pattern:

And here it was mounted up:

Remember the old layout plan--a nice leaf and vine motif:
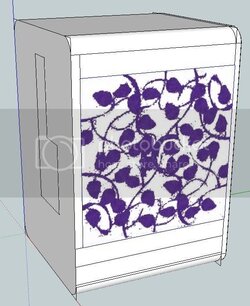
Right now I've got the 2 large panels made of 1/8" white opaque plastic:
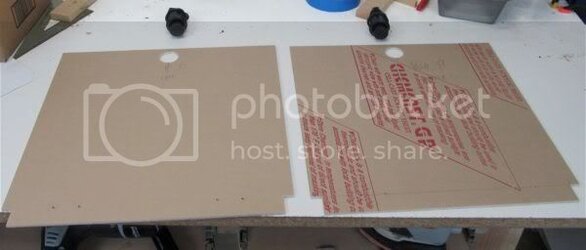
I'm going to cut out the vine and leaf motif in relief, then have a purple backer panel.
At first I thought this would be way too intricate to cut out by hand, so I pursued laser cutting services. But after a bit of practice, I found I could do it. Also thanks to my new awesome Dewalt scrollsaw.
Here was the basic technique I used to cut out the leaves:
First I bisected the leaf, then brought the blade back and started cutting a side diversion:
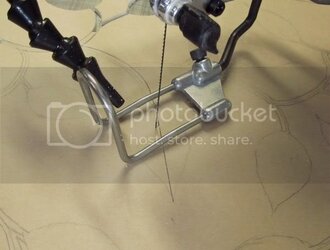
Next I brought this diversion back towards the stem:

Then I continued the cut along the other edge to the leaf point:
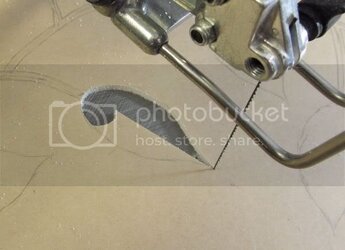
Then I finished the last cut on the other edge:
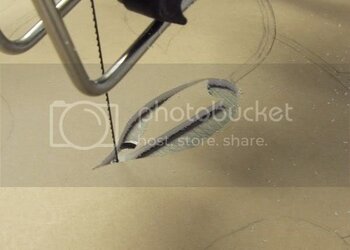
Here I was halfway thru one panel:
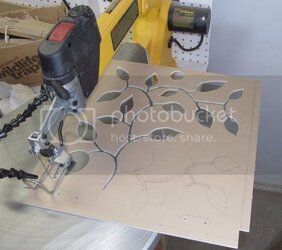
And finished with all my cuts with purple backer:
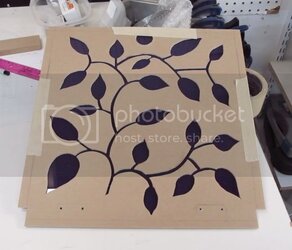
This panel is actually the back panel.
I went ahead and cut the front panel with a very similar pattern:
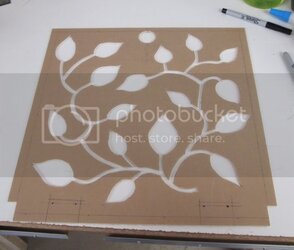
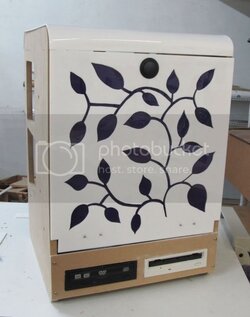
And here it was mounted up:
- Joined
- Apr 29, 2011
- Location
- Anchorage, Alaska
Looks freaking great! I have to say that one of my favorite tools to play with is the scroll saw. Once you get the few techniques down you cut anything if you have patience. Someone also makes a blade for the scroll saw that is rounded so you can move your piece in any direction, versus the standard blade with the teeth in the front
- Joined
- Dec 7, 2003
- Thread Starter
- #24
Might have to get me on those blades....
Next I went ahead and installed the front switches and usb ports.

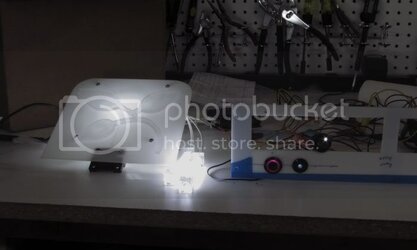
While I was fitting these guys, I went ahead and stuck a shop light behind the front panel.

It had a real nice look to it, almost like some sort of fancy lantern. So I consulted the chief designer (wife) and we decided to go ahead with some internal lighting.
Placement of lighting was going to be a little bit of a challenge. Inside are 2 large items that are going to block lighting:

Tower heatsink position, and video cards in the PCI slots. I'd have to work around these obstructions to try get some even lighting without giant shadow blocks.
I had a set of these CCFLS, which would be my main central lights just below the tower heatsink shadow.

If I left them alone, since they would be fairly close behind the front panel you would see the concentric rings of light.
So I built a light diffuser:

But I couldn't leave such a large panel without some decoration could I?
So I cut out a nice mini vine and leaf motif:

And glued it on for a subtle effect that wouldn't cast shadows:

This diffuser panel was mounted on friction hinges, so it could swing down and still give you access to the PCI slots behind it:

Then I placed 2 4" CCFLs in the corners to fill in light on the sides of the heatsink shadow:

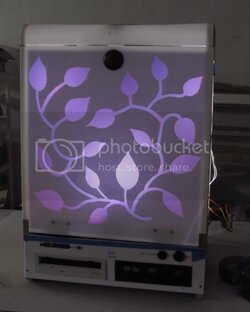
And there you go:

Got a few videos (click pic):
Lighting action:

Accessing the motherboard:

Next I went ahead and installed the front switches and usb ports.
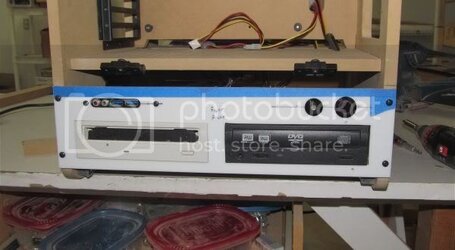
While I was fitting these guys, I went ahead and stuck a shop light behind the front panel.
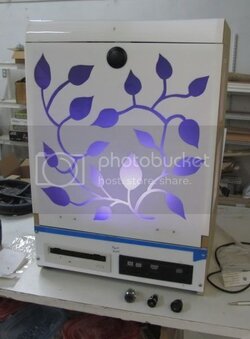
It had a real nice look to it, almost like some sort of fancy lantern. So I consulted the chief designer (wife) and we decided to go ahead with some internal lighting.
Placement of lighting was going to be a little bit of a challenge. Inside are 2 large items that are going to block lighting:
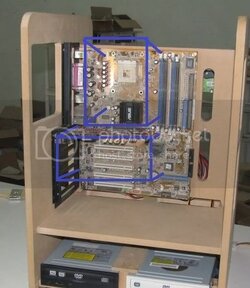
Tower heatsink position, and video cards in the PCI slots. I'd have to work around these obstructions to try get some even lighting without giant shadow blocks.
I had a set of these CCFLS, which would be my main central lights just below the tower heatsink shadow.
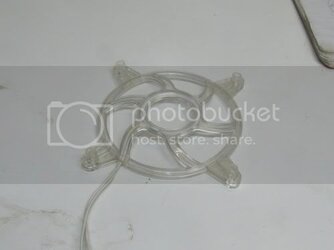
If I left them alone, since they would be fairly close behind the front panel you would see the concentric rings of light.
So I built a light diffuser:
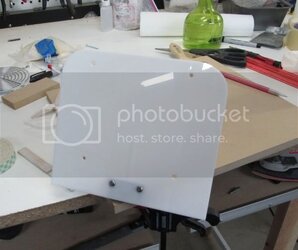
But I couldn't leave such a large panel without some decoration could I?
So I cut out a nice mini vine and leaf motif:

And glued it on for a subtle effect that wouldn't cast shadows:
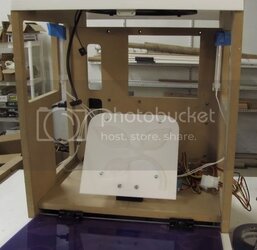
This diffuser panel was mounted on friction hinges, so it could swing down and still give you access to the PCI slots behind it:
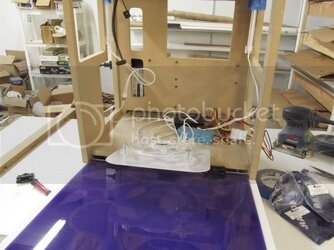
Then I placed 2 4" CCFLs in the corners to fill in light on the sides of the heatsink shadow:
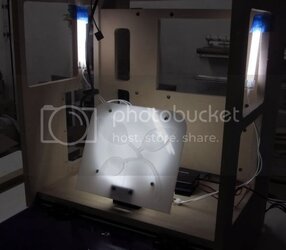
And there you go:
Got a few videos (click pic):
Lighting action:
Accessing the motherboard:
- Joined
- Oct 14, 2007
That's looking great! My wife would like one of these.
Is the wood going to be treated to the insane navig auto-quality paint job?
Is the wood going to be treated to the insane navig auto-quality paint job?
- Joined
- Dec 7, 2003
- Thread Starter
- #26
I'm a little shame-faced to admit it as this is a gift for my wife, but no auto quality paint job.
From the outset this was designed to be an economical build, and also done quickly (to make it for her birthday last week, which I did in fact complete it and I'm trying to catch the posts up for).
So I pulled out a huge trick to finish the exterior. Which I will post on soon.....
From the outset this was designed to be an economical build, and also done quickly (to make it for her birthday last week, which I did in fact complete it and I'm trying to catch the posts up for).
So I pulled out a huge trick to finish the exterior. Which I will post on soon.....
- Joined
- Apr 29, 2011
- Location
- Anchorage, Alaska
That thing looks sweet Navig! Not unlike everything else that you make  I found you a link on the round scroll saw blades, you just have to call and they will tell you nearest distributer http://www.supercutbandsaw.com/roundscrollsawblades.html
 I found you a link on the round scroll saw blades, you just have to call and they will tell you nearest distributer http://www.supercutbandsaw.com/roundscrollsawblades.html
- Joined
- Dec 7, 2003
- Thread Starter
- #28
Thanks--now that I've invested in a quality scrollsaw, best get some decent blades!
A couple of folks have noticed a couple things regarding the exterior of this case:
1) What kind of paint and finish did I plan?
2) How exactly did I plan to mount my fans--because it looks like I just cut some full sized holes in the side panels (very observant)
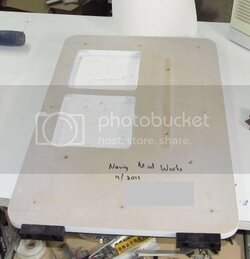
Well, I will mention that my wife wanted a nice glossy black surface, but in the interest of time and economy, I didn't want to do a full auto-finish paint job.
So I cheated a bit:
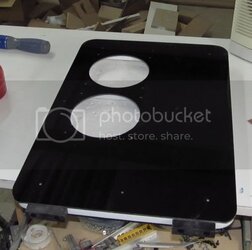
I took some 1/4" thick gloss black plastic panels, and cut them to just slightly larger than the side panels.
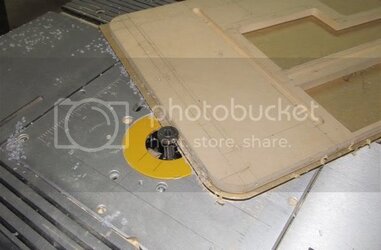
Then, using my router and carefully sized bearings, I trimmed the panels to an exact 3/16" larger profile:

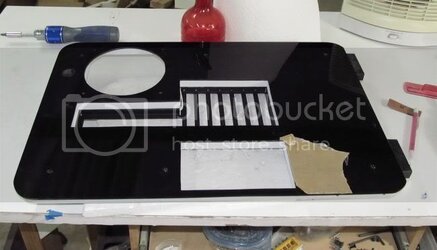
I cut all the necessary holes with my scroll saw:

I cut all the circular fan holes with a hole cutter:

Finally, I trimmed the bottom off so it would be flush with the MDF and sit proper.
Then I simply mounted the plastic surface panel to the exterior of the MDF panels and voila, instant gloss black exterior (once I take off the protection paper):


Why the 3/16" extra lip of the plastic? Remember the front, top, and back will be clad with 1/4" thick panels, so the edges will sit flush with the panels installed, with 1/16" play.
For the interior, I am going to go with a standard flat white paint job.
.
A couple of folks have noticed a couple things regarding the exterior of this case:
1) What kind of paint and finish did I plan?
2) How exactly did I plan to mount my fans--because it looks like I just cut some full sized holes in the side panels (very observant)
Well, I will mention that my wife wanted a nice glossy black surface, but in the interest of time and economy, I didn't want to do a full auto-finish paint job.
So I cheated a bit:
I took some 1/4" thick gloss black plastic panels, and cut them to just slightly larger than the side panels.
Then, using my router and carefully sized bearings, I trimmed the panels to an exact 3/16" larger profile:
I cut all the necessary holes with my scroll saw:
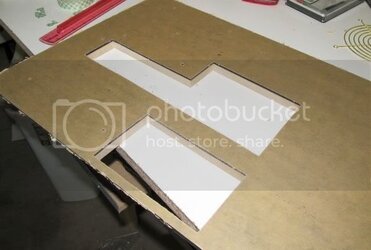
I cut all the circular fan holes with a hole cutter:
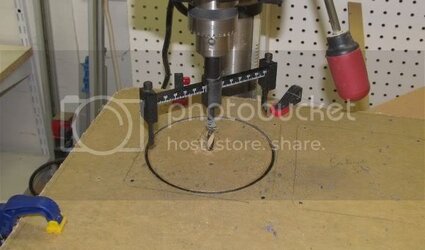
Finally, I trimmed the bottom off so it would be flush with the MDF and sit proper.
Then I simply mounted the plastic surface panel to the exterior of the MDF panels and voila, instant gloss black exterior (once I take off the protection paper):
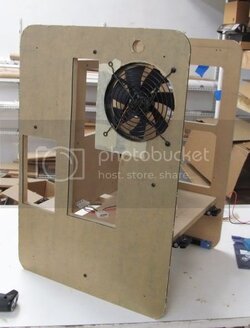
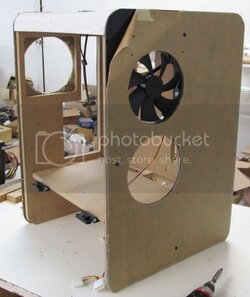
Why the 3/16" extra lip of the plastic? Remember the front, top, and back will be clad with 1/4" thick panels, so the edges will sit flush with the panels installed, with 1/16" play.
For the interior, I am going to go with a standard flat white paint job.
.
- Joined
- Oct 14, 2007
Very inventive and a heck of a lot easier than the auto paint job. 
- Joined
- Dec 7, 2003
- Thread Starter
- #30
I took some time to put together my wiring packaged.
First I hooked everything up and added various resistors to balance the button LEDs:

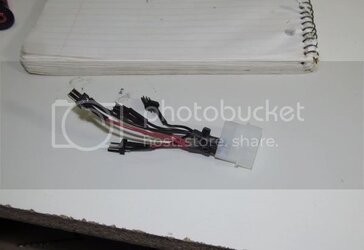
Each of the 4 units that need power (3 lighted switches and 1 CCFL inverter) connect to this 4 headed cabled:

This cable will covert to a panel mounted coaxial plug that I'll mount to the back panel.
At this plug I'll connect a 12v wall adapter. This'll be nice because the LEDs and CCFLs will all operate independent of whether the pc is on.
On to paint....
First I hooked everything up and added various resistors to balance the button LEDs:
Each of the 4 units that need power (3 lighted switches and 1 CCFL inverter) connect to this 4 headed cabled:
This cable will covert to a panel mounted coaxial plug that I'll mount to the back panel.
At this plug I'll connect a 12v wall adapter. This'll be nice because the LEDs and CCFLs will all operate independent of whether the pc is on.
On to paint....
- Joined
- Dec 7, 2003
- Thread Starter
- #31
- Joined
- Dec 7, 2003
- Thread Starter
- #32
Next I started painting all of the rest of the panels and brackets.
First I tackled a problem I've long had with working with MDF. Cut edges of MDF are too absorbent of liquids and so swell and get a funky texture. For example, I've sprayed this edge with a strong coat of gray hi fill primer:

As you can see, its difficult to see that I've primed it at all.
You can work thru this--heavy coats of prime followed by sanding. It takes 3 or 4 coats to get a smooth finish.
This time I decided to try something different:

On these edges, I applied a single coat of Bondo, then sanded it down. I think it works better--faster and better finish.
Panels got 2 coats of gray hi fill prime:

Then 2 coats of white prime:

Finally, 2 coats of top coat matte white:

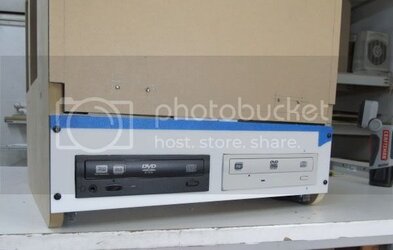
Assembled the 5.25 brackets with their respective components:

(blank--Scythe fan controller--Blu-ray burner--DVD burner)
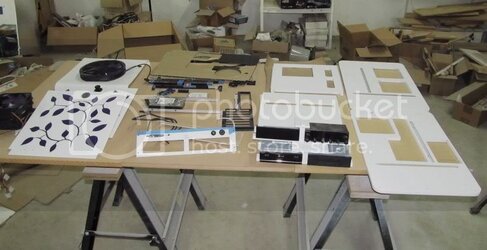
And finally, what I think one of the neatest pictures of this whole project:
I give you Scratch Built Mod on a Table:

First I tackled a problem I've long had with working with MDF. Cut edges of MDF are too absorbent of liquids and so swell and get a funky texture. For example, I've sprayed this edge with a strong coat of gray hi fill primer:

As you can see, its difficult to see that I've primed it at all.
You can work thru this--heavy coats of prime followed by sanding. It takes 3 or 4 coats to get a smooth finish.
This time I decided to try something different:
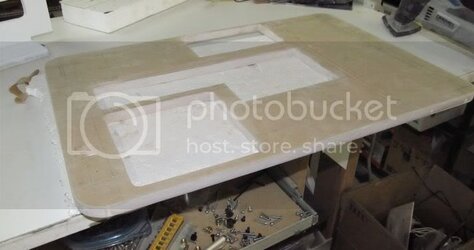
On these edges, I applied a single coat of Bondo, then sanded it down. I think it works better--faster and better finish.
Panels got 2 coats of gray hi fill prime:
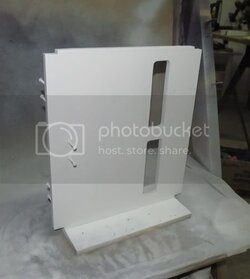
Then 2 coats of white prime:
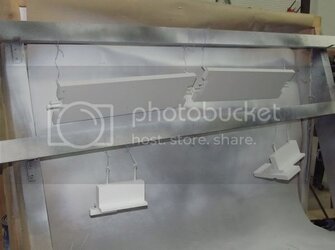
Finally, 2 coats of top coat matte white:
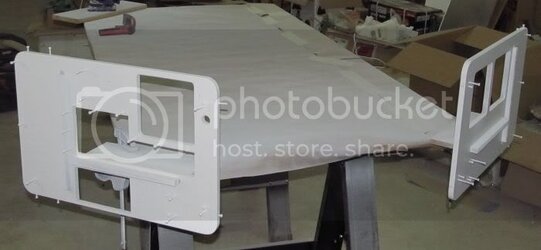
Assembled the 5.25 brackets with their respective components:
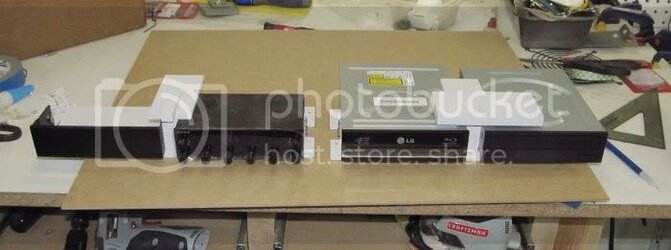
(blank--Scythe fan controller--Blu-ray burner--DVD burner)
And finally, what I think one of the neatest pictures of this whole project:
I give you Scratch Built Mod on a Table:
- Joined
- Dec 7, 2003
- Thread Starter
- #33
- Joined
- Dec 7, 2003
- Thread Starter
- #34
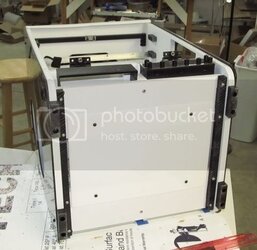
Next I assembled:


Put on the main panels:

At this point I started buttonin’ her up.
I added trim to all the moving panels to fill behind the gaps:

A thin trim piece of white plastic, some clamps, plastic solvent, and capillary action.
Then I put together the wiring:


Installed the 5.25 drives:

Fit a bottom panel:

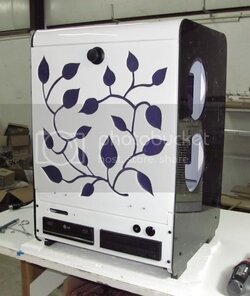
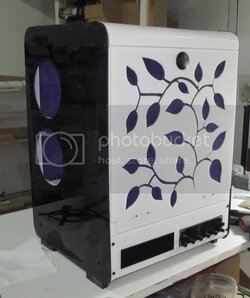
And like that she’s done!


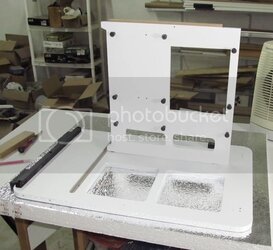
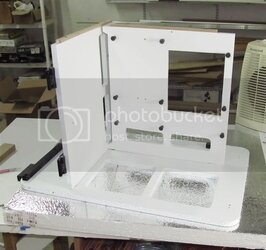
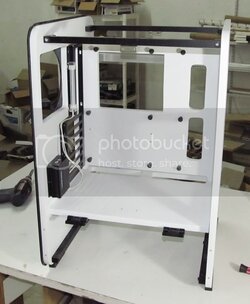
Put on the main panels:
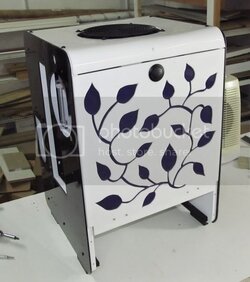
At this point I started buttonin’ her up.
I added trim to all the moving panels to fill behind the gaps:
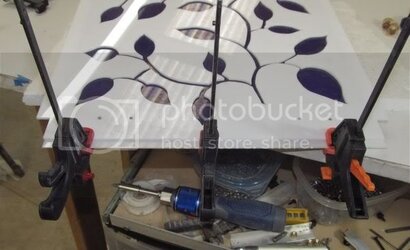
A thin trim piece of white plastic, some clamps, plastic solvent, and capillary action.
Then I put together the wiring:
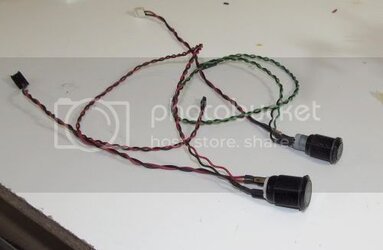
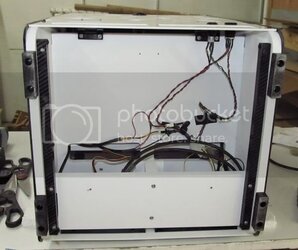
Installed the 5.25 drives:
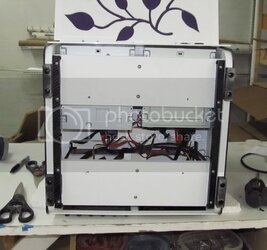
Fit a bottom panel:
And like that she’s done!
- Joined
- Oct 14, 2007
Your wife should be very pleased; it all came together beautifully. Nice work!
- Joined
- Dec 7, 2003
- Thread Starter
- #36
She is!
Also, this bad boy really performs and is whisper quiet.
My posting tho, is not quite done. Here's still coming up:
1) Some more completed pics
2) Mini review of Indigo Xtreme vs Phobya HeGrease vs AS 5. In putting together the hardware for this project, I decided to try to upgrade from the standard Arctic Silver 5 I've been using for years.
3) My "Completed thread". As I usually do when I've finished, I put together a completed thread with a mini recap of the build as well as some nice hi res cleaned up pics. This has been a little delayed because as I've mentioned this is in fact my wife's main system, so I've got to steal it when she's not using it (which is not often) and take some nice photos.
- Joined
- Mar 12, 2002
A+ work as always man. BTW I love the rail saw. I have some nice tools but due to the nature of my work I tend to have mostly the basic tools that I can use in many situations rather than specialised ones like that. Wish I had as much workshop space as you do. My garage is a madhouse, I have to spend half a day reconfiguring all my storage and putting up tarps before I can begin working on my projects.
Well back to the topic at hand, I didnt see those black sidewalls coming they really add some snap to its look IMO.
Well back to the topic at hand, I didnt see those black sidewalls coming they really add some snap to its look IMO.
- Joined
- Dec 7, 2003
- Thread Starter
- #38
As always, performance is a big factor for me, and my wife wanted a nice and quiet system.
Here’s how the airflow works:

That’s 2 14cm fans feeding air right to the cpu and gpus.
With a 14cm side exhaust and a 20cm top exhaust. All speed controlled.
The next step was to put together the pc components for this build:
I7 2500k
Asus Maximus 4 Extreme P67
G.Skill Ripjaws 2x4gb
HIS 6770
Corsair Force GT 120gb SSD
1 Tb WD
DVD burner
Blu-ray burner
Corsair HX 620
Scythe Kaze Master fan controller
Thermalright Ultra Extreme with Yate Loon D12-SL12’s set to 50% in push-pull.
I clocked the i7 2500k to 4.5ghz with the core is set to 1.3v in the bios (1.293v idle, 1.289v load by DMM).
The Antec Big Boy is set to the quietest setting and the Yate Loon 14cm are set to 900 rpms.
Idle temps: 31c
Load temps: 59c
Phobya HeGrease
I put together this system on my test bench to iron out the clock settings and stuff. I also took some time to compare some heatsink compounds to AS5, which I’ve used for years.
Since I was doing this, I decided to record my numbers, and put together a mini review:
AS5, Phobya HeGrease, and Indigo Xtreme: My experience
--> Link <--
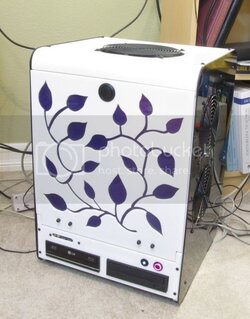
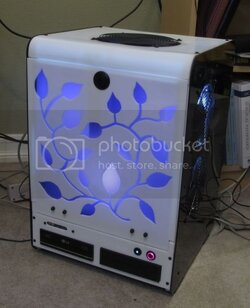
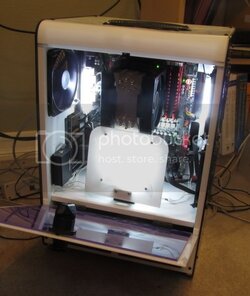
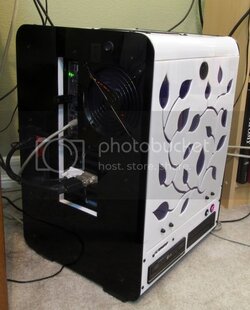
Some semi-final pics.
I mentioned this case was for my wife’s main system. So I had to get it up, together, and running in a bit of a time crunch. And now it’s under constant use.
So I snapped a few completed pics of it in action.
However, as I’ve done for all my projects, I will take some nice hi resolution well lit pics, as soon as a I have opportunity to borrow the case back from her.
Daylight pic:

Semi-lit pic:

Interior front:

I/O side:

Back side:

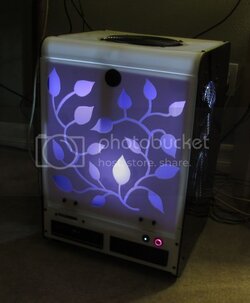
In the dark:

Here’s how the airflow works:
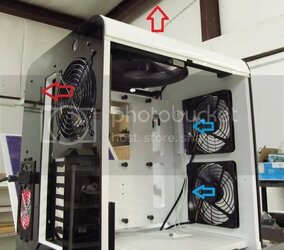
That’s 2 14cm fans feeding air right to the cpu and gpus.
With a 14cm side exhaust and a 20cm top exhaust. All speed controlled.
The next step was to put together the pc components for this build:
I7 2500k
Asus Maximus 4 Extreme P67
G.Skill Ripjaws 2x4gb
HIS 6770
Corsair Force GT 120gb SSD
1 Tb WD
DVD burner
Blu-ray burner
Corsair HX 620
Scythe Kaze Master fan controller
Thermalright Ultra Extreme with Yate Loon D12-SL12’s set to 50% in push-pull.
I clocked the i7 2500k to 4.5ghz with the core is set to 1.3v in the bios (1.293v idle, 1.289v load by DMM).
The Antec Big Boy is set to the quietest setting and the Yate Loon 14cm are set to 900 rpms.
Idle temps: 31c
Load temps: 59c
Phobya HeGrease
I put together this system on my test bench to iron out the clock settings and stuff. I also took some time to compare some heatsink compounds to AS5, which I’ve used for years.
Since I was doing this, I decided to record my numbers, and put together a mini review:
AS5, Phobya HeGrease, and Indigo Xtreme: My experience
--> Link <--
Some semi-final pics.
I mentioned this case was for my wife’s main system. So I had to get it up, together, and running in a bit of a time crunch. And now it’s under constant use.
So I snapped a few completed pics of it in action.
However, as I’ve done for all my projects, I will take some nice hi resolution well lit pics, as soon as a I have opportunity to borrow the case back from her.
Daylight pic:
Semi-lit pic:
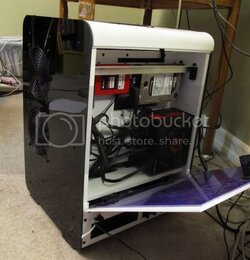
Interior front:
I/O side:
Back side:
In the dark:
- Joined
- Oct 14, 2007
Gorgeous. I sense that your completed thread will make the frontpage again. 

Similar threads
- Replies
- 2
- Views
- 724
