- Joined
- Jun 21, 2002
Before building my current rig (in sig), I was using a Lenovo y50-70 gaming laptop sporting an i7 4720HQ and GTX 960M.
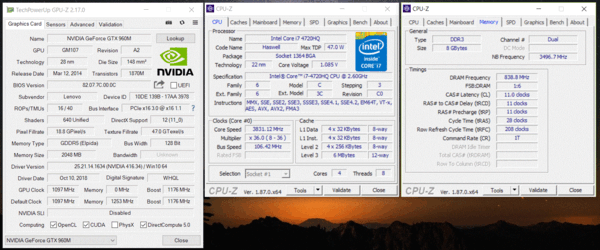
GPU-z and CPU-z for specs
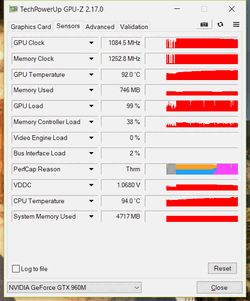
Before cleaning, running Heaven 4.0 Loop max settings, temps for CPU and GPU in the 90s, GPU is thermally throttling as indicated by the clock graph, as well as the purple in the PerfCap graph.
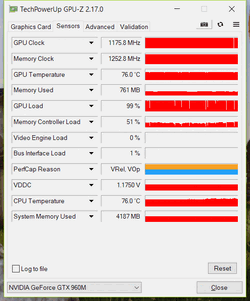
After cleaning and replacing TIM throttling is resolved running Heaven 4.0 loop, max settings. 16C improvement to GPU temps. 18C improvement to CPU temps. Fan noise at both idle and load is also greatly decreased. We will see why CPU temps are so closely related to GPU temps, even at relatively light CPU loads.
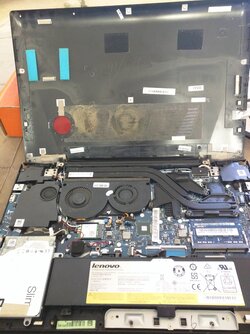
There are no access panels on this laptop, in fact even the battery is not removable from outside the chassis. 12 small screws hold the base on, and once removed everything is readily accessible. You can see that the fabric dust filter appears to have done it's job. There is not a lot of dust in the cooler or the laptop, however the filter itself is very clogged. I actually had to use the sprayer in the sink, because canned air didn't budge the dust. Two blowers draw cool air in through the bottom and blow them out through the copper fins attached to the shared GPU/CPU heatpipe cooler. The GPU has a heatpipe to itself, and also shares one with the CPU. The GDDR and VRMs for both GPU and CPU also contact the cooler, although they are cooled by aluminum plates rather than the heatpipes themselves.
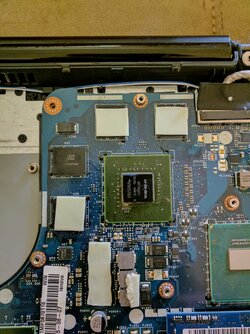
I wish I'd thought to obtain replacement thermal pads, since a couple tore when I removed the cooler. I had to be careful not to overlap the torn ones when replacing the cooler. They are 1mm thick, but I wouldn't have known that. I also failed to get a picture of the cooler once it was removed. Here is a picture of the GPU with GDDR and VRM surrounding. Strange that some of the SMT's are mounted at an odd angle on the package PCB. I didn't work too hard to get the old TIM out of them, because I didn't want to damage them.
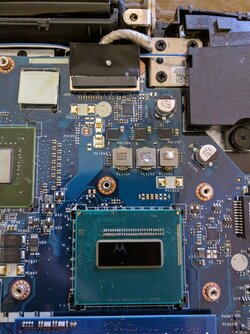
Picture of the CPU die and VRM. Bare naked Haswell. Motorola logo is a reflection of my phone.
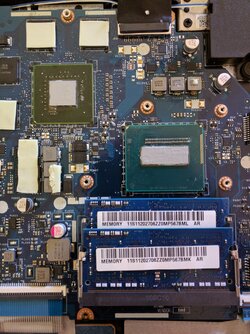
TIM applied. Since these are bare dies (no IHS), I decided to use the preferred technique from back when I was building socket A machines, and spread a thin layer of TIM onto the die with a credit card. I first tried to apply the Thermal Grizzly Hydronaut that shipped with my CPU block, however I found it very thick, and I was unable to spread it. I didn't trust the rather light springs on the cooler to distribute it properly. Next I tried the EK-TIM Ectotherm that shipped with my GPU block. I hoped this would work better as it was also designed for direct die application. It was almost runny, and I felt like I was able to get a nice thin layer on both dies. Due to the VRMs getting in the way, and my credit card having a slight bend, the application wasn't as even as I would have preferred.
.
Just wanted to share due to the massive improvement in temps. Plus I figured everyone loves to see naked dies.
Last edited:
