Modifying the Photon to gain extra flexibility................
How would you like to use the reservoir with multiple fill ports at the top? Or would you like to improve the reservoirs bleeding performance?
Below is a modification that I carried out to one of my Photons - It is very easy to do and does not cost much and it provides the user with a much more flexible reservoir in terms of usage/performance...
I had an idea pop into my head the other day when I was fiddling around with my water cooling gear. I ended up purchasing a Bitspower component that is probably not in huge demand but thought that it could prove worthwhile for our XSPC Photon stand-alone reservoirs.
The part in question is a Bitspower 'Aquapipe-1' http://www.bitspower.com/html/product/pro_show.aspx?num=81092144&kind2=52
The following mod could even be performed with the slightly different Bitspower 'Aquapipe-2' - In this case the pipe would be screwed in from outside the res rather than from the inside once the internal baffle has had a keyway cut to make clearance for the pipe. http://www.bitspower.com/html/product/pro_show.aspx?num=81092145&kind2=52
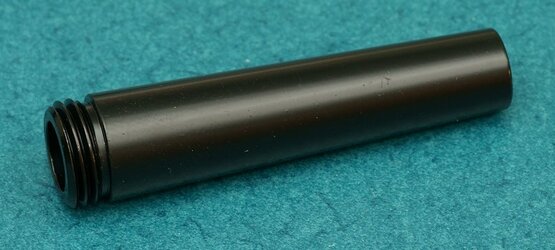
So here is the part that I purchased - the Bitspower Aquapipe-1
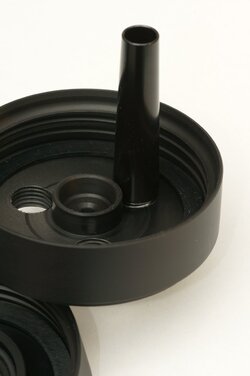
As you can see it is simply a short length of hollow pipe [outside diameter is slightly tapered] with a G1/4 thread at one end.
One of the limitations of the Photon is that users cannot easily use this res if they would like an inlet at the top. While you can certainly use the existing M20 threaded opening as an input via an adaptor - the reservoir does not feature a pipe at the top which is permanently submerged in fluid when in use. This leads to problems when bleeding or switching your system off as air can travel back into the inlet tubing.
The majority of other reservoirs usually feature a pipe which drops into the res from above so that the top inlet into the reservoir is effectively kept below the coolant level in the res to prevent this back-feed of air issue.
Another minor issue with the Photon is that its normal inlet and outlet ports at the bottom are positioned very close to each other. So when bleeding, some of the inlet water is directed straight to the outlet which means that it effectively takes much longer to bleed a system due to air bubbles in the coolant that can simply be drawn into the outlet rather than dissipating upwards into the reservoir. It is not a major issue as it eventually bleeds fine but my modification improves the bleeding cycle time simply because the inlet is now positioned higher up into the main section of the res and prevents incoming coolant flow from being directed directly back out through the adjacent outlet.
OK - First thing you will need to do is to disassemble your Photon - refer to my other thread on this forum which has info and photos and how to do this. http://www.overclockers.com/forums/showthread.php/758561-Dis-assembling-a-XSPC-Photon-Reservoir
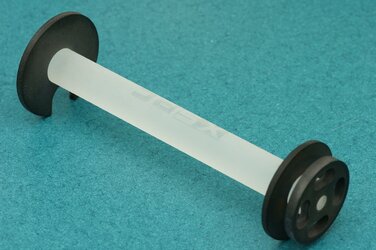
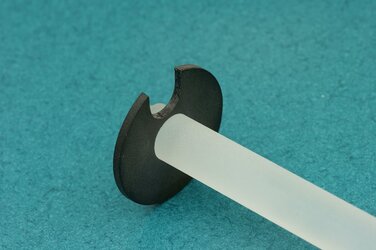
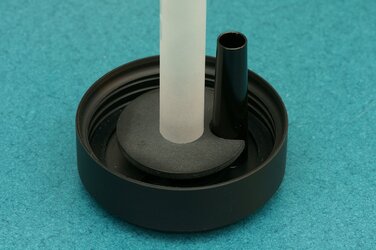
Once apart we need to modify the coolant anti-vortex plate that is normally what we would call the bottom of the res. We need to carefully file (or in my case use a Dremel and grinding stone) a small 'U' shaped clearance in the anti-vortex disc so that the Bitspower Aquapipe can pass through the plate.
Before you start filing or grinding the plastic disc, take note where the XSPC logo is situated on the clear perspex rod as you cannot rotate the rod independent of the Aquapipe. In my case I wanted the Bitspower Aquapipe to be positioned directly behind the XSPC logo so I 'Dremeled' the cutout on the opposite side of the logo ie. behind it.
Note that it seems as if the anti-vortex discs are glued onto the perspex rod so I would not try to remove or rotate them in any way as you may damage them or the rod.
Closer view:
To obtain the correct cutout shape/clearance I simply screwed in the Bitspower Aquapipe to one of the three Photon 'bottom' ports - any one of the ports can be used as they are all effectively the same. Be careful not to cross thread the port...!
Tip: DO NOT screw the Aquapipe all the way in as the thread depth on the res's cap is not all that deep and we need to allow for your fittings to seal on the outside. It is quite safe to only screw the Bitspower Aquapipe in only one or two turns as you will find it threads reasonably tightly and there is absolutely no need to go further.
You can do what I did in that I first screwed in a spare fitting all the way home and then screwed in the Bitspower Aquapipe on to the other side of the port until it would stop - this pretty much positions it perfectly.
Once the Bitspower Aquapipe is fitted you can trial fit the centre acrylic rod assembly and measure/ trim the clearance hole etc as needed to just clear the Aquapipe.
Once you are happy with your clearance cutout - we can then go-ahead and re-assemble the res.
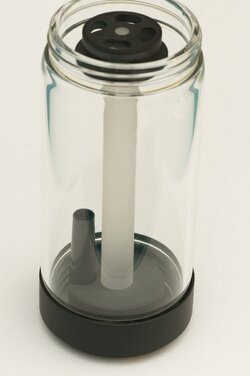
To re-assemble we need to first mount the bottom end cap on FIRST. A bit of silicone on the O-Rings helps - Just screw the glass cylinder on to the end cap and tighten.
Push down and centre the acrylic rod as best as you can and carefully screw on the top end cap and tighten. Ensure that you have not left out any of the O-Rings....
If you get stuck refer to my dis-assembly photos in my earlier thread which highlights all the O-Rings etc. http://www.overclockers.com/forums/showthread.php/758561-Dis-assembling-a-XSPC-Photon-Reservoir
OK - so now what?
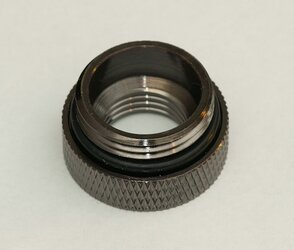
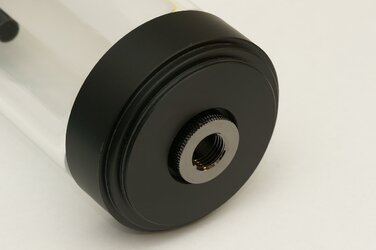
The standard M20 threaded top port can be converted to a standard G1/4 threaded port simply by purchasing an adaptor - these are reasonably commonly available - XSPC specifically make one for these reservoirs.
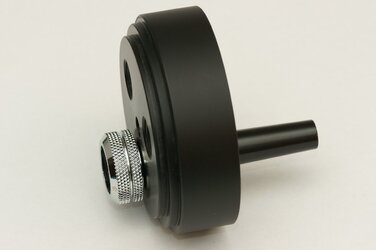
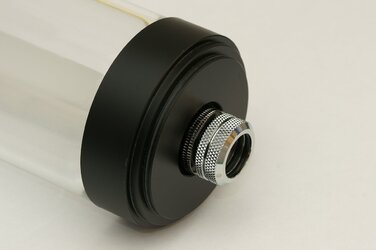
Top port kitted out with Bitspower 16mm Hardline compression fitting.
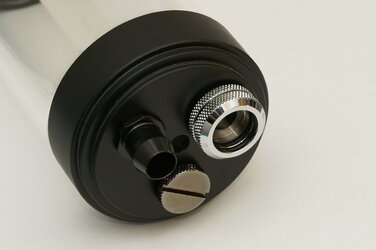
Bottom three ports fitted with a variety of fittings - just for the photoshoot:
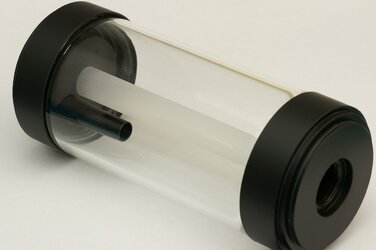
We can now effectively flip the reservoir and use the three ports above as our TOP ports - One for bleeding/filling port, another for your loop and one spare or for whatever combo you require... :thumb:
The single M20 port via the M20<>G1/4 adaptor can now be effectively be utilised as our BOTTOM port.
Just ensure that you fill the res so that the Bitspower Aquapipe outlet is submerged in your coolant and away you go...!
Here is my modified res undergoing a quick pressure test before being placed into service...!
Hope some of you find the modification handy to your needs................

Last edited:
