OP
- Joined
- Jul 19, 2002
- Location
- WPAFB, OH
- Thread Starter
- #21
Progress Update:
Last Updated on: 06-27-07 23:09 PM
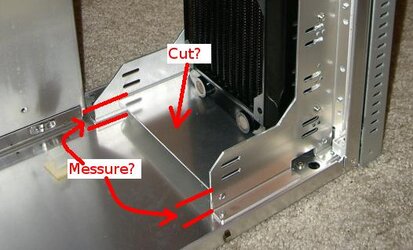
HDD Cage (Cont) - I then turned my attention to the actual HDD rack. I first removed the fan and hardware and marked up a rough idea of the cuts. First removing the fan bracket, then some excess material at the sides. Then I lopped the top off as I will only need room for two disks in the computer. I separated the parts by taking out the pop rivets (one was loose anyways). I will reattached them after paint. After some further cuts and finishing sanding I have three pieces for the HDD rack, which we will revisit later.

Last Updated on: 06-27-07 23:09 PM
HDD Cage (Cont) - I then turned my attention to the actual HDD rack. I first removed the fan and hardware and marked up a rough idea of the cuts. First removing the fan bracket, then some excess material at the sides. Then I lopped the top off as I will only need room for two disks in the computer. I separated the parts by taking out the pop rivets (one was loose anyways). I will reattached them after paint. After some further cuts and finishing sanding I have three pieces for the HDD rack, which we will revisit later.