• Welcome to Overclockers Forums! Join us to reply in threads, receive reduced ads, and to customize your site experience!

[BUILD LOG] Water Box Inferno

Overclockers is supported by our readers. When you click a link to make a purchase, we may earn a commission. Learn More.
I wouldn't question quality of an EK+Asus partnership!

Never assume any components are 100% OK which involve seals that can possibly leak and that have the ability to cause $$$ worth of damage in an instant.


Pull the VRM block off (top only - black screws) and verify that the o-ring is seated correctly.

It may have simply popped out of its seat and then squashed during the assembly phase.

I have been using a Formula VIII board for over a year now with a similar setup as the VII and the VRM block is still working OK under fluid - You probably were just unlucky and received the dreaded 'one-off' faulty unit.

Lucky that it did not cause any permanent damage.

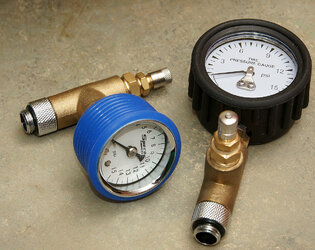
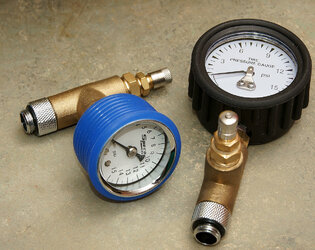
In the future think about possibly assembling an air pressure tester such as the ones below that I knocked up. You simply screw one of these into an open G1/4" port and seal the rest of the loop. You then pump the loop up to around 10 PSI (with a bike pump) and monitor for a short while (30 mins to an hour or so is plenty with this setup). Any major/minor leaks will show up us a drop in air pressure on the gauge.

Easy as to test before you fill a loop up with no danger of coolant leaking over electronics...!

DcG0qd.jpg
 
Last edited:
Never assume any components are 100% OK which involve seals that can possibly leak and that have the ability to cause $$$ worth of damage in an instant.


Pull the VRM block off (top only - black screws) and verify that the o-ring is seated correctly.

It may have simply popped out of its seat and then squashed during the assembly phase.

I have been using a Formula VIII board for over a year now with a similar setup as the VII and the VRM block is still working OK under fluid - You probably were just unlucky and received the dreaded 'one-off' faulty unit.

Lucky that it did not cause any permanent damage.

In the future think about possibly assembling an air pressure tester such as the ones below that I knocked up. You simply screw one of these into an open G1/4" port and seal the rest of the loop. You then pump the loop up to around 10 PSI (with a bike pump) and monitor for a short while (30 mins to an hour or so is plenty with this setup). Any major/minor leaks will show up us a drop in air pressure on the gauge.

Easy as to test before you fill a loop up with no danger of coolant leaking over electronics...!


DcG0qd.jpg

Yes Flat you are right. I should have never assumed that everything is fine.
But, we keep learning and these experiments have so many variables that we have to assume risks at some level.
After all we are trying to cool things using liquid. Something will eventually happen.

Here is what I found out when I removed the block:

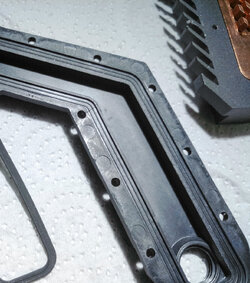
1. I believe the lid of the block is made of ABS, or some sort of plastic. It does have some injection marks. There was some burr on the inside of lid. Part of it was between the seal and the lid.
2. At a closer inspection I found a crack on the lid. Look:
IMG_20170711_141622.jpg

I know I could, but I won't try to fix it, I don't want to glue this crack, nor try to guess if the burr I saw hurt the rubber seal permenently or not.
This lid seems warped. I let it lye on a glass and it doesn't touch the glass completely on all its countour.
I presume the VRM heat dried up the material and made it brittle, I saw ABS fittings getting brittle just like that in my car.
And it is all ok, It is time to call time of death for this block.

I may research for VRM blocks online or have one of those all in one... will see.
For now, to allow me to move on with this, I will bypass cooling the VRM.

Thank you for the suggestions and this gauges are a very good idea!
I will try to get my hands on one of them.

Cheers!
M

EDIT: I meant a monoblock instead of "all in one"
 
Last edited:
You need to run a 24 hr leak test with everything powered off and disconnected, not 30 mins to see if there are any actual leaks. We echo that information all the time. Also, DON'T go powering your components after "drying" up a leak, especially if you were lucky enough to not fry anything prior. You're just really pushing your luck. You NEED to give them several days of drying, especially when your socket was turned into a pond.

I hope there's no permanent damage and everything runs fine in the long run.

Not trying to be rough on you during these tough situations but its obvious you've missed the key basic steps for beginners to watercooling. Becareful and use extra caution. Take your time, it's not a race.

Nonetheless, keep us up to speed.

JB, I completely understand from where you are coming from.
Although, I have some comments on what you just said up there.

Not even 36 hours of leak test would have prevented this of happening.
It happened under the cover, in a pre-existent block under conditions that just heat from the VRMs would create, nothing that I had assembled actually leaked or faulted.

There are several approaches on Quality Assurance, two of them could be described as brute force: when you test for everything exhaustively with no specific aim, because you don't know (or can't know) what you are looking for.
Other is smart testing, that's when you play specific test scenarios to stress the situation and force the system to break. It includes limits testing - within and outside, black box testing, etc...

The 24 hours leak test (hail to whom came up with that number) is brute force and it is useful!
It will test your pipes, fittings and blocks under a unrealistic scenario - water is running but computer not, so what was supposed to heat up, won't, and what was supposed to be cooling the system down will remain at ambient temp.

It is crucial that we understand the limitations and applicability of each testing technique.
But it is also useful to apply to right technique to the right scenario.
Otherwise we are turning the hobby into religion when you just apply something because you were told to, not because it makes sense.

So, I do not believe a 24 hours leak test would have captured what happened here.
This was just found because I applied a stress test, elevating the temperature of the VRM's and enlarging the crack of the block with that.

Risky? hell yeah! I could have damaged my MOBO and my CPU and lose about what? $1.5k (here in Brazil it would cost me about $3k) and a lot of time.
But we freaking cool down things using liquid, there is an intrinsic risk to that that we cannot mitigate, no matter how long or how smart we test.

I like your interventions and thanks for following the build log, these are all good discussions.


Cheers!
M
 
Hey guys,
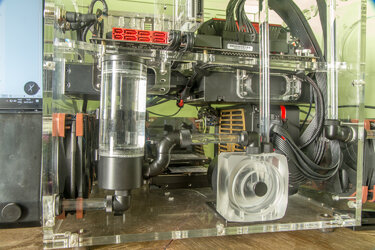
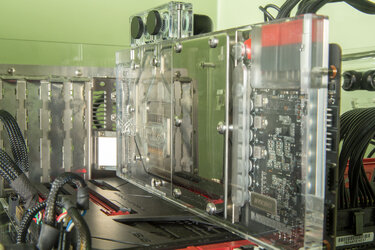
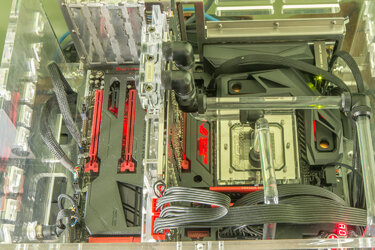
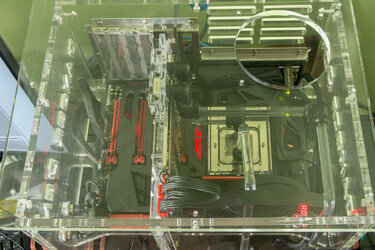
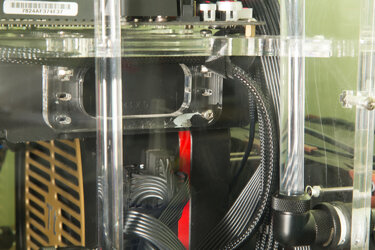
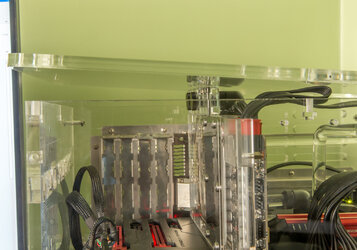
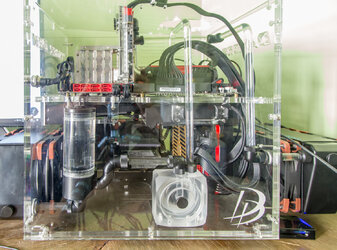
Here is where I am at:
IMG_7965.jpg
IMG_7960.jpg
IMG_7957.jpg
IMG_7956.jpg
IMG_7954.jpg
IMG_7952.jpg
IMG_7951.jpg

Some missing things to call it done:

1. Need to sleeve MOBO and PCI Express cables.
I ran out of sleeves, need to order - it will take some time to arrive.
2. Need to cut a window on the case lid for the GPU water block.
I knew that would happen I just had to know the exact placement before cutting anything.
It would be possible to add "stripes" of acrylic and make the sides taller, so the lid would sit higher than originally is, but to find the same material and match the holes and screws etc... just seems it will look better if I cut a rectangular hole on the lid to accomodate the tallest part of the water block
I was thinking on putting something there to cover and prevent dust from coming in the case, but not sure if I will find the right ornament, it is the water box inferno so, if I could just find the right thing...
3. VRM water block
Yeah, I got tipped off by that crack on the vrm water block. I can't find a replacement and I may try to fix it later... will see.

Just by looking at the picture I realize that I should fix the long left tube that goes into the processor wb to match the height of the one in the right.

I am ok with the looks so far, even though it may seem still a little messy, hopefully with the cables sleeved it will get better.
In fact I had to remove and reassemble so many times that I don't feel like I was careful enough to hide and tuck the cable properly in the last time.

I am really, really, really impressed with my temps. I mean, really, really, really... yeah you got it.

This is based on 4790k haswell, which has been known to have very high temps.
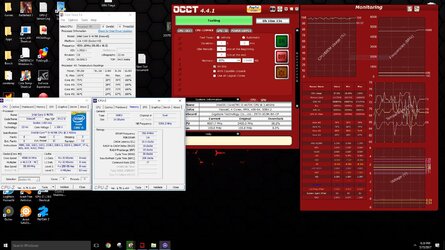
During stress test @4.6Ghz and cache @44x I got 60ºC.
Actually, before this mod I couldn't even run the Aida 64 with FPU test @ stock speed without thermal throttling.

So, I am happy with it!
It is really quiet, I created my fan profiles so the rad on the right side would turn on @ 40º.
At 50º the rad on the back would turn on and then at 60º the rad on the left would turn on, but that last one just happens sporadically and for a very short time during normal usage.

I let you know when I am fully done. Any comments and thoughts are appreciated.

Cheers!
M
 
Very nice work and it suck that you had a leak but im glad everything survived .
What are your room temps ? and what voltage @ 4.6 ?
if you ever want a comparison to a similar chip disable ht and lmk the voltages you are using I will recreate . But those temps look mighty fine to me .
 
Very nice work and it suck that you had a leak but im glad everything survived .
What are your room temps ? and what voltage @ 4.6 ?
if you ever want a comparison to a similar chip disable ht and lmk the voltages you are using I will recreate . But those temps look mighty fine to me .

Thanks man, yes it sucked but whatever, it is part of the hobby.

I turned off HT.
Room temp is 25ºC
Coolant temp is 26ºC
CoreV 1.351v (max)
CPU 4.59Ghz
Max individual core temp 73ºC avg 55ºC

M
 
what stresstest ? aida , p95 (what ver)


your temps look mighty fine my room is much cooler than yours (20) and my temps are higher . Your extra rads and better fans are working .

test.JPG
 
Last edited:
what stresstest ? aida , p95 (what ver)


your temps look mighty fine my room is much cooler than yours (20) and my temps are higher . Your extra rads and better fans are working .

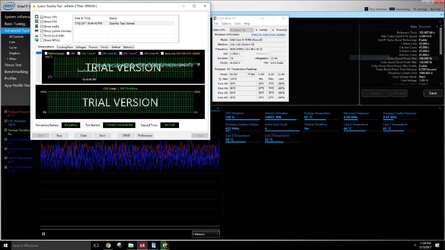
I use Aida64 stress test with RAM, CPU, FPU and cache tests I let it ran for half an hour today.
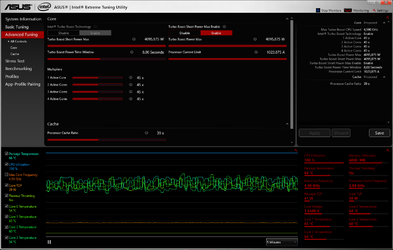
I monitor with Intel Extreme Tuning Utility.

The base clock was set to 102 and the CPU multiplier to 45 on all cores.

I do believe the rads and fans are doing a good job, especially because the delta between the coolant temp and the room temp never goes over 2 degrees.
Bottleneck is where it uses to be, the waterblock heat transfer.

Imagem sem título.png
 
Back