- Joined
- Apr 29, 2010
- Location
- Central FL
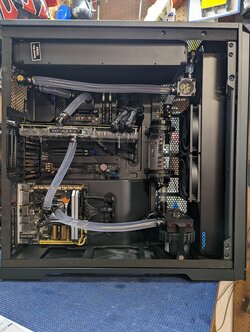
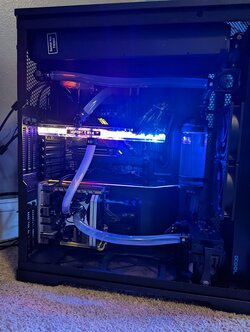
After about 6 months or so of air cooling I've decided to go back to water cooling. Now that I am back at the office I will be using the system mainly for gaming and play but still want a work pc without making a whole separate computer and buying more monitors. Plus I have most of the parts needed from when I disassembled my last build so I figure why not. I bought a new Phanteks Enthoo Pro 2 because most of my cases are older and really won't fit both systems and the loop. I've been kicking around trying a build like this for a while but never could find a case that would fit it all the way I wanted until I saw this one.
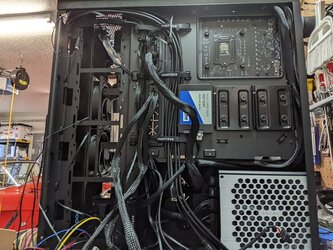
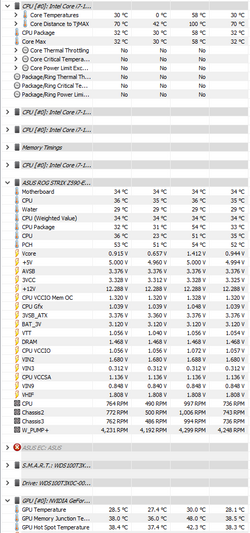
My plan is to use my current system (Intel i7 11700K, ASUS Strix Z590-E, Team Group Dark Z FPS PC4000 16,18,18, 38, eVGA RTX 3080 FTW3 Ultra) as my main with a smaller ITX build consisting of the leftover parts I used to build my work at home pc during lockdown (Intel 4690k, Corsair Dominators PC2100, on chip GPU) as my work computer. The work stuff is old but is basically just a thin client used to remote in so doesn't need to be much. Then cram it all into the same case and cool it with one big loop. Due to time and money constraints the build may drag on but here goes nothing.
First a pic of the case. This thing is amazing! Purpose built to hold two systems, water cooling and a ton of radiator space I'm not sure it is designed to fit all the radiator I plan to cram into it but with a couple tweaks I think it will fit well. After playing with it for a while I like it even more. 480 radiator space up front, 360 up top and room for another 360 on the bottom without the second system. As usual Phanteks includes everything and then some with the case. A complete extra set of screws in a nice little case, magnetic dust covers, all the drive cages I could ever need but not installed in the case so I don't have to waste time removing them, wonderful wire management choices and a nice clean look to top it off. It even includes a precut drain port hole in the front which is a nice touch. This is my third Phanteks case and all have met my needs perfectly. My only complaint with this one so far is all the plastic pieces. I don't mind plastic but my older Phanteks cases at least had aluminum covering the plastic on the outside where this has a brushed plastic look.

I guess a good thing about all the plastic is pretty much every piece can be removed down to the bare metal cage where metal pieces would most likely need cutting. For example the front cover didn't fit with all the fans I want for this build so instead of cutting up the front I was able to pop out the dust cover and the mesh backing piece to add enough space. On the other hand, if it was aluminum it wouldn't need to be so thick. I can live with it though.
The case is designed to have all the fans inside the case with the radiator but after fitting the radiators where I want them this isn't possible so I moved the intake fans to outside of the front of the case. this is why I had to remove all the front backing. It leaves the mesh guard to move freely but once the front is snapped into place the fans keep just enough pressure on it to keep it in place while not interfering with the fan movement. Here is a pic when I was test fitting the front over the new fan location.

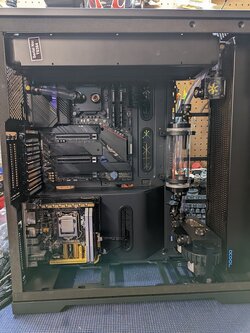
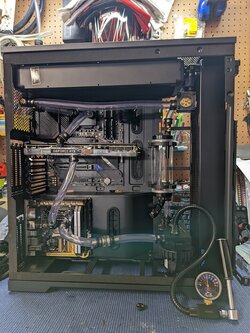
Again, the case is designed for the fans to be inside so I can't put a fan in the top spot with the 480 radiator but I'll offset that a little with some push/pull on the other slots. Pic of the inside with the 480 radiator in place. You can also see where the mini itx system is mounted and the rough pump location.

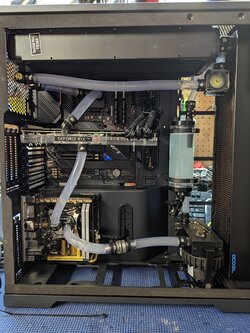
As you can see the radiator goes from top to bottom but fits well. I would prefer to remove the bottom radiator mount to give me a little more room but that will make mounting the pumps harder because it will leave bare mesh down there. Now starts the cramming when I test fit the 360 rad on the top.

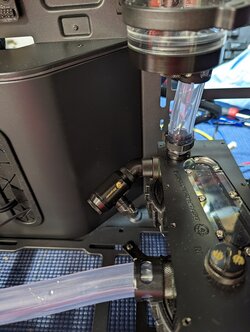
For the first time in any water cooling build I am going to use 90* turns but they just can't be avoided. Also had to create some more fan holes in the top to mount the rad a little farther back in the case but the included dust shroud covers those fine. It also makes it impossible to mount the rear exhaust fan inside so I am moving it outside with a finger guard. From this angle the radiators look a little closer than they really are but I should be able to get my 90* fittings in there pretty easy. This also shows about where I am going to put the reservoir.
Here is the PSU that makes all this possible and what finally nudged me to do the build. Phanteks/Seasonic 1200w dual system PSU. Its a pretty neat setup with cables for both systems in one PSU.

My plan is to use my current system (Intel i7 11700K, ASUS Strix Z590-E, Team Group Dark Z FPS PC4000 16,18,18, 38, eVGA RTX 3080 FTW3 Ultra) as my main with a smaller ITX build consisting of the leftover parts I used to build my work at home pc during lockdown (Intel 4690k, Corsair Dominators PC2100, on chip GPU) as my work computer. The work stuff is old but is basically just a thin client used to remote in so doesn't need to be much. Then cram it all into the same case and cool it with one big loop. Due to time and money constraints the build may drag on but here goes nothing.
First a pic of the case. This thing is amazing! Purpose built to hold two systems, water cooling and a ton of radiator space I'm not sure it is designed to fit all the radiator I plan to cram into it but with a couple tweaks I think it will fit well. After playing with it for a while I like it even more. 480 radiator space up front, 360 up top and room for another 360 on the bottom without the second system. As usual Phanteks includes everything and then some with the case. A complete extra set of screws in a nice little case, magnetic dust covers, all the drive cages I could ever need but not installed in the case so I don't have to waste time removing them, wonderful wire management choices and a nice clean look to top it off. It even includes a precut drain port hole in the front which is a nice touch. This is my third Phanteks case and all have met my needs perfectly. My only complaint with this one so far is all the plastic pieces. I don't mind plastic but my older Phanteks cases at least had aluminum covering the plastic on the outside where this has a brushed plastic look.
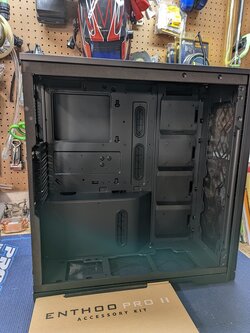
I guess a good thing about all the plastic is pretty much every piece can be removed down to the bare metal cage where metal pieces would most likely need cutting. For example the front cover didn't fit with all the fans I want for this build so instead of cutting up the front I was able to pop out the dust cover and the mesh backing piece to add enough space. On the other hand, if it was aluminum it wouldn't need to be so thick. I can live with it though.
The case is designed to have all the fans inside the case with the radiator but after fitting the radiators where I want them this isn't possible so I moved the intake fans to outside of the front of the case. this is why I had to remove all the front backing. It leaves the mesh guard to move freely but once the front is snapped into place the fans keep just enough pressure on it to keep it in place while not interfering with the fan movement. Here is a pic when I was test fitting the front over the new fan location.
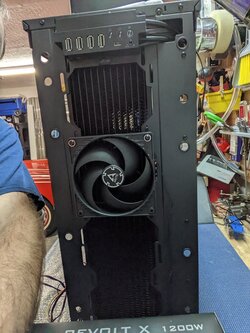
Again, the case is designed for the fans to be inside so I can't put a fan in the top spot with the 480 radiator but I'll offset that a little with some push/pull on the other slots. Pic of the inside with the 480 radiator in place. You can also see where the mini itx system is mounted and the rough pump location.
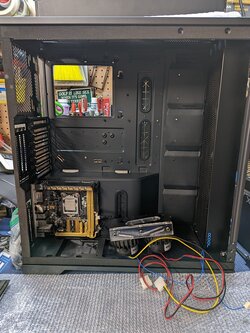
As you can see the radiator goes from top to bottom but fits well. I would prefer to remove the bottom radiator mount to give me a little more room but that will make mounting the pumps harder because it will leave bare mesh down there. Now starts the cramming when I test fit the 360 rad on the top.
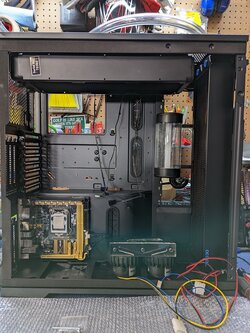
For the first time in any water cooling build I am going to use 90* turns but they just can't be avoided. Also had to create some more fan holes in the top to mount the rad a little farther back in the case but the included dust shroud covers those fine. It also makes it impossible to mount the rear exhaust fan inside so I am moving it outside with a finger guard. From this angle the radiators look a little closer than they really are but I should be able to get my 90* fittings in there pretty easy. This also shows about where I am going to put the reservoir.
Post magically merged:
Here is the PSU that makes all this possible and what finally nudged me to do the build. Phanteks/Seasonic 1200w dual system PSU. Its a pretty neat setup with cables for both systems in one PSU.
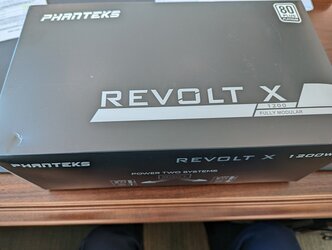
Last edited:
