THE FOLLOWING IS A GUIDE. I AM NOT RESPONSIBLE FOR ANY DAMAGES, INCLUDING BUT NOT LIMITED TO A DEAD COMPUTER, YOUR CASE, CAR, CAT OR GIRLFRIEND CATCHING FIRE. SHOULD ONLY BE ATTEMPTED BY SOMEONE WHO KNOWS WHAT THEY ARE DOING!
Well hello there, if your reading this then you must have some interest in what it is I'm about to do. For starters I must warn you that if your offended by words such as "*** or hell" then you should probably leave.
  No that, that is over with let me introduce myself. My name is Nathan. I have been into computers since the age of 10, I am now 20. I tinker a little bit in cars and in engineering. I was unfortunate for buying my current kit, the Big Water 735 which included a decent water block, a half *** radiator and a good for nothing pump, when I started overclocking @ 3ghz my load temp was 77 (shut it off before it could get any higher). So in the past few days I was replacing the heater core on my 1995 Camaro (how much more American can I get?) and got to thinking about mounting one up in my case. Many people before me have used a GM's Bonneville, which is about the right size for a 120mm fan. Well If you're like me and you have 240mm fan somewhere in your case, you'd probable like to take advantage of it. So that where this tutorial begins, I'm going to show you everything you will need to make a nice, good looking radiator.
Step one: Needed materials.
* 74 Chevy Blazor heater core (any motor, make sure its copper)
* 3/4 nut
* 3/8 x 3/8 female barb adapter
* 3/8 x 3/8 male barb adapter
Step two: Needed tools
* Propane torch with solder
* 3/8 Rachet w/ extention
* 3/4 Socket
* Dremel with Cut off wheels
* Thermal pace
* Chanel locks
* Vice
* File
*** OPTIONAL***
* RTV (Rubber Silicone)
* Motor oil (small amount)
* Garage with Chevy cars in it (I have two)
* Some music (All that Remains and Avenged Sevenfold for me)


Make sure you have a clean work bench to start with because I promise it's going to get messy.
To start with lets make a two cut lines about 1-2 inches from the base. The farther from the base the better. I'd recommend a dremel with cutting wheels as they offer control vs a hack saw. Plus you need to be very careful when it comes to force on those lines.

Once they are cut file down the edges, make sure it looks nice and clean. There is also a tool I used (has a drill looking head used for filing the inside of a tube) which you should also use but an over sized drill should do the job.
Before:

After:

Now for the hard part, take the female 3/8 barb and lube it with some oil. This will make it a bit easier for threading it onto the 3/8 inch pipe.

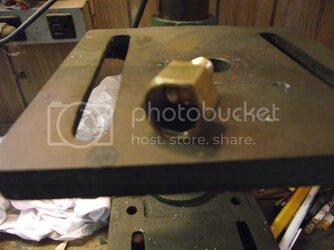
Now screw it on. I promise this will be a huge pain in the ***. My advice is to use plenty of oil and force. Use the 3/4 inch socket and ratchet to apply force as you turn. MAKE SURE YOU HAVE SUPPORT UNDER THE INPUT TUBE OR YOU WILL BREAK IT! The solder holding the input pipe is easily bendable and you want to make sure it moves as little as possible. Once its on about a half inch remove it. Hard part about this is holding the pipe in place as you remove it. Use the Chanel locks to hold it in place. Take your time and do it correctly.

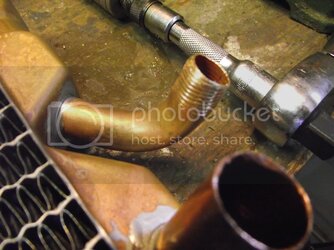
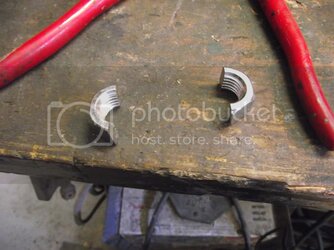
Now it's going to start looking weird, but stay with me. Take that 3/4 inch nut and cut it in half with the dremel.

Now take the 3/8 inch male barb and heavily coat it in RTV. If you don't know what RTV is then
A: Your not a real man
B: I'm about to change your life.
What RTV is, is a silicone sealant. Its used on cars to make gaskets and can withstand extreme temperatures. Temperatures far beyond what we need it to do.
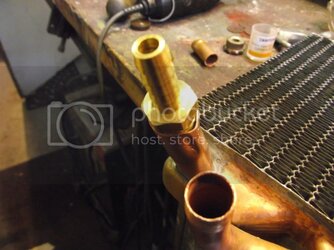
Take the male barb and place it in the 3/4" pipe. Its the one that DOES NOT curve. It should be just a bit to small, (Thats what she said!) now take the nut we cut in half and place it around the 3/4" pipe. Stick it in the vice and crimp it. You should end up something like this:

Coat the 3/8" male barb with RTV and screw it on.
Now we play the waiting game.... Wait 6-12 hours (longer the better, I'd recomend waiting overnight.)
At this point the RTV should be dry and technically you should be able to throw it in your computer. Butttt were not going to because With our $2k computer we don't take chances, time to test for leakes. The best way is to submerge it underwater (in a sink or bathtub) with two hoses connected. Place your thumb over the end of one pipe and blow into the other. This will create pressure inside the heater core and you will see bubbles escaping if you have a leak. If for what ever reason you have a leak, you will need to be sure you seal it with solder. Throw that bad boy up in the vice again and solder the two together. Be sure to clean it with steel wool pretty well. Apply some solder paste and get cracking. Now if you're like me and you may own a Accetaline torch. DON'T EVEN THINK ABOUT IT. I had to go out and rebuy everything because the torch melted the entire thing. I kept pouring water over the base to keep it cool, just for safe measures. This should be your final product:

Once air dried, hence the word AIR not water, apply more RTV over the weld/solder. Let it dry for a few hours.

Now this isn't needed and purely optional. You can buy radiator paint at your local auto parts store, which is better than spray paint, because it transfers heat better.

Give the paint its recommended time to dry and your done!
You may want to for safe measures, hook this up outside the case with paper underneath and let it run for a few hours, just to make sure that there isn't going to be any leaks.
Heres the product numbers
Heater core : O'Reilly auto parts #399077
3/8 male barb : Lowes A-294
3/8 female barb : Lowes A-298
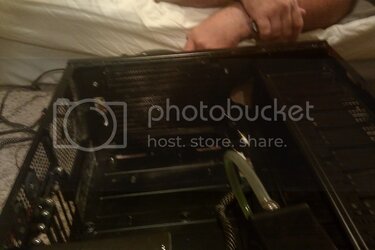
Bear in mind that I'm exhausted while writing this so it may not make much sense. Also I'm using a Solano 1000 case and it has a 240 fan on the top. It fits pretty well
Comments? Criticism? Praises? Ask away!!
Well hello there,
 if your reading this then you must have some interest in what it is I'm about to do. For starters I must warn you that if your offended by words such as "*** or hell" then you should probably leave.
  No that, that is over with let me introduce myself. My name is Nathan. I have been into computers since the age of 10, I am now 20. I tinker a little bit in cars and in engineering. I was unfortunate for buying my current kit, the Big Water 735 which included a decent water block, a half *** radiator and a good for nothing pump, when I started overclocking @ 3ghz my load temp was 77 (shut it off before it could get any higher). So in the past few days I was replacing the heater core on my 1995 Camaro (how much more American can I get?) and got to thinking about mounting one up in my case. Many people before me have used a GM's Bonneville, which is about the right size for a 120mm fan. Well If you're like me and you have 240mm fan somewhere in your case, you'd probable like to take advantage of it. So that where this tutorial begins, I'm going to show you everything you will need to make a nice, good looking radiator.
 Step one: Needed materials.
* 74 Chevy Blazor heater core (any motor, make sure its copper)
* 3/4 nut
* 3/8 x 3/8 female barb adapter
* 3/8 x 3/8 male barb adapter
Step two: Needed tools
* Propane torch with solder
* 3/8 Rachet w/ extention
* 3/4 Socket
* Dremel with Cut off wheels
* Thermal pace
* Chanel locks
* Vice
* File
*** OPTIONAL***
* RTV (Rubber Silicone)
* Motor oil (small amount)
* Garage with Chevy cars in it (I have two)
* Some music (All that Remains and Avenged Sevenfold for me)
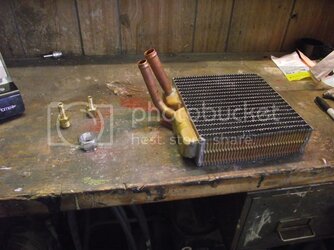
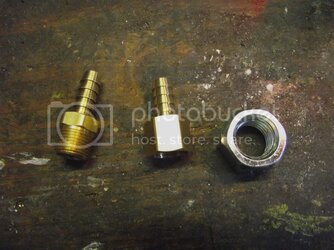
Make sure you have a clean work bench to start with because I promise it's going to get messy.
To start with lets make a two cut lines about 1-2 inches from the base. The farther from the base the better. I'd recommend a dremel with cutting wheels as they offer control vs a hack saw. Plus you need to be very careful when it comes to force on those lines.
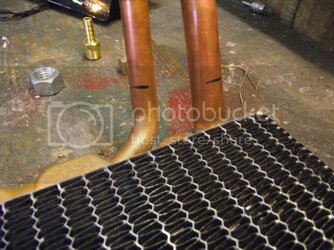
Once they are cut file down the edges, make sure it looks nice and clean. There is also a tool I used (has a drill looking head used for filing the inside of a tube) which you should also use but an over sized drill should do the job.
Before:

After:

Now for the hard part, take the female 3/8 barb and lube it with some oil. This will make it a bit easier for threading it onto the 3/8 inch pipe.
Now screw it on. I promise this will be a huge pain in the ***. My advice is to use plenty of oil and force. Use the 3/4 inch socket and ratchet to apply force as you turn. MAKE SURE YOU HAVE SUPPORT UNDER THE INPUT TUBE OR YOU WILL BREAK IT! The solder holding the input pipe is easily bendable and you want to make sure it moves as little as possible. Once its on about a half inch remove it. Hard part about this is holding the pipe in place as you remove it. Use the Chanel locks to hold it in place. Take your time and do it correctly.
Now it's going to start looking weird, but stay with me. Take that 3/4 inch nut and cut it in half with the dremel.
Now take the 3/8 inch male barb and heavily coat it in RTV. If you don't know what RTV is then
A: Your not a real man
B: I'm about to change your life.
What RTV is, is a silicone sealant. Its used on cars to make gaskets and can withstand extreme temperatures. Temperatures far beyond what we need it to do.
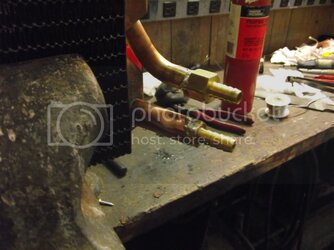
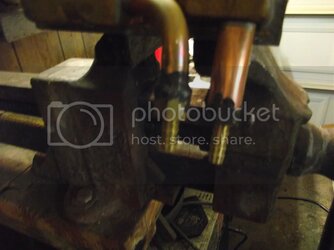
Take the male barb and place it in the 3/4" pipe. Its the one that DOES NOT curve. It should be just a bit to small, (Thats what she said!) now take the nut we cut in half and place it around the 3/4" pipe. Stick it in the vice and crimp it. You should end up something like this:
Coat the 3/8" male barb with RTV and screw it on.
Now we play the waiting game.... Wait 6-12 hours (longer the better, I'd recomend waiting overnight.)
At this point the RTV should be dry and technically you should be able to throw it in your computer. Butttt were not going to because With our $2k computer we don't take chances, time to test for leakes. The best way is to submerge it underwater (in a sink or bathtub) with two hoses connected. Place your thumb over the end of one pipe and blow into the other. This will create pressure inside the heater core and you will see bubbles escaping if you have a leak. If for what ever reason you have a leak, you will need to be sure you seal it with solder. Throw that bad boy up in the vice again and solder the two together. Be sure to clean it with steel wool pretty well. Apply some solder paste and get cracking. Now if you're like me and you may own a Accetaline torch. DON'T EVEN THINK ABOUT IT. I had to go out and rebuy everything because the torch melted the entire thing. I kept pouring water over the base to keep it cool, just for safe measures. This should be your final product:
Once air dried, hence the word AIR not water, apply more RTV over the weld/solder. Let it dry for a few hours.
Now this isn't needed and purely optional. You can buy radiator paint at your local auto parts store, which is better than spray paint, because it transfers heat better.
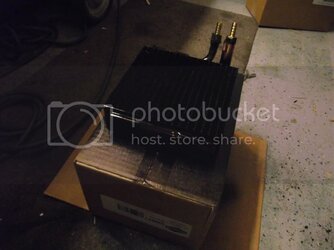
Give the paint its recommended time to dry and your done!
You may want to for safe measures, hook this up outside the case with paper underneath and let it run for a few hours, just to make sure that there isn't going to be any leaks.
Heres the product numbers
Heater core : O'Reilly auto parts #399077
3/8 male barb : Lowes A-294
3/8 female barb : Lowes A-298
Bear in mind that I'm exhausted while writing this so it may not make much sense. Also I'm using a Solano 1000 case and it has a 240 fan on the top. It fits pretty well
Comments? Criticism? Praises? Ask away!!
Last edited:


