• Welcome to Overclockers Forums! Join us to reply in threads, receive reduced ads, and to customize your site experience!

New WC rig complete. PICS!

Overclockers is supported by our readers. When you click a link to make a purchase, we may earn a commission. Learn More.
very nice setup, but with all that room, you should have 2 heatercores "_
 
I think it looks decient,,But get a camera with a flash would ya LOL....
 
Very nice rig!

How do you cut the case so precisely? I have a Centurion case I'm thinking about modding like you did but have never cut a case up before. I also would like to make the water cooling part on the bottom somehow...

Do you take the case totally apart and then measure each piece to the proper length and cut it? Or do ya run around the whole thing with the jigsaw?
 
Wow ! Talk about thread revival.

I'm still using this rig, although I have upgraded the electronics goodies.

Anyway, to answer your question:
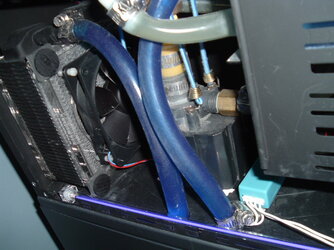
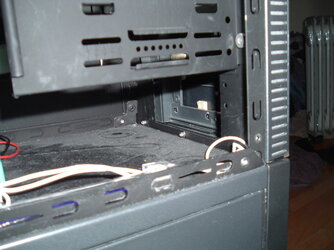
The case was easily disassembled by drilling out the rivets with a 1/8" drill bit. I just picked a vertical height that I thought would look great, then cut all of the vertical pieces off by the same amount. I was pretty careful about my cut-off decision though, because I still wanted to utilize as much of the plastic face as possible. There were specific design features of the plastic that pointed me to a particular height. Had I started with a completely different case I might have made it a different height. I only needed a minimum height for my radiator, so I picked a convenient height that was more than the min but would look cosmetically appealing.

By far, the longest part of this process was painting all of the metal. Cutting the plastic was done with a cut-off wheel (Dremel) followed by filing. I just drew some straight lines with a square and followed the lines, then sanded/filed until I was satisfied.

The metal frame parts were cut with the same Dremel tool. Side panels were cut using a jig saw with a metal cutting blade (cheap!). Rivets were replaced using a hand rivet gun from Home Depot and Aluminum rivets. Make sure to do all of your cutting before you paint of course! Also, if you don't plan to paint, I recommend covering everything (and I mean EVERYTHING) with tape so that nothing is scratched with your tools.
 
Also, this could have been placed on the bottom as well. I chose to use the top simply because I think it's easier to put in vid cards and such if the cooling loop is above the CPU. Ultimately, the decision would be yours, and could be influenced by the case (s) that you are modifying.
 
That's very helpful, thanks MoreGooder! :thup:

The other part that still remains a mystery to me is how you got the two parts to stay together so nicely. I know you said you used rivits to put it all back together but at the place where the two parts meet, how did that work?

Do you happen to have a close up pic of that?
 
To hold the two cases together I simply used more rivets, one in all for corners. The Top of the main case is still there, as well as the bottom of th hacked-up case. I simply drilled holes through them both for the rivets, and in order to pass the tubing and power through. Nothing fancy or complicated at all.

I will be messing around in my case this weekend to upgrade my vid card. I'll see if I can get more shots, this time with an even better camera.

Also, thanks for the kind comments everyone!
 
MoreGooder said:
I will be messing around in my case this weekend to upgrade my vid card. I'll see if I can get more shots, this time with an even better camera.
:attn:
 
Here are a couple of shots showing the bottom of the water cooling compartment.

There's really nothing to hold the two halves together. Although you can't really see them (and they are hard to photograph), there is a rivot in each of the four corners holding them together. The tricky part was figuring out where to drill big holes for the tubing and cables. That took some special time and layout with a cardboard template.

I used a bimetal hole saw from a home improvement store for the tubing holes. Drill pilot holes first. Clamp the parts down extremely well, otherwise they will want to spin out of control when the saw grabs the material.

The back panel of the upper case is simply a thin piece of galvanized metal that I cut to size using a cut-off wheel. Painted black of course.

BTW, the color I used was flat black, with black primer underneath.

Be sure to file off all of the sharp edges.

FYI, I will be out of reach for the next week, so if you have any more questions you'll have to wait till then. Sorry for the inconvenience.
 

Attachments

  • DSCF0272.JPG
    DSCF0272.JPG
    84.3 KB · Views: 61
  • DSCF0271.JPG
    DSCF0271.JPG
    74 KB · Views: 59
Last edited:
Thanks for the pics and the "smartdesign" ideas!

I'm actually leaning toward getting a UFO case from mountainmods now. I don't have much skill with hand tools nor do I own many! LOL! As such it would be wiser for me to save myself the frustration and money I'd spend on tools and put it towards a quality pre-built case that I don't have to mod.

I know that that is sacrilege around here but one thing I've learned from everyone in the modding forums is how much time and skill it takes to "do it right". :shrug:

About how much time would you say you put into modding your rig to making it look as nice as it does today?
 
Back