• Welcome to Overclockers Forums! Join us to reply in threads, receive reduced ads, and to customize your site experience!

Project Car Rad: Custom Wood Case

Overclockers is supported by our readers. When you click a link to make a purchase, we may earn a commission. Learn More.
nachosyumm said:
first of all, i love the project. I really like the upside down motherboard idea, and i plan to do something like that on my upcoming project. I also really like the rad on top, it looks pretty nice.

My question is, how well does that rad work passively? Also, do you have any pictures of the different parts and the assembly of the project?

I used to run a BIXIII with 6 fans at 7 volts and this works every bit as well.

I should have taken more pics of the assembling, but I got so busy making it that I just didn't. Is there anything in particular you are wondering about?

What upcoming project are you contemplating?
 
ghettocomp said:
I keep looking at this and really do like how it is arranged. that Radiator fascinates me for some reason, like something I NEED to get :D

I spent a LOT of time modeling this thing to plan the best way to place components that I could come up with. As a matter of fact, I found it a challenge to hide the drive cables as any cable I had is way too long. I don't thing anyone sells cables short enough.

The only area of improvement would be a better way to hide the cable spaghetti as it really took work to get it tamed. I however was having to keep the case within the size restraints of my desk or I probably would have made it a few inches wider to help accomodate this.

This radiator has proven to be absolutely outstanding for watercooling. I just happened across this on ebay a while back and got if for $35 shipped new (all copper core). The layout of the inlet and outlet, the dimensions, and having no oil/trans cooler, no rad cap, nothing at all has made this ideal. I wish I could find another one as I would buy it just to have as a back up. I have only seen this kind again a few times on ebay (MG Metro).
 
I have been planning on making a wood case that would blend in with the desk. I do not have any designs yet since i am really bad at drawing studd out. I usually plan out projects as i go along.

For photos i was just curious if you happened to have more photos online that u didnt post. I can spend hours looking at the various details of projects and taking note of stuff that i think works well, and stuff that doesnt appear to work as well. There was a lot of stuff i liked about your case.

What rad is that? Will pretty much any large copper rad perfrom well, or are there certain ones you know of that work better?
 
how hot does the rad get to the touch...

could it say..keep food/drink warm? lol
 
nachosyumm said:
I have been planning on making a wood case that would blend in with the desk. I do not have any designs yet since i am really bad at drawing studd out. I usually plan out projects as i go along.

For photos i was just curious if you happened to have more photos online that u didnt post. I can spend hours looking at the various details of projects and taking note of stuff that i think works well, and stuff that doesnt appear to work as well. There was a lot of stuff i liked about your case.

What rad is that? Will pretty much any large copper rad perfrom well, or are there certain ones you know of that work better?

I do have some more photos of different views. I can post them if you like. I just didn't really take pics assembling the actual pieces together.

Planning the project "as you go along" is exactly the thing NOT to do with something like this. There is just too much detail to figure out and get it right "on the fly." That is why I spent the time modeling this. And let me tell you that I am glad I did. I spent a lot of time making this as I really did sweat the details, and there is no way on earth I would have ended up with a result that I am pleased with, that looks good, and that works without the planning. I did have to solve problems while building like where to place the switches, what kind of switches to get, and where to put the front USB ports for example.

As far as rads go, any copper rad is going to work ok. The issue you run into however is getting a copper rad that is small enough to work well, and trying to find one that does not have a transmission cooler and a bunch of weird fittings coming off of it. So many car rads are huge. You want to look for rads for small cars. Before I happened across this rad, i was looking at a 1990 Geo Metro 1.0 Manual Trans no/ac ( http://www.radiatorworld.com/radiatorworldfinal/displayProducts.aspx?carno=26640&cat=1 ) . I'm sure there are others too that would fit the bill.
 
its hard to explain how i go through projects. Its not totally haphazard. I just have to have the materials in front of me to design a project. I can draw out a rough design, but due to my OCD i have to have all the materials measured down to atleast a hundredth of a millimeter before i can even consider drawing an actual model on paper. I still bothers me that my current computer has a hole that is off by a millimeter, even though it is not visible.

I made 2 pages of exact dimensions of my heater core, with exact scale drawings. I love my callipers.

Do you have a better picture or even a drawing of your drain valve? Thats the last feature im trying to figure out in terms of my water cooling setup for my next project. I was thinking of just using a t-fitting, then attaching a ball valve to it for the drain.
 
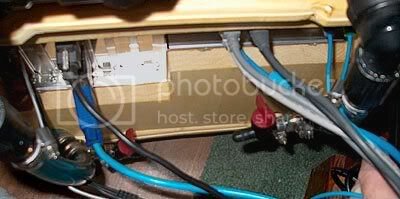
The drain valves that I got are gas ball valves for a lawnmower that the guy at ACE hardware came up with. They are only about the size of 1/2 of a finger in length and use 1/4" ID tubing. I have a Qplex 3/4" x 1/2" x 3/4" T in place (from Lowes). That is what is on the packaging, but when you actually measure it, the fitting is really 5/8" x 3/8" x 5/8", which works out ideal. The 5/8" OD is 1/2" ID, so it is the same ID as my tubing. The reducer part of the T uses 3/8" ID tubing, into which I just slid the 1/4"ID 3/8"OD tubing that goes onto the valves and clamped it down.

I have used a T with a 1/2" plumbing ball valve before and it worked fine, but its just that those valves take up a lot of room and in this case I really didn't want to have a 1/2" valve clogging up space, especially since I have 2 drain valves.
 
SniperXX said:
Man thats a sweet lookin wooden case. :D

I really appreciate that. So far I can say that I am very pleased with this case. I am about to make a few minor changes however to address the one issue I would like to work on which is managing wires at the power supply. Right now they are a pain to get tied up neatly due to the waterlines coming and going into the res. I am going to reroute them so that I can just place a small fake wall in front of the PS and cram all of the wires behind it below the PS to make it easy to get them out of the way.

I also am going to change pumps to a MCP350 as my D5 is just too loud for me.

I also bought some 1" acrylic blocks cheap off of ebay and I am going to make a top for the MCP350 so that I can use 1/2" barbs. I want to pattern mine off of the top at http://radiical.com.au/products/RadiicalPumpTop.asp .
 
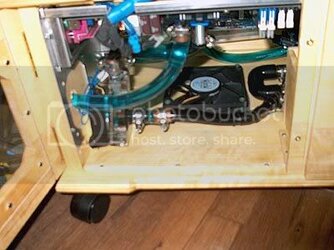
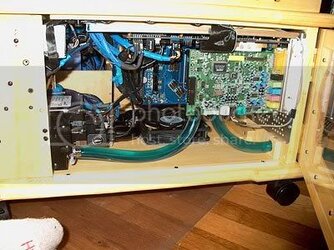
Well, I made a number of changes that I mentioned I was going to do.

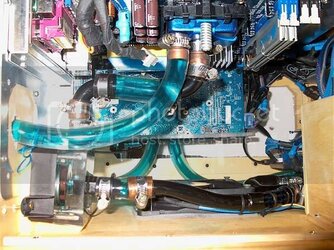
I did make my own DDC pump top (http://www.ocforums.com/showthread.php?t=456511) which works quite well. I also changed the pump from a D5 to a DDC 18w with my pump top and moved it to the back of the case to make access into the case easier. I used 1/2" long sweep copper elbows from the pump outlet to the CPU block inlet to try to minimize restriction.

Lsideopen2.jpg

Lsideopen1.jpg


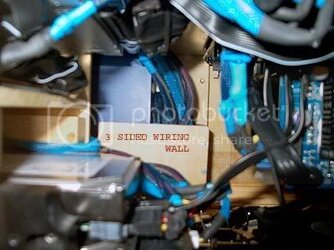
As I mentioned, I wanted to reroute the water lines going from my hard drive block into the res, and from the res into the pump inlet. The way that I had the lines was taking up the entire space by my PS so that trying to figure out where to put the wiring was a problem. Wiring management was the only problem with my design that wasn't working well. So my idea was to come out of the res and angle the lines down toward the drive rack and along the floor of the case thereby freeing up the area below the PS. I then could put a 3 sided wall into that area and just loosely shove the wiring into it. The wall is just held down by two screws driven into the floor.

resLines.jpg

rsideopen.jpg

WiringWall.jpg

I used 3/4" copper elbows going out from and into the res with 3/4" to 1/2" soldered in barb adapters so that the turns would have minimal restriction. I did the same thing with the 180 degree turn from the hard drive block to the res. I ran a piece of 1/2" copper piping bent from the bend out of the res to the pump inlet.
 
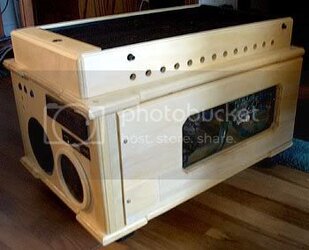
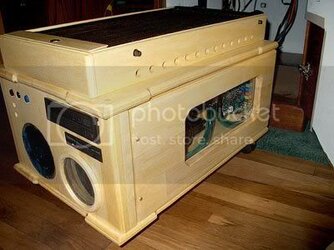
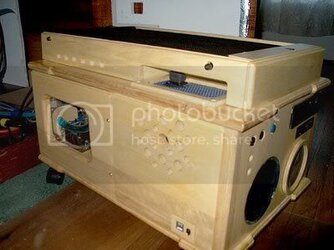
I also wanted to change the way that the radiator mounts as it didn't really blend in with the case well. I used 1/2" boards routed on the top and held together and to the top with brass "L" brackets. The front piece just has one bracket on each side holding it onto the side pieces so that i can take it off with only 2 screws for filling. I drilled the holes in the sides of the pieces to allow for air flow through the rad.

front.jpg

front2.jpg

rside.jpg

rside2.jpg

Lside.jpg
 
I also found that the location of the drain ball valves didn't do much good when draining, so I moved them to the back of the case. I only really need them to drain out the rad initially because then removing the two lines into the rad and tipping back the case drains everything else out.

drains.jpg

I also ripped out the cold cathode lights as they were just cluttering things up too much. I am going to go back and add LED clusters like I used on the res. They are so much easier to wire and fit.
 
Well, I am glad to report after about month of using this setup with the copper bends and the DDC 18v with my top that my temps have stayed the same as having the D5 without the bends. Using 3/4"ID copper fittings for the bends must have done the trick.
 
If the forums allowed me to swear I would. That is one heck of a case. Looks wonderful. Anychance of some dimensions of the build?
 
masakabassist said:
If the forums allowed me to swear I would. That is one heck of a case. Looks wonderful. Anychance of some dimensions of the build?

Sorry for not replying quicker. Thanks for the compliment.

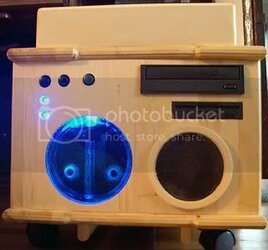
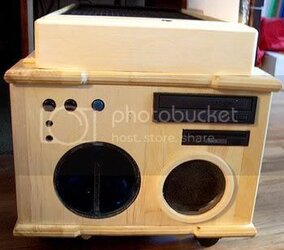
It is 22 1/2" deep, 15" wide, and 10 1/4" high plus about 2 1/2" for the rad.

The only drawback to this is (as you can imagine) the case is quite heavy. 3/4" wood, even though it is Aspen, still carries some weight. I don't transport it around, so that is not a problem, but when I take it out into my workshop in the back yard to do any work on it, it is kind of a pain to lug out there.
 
Back